Dinners

Recipe—Easiest Beef Enchiladas Ever

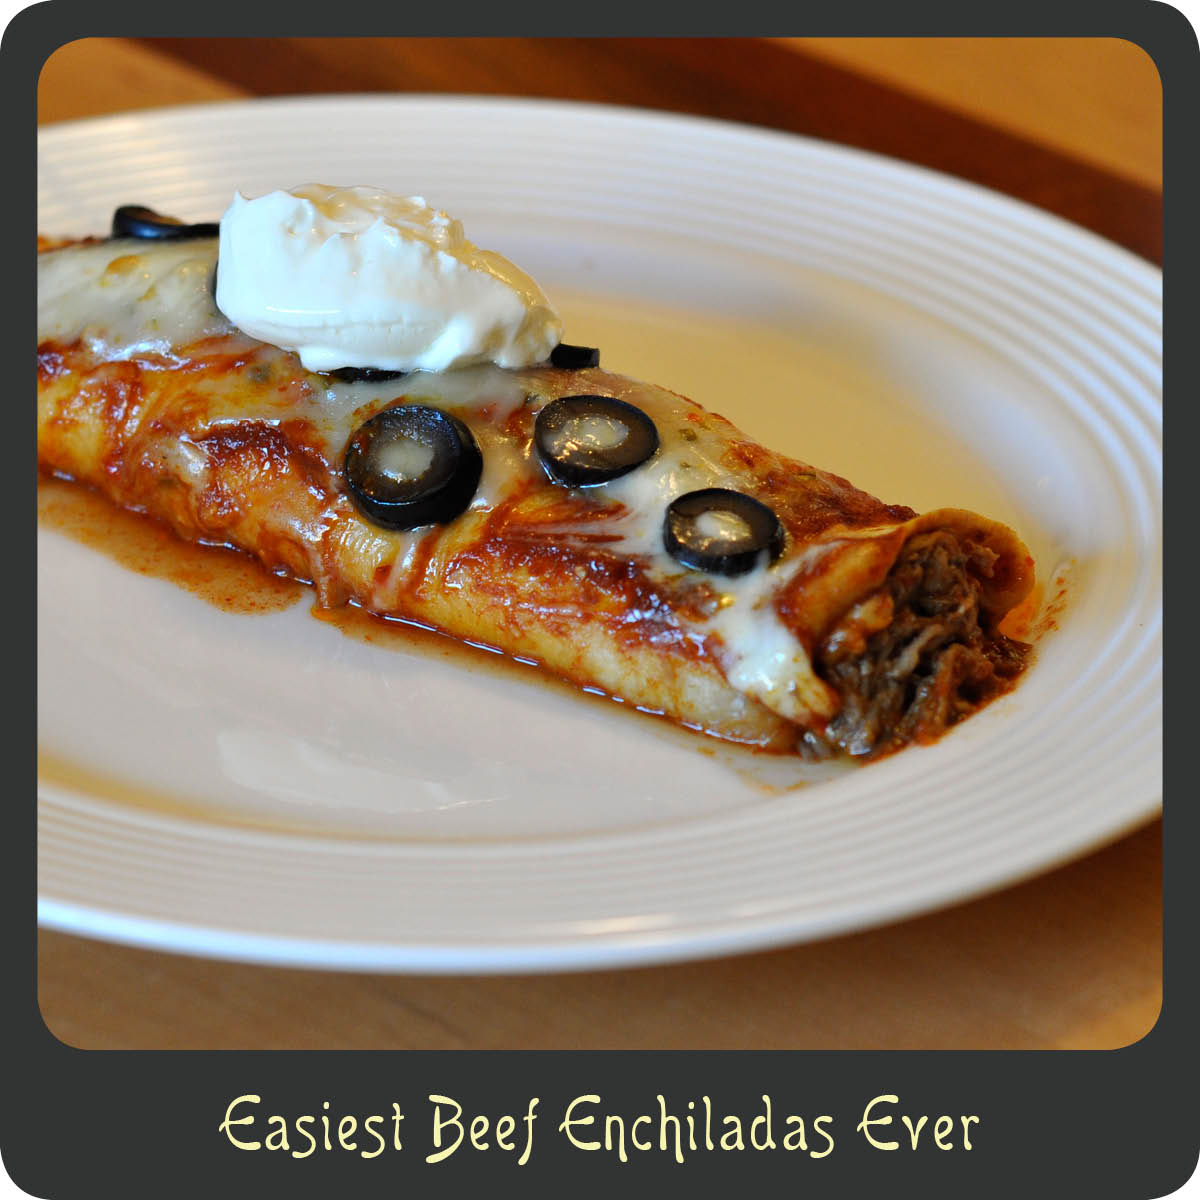
Over the summer the wonderful people at Del Real sent me a massive party box of all sorts of wonderful goodies to try out. One of the items was a package of seasoned shredded beef (carne deshebrada). As soon as I saw it I thought to myself, “wow, having cooked and seasoned meat all ready to go would make enchiladas a total breeze!”

I decided to try and simplify the usually overly complex enchilada process. The name of this recipe describes it to a “t.” I am a huge fan of enchiladas. I make them fairly regularly but when I do the kitchen ends up in total disarray because of all the work that goes into them. This recipe uses only 5 ingredients but makes enough food to feed a small army.

Note: This recipe makes about 12 enchiladas. Since there are only 2 1/2 people in our household I cooked 4 that night and then put the rest into two 8” x 8” foil containers and froze them. That is 3 nights worth of dinner for about $5 a meal. Who can beat that? Cheap and easy. That is my style.

INGREDIENTS
32 oz package Del Read Shredded Beef
12 soft taco sized flour tortillas
2 (28 oz) can Las Palmas Enchilada Sauce (red or green)
4 c jack cheese, shredded
1 c black olives, sliced

STEPS

  • Heat the meat per package instructions.
  • Preheat oven to 425º.
  • After the meat is done cooking transfer it to a large bowl and toss with 1 1/2 cups of the enchilada sauce.
  • Spray your baking dish(es) with a non stick spray or lightly grease.
  • Pour enough enchilada sauce in the bottom of your baking dish(es) to cover the bottom.
  • On a large cutting board, lay a tortilla out flat and add a scoop full of meat and sprinkle with cheese and a few of the sliced olives.
  • Roll up the enchilada and place seam side down in your “sauced up” bake dish and repeat until you are out of ingredients.
  • Pour the remaining sauce over the tops of the enchiladas.
  • Sprinkle with remaining cheese and olives.
  • Cover with foil and bake for 20 minutes.
  • Remove foil and finish off in the oven for another 10–15 minutes or until the cheese is nice and melted and just starting to brown.
  • Allow the enchiladas to cool for 5 minutes before serving.
  • Top with sour cream or guacamole if desired.

A huge thank you to Del Real for giving me the opportunity to try out several of your products. I love them all! You guys rock!

Side Dishes

Recipe—Italian Cheese Rolls

Sometimes you just need to spruce up the ordinary with a little pizzazz. While there is nothing wrong with plain garlic bread or even simple dinner rolls but sometimes it is fun to take those sides dishes to the next level. I have seen these cheese filled Pillsbury rolls popping up all over Pinterest and decided to come up with some yummy rolls of my own. I went with an Italian version to go with all the pasta dishes I make, a great substitute for the traditional garlic bread.

INGREDIENTS
1 container of Pillsbury Grands Flaky Biscuits
block of mozzarella, cut into eight 1.5” x 1.5” cubes
1/4 c butter, melted
1/2 tsp garlic, minced
1/4 c Parmesan cheese, grated
1 tsp Italian seasoning mix
salt

STEPS

  • Preheat oven to 350º.
  • Open the tube of rolls and flatten each one using the palms of your hands.
  • Position a cheese cube in the center of each flattened roll and wrap the edges of the roll up around the cheese cube making sure they are sealed up tight.
  • Place seam side down on a parchment paper lined baking sheet.
  • Repeat until all the rolls have been assembled.
  • Mix together the melted butter and garlic.
  • Brush each roll with the garlic butter.
  • Sprinkle all the rolls with the Parmesan cheese, Italian seasoning, and a little salt.
  • Bake the rolls for 16–18 minutes or until they are golden on top.
  • Let the rolls cool for about 3 minutes before serving. That cheesy filling can be nuclear.
Appetizers, Dinners

Recipe—Big Ol’ BBQ Meatballs

Looking for a family friendly recipe that both you and the kids will enjoy? Then search no more! Don’t have kids, no worries. Everyone loves these regardless of age! My 4 year old  loves helping to crush all the saltine crackers. I just put them in a zip loc bag and he goes to town with his toy hammer. (Cooking is a family affair in our house.) These big ol’ bbq meatballs are huge on flavor and so easy to put together. The brown sugar in the sauce helps to glaze the balls giving them a nice even coating of the sweet and tangy sauce. Yummy! These are the perfect comfort food as the weather cools off. I served these as a main dish but I could totally see making these smaller and serving them up as a party appetizer. Hope you enjoy these sticky saucy balls as much as I do!

Note: The sauce for these balls ends up being super sticky so I HIGHLY recommend lining your cooking sheets with parchment paper to help with cleanup. Otherwise you are going to have a super sticky glaze all over your baking sheets, which will not be very easy to clean up. If you do not have parchment paper then I recommend spraying your cookie sheets with a nice coating of cooking spray.

INGREDIENTS
2 lb ground beef
small yellow onion, finely chopped
1 1/2 sleeves saltine crackers, crushed
3 eggs
salt
pepper
3 tbsp honey mustard
3/4 c ketchup, divided
1 tsp Worcestershire sauce
3/4 c bbq sauce
3/4 c brown sugar

STEPS

  • Preheat your oven to 400º.
  • In a large bowl combine the ground beef, onions, crushed crackers, eggs, salt, pepper, honey mustard, 1/2 cup of the ketchup, and the Worcestershire sauce.
  • Using your hands combine all the ingredients until well blended.
  • Grab a handful of the meat mixture and roll into 2″ balls.
  • Place the balls on a parchment paper lined baking sheet (see above note) and repeat until you are out of the meat mixture.
  • Bake in the oven for 20 minutes.
  • While the meatballs are baking mix together the remaining 1/4 cup of ketchup, bbq sauce, and the brown sugar.
  • Remove the baking sheet from the oven after 20 minutes and top each ball with a spoonful of the sauce.
  • Place the meatballs back in the oven for another 10 minutes to allow the sauce to melt and coat the balls.
  • Remove from oven and serve.
Sandwiches

Recipe—Crock-Pot Shredded Chicken Jalapeño Popper Sammy

I swear, I take one look at this photo and I instantly start to salivate. Jalapenos, cheddar, and cream cheese coming together in the perfect combination. Add in some flavor packed shredded chicken on big warm bun and you will have a super tasty sandwich. Not only do I love this recipe because it tastes amazing but I also love it because it takes no more than 3 minutes to prepare and maybe 5 minutes to finish. Just throw together some greens for a salad or some fries in the oven and you have a meal ready to go. Perfect for us working folks who never seem to have enough time at the end of the day.

INGREDIENTS
2 lb boneless skinless chicken breast
1 small onion, diced
2 tbsp garlic, minced
2 (10 oz) cans original Rotel Diced Tomatoes and Green Chilies
2 tbsp chili powder
1 tbsp cumin
1 tsp salt
1/2 c heavy cream
2 oz cream cheese
1 c cheddar cheese, shredded
1/4 c canned jalapeños, chopped
extra canned jalapeños for topping

STEPS

  • Place the chicken, onion, garlic, and Rotel in the crock-pot.
  • In a small bowl mix together the chili powder, cumin, and salt and sprinkle over all the items in the crock-pot.
  • Cover and cook on low for 8 hours or high for 4 hours.
  • Remove the cooked breasts from the pot and transfer to a cutting board.
  • Using two forks shred the chicken and place back into the crock-pot.
  • Cover the crock-pot and keep on low.
  • While the chicken is soaking up all those tasty flavors start the cheese sauce by heating the heavy cream over medium-high heat.
  • Allow the cream to come to a boil stirring constantly.
  • Whisk in the cream cheese until melted.
  • Add in the cheddar and chopped jalapeños and stir until smooth.
  • Assemble the sandwiches by placing a scoop of the shredded chicken onto the bottom of the bun (I use tongs to try and squeeze out the excess juice), then add a spoonful of the cheese sauce, add additional sliced jalapeños if desired, and top with the other half of the bun.
  • Chow down!

Recipe adapted from Food Fanatic.

Beverages

Recipe—Creamy Hot Cocoa in a Crock-Pot

divadicucina_hotcocoa

Over the weekend we had a holiday cookie decorating party for my son and his little buddies from school. It was wonderful! All the kiddos huddled around the table eating the cookie toppings quicker than they were putting them on the actual frosted cookies getting all hopped up on sugar. I love this time of year!

I wanted to have a little hot cocoa bar where all the kids (and grown ups) could make themselves a fancy cup of cocoa. I’m not talking little envelopes of dry god knows what. I’m talking thick and creamy REAL hot cocoa. The kind that fills you up and warms your belly, the kind that leaves a thick creamy mustache on your upper lip with every sip. I made this a couple of hours before the party and it was perfect! Along with a big crock pot full of pure joy I had bowls of marshmallows, mini chocolate chips, crushed candy canes, chocolate sprinkles, whip cream, and then of course some grown up mixers (Kahlua, Disaronno, Baily’s, Frangelico, and peppermint schnapps). Hey if you know me, you know I don’t half ass anything.

This hot cocoa was by far the best I ever had! If you are having a few people and want to make something very special this holiday season then I recommend you make this hot cocoa. It will take every grown up back to their childhood days and will be memorable for all the kiddos.

Note: Makes 8–12 servings.

INGREDIENTS
14 oz can sweetened condensed milk
12 oz bag chocolate chips (dark, milk, or white chocolate will all work)
2 c heavy whipping cream
6 c milk (2% or whole)
1 tsp vanilla

STEPS

  • Combine all of the ingredients in a large crock-pot.
  • Turn on low.
  • Cook for 2 hours stirring occasionally using a whisk.
  • Ladle into a mug, add in your mixer (optional), and top with your favorite treats or leave as is.
Sweet Treats

Recipe—Chocolate Crackle Cookies

A long time ago in a land far far away, I posted a recipe for Lemon Crackle Cookies. (Okay, it wasn’t that long ago nor that far away.) They were awesome! Perhaps the name Chocolate Crack Cookies would be more appropriate for this recipe since you will not be able to stop eating them! Since the base for my crackle cookies is a box of cake mix they are perfectly fluffy, super moist, ultra fudgy, and easier to make than any cookie should be. This recipe is very straightforward and easy. Anyone can make them. Really. I promise! While they may look complicated all you are doing is rolling the dough into balls, coating them generously with powdered sugar, and then baking them. They do all the fancy crackling while baking. Give them a try. Everyone you share with will be very pleased you did.

INGREDIENTS

2 (18.25 oz) boxes Duncan Hines chocolate cake mix
4 eggs
2/3 c vegetable oil
1 1/2 c powdered sugar

STEPS

  • Preheat oven to 375º.
  • In a large bowl mix together dry cake mix, eggs, and oil.
  • Put the powdered sugar in a shallow bowl or plate.
  • Form small balls with the dough and then roll them in the powdered sugar. Be sure the cookies have a really thick coating of the sugar if you want them to have that crackle look.
  • Place at least 2 inches apart on a parchment paper lined baking sheet.
  • Bake for 7–9 minutes or until golden brown on the bottom.
  • Allow cookies to sit on the baking sheet for a couple of minutes before transferring to a cutting board or cooling rack.
Brunch, Sweet Treats

Recipe—Pistachio Bread

When it comes to the classic Jell-O one of my favorite flavors has always been pistachio. I know, I’m kind of a freak. Don’t get me wrong, I love chocolate but there is just something about the pistachio that is pretty fabulous too. When I saw this recipe for pistachio bread that called for my favorite tasty green pudding I knew I had to give it a try. I served this bread as a brunch item but with it’s cake base it could easily be a dessert. It ended up super moist, fluffy, and had just the right amount of nutty pistachio flavor. My four-year-old son got a kick out of making and eating green bread. It is so easy to make that I recommend putting the kiddos in the kitchen and letting them help. Such a fun recipe to make together!

INGREDIENTS
15 oz box yellow cake mix
3 eggs
1/4 c oil
3/4 c water
3.4 oz package instant pistachio Jell-O pudding, unprepared
1 c sour cream
10 drops green food coloring
1 tsp almond extract
1/2 c pistachios or pecans, chopped

STEPS

  • Preheat oven to 350º.
  • Grease two bread loaf pans.
  • Mix together all ingredients in a large bowl until well combined.
  • Divide the batter among the two loaf pans.
  • Bake for 40-45 minutes or until a toothpick comes out clean when inserted.
  • Cool 10 minutes and remove from bread pans.
  • Allow to cool an additional 15 minutes or more before slicing.
Dinners

Recipe—Pesto Chicken Kabobs

Over the past year or so I have been using pesto more and more. Last summer we got a massive amount of basil from our garden, which yielded lots and lots of tasty homemade pesto. I was able to freeze tons and use it throughout the whole year. Awesome! I have found that pesto actually makes a really great marinade. Recently I am totally hooked on pesto chicken kabobs. Not only are they super fun to eat but they cook in a fraction of the time. Perfect meal for this coming summer.

Tip From the Diva: When using wooden skewers, soak them in water for about 10 minutes before putting all your goodies on them. It keeps them from catching fire and are much easier to handle. Genius right?

INGREDIENTS
3–4 chicken breasts, cut into 1” pieces/cubes
salt and pepper
1/2 c pesto
half of a red onion, cut into 1” squares
red bell pepper, cut into 1” pieces
yellow bell pepper, cut into 1” pieces

STEPS

  • Season the cubed chicken with salt and pepper.
  • Place in a container and toss with the pesto.
  • Allow chicken to marinade for at least 30 minutes. (I like to let mine soak up all the flavors for 7–8 hours.)
  • Thread the meat and the veggies onto the skewers making sure to alternate and discard the leftover marinade.
  • Grill skewers for 10 minutes, turning as needed, or until meat is cooked through and vegetables are tender.
Dinners

Recipe—Stewed Italian Sausages with Peppers

Perhaps it’s the Italian in me but I absolutely LOVE a good Italian sausage with peppers and onions. Ta-sty! This is a recipe I tried awhile back when I was trying to trim down on my carb consumption. You can use any Italian sausages but I really like Aidells Italian Style Chicken Sausages. They are flavor packed and the chicken helps cut down on some of the calories from the traditional pork or beef. The whole family loved this recipe! For those not watching their carbs, I served it with some crusty French bread and it was a perfect meal! Quick, easy, and delicious. That’s my style!

Note: The sausage and veggies are absolutely awesome in a sandwich too. Just grab a pack of sandwich rolls, load ’em up, and chow down!

INGREDIENTS
2 pounds Italian sausage (I love Aidells Italian Style Smoked Chicken Sausage with Mozzarella)
4 tbsp olive oil, divided
2 red bell peppers, chopped
2 yellow bell peppers, chopped
1 red onion, chopped
1 fennel bulb, chopped
salt
1 c dry red wine
1 c fresh parmesan, grated

STEPS

  • Heat 1 tablespoon of the olive oil in a large skillet over medium high heat.
  • Add the sausage and cook turning frequently until they turn a nice golden color and are cooked through, about 15 minutes.
  • Transfer to the sausages to a large plate and cover with foil to keep warm.
  • Add the remaining 3 tablespoons of oil to the skillet along with all the veggies.
  • Cook stirring occasionally until the vegetables are softened, about 12–14 minutes.
  • Season the veggies with salt and add the sausages back into the skillet.
  • Add the wine to the skillet and bring to a simmer.
  • Continue to cook for about 4 minutes or until the wine has reduced by about half.
  • Sprinkle with the grated parmesan and serve.

Recipe adapted from Food and Wine.


Salads, Side Dishes

Recipe—Asparagus and Feta Salad

divadicucina_asapargussalad1

California is one of the leading producers of asparagus in the United Stated. Asparagus is so big in California that the city of Stockton even throws an entire festival in honor of asparagus. True story! I grew up eating asparagus on a regular basis. (By the way, I am 33 and still crack up that it gives you stinky pee. I don’t think I will ever grow up.) I could eat asparagus every day. There are just so many ways to prepare it but I think I have found my favorite way to eat the lovely green spears, grilled asparagus and feta salad. Man this was awesome! My husband and I devoured the whole bowl so if you are cooking for more than 2 people just go ahead and double or triple the recipe. Trust me you will eat it all! There was just so much flavor in the salad and it was so light and refreshing. Perfect for spring or summer. We just served it with a simple grilled chicken breast seasoned with nothing more than salt and pepper and it was the perfect complement. This my friends, is good eating.

Want to know more about asparagus? Then check out this old post and you will be an asparagus pro!

divadicucina_asapargussalad2

INGREDIENTS
1 bunch thick asparagus, ends trimmed
3 tbsp olive oil, divided
1/4 tsp kosher salt
1/4 tsp pepper
zest from one lemon
1 tablespoon freshly squeezed lemon juice
1/2 c crumbled feta cheese

STEPS

  • Preheat the grill to about 325º.
  • Place the asparagus in a baking dish and coat with 2 tablespoons of the olive oil and then season with salt and pepper.
  • Place the asparagus on the grille making sure that they are perpendicular to the grates so that they don’t slip through.
  • Close the grill and cook for 3 minutes.
  • roll the asparagus over and cook for another 3 minutes.
  • Remove the asparagus and transfer to a cutting board.
  • Allow the asparagus to cool for 5–10 minutes.
  • Cut the spears into 1–2” pieces.
  • Place the cut asparagus into a medium bowl and toss with the remaining tablespoon of olive oil, lemon zest, lemon juice, and half of the feta.
  • Top the salad with the remaining asparagus and serve warm or at room temperature.

Recipe adapted from Once Upon a Chef.