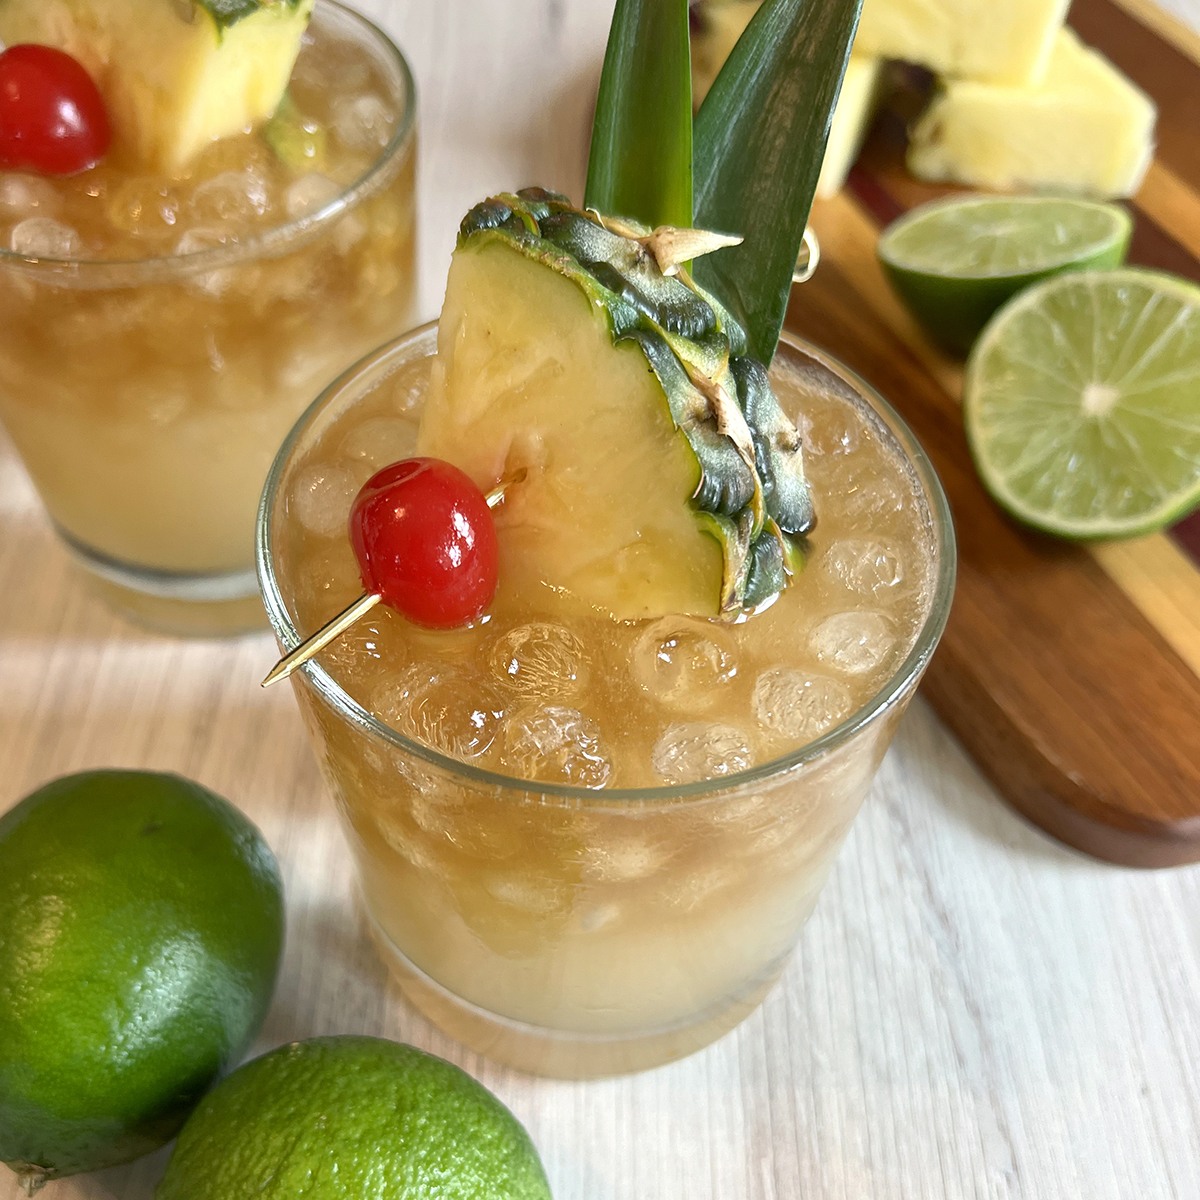
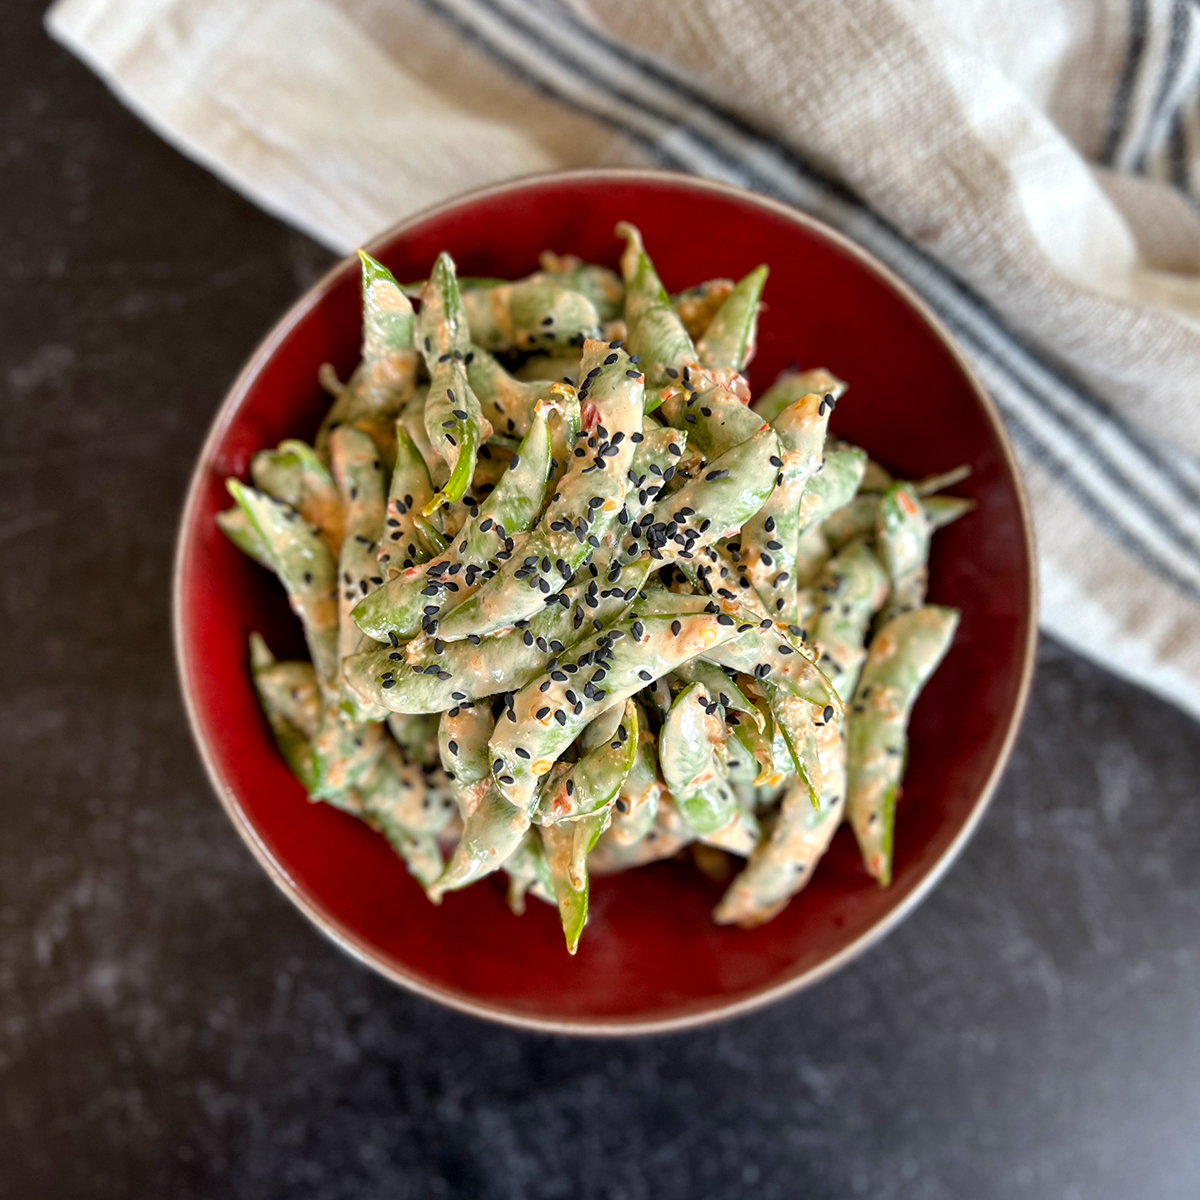
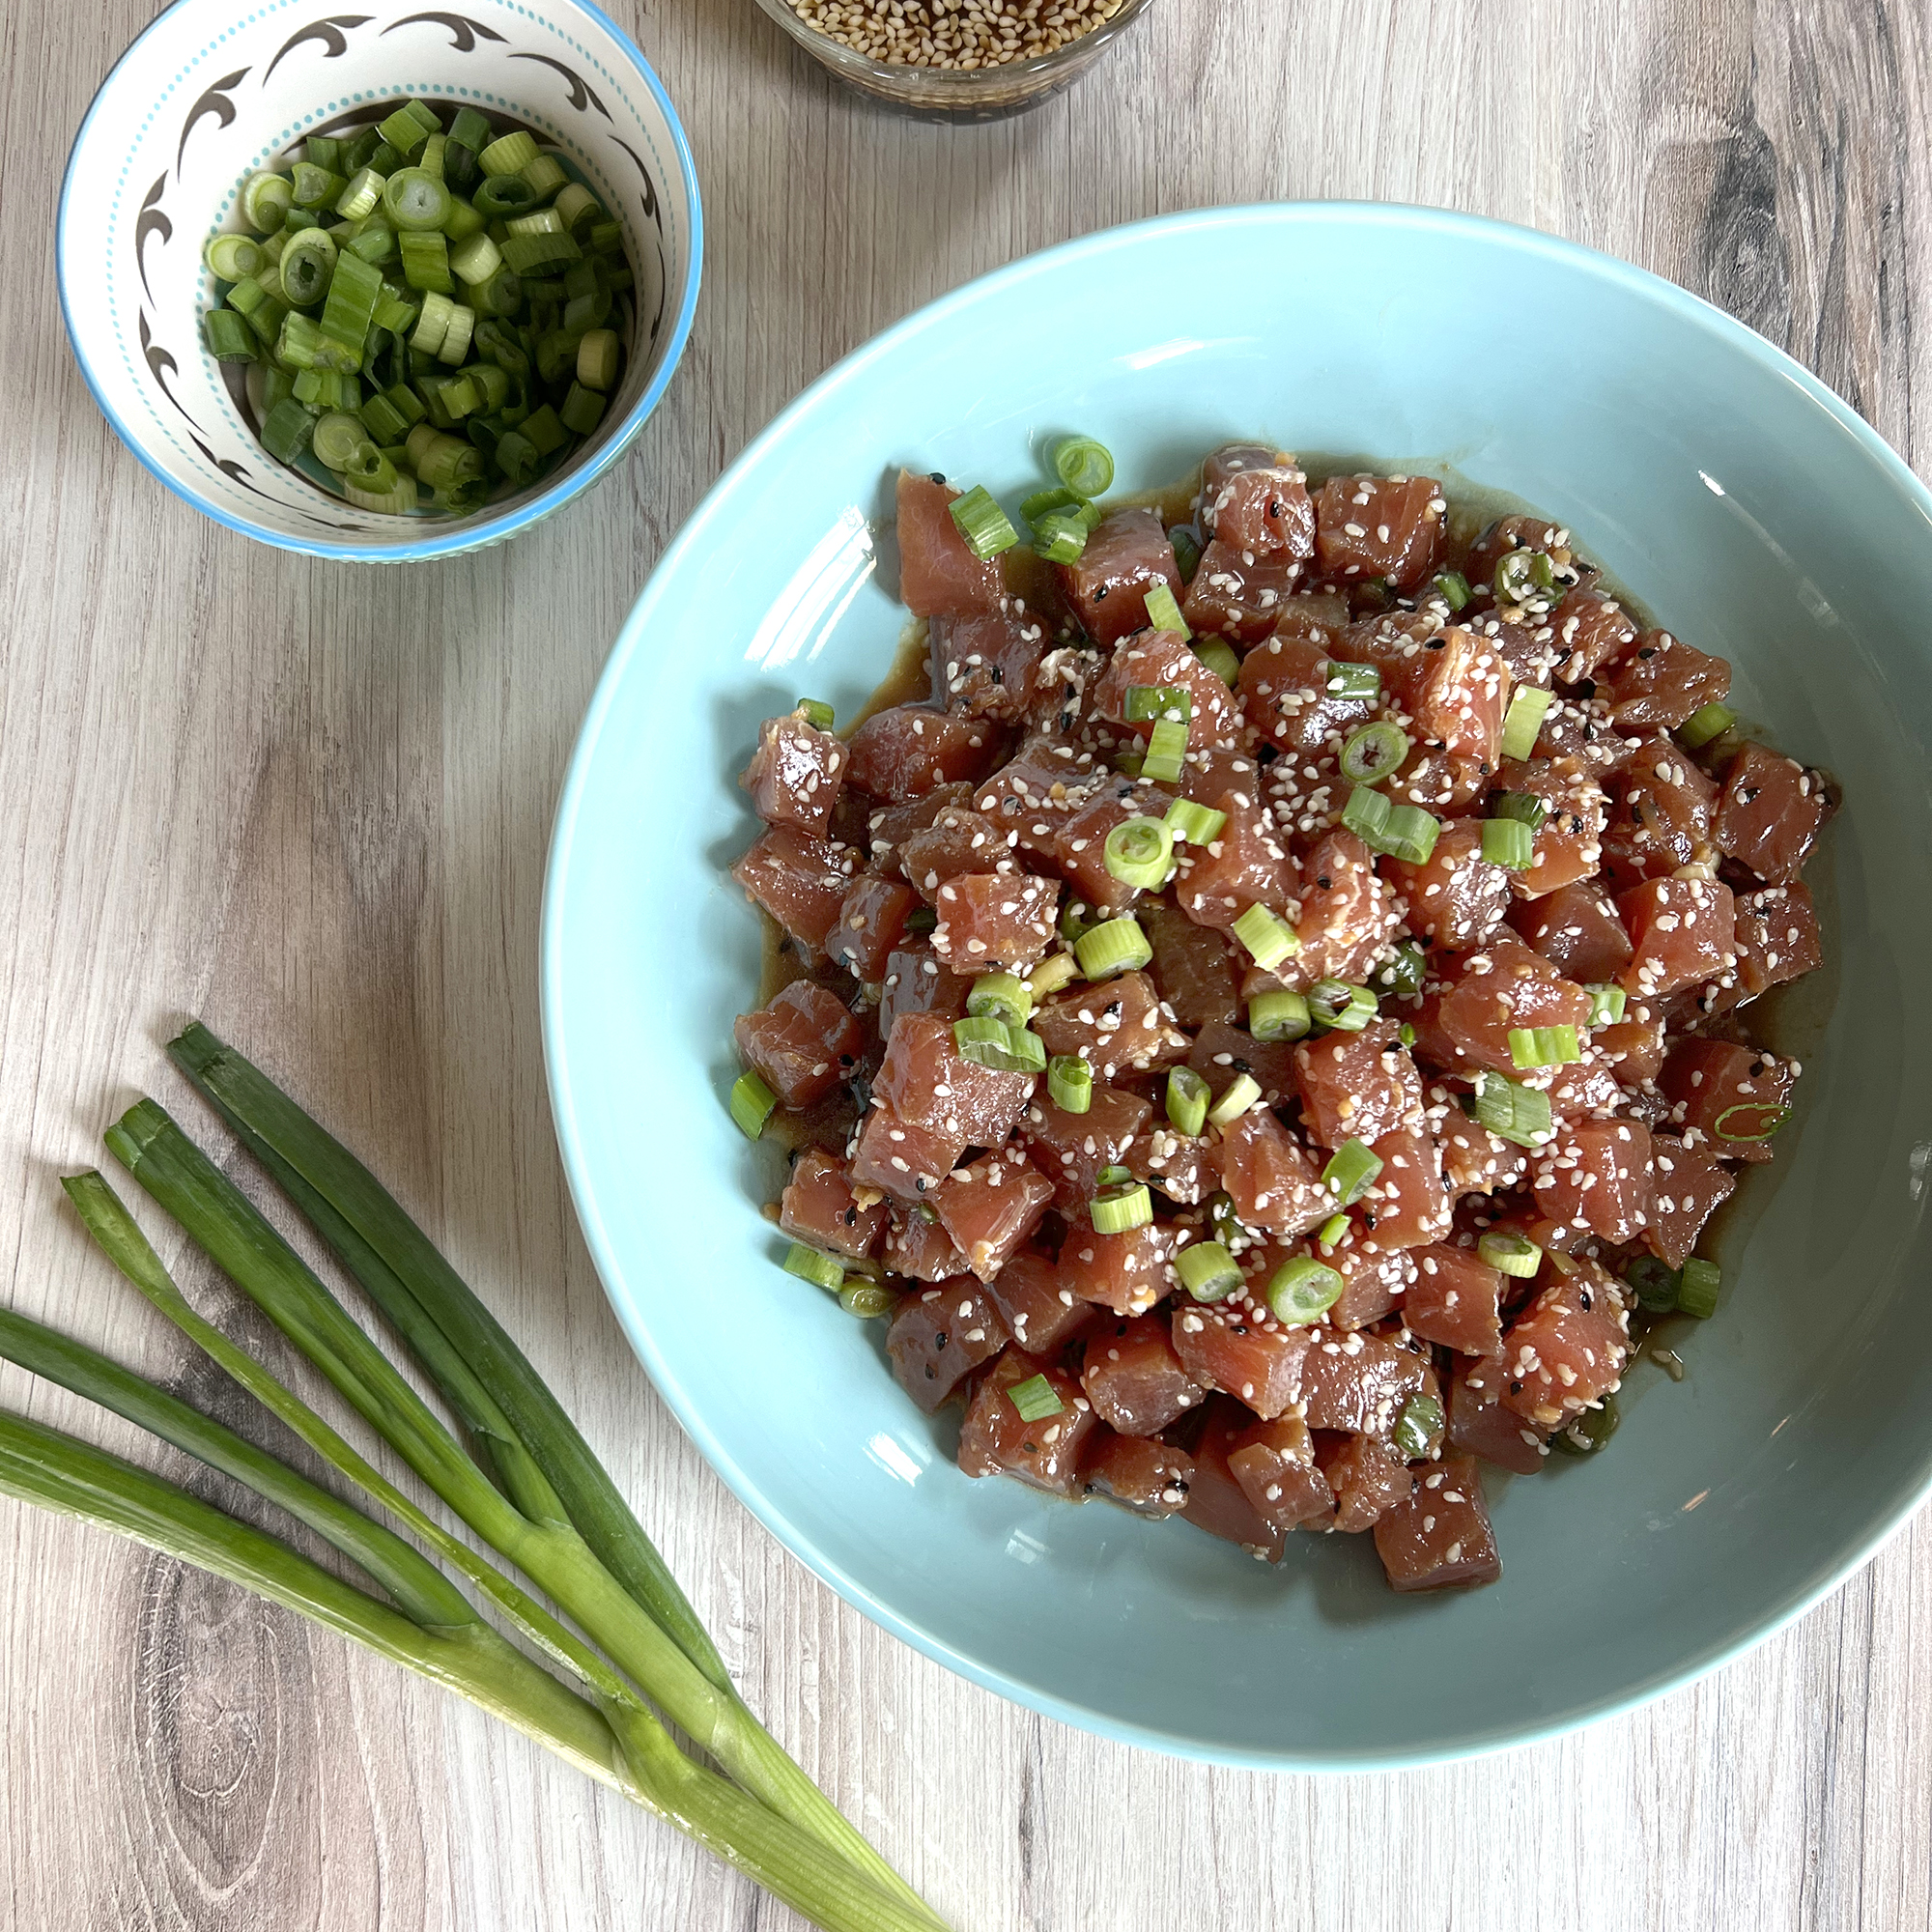
Apparently, I’m just over here dreaming about being back on the islands! After sharing my fresh ahi poke and fiery edamame, there’s really only one thing missing from this little Hawaiian-inspired lineup, a mai tai. And not just any mai tai.
When my husband and I honeymooned on Kauai over 20 years ago, we made it our unofficial mission to find the best mai tai on the island. Tough job, but someone had to do it! What we quickly discovered was that no two mai tais were quite the same.
The original mai tai dates back to 1944 and is credited to Trader Vic. Made with rum, orange liqueur, fresh lime juice, and nutty orgeat syrup, the classic version is actually quite different from the fruity mai tais many of us associate with Hawaii. Later came the Royal Hawaiian-style mai tai, with tropical additions like pineapple and orange juice.
My 1944 Tropical Twist Mai Tai borrows a little from both. It stays true to the flavors of the original while adding a dark rum float and pineapple garnish because, well… we’re making a tropical cocktail. More rum and pineapple just feel right.
The name mai tai derives from the Tahitian term “mai tai–roa aé” which translates to “Out of this world–the best,” a fitting homage to this famous tropical drink that lives up to it’s name.
So make the poke, whip up some fiery edamame, shake yourself a mai tai, and pretend there are palm trees swaying overhead. Kauai may require a plane ticket, but happy hour doesn’t.
INGREDIENTS 3 oz gold rum 1 1/2 oz orange liqueur 1 1/2 oz orgeat syrup 1 1/2 oz simple syrup 3 oz lime juice 3 oz dark rum pineapple wedge and maraschino cherries for garnish (optional)
STEPS
Fill two glasses with ice.
In a drink shaker, combine the gold rum, orange liqueur, orgeat syrup, simple syrup, lime juice, and some ice and shake vigorously.
Strain the mai tais into the prepared ice filled glasses.
Slowly pour the dark rum into the glasses so it “floats” on the top.
If you saw the poke recipe I shared recently, I’ve got the perfect little something to serve alongside it: Fiery Edamame. And fair warning, this stuff is seriously addicting.
You know how there are some foods you simply can’t stop eating? That’s me with this edamame. It has just the right amount of heat to give it a kick, while the creamy, spicy sauce keeps you reaching for just one more. Thank goodness for the shells, they’re pretty much the only thing slowing me down.
I’ve been making this recipe a lot lately because it’s ridiculously easy. We’re talking less than 10 minutes from start to finish, making it perfect as a quick snack, appetizer, or side dish. Pair it with my fresh ahi poke and you’ve got yourself a meal that feels a whole lot fancier than the effort required.
And hey, edamame is packed with protein, fiber, vitamins, and minerals, so I’m going to go ahead and consider that permission to polish off the entire bowl.
Spicy, creamy, messy, and completely irresistible, grab some extra napkins and dig in!
INGREDIENTS 14 oz bag of frozen edamame in pods 1 tbsp garlic, minced 1 tsp sesame oil 2 tbsp chili paste 1/4 c mayonnaise 1 tbsp soy sauce sea salt sesame seeds
STEPS
Prepare the edamame per the package instructions, drain, and transfer to a large bowl.
In a small bowl, whisk together the garlic, sesame oil, chili paste, mayonnaise, and soy sauce.
Pour the sauce over the edamame and toss to coat.
Transfer to a serving dish a sprinkle with a little sea salt and sesame seeds.
There are some vacation memories you just know you’ll be talking about for years, and fishing off the south shore of Kauai is definitely one of those for our family.
A couple of years ago, we squeezed in a trip to the islands to celebrate my son’s birthday, and the one thing at the top of his wish list was to go fishing. We booked a charter with Hunt Fish Kauai and set out from Port Allen just as the sun was rising. The water was calm, the views were incredible, and it was the perfect start to what would become one of our favorite vacation memories.
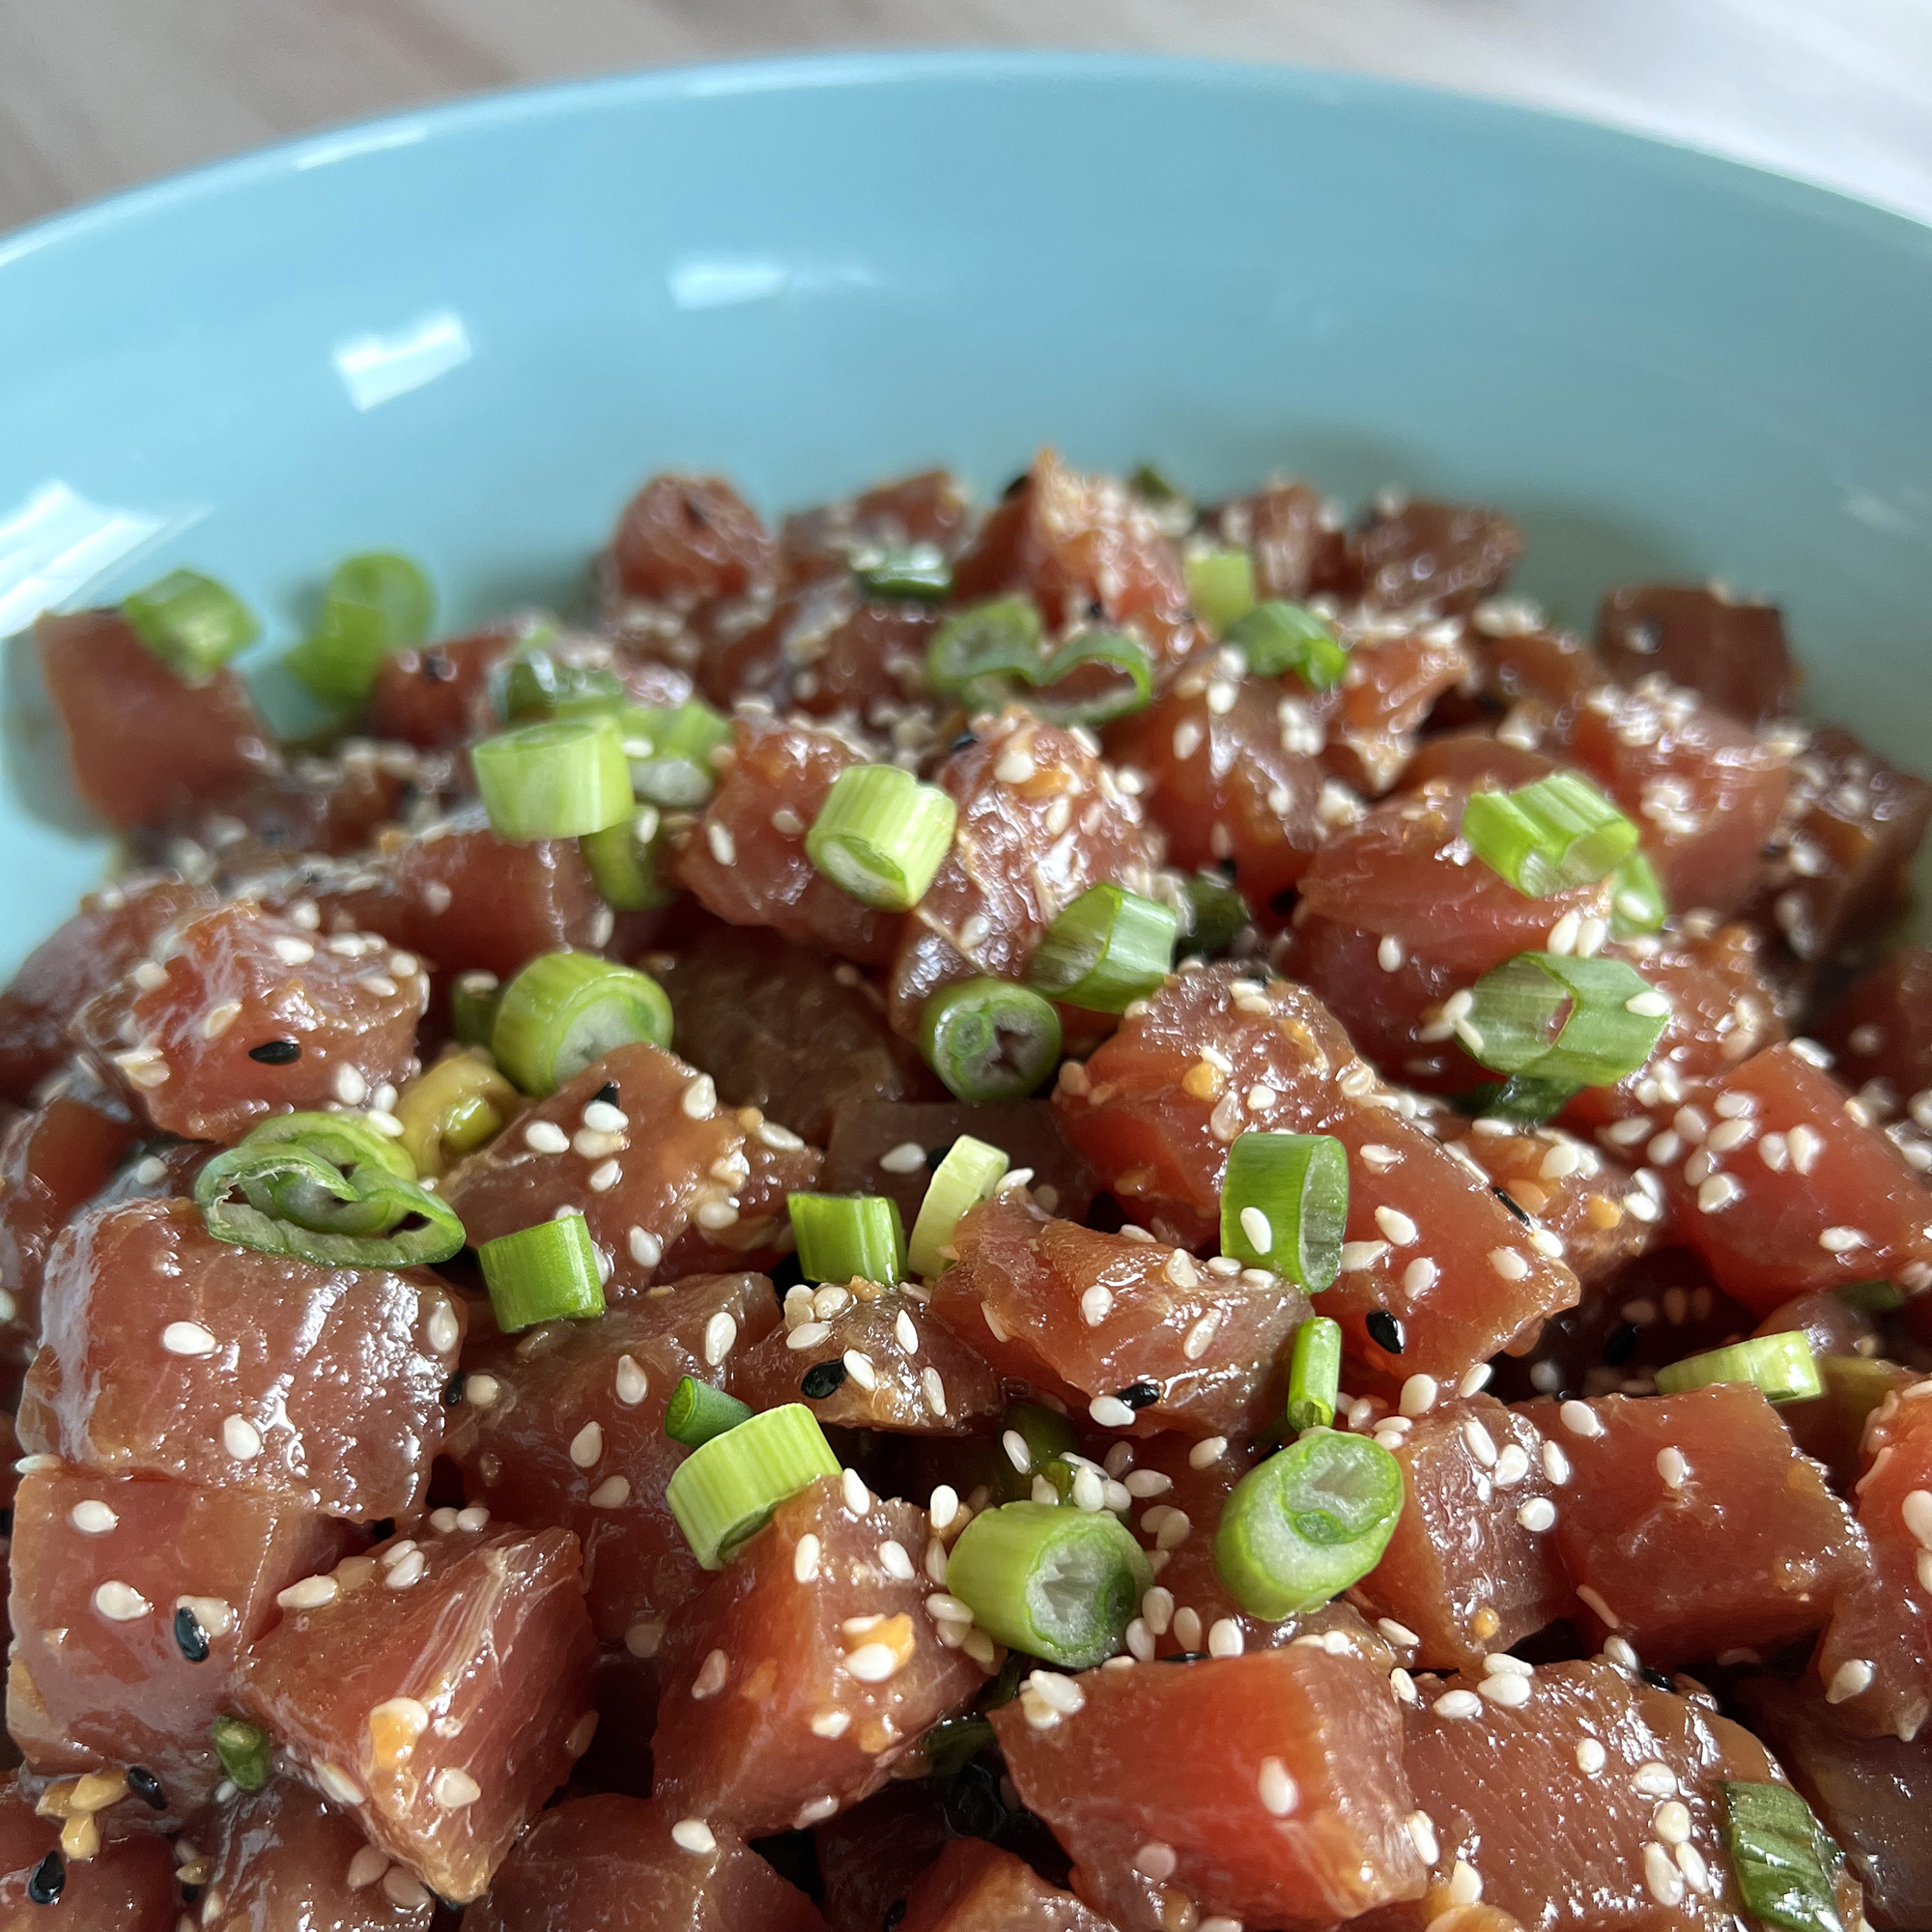
And apparently, we had some serious beginner’s luck! My husband, son, and I each reeled in a beautiful yellowfin tuna. It was exhausting, exhilarating, and easily one of the coolest things we’ve ever done together. When we returned to port the crew fileted our catch right on the dock, and with fish that fresh, there was really only one thing to do, make poke!
Poke is one of my favorites because it’s incredibly quick and easy to make. Serve it as an appetizer or turn it into a meal over sushi rice or greens with jalapeños, cucumber, edamame, avocado, and tropical fruit like pineapple or mango. Sweet, spicy, fresh, and so good!
While making poke at home may not usually start with catching your own tuna in the Pacific (if only!), a trip to your local fish market can still bring a little taste of the islands home. This batch, though? It’s going to be pretty hard to beat.
Note: Keep in mind that you don’t want to make poke out of any piece of fish. You want to make sure it is labeled as “sushi grade” or “high quality tuna.” Stop by your local fish market and see what they have.
Well, hello there! It’s been a minute. Or, you know… almost three years.
I certainly didn’t intend to disappear from Diva di Cucina for that long. I’ve missed this little corner of the internet. Sharing recipes, taking way too many pictures of food, and connecting with all of you. But somewhere along the way, life got busy. Really busy.
And the truth is, as much as I love blogging, my family, friends, and work will always come first. Between all the things that fill my days (and nights and weekends), the blog just kept getting pushed a little further down the list. You know how it goes. You tell yourself, I’ll get to it next week. And then suddenly three years have passed. How does that even happen?!
At the beginning of this year, I made a vision board and set an intention to make my way back here. Nothing crazy. I wasn’t going to promise myself weekly posts or some ambitious content calendar I knew I couldn’t keep up with. My goal was simply to find a better balance and start sharing recipes again, even if it was only once a month.
So here we are, with just four months left in the year, and I am barely making good on that intention. But you know what? I’m here! And I can’t think of a better way to toast my return than with a cocktail. Cheers to that!
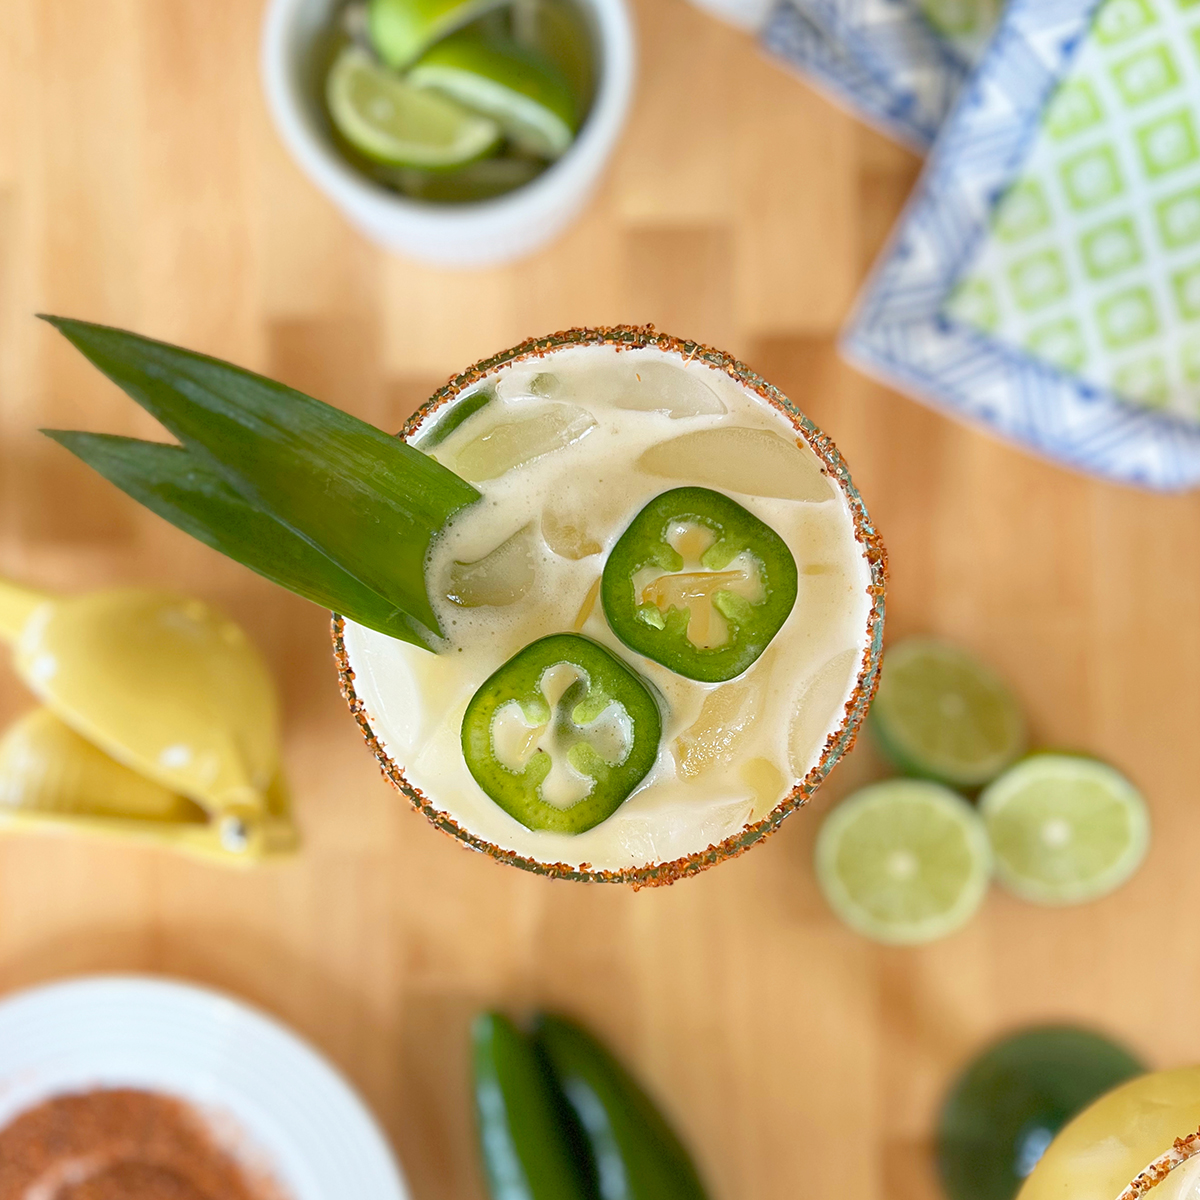
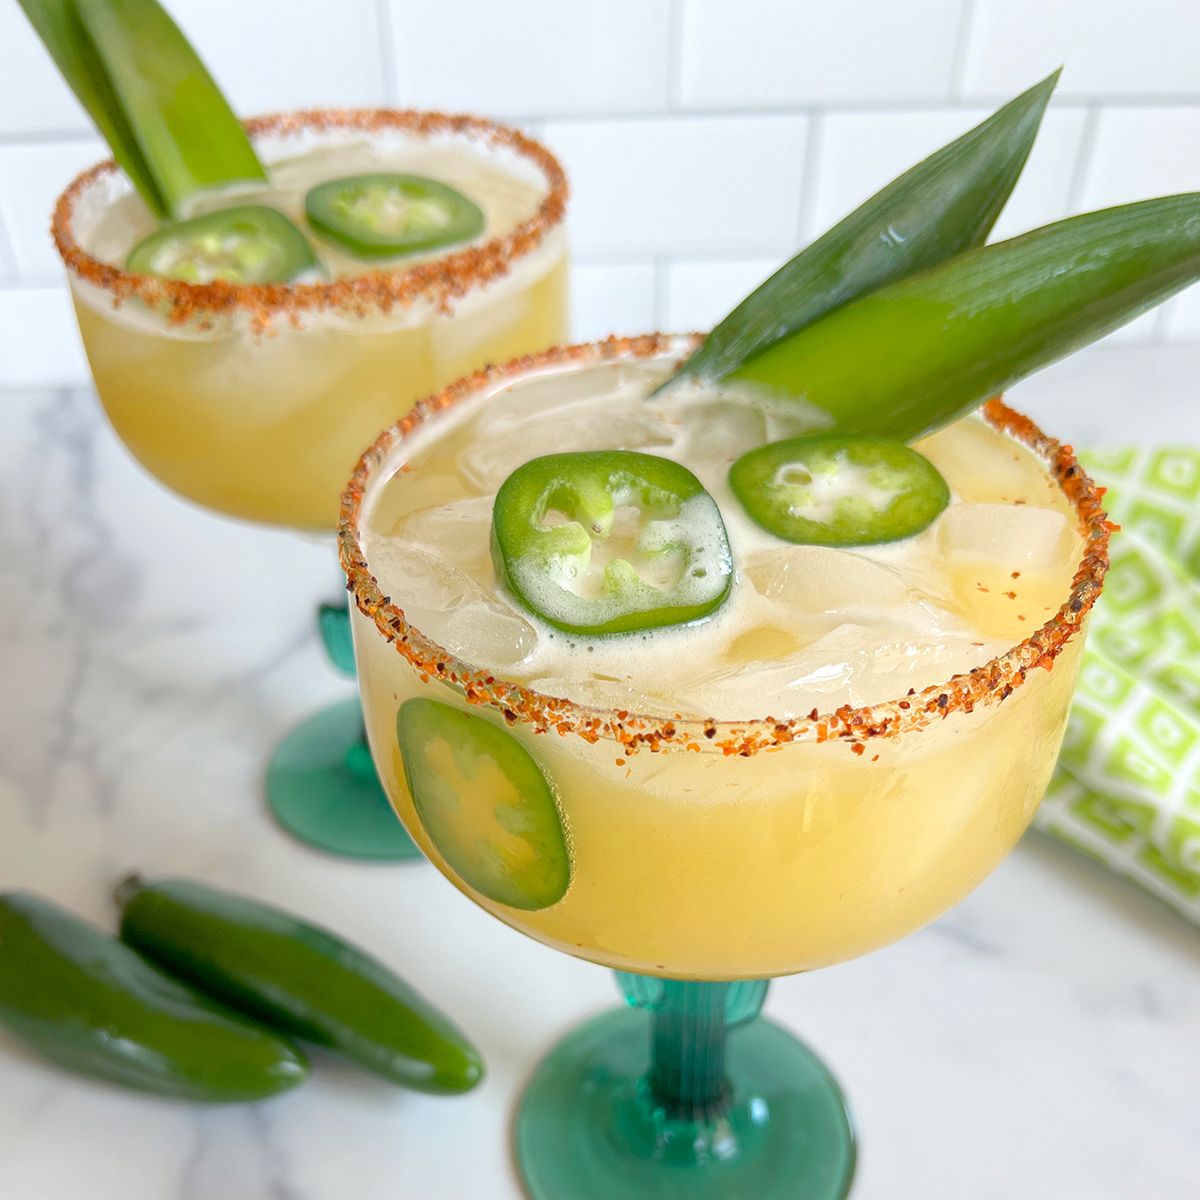
This margarita is the perfect combination of spicy and sweet, and it is ridiculously easy to make. You literally just throw all the ingredients into a shaker and mix vigorously. That’s it! Somehow, though, the finished drink feels fancy enough that people will think you put in way more effort than you actually did. My favorite kind of recipe.
The sweet, tropical pineapple balances out the kick from the jalapeño, while the lime keeps everything bright and refreshing. You can easily adjust the heat depending on how spicy you like things.
It’s the perfect drink for a lazy afternoon by the pool, a summer BBQ with friends, taco night on the patio, or simply celebrating the fact that you finally did the thing you’ve been saying you were going to do all year.
So cheers to finding balance, following through on intentions (even if it takes a little longer than planned) and making time for the things that bring us joy.
And cheers to being back. I’ve missed this. Now, who wants a margarita?
Note: If you don’t like things spicy and just want a mild jalapeno flavor, do not put the jalapeno slices into the drink shaker, just add them to the glasses. Shaking the jalapenos with ice in the shaker releases those spicy oils and infuses the flavor into the drink.
INGREDIENTS 1 1/2 c pineapple juice 1/2 c silver tequila 1/4 c orange liqueur (I prefer Grand Marnier or Cointreau) 2 tbsp lime juice, fresh squeezed 1 jalapeño, sliced lime wedges (optional) tajin or salt for the rim (optional)
STEPS
Pour some tajin or salt on a small plate.
Rub a lime wedge around the rim of two glasses and dip the glasses into the tajin or salt to coat and fill with ice.
In a drink shaker, combine the pineapple juice, tequila, orange liqueur, lime juice, half of the sliced jalapeño, and some ice and shake vigorously for at least 30 seconds.
Strain the margarita into the prepared ice filled glasses and garnish with the other half of the jalapeno slices.
Hot cocoa charcuterie boards are taking off in popularity and there is no better time than the holiday season to try and make your own. Whether you want to make it for just your family to enjoy around the fireplace, a large party, or even for gifting, it is a sure way to spread some holiday cheer.
While a charcuterie board traditionally refers to an assortment of meats, cheeses, and breads served as an appetizer, the term has become much broader and people are getting creative with how they bring foods together. While I never pass up traditional meat and cheese charcuterie to go with a bottle of wine, hot cocoa charcuterie has become one of my favorite Christmas traditions in our home.
On the day we plan to decorate our Christmas tree and put out all our decorations, I lay out a spread of sweets to snack on and every ingredient my son could dream of to make a big ol’ mug of fully loaded hot cocoa. Do I go overboard? Absolutely. But it makes creating a cup of hot cocoa so much more fun and we love grazing on it throughout the day.
Last year we decided to share that holiday magic and made hot cocoa charcuterie boxes for our friends and delivered them to their doorsteps along with a box of assorted fresh baked cookies. The kids seriously love it! Pair a homemade box with some fun holiday mugs for the cutest gift set ever!
As a special touch I also like to purchase some gorgeously decorated sugar cookies from local bakers. They can include a special saying or message like “Merry Christmas.” They become sort of like an edible card.
There really is no right or wrong way to build a hot cocoa charcuterie board or box, it is about bringing together an assortment of ingredients and letting people use their imagination topping, drizzling, dipping, and sipping.
Of course, there are always the obvious choices or marshmallows, whipped cream, and sprinkles, but don’t let the fun stop there. You can fill your board with peppermint bark, caramel sauce, and then make sure to include some tasty treats for dipping too! And don’t for one second think this is just for the kids! Add some holiday spirits for the adults. Nothing like spiking your hot cocoa with some Irish cream or peppermint schnapps.
I hope this has inspired you to create your own hot cocoa board or box this holiday season and beyond. And just keep in mind, the number one rule for building a board or box is, there are no rules! Just have fun with it.
How to Build Your Board or Box
Step 1 The first step is selecting your board or box. My best advice is to make sure it is big enough for all your goodies. The bigger the better but just make sure you have enough to fill it so there aren’t any bare spots.
If you are creating this for a really large group, you could always just line your counter or table with butcher paper or parchment paper and make it a grazing experience.
Step 2 Place your most important ingredient of all, your hot cocoa bombs or container of mix in a corner.
If you want to have your hot cocoa prepared ahead of time, skip this step. When having a party, I like to make my homemade hot cocoa in a crock-pot so it is ready to go. The guests can just ladle it into their mugs.
Step 3 Place small bowls or containers for sprinkles, chocolate chips, smaller candies, and syrups around the board. If making a gift box, plastic sauce cups with lids work great!
Place longer items, like pirouette cookies, candy canes, and candy coated stir sticks in cups or mason jars to add some height to the board.
Step 4 Arrange cookies in clusters around the board or box.
Step 5 Fill in remaining gaps with candies, marshmallows, and chocolates. You want the board to look full so don’t be shy, add lots and don’t worry about layering things up!
Step 6 Add some small scoopers and/or tongs in addition to some sort of stir sticks. I love including chocolate dipped spoons and the wood stir sticks coated in crushed peppermints but it could be as simple as some wood stir sticks or spoons.
Fun Toppings and Extra Treats
Marshmallows (assorted sizes)
Candy canes
Festive sprinkles
Toffee bits
Semi-sweet chocolate chips
White chocolate chips
Pirouette cookies
Chocolate coated pretzels
Assorted cookies
Chocolate coated Oreos
Assorted chocolates and candies
Caramels
Caramel sauce
Chocolate sauce
Chocolate truffles
Peppermint bark
Chocolate covered spoons
Adult mix ins (peppermint or butterscotch schnapps, amaretto, Irish cream, Irish whiskey, etc.)
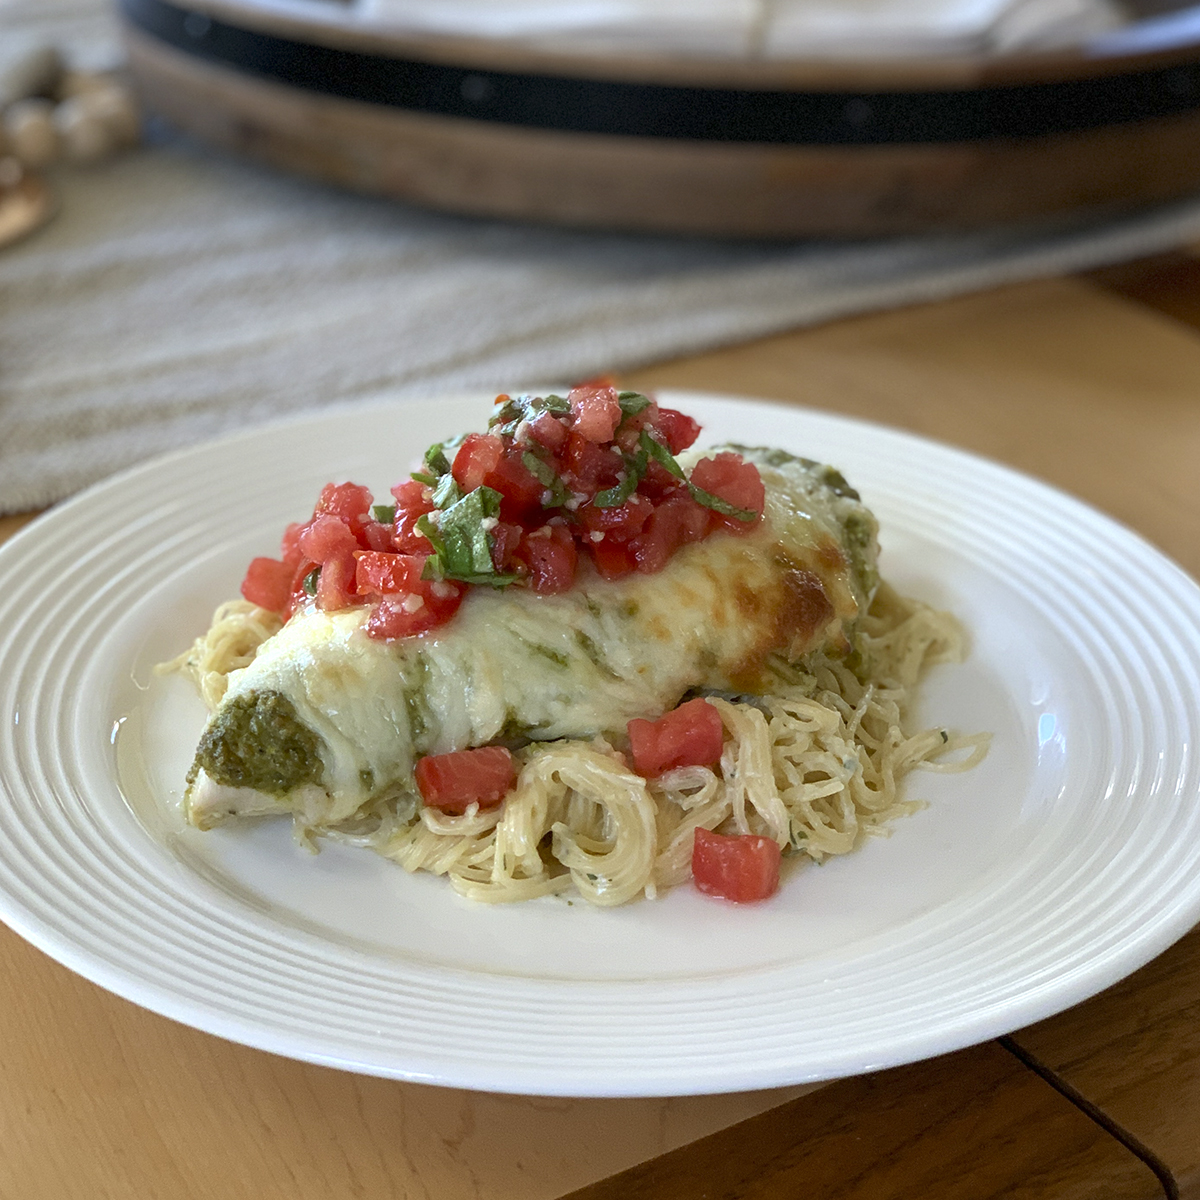
Tomatoes and basil are like an Italian match made in heaven. You can almost guarantee that anything made with those two ingredients will be amazing. One of my favorite ways to bring them together is in a classic bruschetta made up of tomatoes, basil, garlic, and olive oil. So simple but so damn good! Now imagine that fresh bruschetta spooned over a juicy chicken breast smothered in zesty pesto and a layer of melted mozzarella cheese. That my friends, is one hell of a tasty main dish for dinner.
I like to just eat this chicken on it’s own but with the carb monsters I live with, I tend to serve it for them with a side of rice pilaf or over a bed of pasta alfredo. This recipe is so easy to put together, but it looks fancy enough, that you can totally serve it for dinner guests.
BAKED CHICKEN INGREDIENTS 3–4 boneless skinless chicken breast salt & pepper 1 c pesto 2 c mozzarella, shredded
BRUSCHETTA INGREDIENTS 2 large ripe tomatoes, diced 8–10 basil leaves, chopped 1 tsp garlic, minced 2 tbsp extra virgin olive oil salt & pepper
STEPS
Preheat the oven to 400º.
Place the chicken breasts in a lightly greased baking dish and season both sides with salt and pepper.
Spread the pesto over the tops of the chicken breasts and sprinkle with the mozzarella cheese.
Place the baking dish in the oven and bake for about 25 minutes or until the chicken is cooked completely through and mozzarella is just starting to brown up.
While the chicken is cooking, combine all the bruschetta ingredients in a medium bowl and stir to combine.
When the chicken is done cooking, transfer them to a plate and finish with a big scoop of that fresh bruschetta.
Quick one pot dinners are some of my faves. My husband’s too since he does the dishes. Ha ha! Basically, any noodle bowls are a hit with my family and I love them because they are usually quick, easy, and they are a great way to get an assortment of veggies into the mix. This recipe takes less than 30 minutes to make and it is so versatile. You can swap out the beef for shrimp or chicken and you can really use any veggies you want. I also recommend snow peas, bell peppers, zucchini, and mini corn as great options. The sauce has lots of great flavors that the noodles, meat, and veggies all take on. Just the perfect balance of sweet, salty, and spicy. We also like to serve this with a side of egg rolls or pot stickers to get that whole “take out” vibe.
If you follow me on Instagram, you have probably seen my backyard pride and joy, my little garden. One of the first springs in our home I had my dad and husband build me this big, beautiful redwood garden box. It has been a couple of years of figuring out what grows good and what doesn’t. Tomatoes, zucchini and pesto thrive during the hot California summer months.
Well, this year by spry little basil plants turned into full on basil bushes in a matter of a couple of weeks. They were thick, tall, and bushy and I knew they had to be harvested before they went to flower and became bitter and tough. Homemade pesto coming right up!
While I absolutely love store bought pesto nothing beats the freshness of making your own. It can be a little pricey with the cost of pine nuts, quality parmesan, and extra virgin olive oil but it is absolutely worth it! Plus, it is so easy to make. Load all the ingredients in the blender, and blend!
With how much basil I harvested I actually made a massive batch but you certainly don’t need to make that much at a time unless you are sitting on a big basil harvest yourself. The recipe below is written for a single batch.
One thing that is really great about pesto is that it freezes great! I proportion it out into larger containers for pasta dinners and then smaller containers that work great for pizza sauce like when I make my Shrimp Pesto Pizza.
What makes my pesto unique is I like to add some fresh lemon juice to the mix. I find it helps serve as a natural preservative, gives it a great flavor, and also helps to keep the vibrant green color.
INGREDIENTS 2 c basil leaves, packed 3/4 c parmesan cheese, shredded 1 c extra virgin olive oil 1/2 c pine nuts 3 cloves garlic juice from one lemon 1/2 tsp salt 1/4 pepper
STEPS
Combine all the ingredients in the blender and blend string periodically if needed.
Add additional olive oil if you need more liquid to blend.
During the hot summer months my body craves lighter refreshing meals and I just hate running the oven when it is 105º outside. We eat a lot of salads and tacos to keep it quick and simple, but it is always fun to mix it up with some new flavors.
I just absolutely LOVE this peanut sauce with all the other ingredients coming together. You have this flavor medley of peanuts, garlic, and ginger which are so good together and then you get this nice sweetness from the mangos and a little kick from the jalapeño, and that is all just in the sauce and toppings! Don’t forget about all those flavor packed veggies and shrimp in the layered in the lettuce cup too.
This recipe is incredibly versatile. While I myself enjoyed these as lettuce wraps, my husband and son had theirs in a flour tortilla as more of a fusion style taco (they like their carbs) but this would make an amazing entrée salad too if you just wanted to chop up the lettuce and use the sauce as a dressings. Either way, you will not be disappointed!
Note: These take less than 15 minutes to cook and assemble but there is a little bit of prep time needed to slice and dice all the veggies. If you have a busy week ahead, you can absolutely prep ahead of time by chopping up all the veggies and storing them in some sealed containers or bags.
Okay, so I am on a total peach kick here. Hopefully you didn’t miss the recipe I posted last week for Peach Margaritas. I am still recovering from those!
Now, in my opinion, the peach is the epitome of summer fruit. I just love that this time of year when I walk into the produce section or I’m at the farmers market, I get hit with a wall of the sweet sweet smell of stone fruit. Peaches, apricots, nectarines! Yum! There is just something about that sweet fleshy fruit that is so good anyway you have them.
Now when it comes to baking with peaches, I am all about a homecooked peach crisp, not a cobbler. When cooked, peaches get super soft so I like that sweet oatmeal baked to a nice crisp on top with a little bit of cinnamon. This is such a simple recipe, and you just can’t beat it hot out of the oven with a scoop of vanilla ice cream. I could eat it for breakfast, lunch, dinner, and dessert. Trust me, you will want to too!
Note: As much as I love using fresh peaches in my crisp, I want to be able to have peach crisp year round and you can really only get good quality peaches during the summer. So, with that said, I give you permission to substitute canned or frozen peaches in this recipe. If you want to use canned, make sure to completely drain them and if you use frozen, add 10 minutes to the cooking time.
CRISP INGREDIENTS 1/2 c old fashioned oats 1 c flour 1/2 tsp cinnamon 3/4 c butter, softened
STEPS
Preheat oven to 350º.
In a large bowl combine all the filling ingredients and gently fold making sure not to pulverize the peaches.
Transferthe fruit mixture to the bottom of a greased 13” x 9” baking dish and evenly spread out.
In that same bowl, mix together the oats, flour, and cinnamon.
Add the softened butter to the oat mix and using your hands, or a large electric mixer with a paddle, combine everything until it is all evenly mixed and nice and crumbly.
Distribute the oatmeal topping over the top of your fruit. (It is okay if it is all rough and crumbly. Do not push or pat it down.)
Bake uncovered for 30–35 minutes.
Remove from oven and allow it to cool for 10 minutes.
Serve in bowls topped with vanilla ice cream or whip cream.