Dinners

Recipe—Bruschetta Chicken

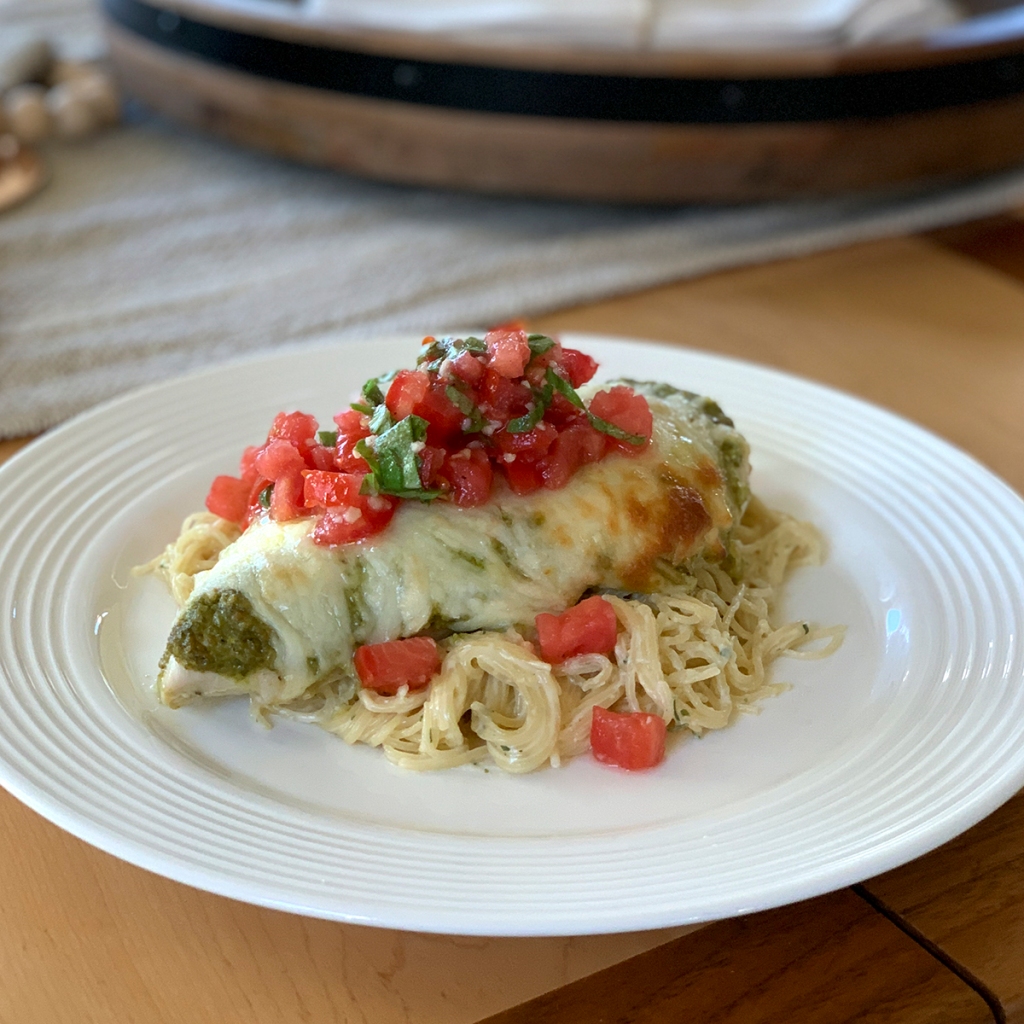
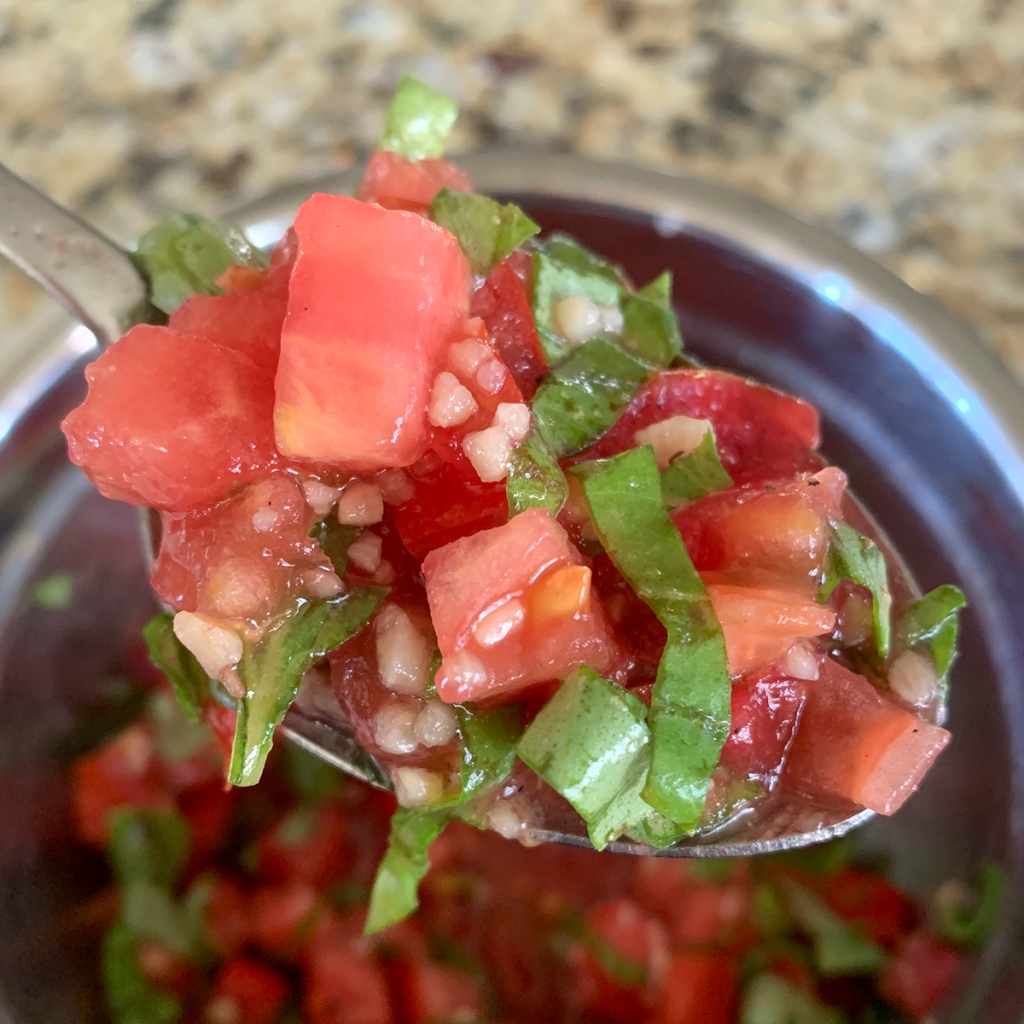
Tomatoes and basil are like an Italian match made in heaven. You can almost guarantee that anything made with those two ingredients will be amazing. One of my favorite ways to bring them together is in a classic bruschetta made up of tomatoes, basil, garlic, and olive oil. So simple but so damn good! Now imagine that fresh bruschetta spooned over a juicy chicken breast smothered in zesty pesto and a layer of melted mozzarella cheese. That my friends, is one hell of a tasty main dish for dinner.

I like to just eat this chicken on it’s own but with the carb monsters I live with, I tend to serve it for them with a side of rice pilaf or over a bed of pasta alfredo. This recipe is so easy to put together, but it looks fancy enough, that you can totally serve it for dinner guests.
BAKED CHICKEN INGREDIENTS
3–4 boneless skinless chicken breast
salt & pepper
1 c pesto
2 c mozzarella, shredded

BRUSCHETTA INGREDIENTS
2 large ripe tomatoes, diced
8–10 basil leaves, chopped
1 tsp garlic, minced
2 tbsp extra virgin olive oil
salt & pepper

STEPS

  • Preheat the oven to 400º.
  • Place the chicken breasts in a lightly greased baking dish and season both sides with salt and pepper.
  • Spread the pesto over the tops of the chicken breasts and sprinkle with the mozzarella cheese.
  • Place the baking dish in the oven and bake for about 25 minutes or until the chicken is cooked completely through and mozzarella is just starting to brown up.
  • While the chicken is cooking, combine all the bruschetta ingredients in a medium bowl and stir to combine.
  • When the chicken is done cooking, transfer them to a plate and finish with a big scoop of that fresh bruschetta.
Dinners

Recipe—Beef Chow Mein

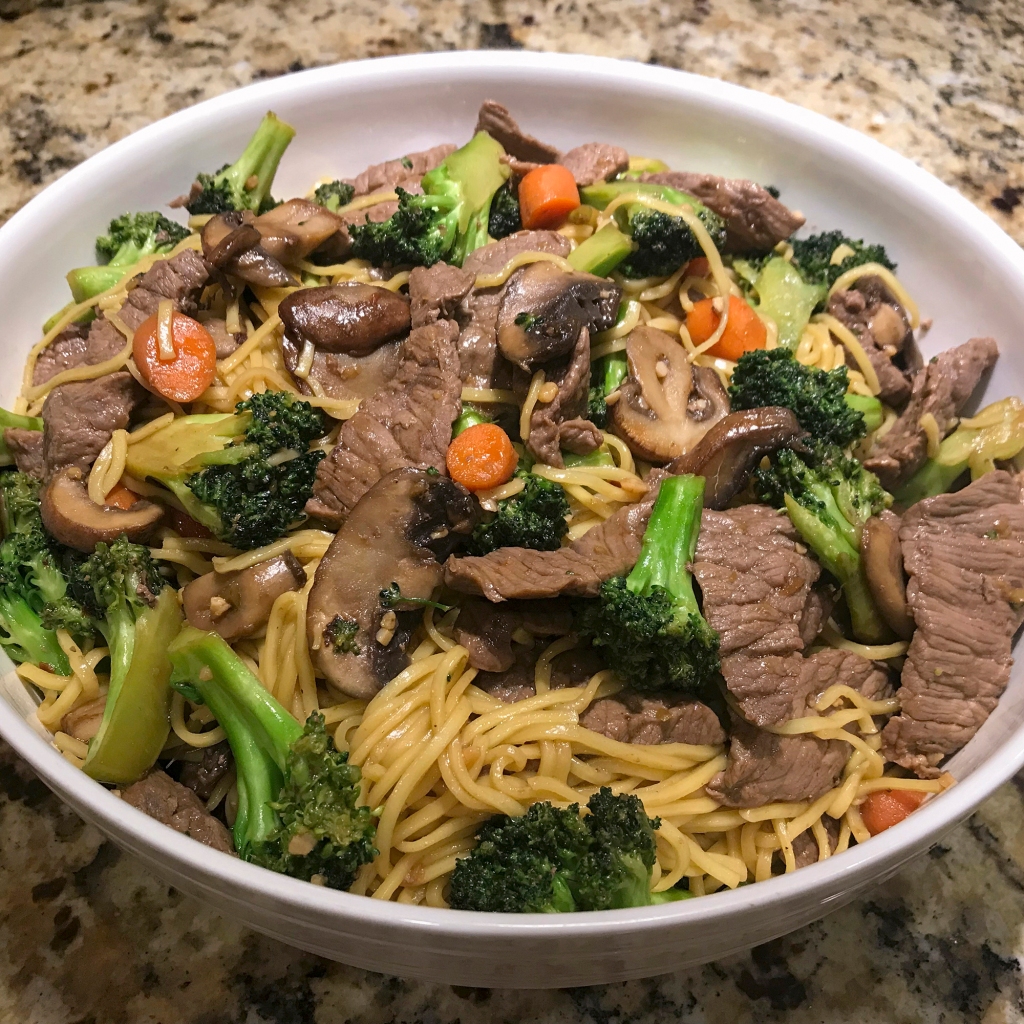
Quick one pot dinners are some of my faves. My husband’s too since he does the dishes. Ha ha! Basically, any noodle bowls are a hit with my family and I love them because they are usually quick, easy, and they are a great way to get an assortment of veggies into the mix. This recipe takes less than 30 minutes to make and it is so versatile. You can swap out the beef for shrimp or chicken and you can really use any veggies you want. I also recommend snow peas, bell peppers, zucchini, and mini corn as great options. The sauce has lots of great flavors that the noodles, meat, and veggies all take on. Just the perfect balance of sweet, salty, and spicy. We also like to serve this with a side of egg rolls or pot stickers to get that whole “take out” vibe.

SAUCE INGREDIENTS
1/3 c soy sauce
3 tbsp oyster sauce
1 tbsp brown sugar
1 tbsp ginger paste
1 tbsp garlic, minced
1 tsp sesame oil
1/4 tsp crushed red pepper 

DISH INGREDIENTS
2 (6-ounce) packages chow mein noodles
1 tbsp olive oil
1 lb beef sirloin steak, thinly sliced
2 c cremini mushrooms, sliced
2 c broccoli florets
2 carrots, sliced

STEPS

  • In a small bowl, whisk together all the sauce ingredients and set aside.
  • Bring a large pot of water to a boil and cook the chow mein noodles according to the package instructions. Drain well.
  • Heat the olive oil in a large skillet or wok over medium high heat. 
  • Add the beef and cook until browned, about 4–5 minutes.
  • Stir in the mushrooms, broccoli, and carrots. 
  • Cook, stirring frequently, until the veggies are tender, about 3-4 minutes. 
  • Add the cooked noodles and sauce mixture to the skillet and cook until well combined, about 2–3 minutes.
  • Serve and enjoy!
Dinners, Salads

Recipe—Thai Shrimp Lettuce Wraps

During the hot summer months my body craves lighter refreshing meals and I just hate running the oven when it is 105º outside. We eat a lot of salads and tacos to keep it quick and simple, but it is always fun to mix it up with some new flavors. 

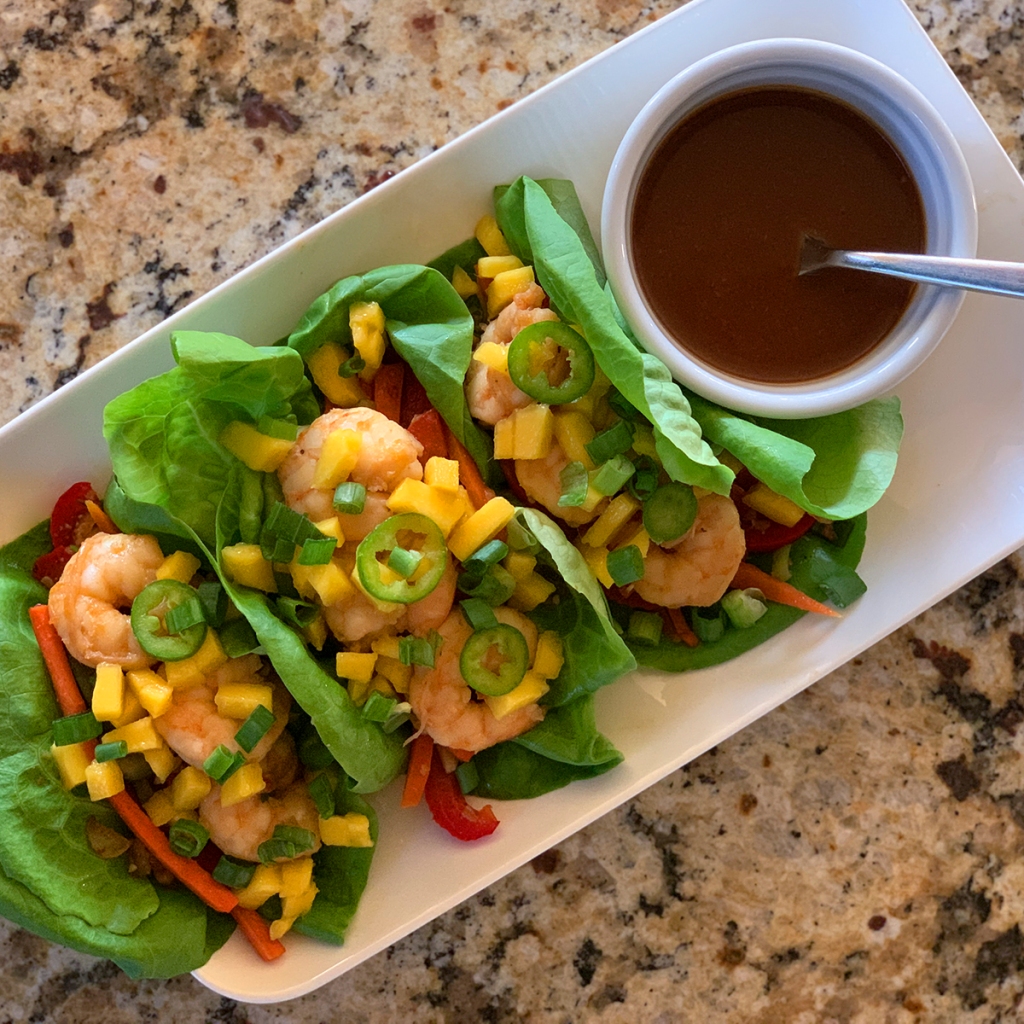
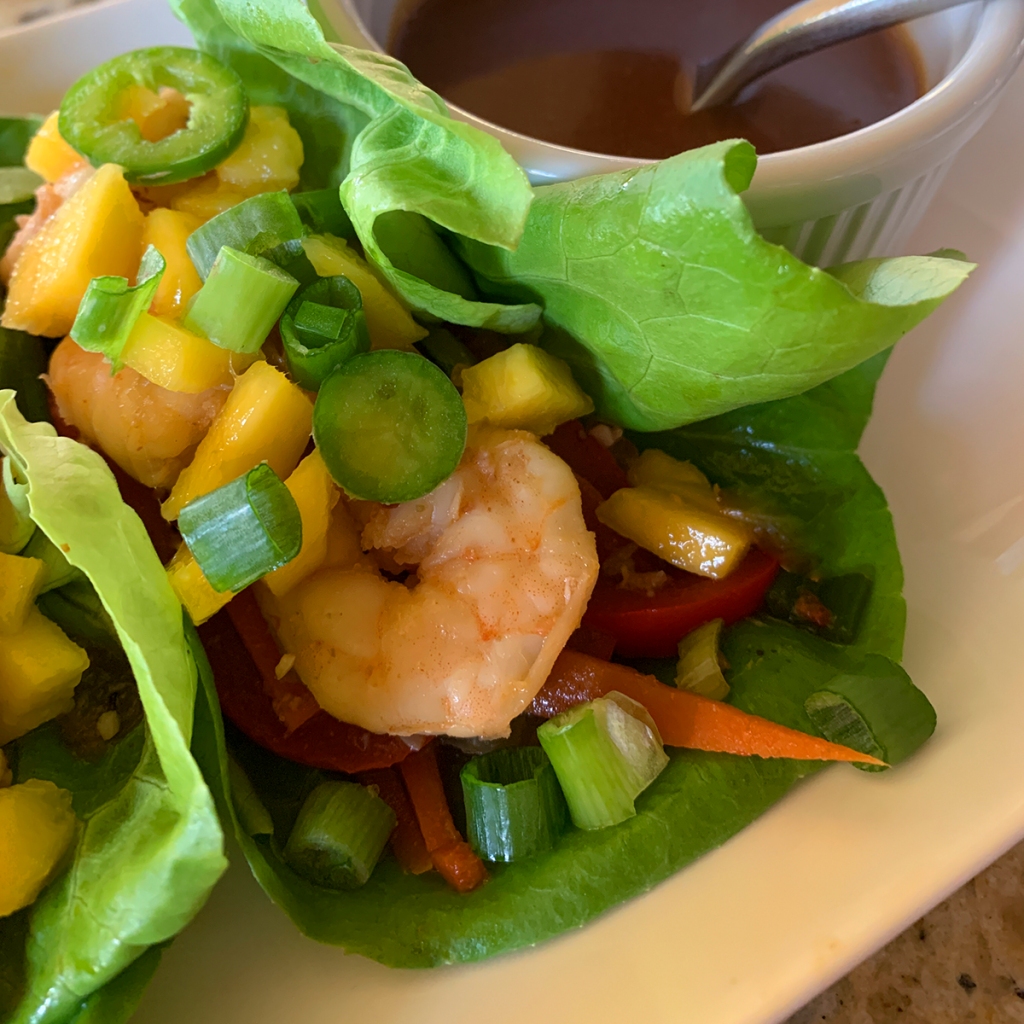
I just absolutely LOVE this peanut sauce with all the other ingredients coming together. You have this flavor medley of peanuts, garlic, and ginger which are so good together and then you get this nice sweetness from the mangos and a little kick from the jalapeño, and that is all just in the sauce and toppings! Don’t forget about all those flavor packed veggies and shrimp in the layered in the lettuce cup too.

This recipe is incredibly versatile. While I myself enjoyed these as lettuce wraps, my husband and son had theirs in a flour tortilla as more of a fusion style taco (they like their carbs) but this would make an amazing entrée salad too if you just wanted to chop up the lettuce and use the sauce as a dressings. Either way, you will not be disappointed!

Note: These take less than 15 minutes to cook and assemble but there is a little bit of prep time needed to slice and dice all the veggies. If you have a busy week ahead, you can absolutely prep ahead of time by chopping up all the veggies and storing them in some sealed containers or bags.

PEANUT SAUCE INGREDIENTS
1 1/2 tbsp peanut butter
2 tsp rice vinegar 
2 tsp coconut milk  
3 tbsp soy sauce 
2 tbsp honey 
1 tsp ginger paste
1 tsp garlic, minced

SHRIMP LETTUCE WRAP INGREDIENTS
1 tbsp olive oil  
1 onion, sliced
2 carrots, julienned
1 red bell pepper, sliced
1 lb raw shrimp, peeled and deveined
1 zucchini, julienned
1/4 c soy sauce
2 tsp garlic, minced
1 tbsp ginger paste
1 tsp crushed red pepper  
1/2 tsp cumin 
1 jalapeños, seeded and sliced
3 green onions, chopped
1 mango, diced
1 head butter leaf lettuce, leaves separated 

STEPS

  • In a small bowl whisk together all the peanut sauce ingredients until smooth and set aside.
  • In a large skillet or wok, heat the olive oil over medium high heat.
  • Add the onion, carrots, and bell pepper to the skillet and cook until they begin to soften, about 3–4 minutes.
  • Add the shrimp, zucchini, and soy sauce to the skillet and cook until the shrimp are golden and almost cooked through, about 3–4 minutes.
  • Stir in the garlic, ginger paste, crushed red pepper, and cumin and cook for another 1–2 minutes.
  • Remove the skillet from the stove top and set aside.
  • To prepare, scoop some of the vegetables into the lettuce cups and top with a few of the shrimp. 
  • Garnish with a couple of jalapeño slices, some green onions, and diced mangos and then drizzle with the peanut sauce.
  • Grab a napkin or three and enjoy!
Dinners

Recipe— Quesabirria Tacos

I follow a LOT of foodies on social media and over the last year I have seen this trend of people posting photos of these delicious looking meat and cheese filled tacos served up with a dish of red sauce for dipping. This delicious looking meal is called birria or quesabirria tacos and now it seems like you see them everywhere! I scoped out some of our local Mexican restaurants and could not find anywhere that had birria tacos on the menu, but I had to have them! Sooooo… to Pinterest I went! 

I found quite a few recipes out there and of course every one of them was different, but none of them had me sold. Being who I am, I picked and pulled elements from several different recipes and came up with my own recipe. 

I was absolutely thrilled with how these tacos turned out. The meat was flavorful and juicy and the broth was so rich and just the right amount of spicy. I served my husband, son, and I each up with three tacos to start with but we kept going back to the grill for another one, and another one, and another one until we were about to pop. These seriously lived up to all the hype. I can honestly say, these were not only the best tacos I have ever made, but also the best tacos I have ever eaten!

Note: These are relatively easy to make but time consuming since you slow cook the meat on the stovetop. It is the perfect recipe to make on a rainy Sunday while you watch some football and just want to indulge in some good food. 

BIRRIA INGREDIENTS
3 lbs short ribs (bone in)
1 large white onion skin removed, halved and cut into 1/2″ thick slices
1 garlic bulb with skin on, top cut off 
2 carrots, cut into quarters
5 bay leaves
8 dried guajillo chiles, stems cut off and seeds removed
3 chicken bouillon cubes
2 tsp chili powder 
1 tsp oregano
1 tsp ground cumin
1 tsp salt

TACO INGREDIENTS
corn tortillas
jack cheese, shredded
white onion, chopped
cilantro, chopped
cotija cheese, crumbled

STEPS

  • In a large pot add meat, onion, garlic, carrots, bay leaves, and dried peppers and cover with water. 
  • Add the chicken bouillon, oregano, cumin, and salt.
  • Bring the pot to a boil over medium high heat.
  • After 30 minutes of cooking, skim any foam off the top of the water.
  • Remove the peppers, onions, and carrots and place them in a blender.
  • Squeeze the garlic cloves from the bulb into the blender and add 1 cup of the liquid from the pot.
  • Puree the ingredients in the blender until smooth. 
  • Pour the vegetable puree back into the pot.
  • Add the lid to the pot and simmer over medium-low heat for 3 hours stirring every 30 minutes or so.
  • Transfer the meat and bones to a large cutting board. 
  • Remove the meat from the bones and discard the bones.
  • Using two large forks, shred the meat and set aside.
  • Heat a large skillet or griddle over medium heat.
  • Dip a corn tortilla into the broth left in the pot and place the tortilla on the griddle. 
  • Top the tortilla with jack cheese, chopped meat, diced white onion, and some cilantro.
  • Fold the taco in half and press down with the back of a spatula.
  • Continue cooking until the tortilla is golden and cheese is melted, about 2–3 minutes.
  • Flip the taco and continue cooking the other side.
  • Transfer the tacos to a plate or serving dish as you finish them. 
  • Garnish the finished tacos with cilantro and crumbled cotija cheese. 
  • Ladle some of the broth into a ramekin and top with fresh onions and more cilantro and serve with the tacos. 
  • Dip the tacos into the broth and enjoy each and every sauce-soaked cheesy bite. 
Dinners

Recipe—Grilled Pork Tenderloin with Queso Stuffed Chiles

There are some recipes that are summer staples, this recipe is one of those in our household. Zesty citrus grilled pork tenderloin medallions paired with cheesy grilled stuffed peppers. Looks and sounds amazing, doesn’t it?

One of the reasons we primarily make this in the summer is because that is when peppers are in season, and you can usually find pretty large ones at the store. The bigger the better when it comes to this recipe! That way you can pack them full of all the cheesy goodness. 

I absolutely love pork tenderloins. They are so lean and are actually a really great grilling meat. With this recipe, the meat is so flavorful and juicy, and takes on really great citrusy and smoky flavor as it plumps up on the grill. 

There are so many things to love about this recipe. It is relatively easy, looks amazing, tastes amazing, and all the components of this dish are cooked outside, so you don’t have to deal with a hot oven during warm summer nights. What’s not to love?

TENDERLOIN INGREDIENTS
4 tbsp apple cider vinegar
1 tsp dried oregano
1/2 c fresh squeezed orange juice
2 tsp olive oil
1 tbsp garlic, minced
1 lb. pork tenderloin

STUFFED PEPPER INGREDIENTS
3/4 c queso fresco, crumbled
3/4 c jack cheese, shredded
1/2 c cilantro leaves, chopped
1 small tomato, diced
4 anaheim or hatch chile peppers, sliced open lengthwise, seeds removed

GARNISH

1 lime, cut into wedges
additional chopped cilantro

STEPS

  • Combine the apple cider vinegar, oregano, orange juice, olive oil, and garlic in a large resealable bag. 
  • Add the tenderloin to the bag and marinade in the fridge for 2–12 hours.
  • In a medium bowl, mix together the queso, jack cheese, cilantro, and diced tomato. 
  • Spoon the cheese mixture into each pepper half.
  • Preheat the grill to 400º.
  • Add the pork tenderloin to the grill and cook for 10–12 minutes. 
  • Flip the tenderloin and cook for another 10–12 minutes or until the internal temperature reaches 145º.
  • Remove the pork from the grill and allow it to rest.
  • While the tenderloin in resting, add the stuffed chiles to the grill and cook for 10–12 minutes or until the cheese is nice and melted. 
  • Slice the pork and serve with the grilled chiles and sliced lime and garnish with additional fresh chopped cilantro.

If you like this recipe, then I highly recommend you check out my recipes for The Most Awesome Pork Tenderloin Ever or Pork Tenderloin Sammies with Red Cabbage Coleslaw and Sriracha.

Dinners, Soups

Recipe—Keto White Chicken Chili

Okay, you may be thinking, “Why is this Diva posting a chili recipe as the weather is warming up? Isn’t chili a cool weather dish?” Here is my response, this is probably one of the best keto meals I have ever had, and the flavors are so good that I absolutely eat this any time. Plus, it is just so easy to make, and in my opinion, an easy one pot recipe is welcome year-round.

I have been “doing keto” since June 2020 and am down 33 lbs. Yay me! Now don’t worry, this blog is not suddenly turning keto. I am just all about offering variety to my followers and I could not keep this recipe to myself, it is just too good! If you are a long time follower, you know my blog is anything but a keto or diet blog.

Now even if you aren’t on a ketogenic diet, you can absolutely enjoy this recipe as is, or what I do for my husband and son who are full on carbivores (I just made that up), is split the cooked chili into two batches after it is all cooked. One keto batch for me, and one carb loaded version for them. I have integrated carbs two different ways for them. One time I added a can of white cannellini beans to their chili and another time I served this over a bowl of cooked rice. Both of those options were very well received.

Hope you love this recipe as much as I do because it is definitely one of my new favorite “go tos”.

INGREDIENTS
2 tbsp olive oil
1 lb ground chicken (or turkey)
2 tsp cumin
1 tsp oregano
1/4 tsp cayenne pepper
salt and pepper
4 tbsp butter
1 green bell pepper, diced
1/2 a yellow onion, diced
2 tsp garlic, minced
1 jalapeño, deseeded and chopped
1 1/2 c chicken broth
4 oz cream cheese
1/2 c heavy cream
4.5-ounce can diced green chiles, drained

GARNISHES
avocado
cilantro
cotija cheese, crumbled

STEPS

  • Heat the olive oil in a large pot over medium high heat and add the ground chicken breaking it apart as it cooks.
  • Season the meat with cumin, oregano, cayenne pepper, salt and pepper and continue cooking until it is almost cooked through.
  • Add the butter, bell pepper, onion, garlic, and jalapeño to the pot.
  • Sauté until all the veggies are cooked through and tender, about 5–10 minutes.
  • Add the broth to the pot and bring to a simmer.
  • Simmer for 10 minutes and then add the cream cheese, heavy cream, and green chiles.
  • Continue simmering for another 15 minutes stirring every once in a while, making sure that the cream cheese melts and is nicely integrated.
  • Garnish with avocado, cilantro, and crumbled cotija cheese.
Brunch, Dinners

Recipe—Sausage & Cheddar Quiche

Sausage & Cheddar Quiche

I love breakfast! Yes, I do! I love breakfast! How about you!? 

I will say however, that breakfast is a meal I don’t get to really prepare and enjoy often enough. Monday–Friday usually consists of something quick and on the go so sometimes I make breakfast for dinner just to get that breakfast fix. One thing I love about quiche is it is really perfect for any meal, breakfast, lunch, or dinner! Add some fruit and potatoes, you got breakfast. Add a green salad, now it’s lunch or dinner. 

This quiche is really as easy as they come, especially with a premade piecrust. I know quiche might seem intimidating to make but I promise there is no need to be scared! It really isn’t complicated and is well worth the effort it takes to make. Plus, sausage and cheddar are just a classic breakfast combo that you can’t beat.

Sausage & Cheddar Quiche

INGREDIENTS
1 sheet of refrigerated piecrust at room temperature
8 oz mild or spicy breakfast sausage
5 green onions, thinly sliced
2 c shredded sharp cheddar cheese, divided
1 c half and half
6 large eggs
1 tsp garlic salt
1 tsp freshly ground black pepper
1/2 tsp ground mustard

STEPS

  • Preheat the oven to 350°F. 
  • Unroll your piecrust and line a pie dish with a single sheet and set aside
  • In a non-stick skillet, over medium-high heat, cook the sausage until no pink remains. 
  • Add the green onion to the skillet and cook for another minute. 
  • Drain excess fat from pan.
  • Spread half of the sausage mixture in the pie crust and sprinkle with half of the cheese. 
  • Spread the remaining sausage mixture over the cheese.
  • In a medium bowl whisk together the half and half, eggs, salt, pepper, and ground mustard.  
  • Pour the egg mixture evenly over the sausage and sprinkle the top with the remaining cheese. 
  • Place the quiche into the oven and bake for 45–50 minutes or until the center is set when gently shaken. 
  • Remove the quiche from the oven and allow it to rest for 15 minutes before cutting into it and serving. 
Dinners

Recipe—Grilled Hawaiian Sticky Chicken & Pineapple

Grilled Hawaiian Chicken & Pineapple

Aloha! Summer is coming to a close and most vacations are currently on hold. So if you can’t get to a tropical island, then let’s bring the island life to you!

Back in April when we were about a month into sheltering in place at home, my family and I came up with an idea to do a weekly family theme night. We were doing them every Friday just so we had something fun to look forward to at the end of the week. The first one we did was a Tropical Beach Party. The primary focus of our theme nights was our menu but we found lots of other fun details to incorporate. We ended up watching Lilo and Stitch while sprawled out on beach towels on our living room floor.

For this specific dinner I made my Grilled Hawaiian Sticky Chicken and Pineapple. It was so good! The key is definitely marinating the chicken for the entire day to really let all those flavors soak into the meat. You get this delicious combination of salty, sweet, and smoky. Cooking it low and slow on the grill gives the chicken and pineapple a nice caramelized exterior and then you brush them with honey at the end so you end up with this sweet sticky exterior that brings out so much flavor. The pineapple manages to get even sweeter and even picks up a bit of a smoky flavor from the grill. My mouth is literally watering just thinking about it. I served it up with some of my Tropical Macadamia Nut Ricewhich is packed with island flavors of toasted coconut and macadamia nuts. If you really want to take this meal to the next level then break out the blender and try my Best Ever Piña Coladas. So, for now, home may not be as good as Hawaii but at least with this meal, the only thing you will be missing is the sand between your toes.

Grilled Hawaiian Chicken & Pineapple

Note: The trick with grilling this recipe to is to do it over a lower indirect heat and making sure not to have it directly over the heat source. The glaze can easily burn if you try and cook it hot and fast. If you are not the grilling type then you can absolutely cook it in a pan on the stove top.

INGREDIENTS
4 chicken breasts
1/4 c pineapple juice
1/4 c soy sauce
1/4 c brown sugar
3 tbsp ketchup
1 tbsp garlic, minced
2 tbsp olive oil
fresh pineapple, cut into long spears
1/4 c honey
green onions, chopped

STEPS

  • In a small bowl whisk together the pineapple juice, soy sauce, brown sugar, ketchup, garlic, and olive oil.
  • Place the chicken and marinade in a large Ziploc bag and mix to ensure all the chicken breasts get covered with the marinade.
  • Marinade in the refrigerator for 2–24 hours.
    About 30 minutes before cooking, remove the marinated chicken from the bag and place in a shallow dish. Allow the chicken to rest at room temperature for about 30 minutes before grilling.
  • Preheat the grill to 350º.
  • Add the chicken to the grill making sure you cook it over indirect heat. (See above note.)
  • Cook the chicken for 7–10 minutes per side or until the internal temperature reaches 160º.
  • During the last 10 minutes of the chicken cooking, add the pineapple spears to the grill also making sure to cook it over indirect heat.
  • Turn the pineapple every 2–3 minutes making sure to get some nice grill marks on them.
  • When the chicken and pineapple are done, transfer them to a serving dish and lightly brush with the honey, and sprinkle with the green onions.
Appetizers, Dinners

Recipe—Loaded Korean Beef Fries

Recipe—Loaded Korean Beef Fries

If your mouth isn’t watering just looking at this pic, then you must be dead. And if you are doing everything you can to keep from drooling on your keyboard or phone, then please, give this recipe a try. You will have no regrets. Absolutely calorie worthy.

This is actually a copycat version of the Loaded Korean BBQ Beef Fries from my favorite local food truck, Turnt Up Tacos and Tortas. The first time I had them, I was HOOOOOOKED!

I start off with a base of thin crispy fries and cover them in finely shredded jack cheese and then pile on a mound of my sweet and spicy Korean Beef and then top that with a cabbage and carrot-based coleslaw made with a creamy sesame ginger sauce and then don’t forget about that spicy sriracha drizzled over the top to give it a kick. The flavors are so freaking good, I tell ya! Mmmmm… mmmmm… mmmmmmmmm!

I have actually started serving this as a meal in my house with each person getting their own plate of loaded fries (yes, loaded fries as a meal, it even has most of the food groups) but you could absolutely make one big pile of loaded fries and share them with friends as an appetizer or shared plate.

Note: The sesame oil and ginger paste go in both the Korean beef as well as the creamy sesame ginger sauce so pay close attention when preparing.

INGREDIENTS
bag of frozen french fries
1 lb ground beef
1/2 c brown sugar
1/4 c soy sauce
1 tbsp & 1 tsp sesame oil
1 tbsp garlic, minced
1 tsp ginger paste, divided
1/4 tsp crushed red pepper
salt and pepper
3 c green cabbage, shredded
1/2 c carrots, shredded
1/2 c mayonnaise
1 tsp white sugar
1/4 c milk
2 c jack cheese, shredded
Sriracha sauce
2 green onions, chopped
sesame seeds

STEPS

  • Bake or fry the French fries according to the package directions.
  • While the fries are baking, cook the ground beef over medium high heat breaking it apart as it cooks.
  • Once the beef is cooked through, drain off most of the fat.
  • Add in the brown sugar, soy sauce, garlic, 1 tablespoon of the sesame oil, 1/2 teaspoon of the ginger paste, red peppers, salt, and pepper.
  • Simmer over medium heat for a 4–5 minutes stirring occasionally.
  • While the beef is cooking, put the cabbage and carrots in a medium bowl and set aside.
  • In a small bowl whisk together the mayonnaise, white sugar, 1 teaspoon of sesame oil, the other 1/2 teaspoon of ginger paste, and the milk to make the creamy sesame ginger sauce.
  • Toss about 3/4 of the creamy sesame ginger sauce with the cabbage and carrots and set aside the rest to drizzle over the top.
  • When the fries are done transfer them to the plates.
  • Top each pile of fries with the jack cheese, cooked Korean beef, and the coleslaw.
  • Drizzle the remaining creamy sesame ginger sauce and sriracha sauce over the top.
  • Sprinkle with sesame seeds and finish off with green onions.
Dinners

Recipe—Ground Pork Tacos with Corn Salsa & Cilantro Lime Crema

Okay, here we go, first recipe post of 2020! I feel like it should be something super extreme and mind blowing since you have all been waiting for so long but here we are in the middle of a pandemic and that just seems unrealistic. How are you all doing? Are you cooking at home more than ever? I know I am. I’m trying to use this as an opportunity to eat at home more and save some moolah.

These pork tacos were one of the first meals I made when we went into official “lock down” a couple of weeks ago. When all this really started I did an inventory of what we had in our box freezer and noticed we had TONS of ground pork so I wanted to do something different with that. Ground pork is just not a typical protein to cook with since it has such a different flavor compared to ground beef or ground turkey.

Not to go tooting my own horn or anything, buuuuuut these turned out so freaking good! There are so many great flavors wrapped up in the tortilla. You have the sweet corn salsa, the tangy cilantro lime crema, and then the savory pork cooked in a tomato sauce that has a nice little kick to it thanks to the jalapeño. Nothing too crazy heat wise, my ten-year-old chowed down on them. If you are looking to spice up your typical “Taco Tuesday” give these a try.

Hang in there folks! We are all in this together! Huge virtual hugs (and more recipes) coming your way! xoxox—Diva di Cucina

INGREDIENTS FOR THE CORN SALSA
1 tbsp olive oil
15.25 oz canned corn
2 tbsp red onion, finely chopped
1/3 c cilantro, chopped
1 tsp garlic, minced
1 1/2 tsp cumin
1 tbsp lime juice
3 tbsp olive oil
salt and pepper

INGREDIENTS FOR THE CILANTRO LIME CREMA
1/3 c sour cream
2 tsp lime juice
2 tbsp cilantro, chopped
1 tbsp water

INGREDIENTS FOR THE PORK
1 tbsp olive oil
1 lb ground pork
1 jalapeño, thinly sliced
1/4 c red onion, finely chopped
1 tbsp garlic, minced
6 tbsp tomato paste
2 tsp cumin
1/3 c water
salt and pepper

OTHER INGREDIENTS
tortillas (I loved these with white corn tortillas)
cotija cheese
cilantro, chopped

STEPS FOR CORN SALSA

  • Heat 1 tablespoon of olive oil in large skillet over medium high heat and add the corn.
  • Cook the corn for about 5 minutes stirring every minute or so.
  • Transfer the corn to a medium sized bowl and add the remaining corn salsa ingredients.
  • Season with salt and pepper to taste.
  • Stir and set aside.

STEPS FOR THE CILANTRO LIME CREMA

  • In a small bowl, whisk together all the cilantro lime crema ingredients and set aside.

STEPS FOR THE PORK

  • Add 1 tablespoon of oil to the pan the corn was cooked in and turn up to medium-high heat.
  • Add the pork to the skillet and break apart using a spatula.
  • Once the pork has started to brown, add in the jalapeño, red onion, and garlic.
  • Continue to cook until the pork is all brown and cooked through and the onion and peppers are tender.
  • Mix in the tomato paste, cumin, and water and season with salt and pepper to taste.
  • Cook for another 2–3 minutes allowing the sauce to thicken up.

TACO ASSEMBLY

  • Warm up your tortillas and top each one with a scoop of the meat, a scoop of the corn salsa, a drizzle of the cream, some cotija cheese crumbles on top, and finish it off with a sprinkling of cilantro.

Enjoy!