Salads, Side Dishes

Recipe—Creamy Dill Red Potato Salad

Summer is upon us! Well not quite, but we are so close! I can literally smell it! The smell of grilled meat has infiltrated the warm evening air in my subdivision and I am itching for a good ol’ fashioned cookout.

One thing I absolutely love about summer BBQs are all the cold salads. Macaroni salads, potato salads, mmmmmmm… mmmm… mmmm! (I really should not write these posts when I am hungry because right now, I am salivating just thinking back to this potato salad.)

I have a go to potato salad that is loaded with bacon, olives, bell peppers, onions, and so much more and it is amazing, but sometimes I am looking to mix it up with something a little more simple and lighter. 

The red potatoes really come out fluffy and then the super creamy dressing is a little tangy from the vinegar and sour cream and then you have this delicious dill flavor. So simple and so lite. Perfect for these warm summer days!

INGREDIENTS
8 large red potatoes, diced
1 c sour cream
1 c mayonnaise
1/2 c red wine vinegar
1 1/2 tsp dill
salt and pepper
4 green onions, chopped

STEPS

  • Add 1–2 tablespoon of salt to a large pot of water and bring to a boil.
  • Add the diced potatoes and boil for 10–14 minutes or until fork tender.
  • While the potatoes are boiling whisk together the sour cream, mayonnaise, vinegar, dill, salt and pepper in a small bowl.
  • When the potatoes are done cooking drain them in a colander and transfer to a large bowl.
  • Add most of the green onions (saving a handful for garnish) and dressing and toss to coat. 
  • Garnish with the leftover green onions and a little bit of the dill.
  • Cover with a lid or saran wrap and refrigerate for at least 4 hours. The longer it rests, the better the flavors.

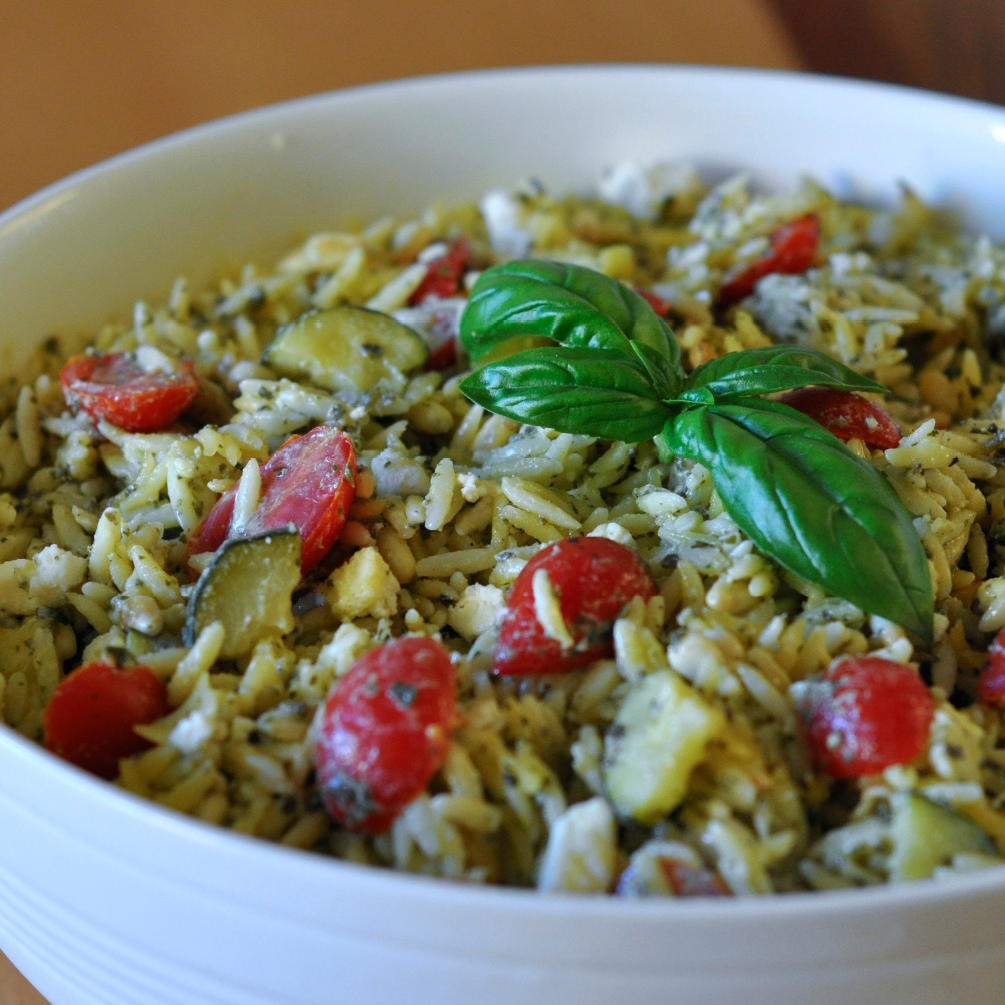
If you like this recipe, then I highly recommend you check out these other awesome salads that make for great additions to your BBQ menu!

Italian Pasta Salad

Italian Pasta Salad

Classic Macaroni Salad

Classic Macaroni Salad

Orzo Pesto Pasta

Orzo Pesto Pasta

Advertisement
Brunch

Recipe—French Toast Casserole

French Toast Casserole

Christmas morning can sometimes be a bit chaotic with hustle and bustle of gift giving, cleaning up of all the shreds of paper and ribbon, and then sometimes the mad dash to clean the house before relatives arrive for round two of Christmas. At least that’s how it is in our home. However, on Christmas morning I always want to sit down and have a nice breakfast with my crew, I just don’t always have the time to make a big Christmas worthy breakfast. However, I do have the time to throw a casserole in the oven. So here you have French Toast Casserole to save the morning!

Several years back I posted a recipe for Blueberry French Toast Casserole. Not to toot my own horn, but toot toot! It’s amazing if you haven’t given it a try. What I love about french toast casserole is you can prep the dish the day before, throw it in the oven in the morning, and boom! Just like that you have a hot and delicious breakfast with almost no work. This recipe has all that delicious cinnamon goodness baked into a sweet bread pudding with a crispy streusel topping. It is so tasty!

So if you are looking for a quick and easy breakfast that you can make in advance, then this is the recipe for you.

French Toast Casserole

INGREDIENTS
12 slices sourdough bread (or a sourdough loaf), cut into 1” cubes
10 eggs
2 c milk
1/2 c heavy cream
2 tbsp vanilla extract
1/2 c sugar
1 c brown sugar, divided
1/2 c flour
1 tsp cinnamon
1/2 c cold butter, cut into small pieces

STEPS

  • Cut the loaf of sourdough into cubes and distribute them in a greased 9” x 13” pan.
  • In a large bowl whisk together the eggs, milk, cream, and vanilla.
  • Whisk in a 1/2 cup of the brown sugar and all the granulated sugar to the egg mixture
  • Pour the egg mixture over the bread.
  • Using your fingers or the back of a spatula gently press all of the bread pieces down into the egg mixture.
  • Cover the baking dish with foil and place in the fridge 8 hours or overnight.
  • For the streusel topping, in a medium bowl, mix together the other 1/2 cup of brown sugar, flour, cinnamon.
  • Add the cut-up butter to the topping mix and using a large fork or pastry cutter mix it all together until it is a nice crumbly consistency.
  • Store the streusel in a Ziploc bag in the fridge until ready to bake.
  • When ready to bake, remove the casserole dish and streusel from the fridge and allow it to sit on the counter for about 30 minutes.
  • Preheat oven to 350º.
  • Sprinkle the streusel topping over the french toast.
  • Cover the dish back up with foil and bake for 45 minutes.
  • Remove the foil and continue baking until the top is a nice golden brown and the egg mixture is set, about an additional 15–20.
  • Remove from oven and allow it to cool for 5 minutes.
  • Cut and serve with a pat of butter and some warm syrup.
Sweet Treats

Recipe—Craisin White Chocolate Chip Oatmeal Cookies (AKA Santa’s Favorite)

Craisin White Chocolate Chip Oatmeal Cookies

One of my favorite things about Christmas is all the traditions that go along with it. Gingerbread house building, baking, listening to Christmas music, hanging the stockings, you catch my drift. There is just so much magic in the month leading up to Christmas. Well, ever since my son with 10 months old we have taken him for annual photos with Santa. They are all framed and sit in chronological order (have a mentioned I have OCD tendencies before? LOL) along the entertainment center leading up to Christmas.

Santa

This year he is 10 years old and he still wanted to go take a pick with Santa. With COVID I didn’t think we could make that happen but sure enough, we found a place that was doing physically distanced photos by appointment only. Yay! Anyways, ever since my son could talk he would make sure to ask Santa what kind of cookies he wanted us to leave out for Christmas, it never fails, he ALWAYS says oatmeal. Now one thing I will fess up to is that I despise raisins! I cannot eat them! Even as an adult I will pick them out of trail mix. I refuse to contaminate a good oatmeal cookie with raisins! However, I do love me some craisins. So, ever since that first time Santa said he wanted oatmeal cookies, this recipe made it into the baking rotation. These are delicious, buttery, and just the right amount of chewy and sweet. To me, these cookies are the cookie of Christmas and I guarantee you they are Santa approved!

INGREDIENTS
1 1/2 c flour
1 tsp baking soda
1/2 tsp salt
1/2 c + 6 tbsp butter, softened
3/4 c brown sugar
1/2 c granulated sugar
2 eggs
1 tsp vanilla
3 c oats uncooked
1 c craisins
11 oz white chocolate chips

STEPS

  • Preheat oven to 350°F.
  • In a medium bowl, stir together flour, baking soda, and salt and set aside.
  • In a large bowl, using an electric mixer, beat together the butter and sugars until creamy.
  • Add eggs and vanilla to the butter mixture.
  • Gradually start to fold in the flour ingredients into the butter mixture.
  • Add oats, craisins, white chocolate chips and mix well.
  • Drop dough by the spoonful onto a parchment paper lined baking sheet.
  • Bake for 8–10 minutes or until light golden brown.
  • Allow cookies to sit on the baking sheet for a couple of minutes before transferring to a cutting board or cooling rack.
Sweet Treats

Recipe—Glazed Lemon Cookies

We are on Day 4 of 5 of my Christmas Cookie Week! That’s right, this week I will be posting 5 of my favorite Christmas Cookie recipes!

Glazed Lemon Cookies

We have the cutest little lemon bush in our back yard and it holds a special place in my heart as it was a housewarming gift from some of our friends when we built our house 6 years ago. Every year come December, it never fails, the lemons are ready for picking. For that reason, these glazed lemon cookies have become a staple in our holiday cookie rotation. They are so soft and light and I just love the zestiness the fresh lemon brings to them. While I love making these around the holidays they are also perfect for spring or summer.

Note: I recommend placing some paper towels or wax paper under the cooling rack before taking the cookies out of the oven. When you do the glazing you will get some drippage and the paper towels or wax paper will help to catch that excess sticky goodness that make cleanup so much easier.  

COOKIE INGREDIENTS
2 1/4 c flour
1 tbsp cornstarch
1/2 tsp baking soda
1/2 tsp salt
3/4 c butter, softened
1 1/4 c granulated sugar
zest from 2 lemons
2 eggs
2 tbsp lemon juice
1 1/2 tsp vanilla extract

GLAZE INGREDIENTS
1 c powdered sugar
2 tbsp fresh lemon juice

STEPS

  • Preheat oven to 350º.
  • In a medium bowl, stir together the flour, cornstarch, baking soda, and salt.
  • In a large bowl beat together the butter, sugar, and lemon zest on medium-high speed for 3 minutes.
  • Add the eggs, lemon juice, and vanilla to the butter mixture and continue to beat until evenly incorporated.
  • Gradually add in the dry ingredients until combined.
  • Form small balls with the dough and place at least 2 inches apart on a parchment paper lined baking sheet.
  • Bake for 8–10 minutes or until they just start to get a light golden color on the bottom.
  • Allow cookies to sit on the baking sheet for a couple of minutes before transferring to a cooling rack.
  • Once the cookies have completely cooled, whisk together the powdered sugar and fresh lemon juice to make the glaze. (You want to be able to drizzle the glaze so add a tad bit more lemon juice or water if needed to thin it, or more powdered sugar if you need it thicker.)
  • Transfer the glaze to a transfer to a piping bag with a very small opening or a Ziploc bag. (If using a Ziplock bag, you will want to cut a small tip off one corner.)
  • Drizzle the glaze back and forth over the cookies.
  • Allow the cookies to rest for at least an hour so the glaze has time to set.
  • Enjoy!
Sweet Treats

Recipe—Individual Pumpkin Pie Mousse Cups

Pumpkin Pie Mousse Cups

As soon as the summer heat starts to die down and mornings become cooler, my body literally craves pumpkin spice. Yes, I am a pumpkin spice loving, leggings, Ugg, scarf, and sweater wearing, momma. I can’t help it! There is just something about indulging in all things pumpkin that allows me to fully transition into fall.

While I absolutely love a homemade pumpkin pie at Thanksgiving, I don’t always have the time, energy, or space in my oven, to make anything besides the turkey and all the fixings. I absolutely love this dessert because it is quick, easy, and no bake! You get all the flavors of pumpkin pie with the pumpkin puree and pumpkin spice but it is a creamy, light, and fluffy mousse! Plus, you can make it a day or two in advance so you have one less thing to deal with on the big T-Day.

If you are making dessert and then going somewhere one of the most cumbersome tasks is transporting a pie. It slides everywhere and I hate covering pies with foil because it never fails, when you go to uncover it, your crust becomes a crumbly mess and never looks as good as when it came out of the oven. These are great because you can assemble them in mason jars, leave a little air space at the top, and just screw on the lid. Easiest dessert for traveling ever! If you are making these to be served in your home, they look super cute in wine glasses too.

Happy Thanksgiving everyone!

INGREDIENTS

1 1/2 c graham crackers
4 tbsp butter, melted
3/4 c granulated sugar, divided
1 pint heavy whipping cream
1 tsp vanilla
1/2 c powdered sugar
8 oz cream cheese, room temperature
1 c pumpkin puree
1 tsp pumpkin pie spice

STEPS

  • Prepare the crust by stirring together the graham crackers, melted butter, and 1/4 c of the granulated sugar in a small mixing bowl until well combined.
  • Set aside 1/4 cup of the graham cracker crumb mixture to serve as your garnish.
  • Distribute the remaining graham cracker crumbs evenly among 6–8 individual serving dishes.
  • Using the back of a spoon, gently press the graham crackers down into the bottom of the dishes.
  • Combine the heavy whipping cream, powdered sugar, and vanilla in a mixing bowl and beat until the whip cream thickens up.
  • In another mixing bowl blend together the cream cheese, pumpkin puree, pumpkin pie spice, and the remaining 1/2 cup of granulated until well-integrated.
  • Fold in 1 cup of the whip cream into the pumpkin mixture.
  • Evenly distribute the pumpkin mousse into each of the dishes.
  • Garnish each cup with the remaining whip cream and top with the graham crackers crumbs you previously set aside.
Cooking Demos

Diva is Going Live with Another FREE Cooking Demo!

Hey everyone! With weather finally cooling down and Thanksgiving just around the corner, is everyone finally feeling those fall vibes? I know I am! You may recall that over the summer I partnered up with UNIQUE Programs and did an Instagram Live cooking demo. Apparently it went well because they have asked me back to do another! So with that said, I am excited to announce that coming up on this Wednesday, November 18 at 12:00 pm PST I will be going live once again and this time making a fall feast! This will be a completely FREE virtual event where you can tune in on Zoom and learn how to make my Apple Pie Pork Chop and Individual Pumpkin Pie Mousse Cups. That’s right, essentially a completely free one-hour cooking class! 

You can tune in via Zoom using this link (https://csus.zoom.us/j/86190043772) our you can enter the Zoom ID from the graphic below. There is no need to sign up or create an account.

Fall Cooking Demo

There will be no cooking show foolery here, I will be cooking in real time so you can make both these dishes right along with me! I have provided a list of the ingredients below for both dishes if you want to make sure you have everything on hand. If you are at work or unable to cook live with me that is absolutely okay too! Just tune in, say hi, be entertained, and get some tips for when you want to make these awesome dishes another time!

The pork chop recipe I will be making has all the staples of a tasty fall dish. It is a pan seared herb crusted pork chop topped with apple pie filling and stuffing and finished off in the oven to give the stuffing just a little bit of crunchiness. I use a little bit of cinnamon and rosemary to bring in some bold flavors. It’s like having apple pie with a side of pork for diner. What’s not to love!?! I have been making this recipe for years! Not only is it delicious but it is super affordable.

My pumpkin pie mousse cups aren’t even on the blog yet so you are going to be the first to get the recipe. (Don’t worry, it will be posted soon!) This dessert is so easy to make and has all the flavors from a traditional pumpkin pie. I love it though because it is light and fluffy and doesn’t require any baking.

GIVEAWAY ALERT! Also, UNIQUE Programs will be doing an awesome giveaway on Tuesday so make sure you go follow them and me on Instagram if you don’t already. You may just be able to get your hands on some kitchen products from my new online boutique! 😉

I really love connecting with my followers in a more personal way so I truly hope you will tune in on Wednesday to join me. At the very least pop in and say hello! I look forward to chatting with you all and answering any questions you may have as we spend an hour together! See you then!

Apple Pie Pork Chop

Pork Chop Recipe

  • boneless pork chops
  • garlic, minced
  • fresh rosemary, chopped
  • salt & pepper
  • butter
  • Stove Top pork stuffing
  • olive oil
  • apple pie filling
  • cinnamon

Pumpkin Pie Mousse

Pumpkin Pie Mousse Cups

  • graham cracker crumbs
  • butter
  • sugar
  • heavy whipping cream
  • vanilla
  • powdered sugar
  • cream cheese
  • pumpkin puree
Brunch, Dinners

Recipe—Sausage & Cheddar Quiche

Sausage & Cheddar Quiche

I love breakfast! Yes, I do! I love breakfast! How about you!? 

I will say however, that breakfast is a meal I don’t get to really prepare and enjoy often enough. Monday–Friday usually consists of something quick and on the go so sometimes I make breakfast for dinner just to get that breakfast fix. One thing I love about quiche is it is really perfect for any meal, breakfast, lunch, or dinner! Add some fruit and potatoes, you got breakfast. Add a green salad, now it’s lunch or dinner. 

This quiche is really as easy as they come, especially with a premade piecrust. I know quiche might seem intimidating to make but I promise there is no need to be scared! It really isn’t complicated and is well worth the effort it takes to make. Plus, sausage and cheddar are just a classic breakfast combo that you can’t beat.

Sausage & Cheddar Quiche

INGREDIENTS
1 sheet of refrigerated piecrust at room temperature
8 oz mild or spicy breakfast sausage
5 green onions, thinly sliced
2 c shredded sharp cheddar cheese, divided
1 c half and half
6 large eggs
1 tsp garlic salt
1 tsp freshly ground black pepper
1/2 tsp ground mustard

STEPS

  • Preheat the oven to 350°F. 
  • Unroll your piecrust and line a pie dish with a single sheet and set aside
  • In a non-stick skillet, over medium-high heat, cook the sausage until no pink remains. 
  • Add the green onion to the skillet and cook for another minute. 
  • Drain excess fat from pan.
  • Spread half of the sausage mixture in the pie crust and sprinkle with half of the cheese. 
  • Spread the remaining sausage mixture over the cheese.
  • In a medium bowl whisk together the half and half, eggs, salt, pepper, and ground mustard.  
  • Pour the egg mixture evenly over the sausage and sprinkle the top with the remaining cheese. 
  • Place the quiche into the oven and bake for 45–50 minutes or until the center is set when gently shaken. 
  • Remove the quiche from the oven and allow it to rest for 15 minutes before cutting into it and serving. 
Sweet Treats

Recipe—Cannoli Dip  

Recipe—Cannoli Dip

Yesterday I did my first ever Instagram Live Cooking Demo. Did anyone catch it? If so, what did you think? Any feedback? I know there was certainly areas for improvement but I had fun and know what I can do better next time! If you want to view it you can do so here.

This was my first time ever doing any sort of live cooking demo so when Sac State UNIQUE Programs asked me if I would be willing to be a part of their summer virtual programming I jumped at the opportunity. I have never done any sort of cooking demo or Instagram Live video so I was absolutely stoked to do something outside my comfort zone. After all, virtual programming and activities have become such a big part of life these last several months.

For the cooking demo I was given a 1-hour timeslot and could make anything I wanted. I thought about it for a couple of days and knew I wanted to do a dinner and dessert. My go to favorite meal these days is my Italian Chicken Dinner. (It is so freaking easy and it is an entire meal!) Once I had that established, I decided to commit to an Italian theme. My first thought for dessert was tiramisu or cannolis. However, both are relatively time consuming and complex and since this was my first time cooking live I wanted to be sure it was something I could pull off. I decided to try and do a quick adaptation of cannolis and came up with this cannoli dip. Dessert dips are kind of my thing. You may recall that I have also posted recipes for Funfetti Cake Batter Cookie Dip, Sweet Cherry Chip Dip, Toffee Apple Dip, and a Sweet Cream Dip with Strawberries.

For those of you that may not know, a cannoli, it is a traditional Italian dessert that is a fried pastry tube filled with a sweet cream made with ricotta cheese as the base and then the ends are traditionally dipped in assorted garnishes, pistachios, chocolate chips, cherries, etc. If you have never had a cannoli, you may be thinking ricotta cheese in a pastry? The answer is, YES! YES! YES! Ricotta is a cheese that can be used in both savory or sweet dishes. The fluffy ricotta cheese is completely transformed in this recipe to a light and sweet cream filling that you could eat by the spoonful. This recipe is fantastic to take to a party or just to serve up for the family for a night in. I served it with broken waffle cones but it also goes great with strawberries, graham crackers, and Nilla wafers. The possibilities are really endless!

INGREDIENTS
1 c ricotta cheese
8 oz cream cheese, room temperature
1 tsp vanilla
1 1/2 c powdered sugar
1 c mini chocolate chips
box of waffle cones, broken up into chip sizes

STEPS

  • Place the ricotta, cream cheese, and vanilla in a large mixing bowl and beat using a handheld or standing mixer on medium speed for 3–5 minutes or until smooth.
  • Add in the powdered sugar and continue to mix for another 1–2 minutes making sure it is all evenly incorporated.
  • Add most of the chocolate chips to the bowl and fold in using a rubber spatula or spoon. (Be sure to save a small handful to sprinkle over the top as garnish!)
  • Transfer the dip to a serving dish, garnish with remaining chocolate chips, and serve along with the broken waffle cones.
Cooking Demos

The Diva is Going Live!

I have some very exciting news to share with all of you! Coming up on Wednesday, August 5 at 12:00 pm PST I will be doing my first ever cooking demo on Instagram Live as part of Sacramento State UNIQUE Programs’ summer virtual programming series. I would love for you to join me! This will be a completely FREE virtual event where you can tune in on Instagram and learn how to make an Italian Chicken Dinner and Cannoli Dip. That’s right, essentially a completely free one-hour cooking class! First thing is first though, go follow me on Instagram so you don’t miss out!

Diva di Cucina Cooking Demo

When UNIQUE Programs approached me about doing a cooking demo earlier this summer it was a no brainier. This is something I have always wanted to do so this offer was the push I needed to finally commit to a live cooking demonstration. Not gonna lie, I am pretty nervous but I am super excited to share a couple of my favorite recipes with everyone.

UNIQUE Programs is all about bringing innovative quality entertainment to the campus community at Sacramento State but with their events now being virtual they are able to expand their audience to a global level. How awesome is that!? Speaking of awesome, what do you think of these digital graphics their design team created to market the event? I love them! It was so funny to see me and my dishes illustrated.

The Italian Chicken dinner I will be making is one of my favorite go to recipes. It is super quick, easy, healthy, delicious and also so importantly, affordable! I am talking a delicious gourmet meal that can feed four for under $20! (That is assuming you have the pantry essentials such as olive oil, balsamic vinegar, and seasonings.) I know dinner parties are on hold but this is a great dish to make for guests once we are back to socializing or even for yourself if you want to meal prep for the week. You literally throw it all in the pan and bake it leaving you free to entertain guests, or in my case, make a dessert!

Italian Chicken Dinner

When selecting what dessert to make for you, I knew I wanted to stick with the Italian theme so I am taking my love for cannolis and my love for dessert dips and we will be making a Cannoli Dip! That’s right, a delicious creamy sweet dip with waffle cones for dipping! You know I had to put my own twist on things. This will literally take a couple of minutes to make and is so fun to eat.

Cannoli Dip

There will be no cooking show foolery here, I will be cooking in real time so you can make both these dishes right along with me! Below you can find ingredient lists for the Italian Chicken Dinner and Cannoli Dip in case you want to get all the ingredients ahead of time. If you are at work or unable to cook live with me that is absolutely okay too! Just tune in and be entertained and get some tips for when you want to make these awesome dishes another time!

I really want to connect with my followers in a more personal way so I truly hope you will tune in on Wednesday to join me in my first ever Instagram Live Cooking Demo. At the very least pop in and say hello! Make sure you go follow me on Instagram if you don’t already so you get a notification reminder that day when I go live. I look forward to chatting with you all and answering any questions you may have as we spend an hour together! See you then! Ciao!

Diva di Cucina Cooking Demo

Diva di Cucina Cooking Demo


Beverages

Recipe—Best Ever Piña Coladas

Recipe—Best Ever Piña Coladas

Back in April I posted some ideas for a family theme night to help liven up life at home during the quarantine. One of the first theme nights that we did was a Tropical Beach Party. Of course, no beach party is complete without a tropical drink of some sort. I made these amazing piña coladas and they were so easy! (A virgin one for the kiddo of course!) For a brief moment I was able to kick up my feet, close my eyes, sip my piña colada, and pretend I was on an island far far away.

What sets these apart from a lot of other piña colada recipes is, in lieu of some of the ice, I used frozen pineapple chunks. This keeps them thick and frosty while giving them a nice creamy texture and keeps them from getting as watered down as they melt. With only a couple of months left of summer, it is time for you to get out the blender, and whip yourself up a batch of these delicious piña coladas!

Notes: This recipe makes 3–4 drinks. For a little extra kick, pour a floater of Malibu Rum over the top. For a virgin/nonalcoholic option, just replace the alcohol with extra pineapple juice. You can find bags of frozen pineapple chunks in the frozen fruit section of your grocery store.

INGREDIENTS
3 c ice
1 cup pineapple chunks, frozen
4 oz pineapple juice
4 oz coconut cream
3 oz white rum
2 oz dark rum

GARNISHES (OPTIONAL)
shredded coconut
pineapple slices
maraschino cherries

STEPS

  • Put all the ingredients in the blender and blend until smooth. Add extra pineapple juice if needed.
  • Pour into a glass and garnish with the shredded coconut, a pineapple slice, and maraschino cherry.