Salads, Side Dishes

Recipe—Red, White, & Blue Potato Salad

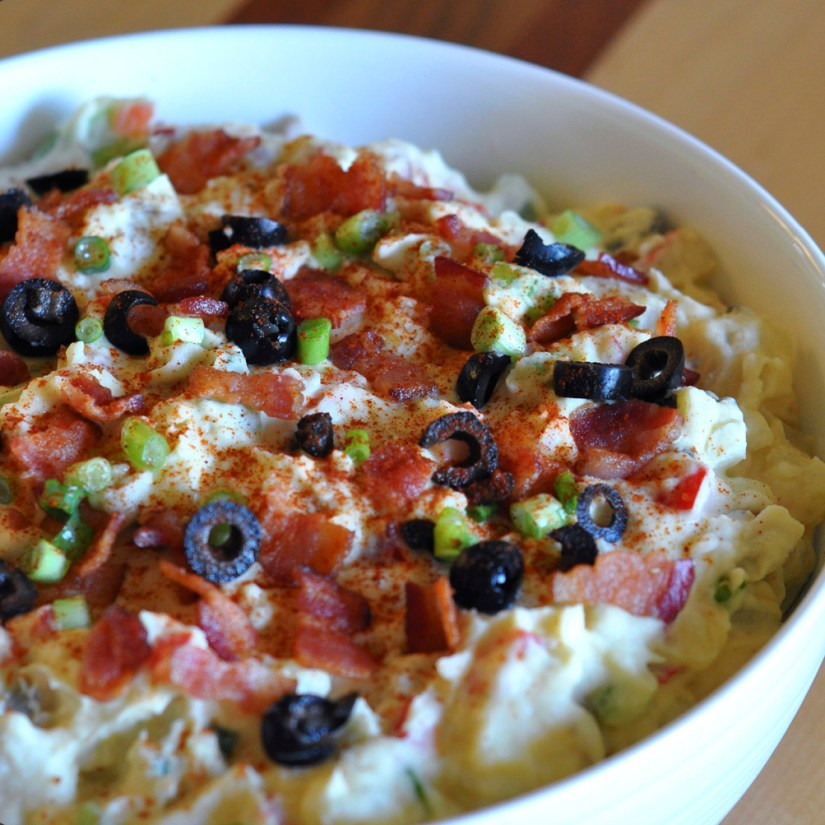
Hello grilling season! It is great to have you back in my life! (And all of you amazing followers too!) Nothing says summer like lazy days with friends, sun shining on your skin, hot grilled meat, and some tasty side salads! 

With 4th of July just around the corner it feels like the perfect time to share one of my favorite summer side dish recipes with y’all. This Red White and Blue Potato salad is packed with all my favorite flavors and by favorite flavors, I mean bacon and blue cheese. 

This salad is an amazing complement to any bbq dish, but we especially love it with a nice steak and some red wine. Just something about the way all those flavors come together is top notch. *chef’s kiss*

Note: I like to set aside some of the bacon, blue cheese crumbles, and green onions to garnish the top of the salad with.

INGREDIENTS
3 lbs baby red potatoes, chopped into 3/4” cubes
1/2 cup mayonnaise
1/2 cup sour cream
1/2 tsp dill
1/2 tsp salt  
1/4 tsp ground mustard 
1/2 tsp onion powder  
8 slices bacon, cooked and chopped
3/4 c blue cheese
1/2 c green onion, sliced

STEPS

  • Place the chopped potatoes into a large pot and cover with water. 
  • Bring to a boil and cook for approximately 12–15 minutes, or until the potatoes are soft and tender.
  • Drain the potatoes and transfer them into a large bowl and allow to cool for 30 minutes. 
  • In a medium bowl mix together the mayonnaise, sour cream, dill, salt, ground mustard, and onion powder. 
  • Add the bacon, blue cheese, and green onion to the bowl with the potatoes. 
  • Pour the dressing over the top of the potatoes and other ingredients and stir to combine.
  • Cover and chill for at least 2 hours before serving. 

Here are some other amazing summer side dishes to try out!

Soups

Recipe—Zuppa Toscana 

I have been sitting on this recipe for months now just waiting for the right time of year to share. After getting record amounts of rain in Sacramento this last weekend and it FINALLY feeling like fall, I think we are finally ready for one of the best soup recipes ever! Now I can’t even take credit for this soup recipe. My friend made this Olive Garden “copycat” soup for me back in July when I was recovering from a medical procedure, and I was absolutely smitten. I had to ask for the recipe and made it for my family less than a week later. It is now a family fave. I just absolutely love that spicy sausage with the rich creamy broth and the loads of kale. (Not gonna lie, the kale makes me feel like I am eating healthy.)

Note: If you are watching your carbs you can easily leave out the potatoes for a fantastic low carb soup. 

INGREDIENTS

12 oz pack of bacon, chopped
16 oz hot Italian sausage, ground
1/2 yellow onion, chopped
2 tbsp garlic, minced
64 oz chicken broth
5 medium potatoes, cubed into 1/2″ squares
2 bunches kale, stems removed and leave chopped
1 pint heavy cream
2 tsp salt
1 tsp ground pepper
freshly grated parmesan

STEPS

  • Add the bacon to a large pot and cook over medium-high heat.
  • When the bacon is cooked to desired doneness, remove it from the pot and set aside.
  • Add the sausage to the pot breaking it up as it cooks.
  • Once the sausage is cooked through, drain off most of the grease leaving about 1–2 tablespoons.
  • Add the chopped onions and garlic to the pot with the sausage and cook stirring occasionally until the onion starts to brown, about 5–6 minutes.
  • Add the broth and potatoes to the pot and bring to a boil.
  • Simmer the soup for about 15–20 minutes or until the potatoes are just fork tender. 
  • Add the kale, cream, salt, and pepper to the pot and simmer for another 5–10 minutes. 
  • Ladle the soup into bowls and top with parmesan. 
Salads, Side Dishes

Recipe—Creamy Dill Red Potato Salad

Summer is upon us! Well not quite, but we are so close! I can literally smell it! The smell of grilled meat has infiltrated the warm evening air in my subdivision and I am itching for a good ol’ fashioned cookout.

One thing I absolutely love about summer BBQs are all the cold salads. Macaroni salads, potato salads, mmmmmmm… mmmm… mmmm! (I really should not write these posts when I am hungry because right now, I am salivating just thinking back to this potato salad.)

I have a go to potato salad that is loaded with bacon, olives, bell peppers, onions, and so much more and it is amazing, but sometimes I am looking to mix it up with something a little more simple and lighter. 

The red potatoes really come out fluffy and then the super creamy dressing is a little tangy from the vinegar and sour cream and then you have this delicious dill flavor. So simple and so lite. Perfect for these warm summer days!

INGREDIENTS
8 large red potatoes, diced
1 c sour cream
1 c mayonnaise
1/2 c red wine vinegar
1 1/2 tsp dill
salt and pepper
4 green onions, chopped

STEPS

  • Add 1–2 tablespoon of salt to a large pot of water and bring to a boil.
  • Add the diced potatoes and boil for 10–14 minutes or until fork tender.
  • While the potatoes are boiling whisk together the sour cream, mayonnaise, vinegar, dill, salt and pepper in a small bowl.
  • When the potatoes are done cooking drain them in a colander and transfer to a large bowl.
  • Add most of the green onions (saving a handful for garnish) and dressing and toss to coat. 
  • Garnish with the leftover green onions and a little bit of the dill.
  • Cover with a lid or saran wrap and refrigerate for at least 4 hours. The longer it rests, the better the flavors.

If you like this recipe, then I highly recommend you check out these other awesome salads that make for great additions to your BBQ menu!

Italian Pasta Salad

Italian Pasta Salad

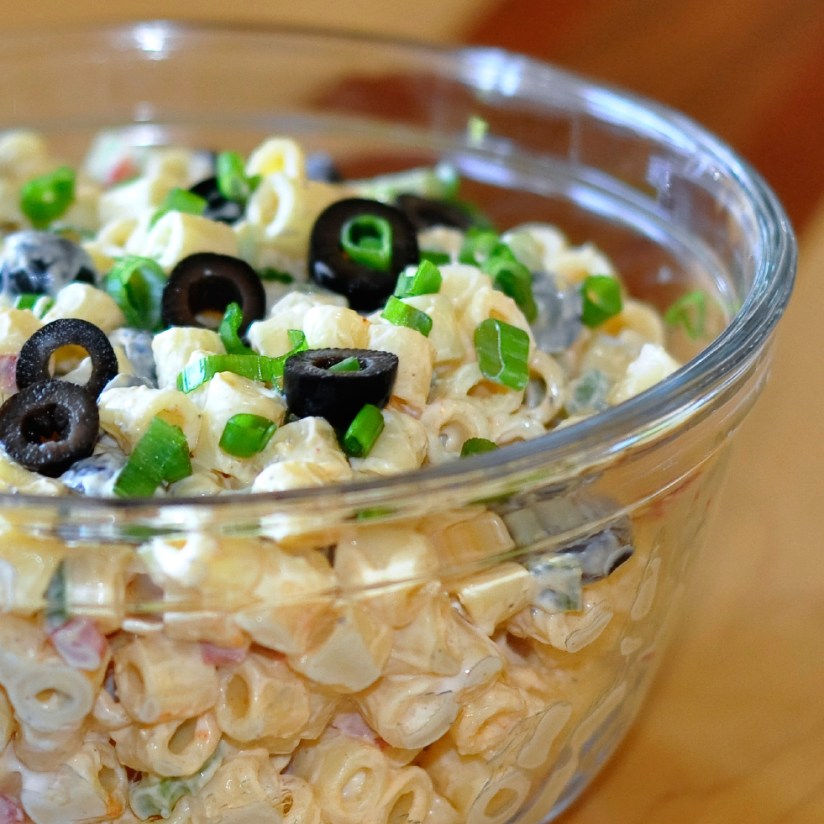
Classic Macaroni Salad

Classic Macaroni Salad

Orzo Pesto Pasta

Orzo Pesto Pasta

Sweet Treats

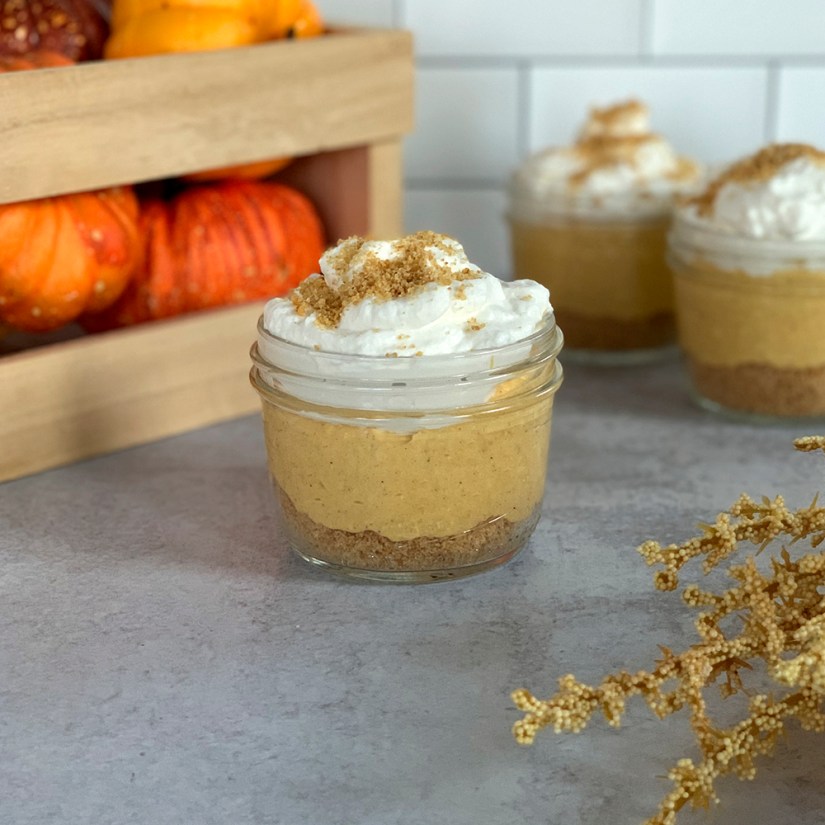
Recipe—Individual Pumpkin Pie Mousse Cups

Pumpkin Pie Mousse Cups

As soon as the summer heat starts to die down and mornings become cooler, my body literally craves pumpkin spice. Yes, I am a pumpkin spice loving, leggings, Ugg, scarf, and sweater wearing, momma. I can’t help it! There is just something about indulging in all things pumpkin that allows me to fully transition into fall.

While I absolutely love a homemade pumpkin pie at Thanksgiving, I don’t always have the time, energy, or space in my oven, to make anything besides the turkey and all the fixings. I absolutely love this dessert because it is quick, easy, and no bake! You get all the flavors of pumpkin pie with the pumpkin puree and pumpkin spice but it is a creamy, light, and fluffy mousse! Plus, you can make it a day or two in advance so you have one less thing to deal with on the big T-Day.

If you are making dessert and then going somewhere one of the most cumbersome tasks is transporting a pie. It slides everywhere and I hate covering pies with foil because it never fails, when you go to uncover it, your crust becomes a crumbly mess and never looks as good as when it came out of the oven. These are great because you can assemble them in mason jars, leave a little air space at the top, and just screw on the lid. Easiest dessert for traveling ever! If you are making these to be served in your home, they look super cute in wine glasses too.

Happy Thanksgiving everyone!

INGREDIENTS

1 1/2 c graham crackers
4 tbsp butter, melted
3/4 c granulated sugar, divided
1 pint heavy whipping cream
1 tsp vanilla
1/2 c powdered sugar
8 oz cream cheese, room temperature
1 c pumpkin puree
1 tsp pumpkin pie spice

STEPS

  • Prepare the crust by stirring together the graham crackers, melted butter, and 1/4 c of the granulated sugar in a small mixing bowl until well combined.
  • Set aside 1/4 cup of the graham cracker crumb mixture to serve as your garnish.
  • Distribute the remaining graham cracker crumbs evenly among 6–8 individual serving dishes.
  • Using the back of a spoon, gently press the graham crackers down into the bottom of the dishes.
  • Combine the heavy whipping cream, powdered sugar, and vanilla in a mixing bowl and beat until the whip cream thickens up.
  • In another mixing bowl blend together the cream cheese, pumpkin puree, pumpkin pie spice, and the remaining 1/2 cup of granulated until well-integrated.
  • Fold in 1 cup of the whip cream into the pumpkin mixture.
  • Evenly distribute the pumpkin mousse into each of the dishes.
  • Garnish each cup with the remaining whip cream and top with the graham crackers crumbs you previously set aside.
Brunch, Dinners

Recipe—Sausage & Cheddar Quiche

Sausage & Cheddar Quiche

I love breakfast! Yes, I do! I love breakfast! How about you!? 

I will say however, that breakfast is a meal I don’t get to really prepare and enjoy often enough. Monday–Friday usually consists of something quick and on the go so sometimes I make breakfast for dinner just to get that breakfast fix. One thing I love about quiche is it is really perfect for any meal, breakfast, lunch, or dinner! Add some fruit and potatoes, you got breakfast. Add a green salad, now it’s lunch or dinner. 

This quiche is really as easy as they come, especially with a premade piecrust. I know quiche might seem intimidating to make but I promise there is no need to be scared! It really isn’t complicated and is well worth the effort it takes to make. Plus, sausage and cheddar are just a classic breakfast combo that you can’t beat.

Sausage & Cheddar Quiche

INGREDIENTS
1 sheet of refrigerated piecrust at room temperature
8 oz mild or spicy breakfast sausage
5 green onions, thinly sliced
2 c shredded sharp cheddar cheese, divided
1 c half and half
6 large eggs
1 tsp garlic salt
1 tsp freshly ground black pepper
1/2 tsp ground mustard

STEPS

  • Preheat the oven to 350°F. 
  • Unroll your piecrust and line a pie dish with a single sheet and set aside
  • In a non-stick skillet, over medium-high heat, cook the sausage until no pink remains. 
  • Add the green onion to the skillet and cook for another minute. 
  • Drain excess fat from pan.
  • Spread half of the sausage mixture in the pie crust and sprinkle with half of the cheese. 
  • Spread the remaining sausage mixture over the cheese.
  • In a medium bowl whisk together the half and half, eggs, salt, pepper, and ground mustard.  
  • Pour the egg mixture evenly over the sausage and sprinkle the top with the remaining cheese. 
  • Place the quiche into the oven and bake for 45–50 minutes or until the center is set when gently shaken. 
  • Remove the quiche from the oven and allow it to rest for 15 minutes before cutting into it and serving. 
Sweet Treats

Recipe—Peach Mousse

Peach Mousse
A couple of weeks ago, I did my first ever live cooking demo on Instagram. I shared my recipes for a delicious Italian Chicken Dinner and easy Cannoli Dip. This cooking demo was part of a summer event series hosted by Sac State UNIQUE Programs. They typically host local bands for their Nooners (noon-time events), so I was really excited to share a couple of recipes! UNIQUE Programs also had Carly Preston of Adventures In Yum do a live cooking demo at the beginning of July. Carly and I thought it would be fun to partner up as guest bloggers for a little recipe swap since we both have so many amazing recipes to share with our followers. She has been posting recipes since summer of 2019 and she has a lot of great posts on her site, especially desserts! Seriously, she is the dessert queen! Make sure you go check out Adventures In Yum!

Today she is sharing with you all her recipe for Peach Mousse. Look at how beautiful and fluffy it looks! And you know I am all about using seasonal produce and since it is stone fruit season this seems perfect! Just add a refreshing drink like my Summertime White Sangria and enjoy the refreshing flavors of summer.

I present to you, a recipe for Peach Mousse from Adventures In Yum!

Peach Mousse

Happy Stone Fruit Season! With peaches, nectarines, and plums being plentiful during this time of year, I love to create at least a couple of fun desserts every year with these flavorful summer fruits.

Peaches are one of my go-to summer fruits when making desserts. When I think about them, I always think of peach cobbler. Last year I made a couple of yummy treats inspired by this classic dessert, so if you love peach cobbler, I highly recommend checking out my Peach Cobbler Cupcakes and my Boozy Peach Cobbler Milkshakes. Both will give you the flavors of peach cobbler, but in fun and different ways.

When thinking about what peach dessert to make this year, I wanted to make something that was very light. An airy, no-bake dessert is the perfect treat for this time of year! The result? My peach mousse! I first tested this recipe last year when I decided to make a peach cobbler inspired dessert in the shape of a peach. The mousse was the outermost layer of the peach, and it offered a lighter texture compared to the “peach pit” made of peach curd and peach compote. All three layers of peach plus the streusel topping “gravel” gave all the flavor of a peach cobbler, but in a light and refreshing take on the traditional dessert.

Finishing this yummy mousse with a dollop of whipped cream and/or some crunchy streusel topping is a great way to add a delicious depth of flavor and a great textural component. The flavors will remind you of peach cobbler, but the components will result in a lovely, light treat.
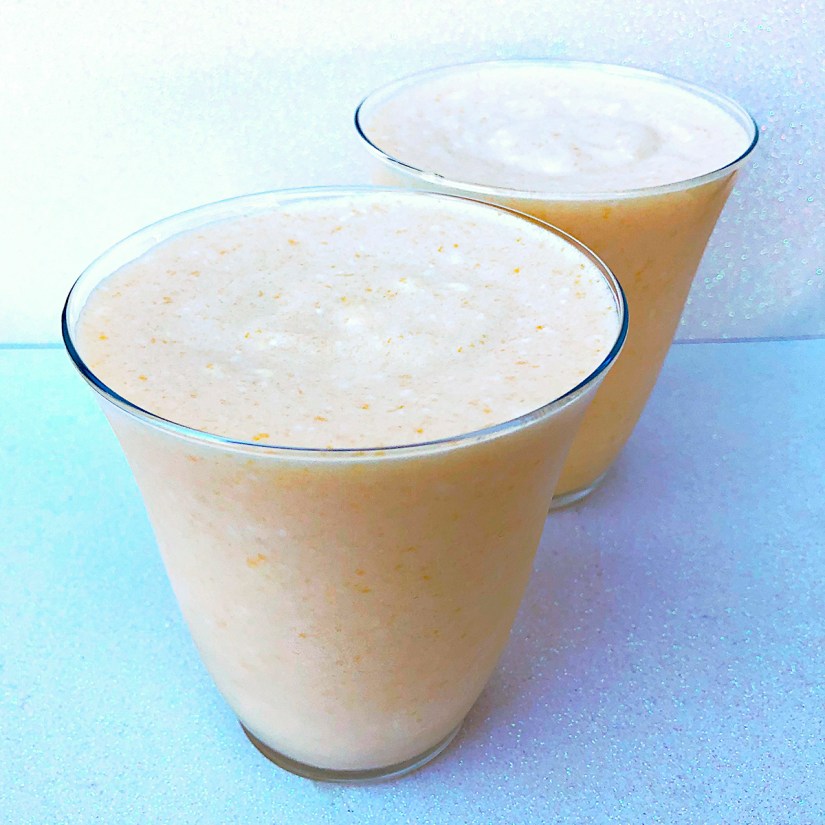
Peach Mousse

INGREDIENTS
1/2 c cool water
2 packets of unflavored gelatin
1 c heavy whipping cream
1/4 c granulated sugar
2 c peach purée
4 egg whites
1/4 cup + 2 tablespoons granulated sugar

OPTIONAL GARNISHES
Whipped cream
Streusel Topping (Found in my Peach Cobbler Cupcakes post)

STEPS

  • To a small microwave-safe bowl, add a 1/2 cup water and then sprinkle the 2 packets of powdered gelatin over the top.
  • Briefly mix together and set aside for 5 minutes to allow the gelatin to bloom, and prep the rest of your ingredients and equipment.
  • Next, place the gelatin in the microwave and heat for 15–30 seconds, until all the gelatin has melted. Set aside to work on the rest of the components.
  • To a stand mixer bowl, add the 1/4 cup + 2 tablespoons of granulated sugar and 4 egg whites.
  • Using a wire whisk, whisk these ingredients by hand and then place the bowl over a medium saucepan containing simmering water.
  • Constantly whip this mixture until all of the sugar dissolves and reaches a temperature of 140°F on a thermometer. (This will pasteurize the egg whites so that they are safe for consumption.)
  • Remove the bowl from the stove, place it in the stand mixer, and whip on medium until it achieves medium peaks.
  • While the meringue whips, add the remaining 1/4 cup of granulated sugar and 1 cup cold heavy whipping cream to a medium mixing bowl whisk either by hand or with a hand mixer until you reach medium peaks.
  • In a large mixing bowl, stir together the peach puree and melted gelatin.
  • Next, fold the whipped cream into the mixture.
  • And finally, gently fold the meringue into the mixture. Fill your favorite serving glasses with the peach mousse and let it set for at least an hour.
  • The peach mousse is set and ready to serve!
  • Optional toppings include a nice dollop of whipped cream and/or a sprinkle of crunchy streusel topping.

Thank you so much for checking out this recipe! I hope you enjoy it as much as my taste-testers and I did!

Sweet Treats

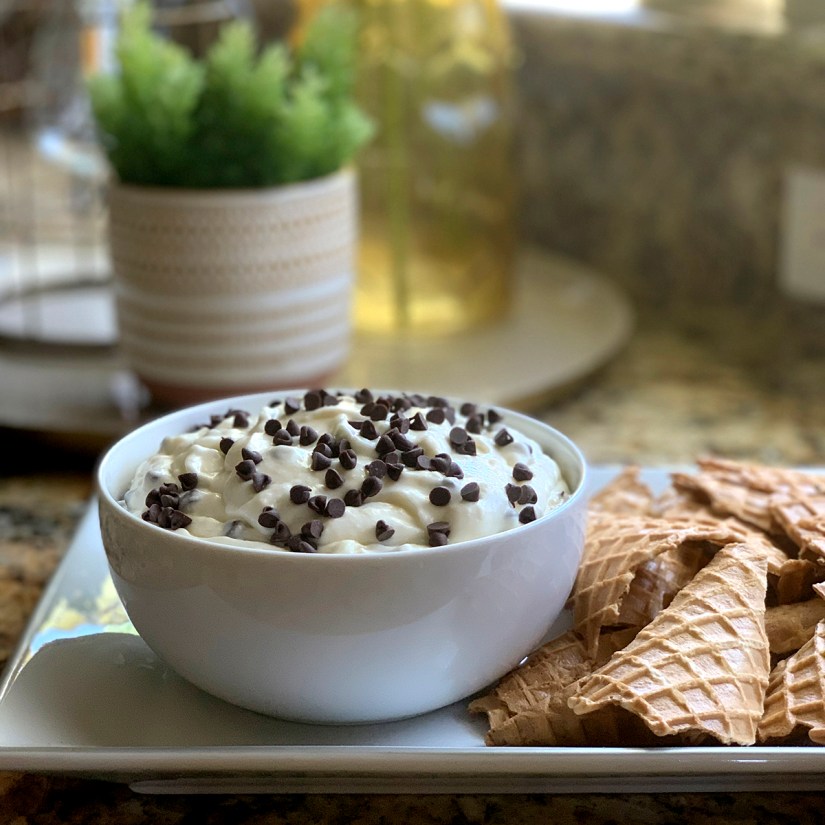
Recipe—Cannoli Dip  

Recipe—Cannoli Dip

Yesterday I did my first ever Instagram Live Cooking Demo. Did anyone catch it? If so, what did you think? Any feedback? I know there was certainly areas for improvement but I had fun and know what I can do better next time! If you want to view it you can do so here.

This was my first time ever doing any sort of live cooking demo so when Sac State UNIQUE Programs asked me if I would be willing to be a part of their summer virtual programming I jumped at the opportunity. I have never done any sort of cooking demo or Instagram Live video so I was absolutely stoked to do something outside my comfort zone. After all, virtual programming and activities have become such a big part of life these last several months.

For the cooking demo I was given a 1-hour timeslot and could make anything I wanted. I thought about it for a couple of days and knew I wanted to do a dinner and dessert. My go to favorite meal these days is my Italian Chicken Dinner. (It is so freaking easy and it is an entire meal!) Once I had that established, I decided to commit to an Italian theme. My first thought for dessert was tiramisu or cannolis. However, both are relatively time consuming and complex and since this was my first time cooking live I wanted to be sure it was something I could pull off. I decided to try and do a quick adaptation of cannolis and came up with this cannoli dip. Dessert dips are kind of my thing. You may recall that I have also posted recipes for Funfetti Cake Batter Cookie Dip, Sweet Cherry Chip Dip, Toffee Apple Dip, and a Sweet Cream Dip with Strawberries.

For those of you that may not know, a cannoli, it is a traditional Italian dessert that is a fried pastry tube filled with a sweet cream made with ricotta cheese as the base and then the ends are traditionally dipped in assorted garnishes, pistachios, chocolate chips, cherries, etc. If you have never had a cannoli, you may be thinking ricotta cheese in a pastry? The answer is, YES! YES! YES! Ricotta is a cheese that can be used in both savory or sweet dishes. The fluffy ricotta cheese is completely transformed in this recipe to a light and sweet cream filling that you could eat by the spoonful. This recipe is fantastic to take to a party or just to serve up for the family for a night in. I served it with broken waffle cones but it also goes great with strawberries, graham crackers, and Nilla wafers. The possibilities are really endless!

INGREDIENTS
1 c ricotta cheese
8 oz cream cheese, room temperature
1 tsp vanilla
1 1/2 c powdered sugar
1 c mini chocolate chips
box of waffle cones, broken up into chip sizes

STEPS

  • Place the ricotta, cream cheese, and vanilla in a large mixing bowl and beat using a handheld or standing mixer on medium speed for 3–5 minutes or until smooth.
  • Add in the powdered sugar and continue to mix for another 1–2 minutes making sure it is all evenly incorporated.
  • Add most of the chocolate chips to the bowl and fold in using a rubber spatula or spoon. (Be sure to save a small handful to sprinkle over the top as garnish!)
  • Transfer the dip to a serving dish, garnish with remaining chocolate chips, and serve along with the broken waffle cones.
Beverages

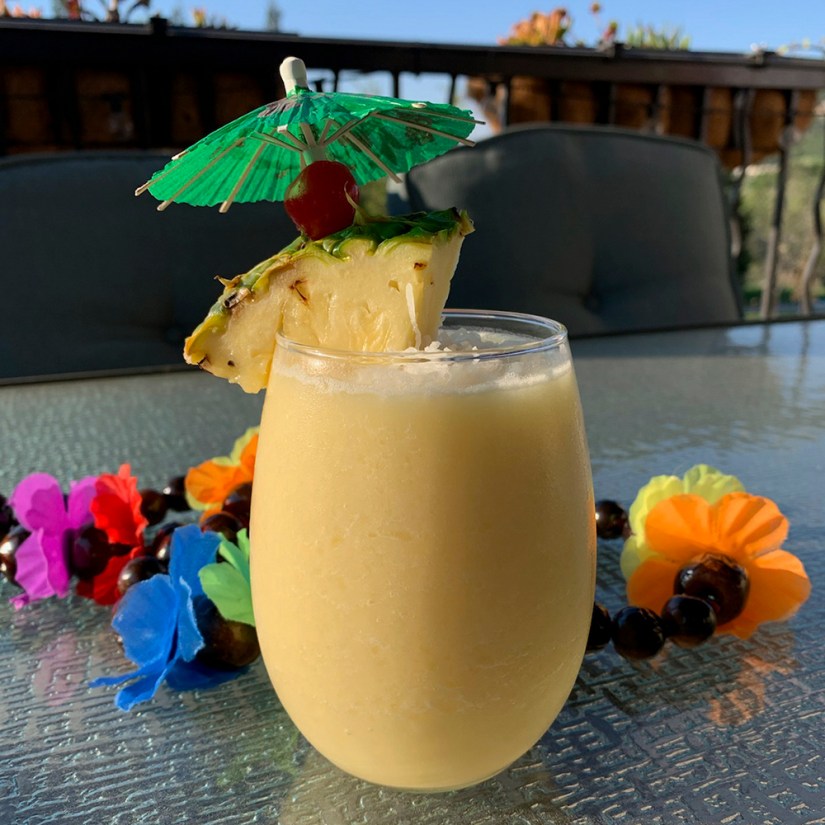
Recipe—Best Ever Piña Coladas

Recipe—Best Ever Piña Coladas

Back in April I posted some ideas for a family theme night to help liven up life at home during the quarantine. One of the first theme nights that we did was a Tropical Beach Party. Of course, no beach party is complete without a tropical drink of some sort. I made these amazing piña coladas and they were so easy! (A virgin one for the kiddo of course!) For a brief moment I was able to kick up my feet, close my eyes, sip my piña colada, and pretend I was on an island far far away.

What sets these apart from a lot of other piña colada recipes is, in lieu of some of the ice, I used frozen pineapple chunks. This keeps them thick and frosty while giving them a nice creamy texture and keeps them from getting as watered down as they melt. With only a couple of months left of summer, it is time for you to get out the blender, and whip yourself up a batch of these delicious piña coladas!

Notes: This recipe makes 3–4 drinks. For a little extra kick, pour a floater of Malibu Rum over the top. For a virgin/nonalcoholic option, just replace the alcohol with extra pineapple juice. You can find bags of frozen pineapple chunks in the frozen fruit section of your grocery store.

INGREDIENTS
3 c ice
1 cup pineapple chunks, frozen
4 oz pineapple juice
4 oz coconut cream
3 oz white rum
2 oz dark rum

GARNISHES (OPTIONAL)
shredded coconut
pineapple slices
maraschino cherries

STEPS

  • Put all the ingredients in the blender and blend until smooth. Add extra pineapple juice if needed.
  • Pour into a glass and garnish with the shredded coconut, a pineapple slice, and maraschino cherry.
Appetizers, Side Dishes

Recipe—Fiery Edamame

divadicucina_fieryedamame

You know how you have some food items that you literally just cannot get enough of? Like, you would eat every bit of it if you weren’t sharing and then when it is all gone you are using your fingers to get every last drop out of the bottom of the dish. That is me with this Creamy & Spicy Garlic Edamame. I literally would lick the bowl clean like a 5-year-old does with their ice cream bowl if I could get my tongue to the bottom of it. Too graphic? Sorry! The sauce is just so freaking good! It has just the right amount of heat that you feel a little burn but the creaminess of the sauce helps to tame it and you just keep going back for more.

I have been making this recipe a lot lately. It is a quick (I am talking less than 10 minutes start to finish) and easy side dish that goes great when I am making a stir fry or big batch of ramen but it also makes an awesome snack. Edamame is high in protein and fiber and is rich in vitamins and minerals, plus it is just fun to eat. It is probably a good thing that they have a shell because that is the only thing that slows me down when I have a bowl of these in front of me. 😉

INGREDIENTS
14 oz bag of frozen edamame in pods
1 tbsp garlic, minced
1 tsp sesame oil
2 tbsp chili paste (Sambal Oelek is my go to)
1/4 mayonnaise
1 tbsp soy sauce
sea salt
sesame seeds

STEPS

  • Prepare the edamame per the package instructions, drain, and transfer to a large bowl.
  • In a small bowl whisk together the garlic, sesame oil, chili paste, mayonnaise, and soy sauce.
  • Pour the sauce over the edamame and toss to coat.
  • Transfer to a serving dish a sprinkle with a little sea salt and sesame seeds.
Appetizers, Dinners

Recipe—Loaded Korean Beef Fries

Recipe—Loaded Korean Beef Fries

If your mouth isn’t watering just looking at this pic, then you must be dead. And if you are doing everything you can to keep from drooling on your keyboard or phone, then please, give this recipe a try. You will have no regrets. Absolutely calorie worthy.

This is actually a copycat version of the Loaded Korean BBQ Beef Fries from my favorite local food truck, Turnt Up Tacos and Tortas. The first time I had them, I was HOOOOOOKED!

I start off with a base of thin crispy fries and cover them in finely shredded jack cheese and then pile on a mound of my sweet and spicy Korean Beef and then top that with a cabbage and carrot-based coleslaw made with a creamy sesame ginger sauce and then don’t forget about that spicy sriracha drizzled over the top to give it a kick. The flavors are so freaking good, I tell ya! Mmmmm… mmmmm… mmmmmmmmm!

I have actually started serving this as a meal in my house with each person getting their own plate of loaded fries (yes, loaded fries as a meal, it even has most of the food groups) but you could absolutely make one big pile of loaded fries and share them with friends as an appetizer or shared plate.

Note: The sesame oil and ginger paste go in both the Korean beef as well as the creamy sesame ginger sauce so pay close attention when preparing.

INGREDIENTS
bag of frozen french fries
1 lb ground beef
1/2 c brown sugar
1/4 c soy sauce
1 tbsp & 1 tsp sesame oil
1 tbsp garlic, minced
1 tsp ginger paste, divided
1/4 tsp crushed red pepper
salt and pepper
3 c green cabbage, shredded
1/2 c carrots, shredded
1/2 c mayonnaise
1 tsp white sugar
1/4 c milk
2 c jack cheese, shredded
Sriracha sauce
2 green onions, chopped
sesame seeds

STEPS

  • Bake or fry the French fries according to the package directions.
  • While the fries are baking, cook the ground beef over medium high heat breaking it apart as it cooks.
  • Once the beef is cooked through, drain off most of the fat.
  • Add in the brown sugar, soy sauce, garlic, 1 tablespoon of the sesame oil, 1/2 teaspoon of the ginger paste, red peppers, salt, and pepper.
  • Simmer over medium heat for a 4–5 minutes stirring occasionally.
  • While the beef is cooking, put the cabbage and carrots in a medium bowl and set aside.
  • In a small bowl whisk together the mayonnaise, white sugar, 1 teaspoon of sesame oil, the other 1/2 teaspoon of ginger paste, and the milk to make the creamy sesame ginger sauce.
  • Toss about 3/4 of the creamy sesame ginger sauce with the cabbage and carrots and set aside the rest to drizzle over the top.
  • When the fries are done transfer them to the plates.
  • Top each pile of fries with the jack cheese, cooked Korean beef, and the coleslaw.
  • Drizzle the remaining creamy sesame ginger sauce and sriracha sauce over the top.
  • Sprinkle with sesame seeds and finish off with green onions.