Beverages, Kitchen Tips, Sweet Treats

How to Build an Epic Hot Cocoa Charcuterie Board or Box

Hot cocoa charcuterie boards are taking off in popularity and there is no better time than the holiday season to try and make your own. Whether you want to make it for just your family to enjoy around the fireplace, a large party, or even for gifting, it is a sure way to spread some holiday cheer.

While a charcuterie board traditionally refers to an assortment of meats, cheeses, and breads served as an appetizer, the term has become much broader and people are getting creative with how they bring foods together. While I never pass up traditional meat and cheese charcuterie to go with a bottle of wine, hot cocoa charcuterie has become one of my favorite Christmas traditions in our home. 
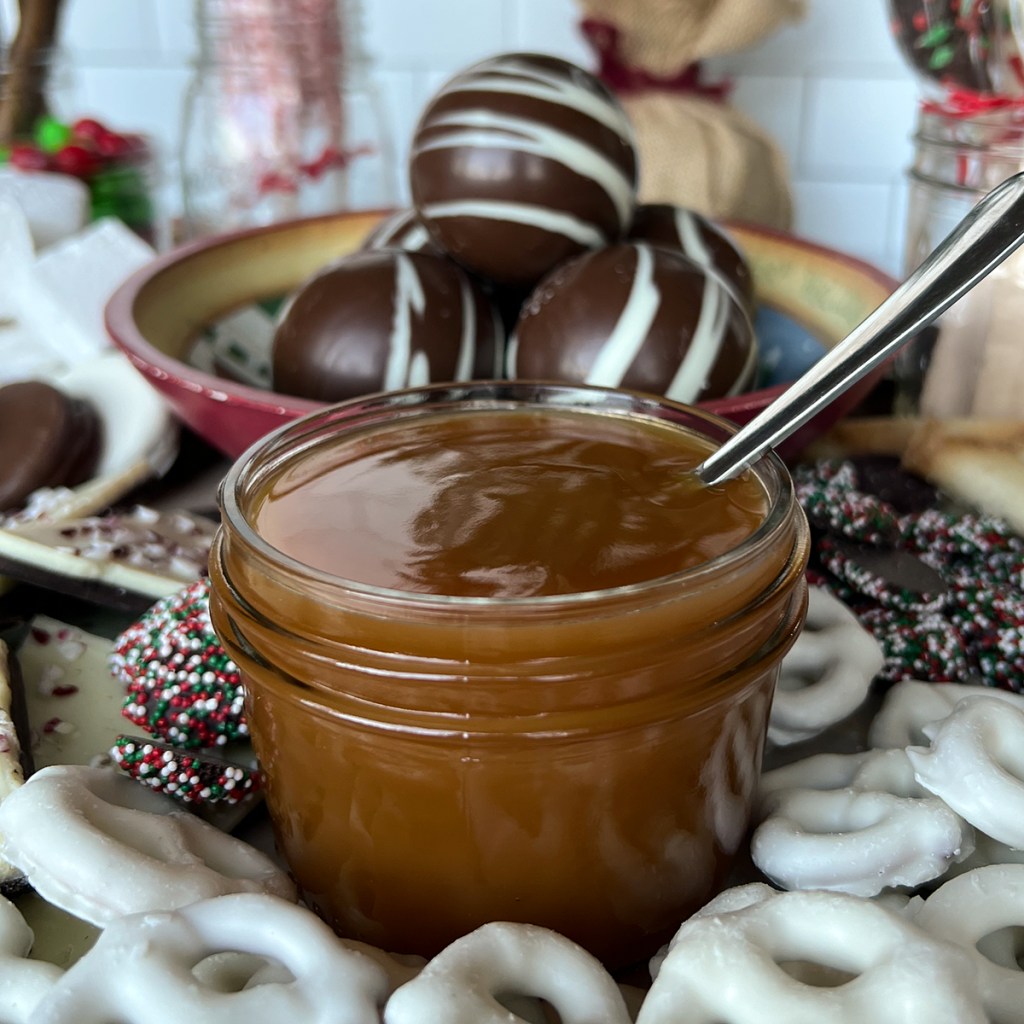
On the day we plan to decorate our Christmas tree and put out all our decorations, I lay out a spread of sweets to snack on and every ingredient my son could dream of to make a big ol’ mug of fully loaded hot cocoa. Do I go overboard? Absolutely. But it makes creating a cup of hot cocoa so much more fun and we love grazing on it throughout the day.

Last year we decided to share that holiday magic and made hot cocoa charcuterie boxes for our friends and delivered them to their doorsteps along with a box of assorted fresh baked cookies. The kids seriously love it! Pair a homemade box with some fun holiday mugs for the cutest gift set ever!
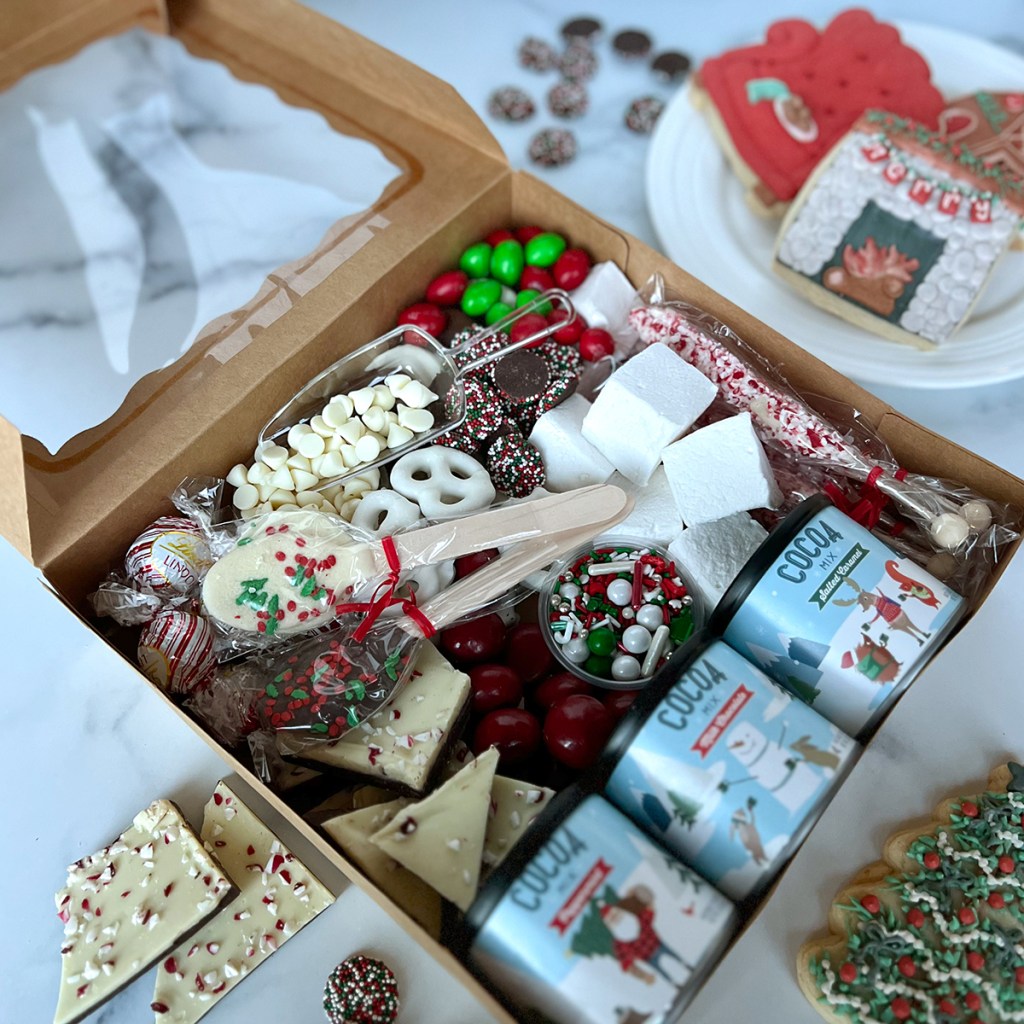
As a special touch I also like to purchase some gorgeously decorated sugar cookies from local bakers. They can include a special saying or message like “Merry Christmas.” They become sort of like an edible card.

There really is no right or wrong way to build a hot cocoa charcuterie board or box, it is about bringing together an assortment of ingredients and letting people use their imagination topping, drizzling, dipping, and sipping. 

Of course, there are always the obvious choices or marshmallows, whipped cream, and sprinkles, but don’t let the fun stop there. You can fill your board with peppermint bark, caramel sauce, and then make sure to include some tasty treats for dipping too! And don’t for one second think this is just for the kids! Add some holiday spirits for the adults. Nothing like spiking your hot cocoa with some Irish cream or peppermint schnapps. 
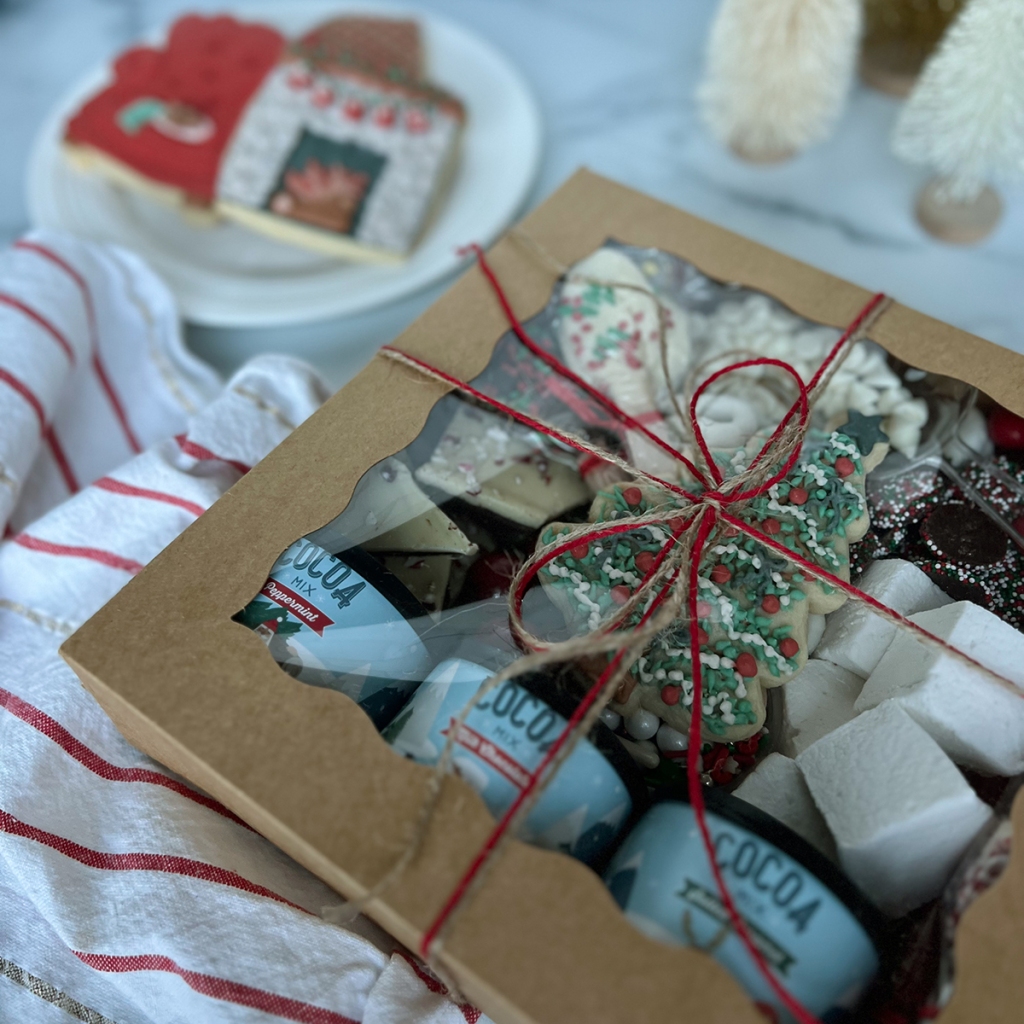
I hope this has inspired you to create your own hot cocoa board or box this holiday season and beyond. And just keep in mind, the number one rule for building a board or box is, there are no rules! Just have fun with it.

How to Build Your Board or Box

Step 1
The first step is selecting your board or box. My best advice is to make sure it is big enough for all your goodies. The bigger the better but just make sure you have enough to fill it so there aren’t any bare spots. 

If you are creating this for a really large group, you could always just line your counter or table with butcher paper or parchment paper and make it a grazing experience.

Step 2
Place your most important ingredient of all, your hot cocoa bombs or container of mix in a corner.

If you want to have your hot cocoa prepared ahead of time, skip this step. When having a party, I like to make my homemade hot cocoa in a crock-pot so it is ready to go. The guests can just ladle it into their mugs. 

Step 3
Place small bowls or containers for sprinkles, chocolate chips, smaller candies, and syrups around the board. If making a gift box, plastic sauce cups with lids work great!

Place longer items, like pirouette cookies, candy canes, and candy coated stir sticks in cups or mason jars to add some height to the board.

Step 4
Arrange cookies in clusters around the board or box.

Step 5
Fill in remaining gaps with candies, marshmallows, and chocolates. You want the board to look full so don’t be shy, add lots and don’t worry about layering things up! 

Step 6
Add some small scoopers and/or tongs in addition to some sort of stir sticks. I love including chocolate dipped spoons and the wood stir sticks coated in crushed peppermints but it could be as simple as some wood stir sticks or spoons.

Fun Toppings and Extra Treats

  • Marshmallows (assorted sizes)
  • Candy canes
  • Festive sprinkles
  • Toffee bits
  • Semi-sweet chocolate chips 
  • White chocolate chips
  • Pirouette cookies 
  • Chocolate coated pretzels
  • Assorted cookies
  • Chocolate coated Oreos
  • Assorted chocolates and candies
  • Caramels         
  • Caramel sauce
  • Chocolate sauce
  • Chocolate truffles 
  • Peppermint bark
  • Chocolate covered spoons
  • Adult mix ins (peppermint or butterscotch schnapps, amaretto, Irish cream, Irish whiskey, etc.)

If you like this, then make sure to also check out my recipes for Homemade Marshmallows or Creamy Hot Cocoa in a Crock-Pot!

A huge thank you to Sugar Sweetery for providing the sugar cookies for this article. Check them out on IG @sugar_sweetery

Sweet Treats

Recipe—Peach Crisp

Peach Crisp

Okay, so I am on a total peach kick here. Hopefully you didn’t miss the recipe I posted last week for Peach Margaritas. I am still recovering from those! 

Now, in my opinion, the peach is the epitome of summer fruit. I just love that this time of year when I walk into the produce section or I’m at the farmers market, I get hit with a wall of the sweet sweet smell of stone fruit. Peaches, apricots, nectarines! Yum! There is just something about that sweet fleshy fruit that is so good anyway you have them.

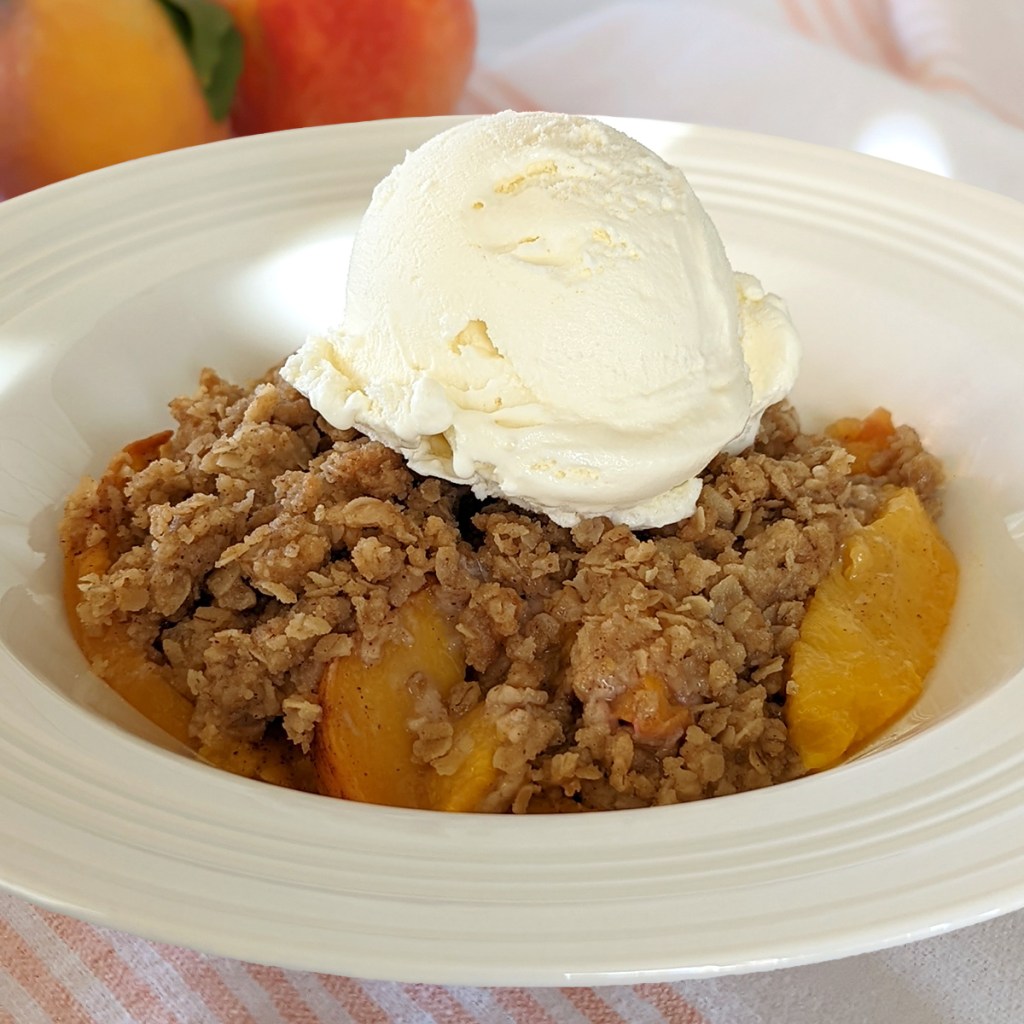
Now when it comes to baking with peaches, I am all about a homecooked peach crisp, not a cobbler. When cooked, peaches get super soft so I like that sweet oatmeal baked to a nice crisp on top with a little bit of cinnamon. This is such a simple recipe, and you just can’t beat it hot out of the oven with a scoop of vanilla ice cream. I could eat it for breakfast, lunch, dinner, and dessert. Trust me, you will want to too!

Note: As much as I love using fresh peaches in my crisp, I want to be able to have peach crisp year round and you can really only get good quality peaches during the summer. So, with that said, I give you permission to substitute canned or frozen peaches in this recipe. If you want to use canned, make sure to completely drain them and if you use frozen, add 10 minutes to the cooking time. 

PEACH FILLING INGREDIENTS
6–8 peaches, sliced
2 tablespoons butter, melted
1/2 tsp cinnamon
2 tbsp cornstarch

CRISP INGREDIENTS
1/2 c old fashioned oats
1 c flour
1/2 tsp cinnamon
3/4 c butter, softened

STEPS

  • Preheat oven to 350º.
  • In a large bowl combine all the filling ingredients and gently fold making sure not to pulverize the peaches.
  • Transferthe fruit mixture to the bottom of a greased 13” x 9” baking dish and evenly spread out. 
  • In that same bowl, mix together the oats, flour, and cinnamon.
  • Add the softened butter to the oat mix and using your hands, or a large electric mixer with a paddle, combine everything until it is all evenly mixed and nice and crumbly. 
  • Distribute the oatmeal topping over the top of your fruit. (It is okay if it is all rough and crumbly. Do not push or pat it down.)
  • Bake uncovered for 30–35 minutes. 
  • Remove from oven and allow it to cool for 10 minutes. 
  • Serve in bowls topped with vanilla ice cream or whip cream.
Beverages

Recipe—Chocolate Chip Cookie Shots

Recipe—Chocolate Chip Cookie Shots

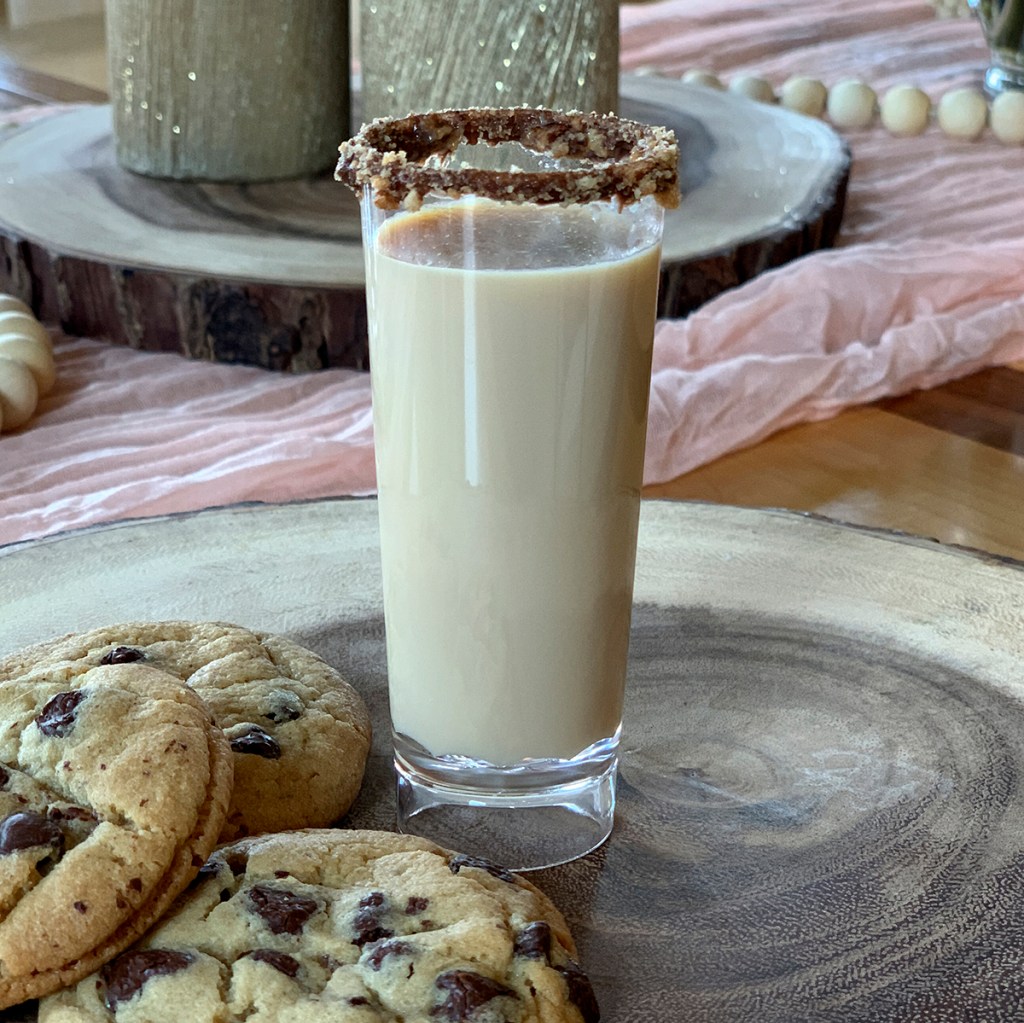
‘Tis the season for indulging in tasty adult beverages and lots of fresh baked goodies. This time of year, I just love having a sweet night cap for dessert cuddled up next to the Christmas tree. Don’t get me wrong, I would honestly make these dessert shots any time of year. I actually made a big batch and served them for dessert at my party over the summer. They were a total hit paired up with a tray of chocolate chip cookies.

This is one of my favorite dessert shots. Every drop packs a punch and you get a nice little bit of cookie on the edge with each sip. This recipe makes two generous shots so there is one for you and one for a friend. Or even better, one for each hand. Enjoy! 

Note: If you don’t have chocolate vodka, you can substitute regular vodka. If you plan on making these for a party, you can pre mix the alcohol but do not put into the shot glasses until you are ready to serve. Otherwise your cookie edge can get a bit soggy.  

INGREDIENTS
1/2 oz Disaronno amaretto
3 oz Bailey’s irish cream
1 1/2 oz chocolate vodka
2 chocolate chip cookies, crushed for garnish
chocolate cake frosting (for rimming the glasses) or light corn syrup

STEPS

  • Put a tbsp chocolate frosting or light corn syrup in a small bowl and add the cookie crumbs to a small plate.
  • Dip the rim of a shot glass into the frosting/corn syrup and then the cookie crumbs to coat the edge. Repeat with the other glass.
  • Fill a shaker with ice and add the amaretto, Irish cream, and chocolate vodka. 
  • Shake well and strain into the prepared shot glasses.

Recipe adapted from Mantitlement.

Sweet Treats

Recipe—Banana Cream Pie Dip

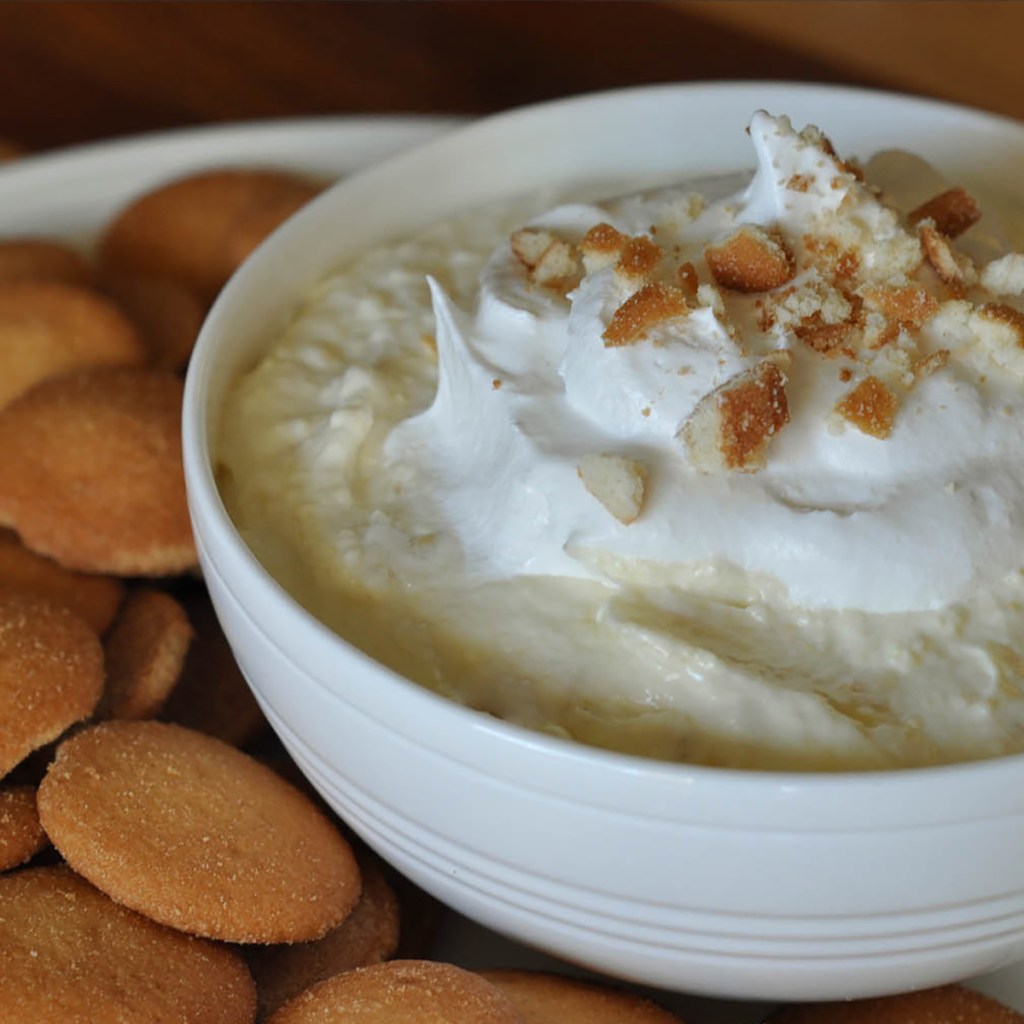
Banana cream pie is one of my top 5 favorite desserts, maybe top 3. It was pretty much the only late night craving I had throughout my pregnancy with my son. Maybe it is because it reminds me of the banana shakes my dad used to make me as a kid. That was kind of our thing. Friday nights watching M*A*S*H and drinking banana shakes. That. Was. The. Life!

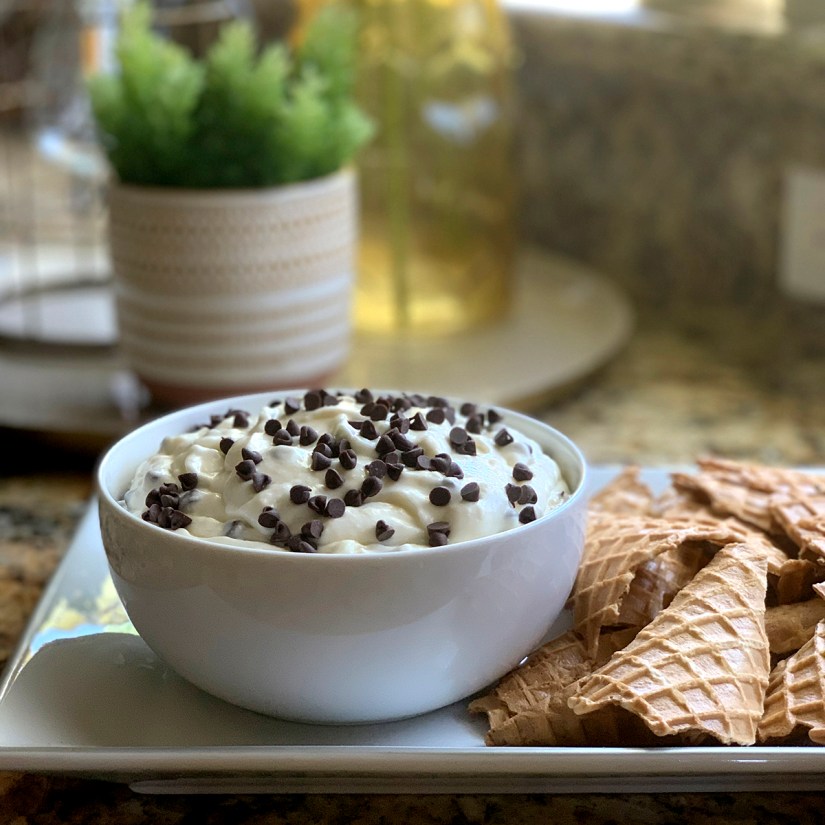
This dip has everything I love about banana cream pie but in one very addicting easy to make dip. It is perfect for parties or just a random dessert. If you have been following me for a while now you may know I have a thing for dessert dips. I’ve posted recipes for Cannoli Dip, Sweat Cream Dip with Strawberries, Sweet Cherry Chip Dip, Funfetti Cake Batter Cookie Dip, and Toffee Apple Dip

Dessert dips are so quick and easy to make. So many people are intimidated by overly complex desserts but when all you have to do is mix a bunch of ingredients in a bowl, these really are foolproof. 

INGREDIENTS
3.4 oz box instant banana cream pudding
2 c milk
8 oz cream cheese, softened
1/2 tsp vanilla extract
1 c powdered sugar
2 c Cool Whip, divided
Nilla wafers or graham crackers for serving

STEPS

  • In a medium bowl, beat together the pudding powder and milk until well combined and set aside. 
  • In a separate large bowl, use an electric mixer and beat together the cream cheese, powdered sugar, and vanilla until smooth. 
  • Fold the pudding mixture and 1 1/2 cups of the Cool Whip into the cream cheese mixture and stir until it is creamy.
  • Transfer the finished mixture to a serving dish and top with the remaining 1/2 cup of Cool Whip. 
  • Place in the refrigerator and allow to set for 30 minutes or more. 
  • Sprinkle with a few crushed wafers or graham cracker crumbs.
  • Serve with a side of Nilla Wafers or graham crackers.

If you like this recipe, then I highly recommend you check out these other awesome dessert dip recipes!

Cannoli Dip

Cannoli Dip

Cherry Chip Dip

Toffee Apple Dip

Sweet Treats

Recipe—Old Fashioned Strawberry Ice Cream

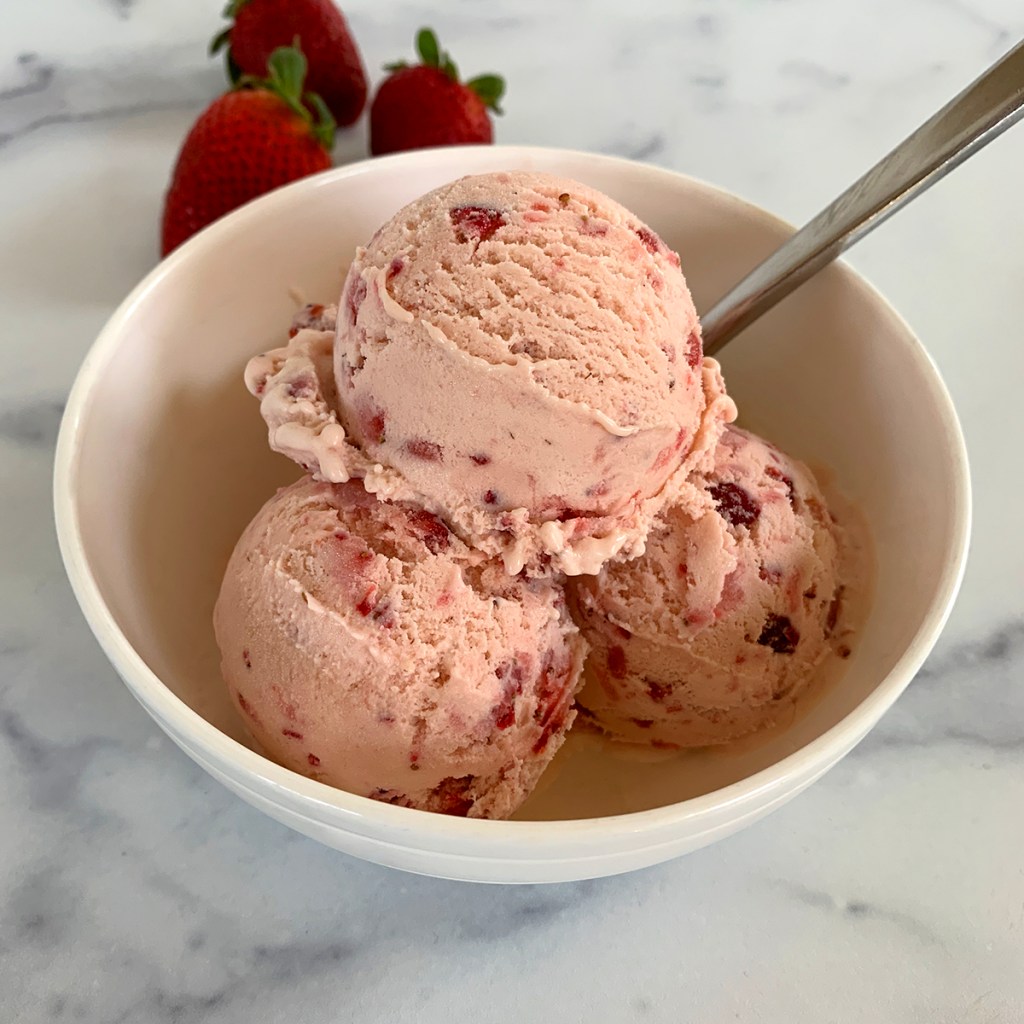
The other day as we were driving into our subdivision, we spotted a little pop-up fruit stand with the most vibrant red strawberries on the side of the road. They were so fresh and ripe that you could smell the sweet strawberry aroma from over 10 feet away. It literally just drew me in. 

It was the first really warm weekend of the year so making some homemade strawberry ice cream just seemed obvious. Fresh churned old fashioned strawberry ice cream is just an iconic summer treat and the key is ripe fresh strawberries. The kind that you can only find in the warmer months and that are a deep red throughout.

Now the trick to getting a really good creamy strawberry ice cream, is to make it with an egg/custard base. Strawberries have so much juice in them that your ice cream can take on an icy texture if you just use milk and cream. So, this recipe may be a bit more work than others, but it is so worth it. The final product will be so creamy and decadent. Absolutely worth it!

So as the weather really starts to warm up as summer creeps in, and you start seeing your market and fruit stands flooded with ripe strawberries, make sure to keep this recipe in mind. It is the perfect dessert to make this summer.

Note: This recipe requires that you make a custard egg mixture over the stove that needs to be completely chilled before being placed in the ice cream maker. The steps below guide you to put the custard in the fridge for 4–5 hours. However, if you don’t have the time, you can place the bowl of warm custard in a second large bowl filled with ice water and stir frequently. This will allow your mixture to cool within 30–40 minutes. Just make sure to keep it well stocked with ice.

INGREDIENTS
4 large egg yolks
3/4 c sugar, divided
1/4 c  brown sugar
1/4 tsp kosher salt
2 c heavy cream
1 cups whole milk
1 tsp vanilla
4 c strawberries, sliced 
1 tbsp lemon juice 

STEPS

  • In large bowl, whisk together the egg yolks, 1/2 cup of the sugar, brown sugar, and salt until it is nice and smooth and set aside.
  • In a large saucepan combine the heavy cream, milk, and vanilla and heat over medium heat until it begins to simmer. 
  • Remove the pot from heat and VERY slowly add the egg mixture to the pot while whisking the entire time. (By slowly mixing in the egg mixture and whisking continuously you are tempering the eggs but not cooking them.) 
  • Return the saucepan with the creamy egg mixture to the stove and heat through over medium heat.
  • Stir the mixture frequently until it just starts the slightly thicken. You do not want to overdo it or the eggs will begin to cook/scramble.
  • Once the custard mixture is done, transfer it to a large metal or glass bowl, cover it with plastic wrap or a lid, and place it in the fridge for 4­–5 hours until it is well chilled. 
  • When you are ready to start making the ice cream, combine the strawberries, lemon juice, and 1/4 cup of the sugar in a large bowl.
  • Using a metal masher, break up the strawberries until they are really saturated in their juices.
  • Add the mashed strawberries to the custard mixture, stirring to combine.
  • Pour the final ice cream mixture into your ice cream maker and churn according to your device’s directions. 
  • Transfer the finished ice cream to an airtight container and store in the freezer. 
  • If you like this recipe, make sure to also check out my recipe for Blackberry Ice Cream, another favorite in our house. 
Sweet Treats

Recipe—Lemon Italian Ice

If you think a cold glass of lemonade is refreshing on a hot summer day, wait until you try this frozen treat, Lemon Italian Ice! There is no comparison. This is better, hands down. Your kiddos will think so too.

My son and I make this during the summer and it is the most refreshing thing I have probably ever had. The lemon mixture with fresh zest is just the perfect amount of tart and sweet and it is crazy how light and fluffy it is! Absolute heaven! 

I absolutely love how easy this recipe is to make. So easy that my 11-year-old does most of the work. I pretty much just zest the lemons and he does the rest. Plus, it is basically 4 ingredients. Fresh lemons, sugar, salt, and water. So simple and relatively healthy compared to other frozen treats.

So as the weather warms up and you are looking for creative ways to cool off, give this a try. It is sure to do the trick!

Notes: 

  • The trick to making this is to work quickly when you are processing the frozen cubes and keep the fluffy ice from melting. We had a container ready to go in the freezer and as soon as I emptied each batch from the blender to the container, it went back into the freezer. This really kept it light and fluffy and it never froze together. 
  • To get 1 1/2 cups of fresh lemon juice, you will probably need between 8–10 lemons.
  • This makes a pretty decent sized batch so you can easily get 6–8 servings out of it. 

INGREDIENTS
grated zest from 2 lemons
1 1/2 c fresh squeezed lemon juice
1 c sugar
1/4 tsp kosher salt
2 c water

GARNISHES (optional)
fresh raspberries
fresh mint leaves

STEPS

  • In a medium saucepan, combine the lemon zest, juice, sugar, salt, and water.
  • Cook over medium heat, stirring frequently until the sugar is dissolved. 
  • Allow the mixture to cool for about 30 minutes.
  • Pour the liquid into ice cube trays and freeze overnight.
  • Put 6–8 ice cubes at a time into a food processor or blender and pulse until all the cubes are broken up and you have a fluffy mixture.
  • Immediately transfer the “fluffy ice” to serving dishes OR a freezer safe container to be enjoyed later.
  • Repeat this process with the remaining cubes.
  • Garnish your Italian ice with some fresh raspberries and mint sprigs.
  • Store the leftover Italian ice in the freezer in a tightly covered container. 
  • To serve later, remove the Italian ice from the freezer and allow it to sit for 5–10 minutes to help soften it up for scooping. 
Sweet Treats

Recipe—Classic Whoopie Pies

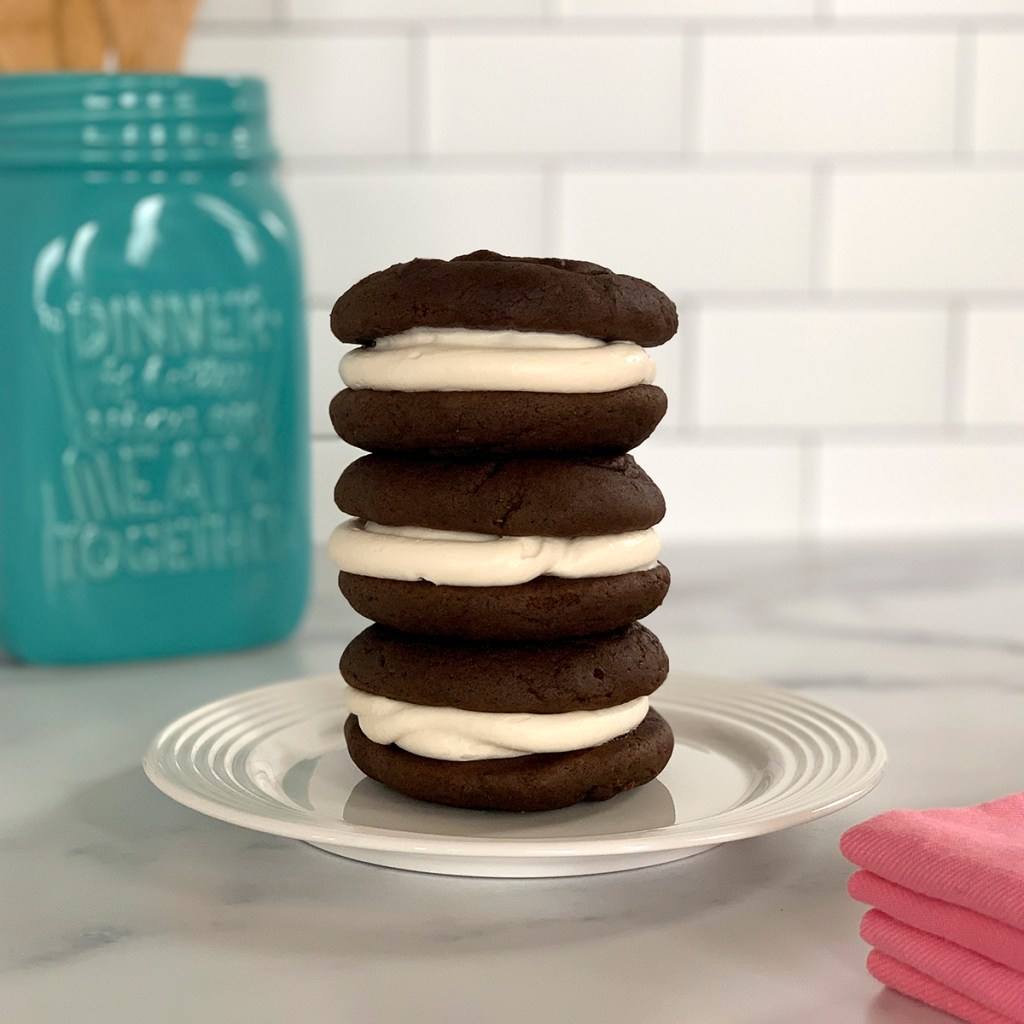
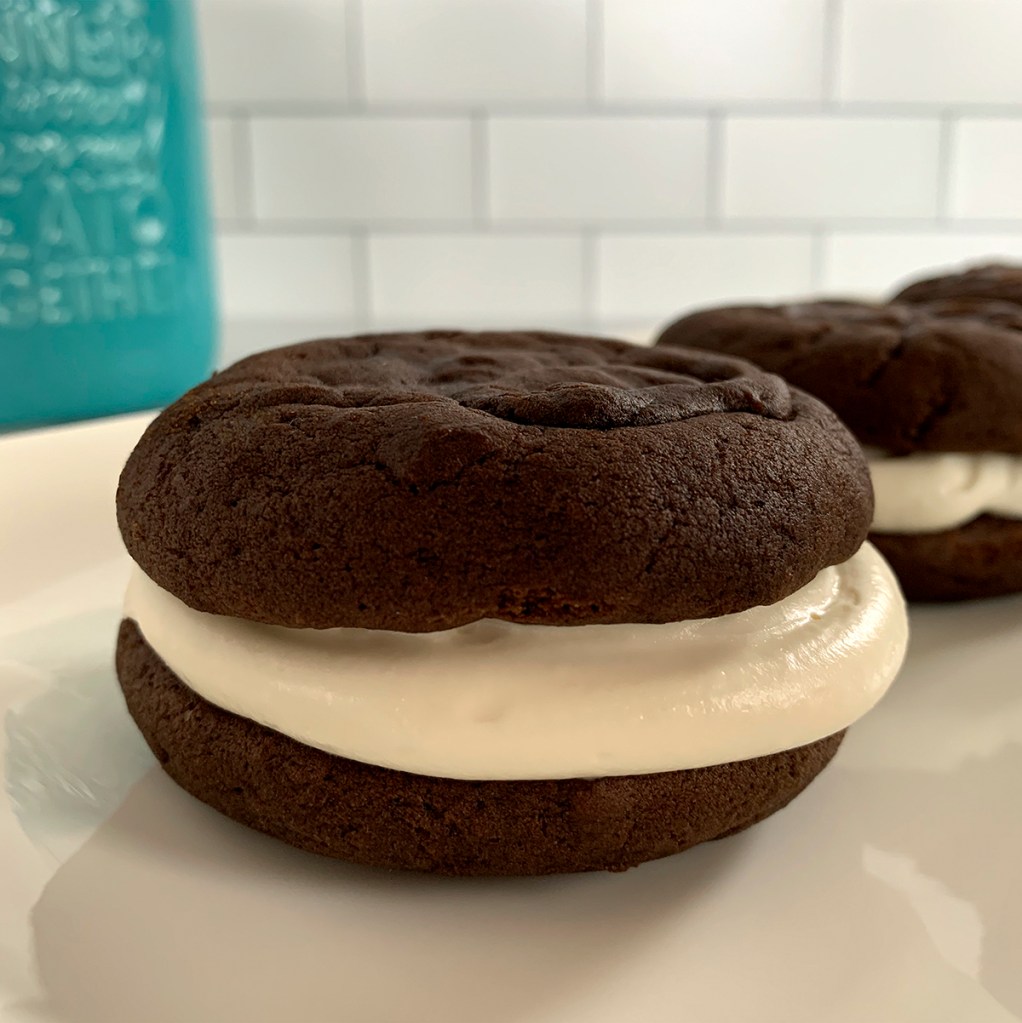
There is something so fun about whoopie pies. That creamy marshmallow filling sandwiched between two fluffy chocolate cakes. Yes, please! 

The other day I saw an article about the history of whoopie pies and it is too cute not to share. According to legend, Amish wives would take leftover cake batter and make the tiny cakes. Husbands and kids would then find the little “pies” in their lunch boxes the next day and would exclaim “Whoopee!” Cute right? That would probably be my reaction if I found one of these in my lunch too.

They may seem complicated but actually are super easy to make. You basically make cookies out of cake batter and just bake them for a few minutes, let them cool, and then fill them with gooey goodness. Oh, and then add a glass of milk or a good stout. 

Notes: 

  • This recipe makes about 10–12 assembled pies. 
  • You can put the marshmallow filling between the cakes just by scooping it on, or I like to use a piping bag with a large tip to get really smooth edges. You can have fun using decorative piping tips too. 
  • Store uneaten whoopie pies in an airtight container in the fridge for best results. Then allow them to come to room temperature for about 10–15 minutes. This will allow the cake to soften back up. My husband and son actually like to keep them in the freezer and they eat them frozen so they are like a super indulgent ice cream sandwich. 

CAKE INGREDIENTS
1/2 c unsweetened cocoa
2 c flour
1 1/2 tsp baking soda
1/2 tsp baking powder
1/2 tsp salt
1/2 c vegetable oil
1 c sugar
1 egg
1 c whole milk
2 tsp vanilla

MARSHMALLOW FILLING INGREDIENTS
1 c powdered sugar
1/2 c unsalted butter, softened 
1 tsp vanilla extract
1 1/2 c marshmallow creme/fluff

STEPS

  • Preheat the oven to 400º. 
  • Line a couple of baking sheets with parchment paper or a silicone mat.
  • Stir together the cocoa, flour, baking soda, baking powder, and salt in a medium bowl and set aside. 
  • In a separate mixing bowl, beat together the vegetable oil, sugar, egg, milk, and vanilla extract until well integrated.
  • Slowly add the dry ingredients to the mixing bowl and beat until just combined. 
  • Scoop large equal sized spoonfuls of batter onto the lined baking sheet keeping them a couple of inches apart.
  • Bake the “cakes” for about 6–7 minutes. Make sure they are puffed up and looked cook through but don’t overcook them.
  • Using a spatula, immediately transfer the cakes to a cooling rack and allow them to cool completely.
  • Prepare the marshmallow filling by beating together all the powdered sugar, butter, and vanilla until nice and smooth. Gradually add the marshmallow creme until it is mixed in. (If the frosting doesn’t seem thick enough, add in a bit more powdered sugar a little at a time. You want it to be about the consistency of frosting.)
  • Take one of the cakes, turn it upside down, and put a nice sized dollop of the marshmallow filling in the center of the underside of the cake. (If your filling is squishing out from the weight of the cake on top, you can place the filling in the fridge for about 30 minutes. The butter chilling will help to thicken it up.)
  • Place a matching cake flat side down on top of the filling and push it down to spread the filling evenly from edge to edge. I like my filling to be about 1/2” thick.
  • Repeat until all the pies are complete!

If you like this recipe, check out my recipe for Carrot Cake Whoopie Pies which are made with a cream cheese marshmallow filling. 

Sweet Treats

Recipe—Craisin White Chocolate Chip Oatmeal Cookies (AKA Santa’s Favorite)

Craisin White Chocolate Chip Oatmeal Cookies

One of my favorite things about Christmas is all the traditions that go along with it. Gingerbread house building, baking, listening to Christmas music, hanging the stockings, you catch my drift. There is just so much magic in the month leading up to Christmas. Well, ever since my son with 10 months old we have taken him for annual photos with Santa. They are all framed and sit in chronological order (have a mentioned I have OCD tendencies before? LOL) along the entertainment center leading up to Christmas.

Santa

This year he is 10 years old and he still wanted to go take a pick with Santa. With COVID I didn’t think we could make that happen but sure enough, we found a place that was doing physically distanced photos by appointment only. Yay! Anyways, ever since my son could talk he would make sure to ask Santa what kind of cookies he wanted us to leave out for Christmas, it never fails, he ALWAYS says oatmeal. Now one thing I will fess up to is that I despise raisins! I cannot eat them! Even as an adult I will pick them out of trail mix. I refuse to contaminate a good oatmeal cookie with raisins! However, I do love me some craisins. So, ever since that first time Santa said he wanted oatmeal cookies, this recipe made it into the baking rotation. These are delicious, buttery, and just the right amount of chewy and sweet. To me, these cookies are the cookie of Christmas and I guarantee you they are Santa approved!

INGREDIENTS
1 1/2 c flour
1 tsp baking soda
1/2 tsp salt
1/2 c + 6 tbsp butter, softened
3/4 c brown sugar
1/2 c granulated sugar
2 eggs
1 tsp vanilla
3 c oats uncooked
1 c craisins
11 oz white chocolate chips

STEPS

  • Preheat oven to 350°F.
  • In a medium bowl, stir together flour, baking soda, and salt and set aside.
  • In a large bowl, using an electric mixer, beat together the butter and sugars until creamy.
  • Add eggs and vanilla to the butter mixture.
  • Gradually start to fold in the flour ingredients into the butter mixture.
  • Add oats, craisins, white chocolate chips and mix well.
  • Drop dough by the spoonful onto a parchment paper lined baking sheet.
  • Bake for 8–10 minutes or until light golden brown.
  • Allow cookies to sit on the baking sheet for a couple of minutes before transferring to a cutting board or cooling rack.
Sweet Treats

Recipe—Glazed Lemon Cookies

We are on Day 4 of 5 of my Christmas Cookie Week! That’s right, this week I will be posting 5 of my favorite Christmas Cookie recipes!

Glazed Lemon Cookies

We have the cutest little lemon bush in our back yard and it holds a special place in my heart as it was a housewarming gift from some of our friends when we built our house 6 years ago. Every year come December, it never fails, the lemons are ready for picking. For that reason, these glazed lemon cookies have become a staple in our holiday cookie rotation. They are so soft and light and I just love the zestiness the fresh lemon brings to them. While I love making these around the holidays they are also perfect for spring or summer.

Note: I recommend placing some paper towels or wax paper under the cooling rack before taking the cookies out of the oven. When you do the glazing you will get some drippage and the paper towels or wax paper will help to catch that excess sticky goodness that make cleanup so much easier.  

COOKIE INGREDIENTS
2 1/4 c flour
1 tbsp cornstarch
1/2 tsp baking soda
1/2 tsp salt
3/4 c butter, softened
1 1/4 c granulated sugar
zest from 2 lemons
2 eggs
2 tbsp lemon juice
1 1/2 tsp vanilla extract

GLAZE INGREDIENTS
1 c powdered sugar
2 tbsp fresh lemon juice

STEPS

  • Preheat oven to 350º.
  • In a medium bowl, stir together the flour, cornstarch, baking soda, and salt.
  • In a large bowl beat together the butter, sugar, and lemon zest on medium-high speed for 3 minutes.
  • Add the eggs, lemon juice, and vanilla to the butter mixture and continue to beat until evenly incorporated.
  • Gradually add in the dry ingredients until combined.
  • Form small balls with the dough and place at least 2 inches apart on a parchment paper lined baking sheet.
  • Bake for 8–10 minutes or until they just start to get a light golden color on the bottom.
  • Allow cookies to sit on the baking sheet for a couple of minutes before transferring to a cooling rack.
  • Once the cookies have completely cooled, whisk together the powdered sugar and fresh lemon juice to make the glaze. (You want to be able to drizzle the glaze so add a tad bit more lemon juice or water if needed to thin it, or more powdered sugar if you need it thicker.)
  • Transfer the glaze to a transfer to a piping bag with a very small opening or a Ziploc bag. (If using a Ziplock bag, you will want to cut a small tip off one corner.)
  • Drizzle the glaze back and forth over the cookies.
  • Allow the cookies to rest for at least an hour so the glaze has time to set.
  • Enjoy!
Sweet Treats

Recipe—Cherry Chip Shortbread Cookies

We are on Day 3 of 5 of my Christmas Cookie Week! That’s right, this week I will be posting 5 of my favorite Christmas Cookie recipes!

Cherry Chip Shortbread Cookies

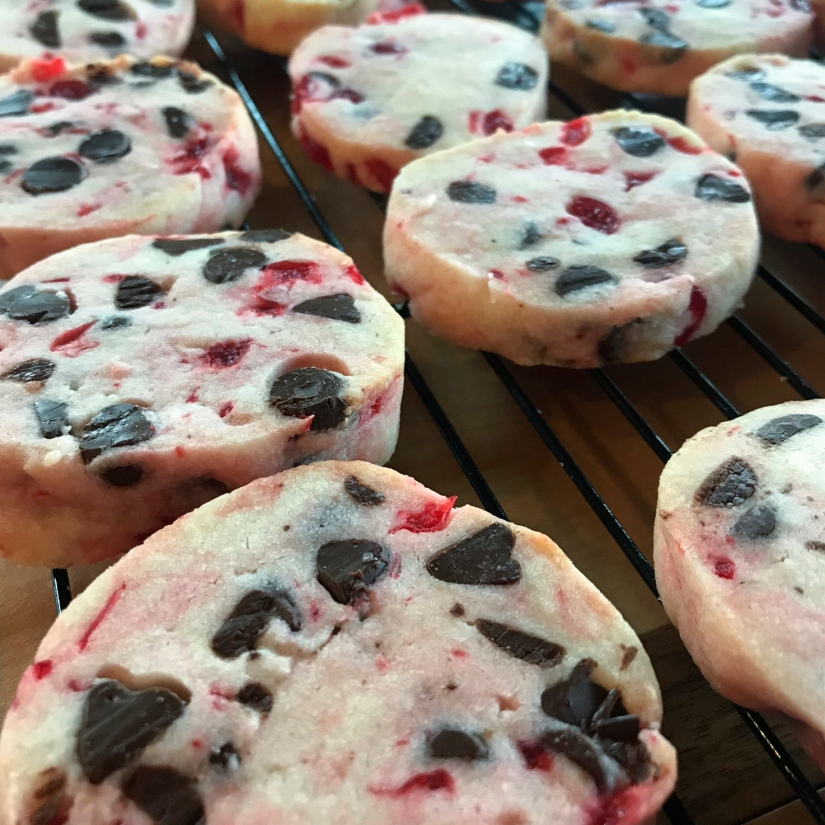
If you have been following me for a while now, you know fruit and chocolate are kind of my thing. Bananas and chocolate, strawberries and chocolate, cherries and chocolate… you catch my drift. Add in the melt in your mouth buttery flavor of a shortbread cookie, and you have one of the best tasting cookies ever! Not only do they taste amazing but they are also so pretty! I love the pops of red that the cherries add.

If I will give you any advice about this recipe, it is to double the recipe. One batch for you, and one batch for sharing. They really are that good!

INGREDIENTS
1 c butter, softened
1/2 c powdered sugar
1/2 tbsp vanilla extract
2 c flour
1/2 tsp salt
1 c maraschino cherries, chopped and patted dry
1 c chocolate chips

STEPS

  • In a large mixing bowl beat together the butter, sugar, and vanilla.
  • In a separate bowl, mix together the flour and salt.
  • Gradually mix the dry ingredients into the butter mixture until it is all combined.
  • Gently fold in the cherries and chocolate chips until evenly distributed.
  • Lay out a long strip of plastic wrap and form the dough into a log in the middle of it. I try and make my log about 2” in diameter.
  • Wrap the log up in the saran wrap and chill in the fridge for an hour.
  • Preheat the oven to 350º.
  • Once the log has firmed up, remove it from the saran wrap and cut it into approximately 1/3” slices.
  • Place the slices about 1” apart on a parchment paper lined baking sheet.
  • Bake the cookies for about 10–12 minutes or until they just start to turn golden around the edges.
  • Allow the cookies to cool for a few minutes before transferring them to a cooling rack.