Sweet Treats

Recipe—Banana Cream Pie Dip

Banana cream pie is one of my top 5 favorite desserts, maybe top 3. It was pretty much the only late night craving I had throughout my pregnancy with my son. Maybe it is because it reminds me of the banana shakes my dad used to make me as a kid. That was kind of our thing. Friday nights watching M*A*S*H and drinking banana shakes. That. Was. The. Life!

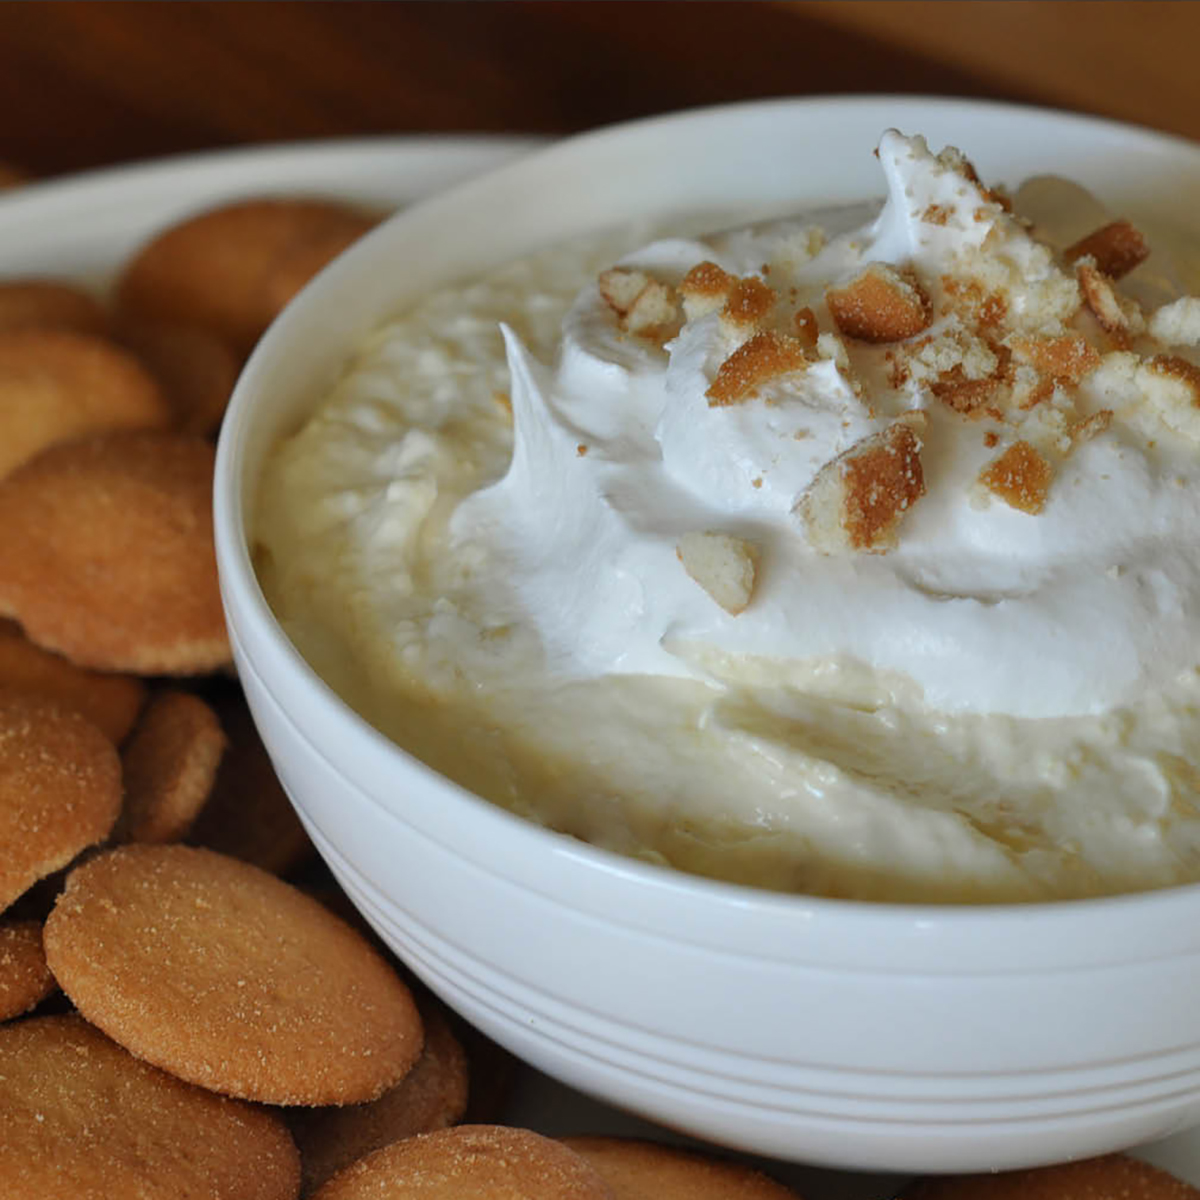
This dip has everything I love about banana cream pie but in one very addicting easy to make dip. It is perfect for parties or just a random dessert. If you have been following me for a while now you may know I have a thing for dessert dips. I’ve posted recipes for Cannoli Dip, Sweat Cream Dip with Strawberries, Sweet Cherry Chip Dip, Funfetti Cake Batter Cookie Dip, and Toffee Apple Dip

Dessert dips are so quick and easy to make. So many people are intimidated by overly complex desserts but when all you have to do is mix a bunch of ingredients in a bowl, these really are foolproof. 

INGREDIENTS
3.4 oz box instant banana cream pudding
2 c milk
8 oz cream cheese, softened
1/2 tsp vanilla extract
1 c powdered sugar
2 c Cool Whip, divided
Nilla wafers or graham crackers for serving

STEPS

  • In a medium bowl, beat together the pudding powder and milk until well combined and set aside. 
  • In a separate large bowl, use an electric mixer and beat together the cream cheese, powdered sugar, and vanilla until smooth. 
  • Fold the pudding mixture and 1 1/2 cups of the Cool Whip into the cream cheese mixture and stir until it is creamy.
  • Transfer the finished mixture to a serving dish and top with the remaining 1/2 cup of Cool Whip. 
  • Place in the refrigerator and allow to set for 30 minutes or more. 
  • Sprinkle with a few crushed wafers or graham cracker crumbs.
  • Serve with a side of Nilla Wafers or graham crackers.

If you like this recipe, then I highly recommend you check out these other awesome dessert dip recipes!

Cannoli Dip

Cannoli Dip

Cherry Chip Dip

Toffee Apple Dip

Advertisement
Sweet Treats

Recipe—Old Fashioned Strawberry Ice Cream

The other day as we were driving into our subdivision, we spotted a little pop-up fruit stand with the most vibrant red strawberries on the side of the road. They were so fresh and ripe that you could smell the sweet strawberry aroma from over 10 feet away. It literally just drew me in. 

It was the first really warm weekend of the year so making some homemade strawberry ice cream just seemed obvious. Fresh churned old fashioned strawberry ice cream is just an iconic summer treat and the key is ripe fresh strawberries. The kind that you can only find in the warmer months and that are a deep red throughout.

Now the trick to getting a really good creamy strawberry ice cream, is to make it with an egg/custard base. Strawberries have so much juice in them that your ice cream can take on an icy texture if you just use milk and cream. So, this recipe may be a bit more work than others, but it is so worth it. The final product will be so creamy and decadent. Absolutely worth it!

So as the weather really starts to warm up as summer creeps in, and you start seeing your market and fruit stands flooded with ripe strawberries, make sure to keep this recipe in mind. It is the perfect dessert to make this summer.

Note: This recipe requires that you make a custard egg mixture over the stove that needs to be completely chilled before being placed in the ice cream maker. The steps below guide you to put the custard in the fridge for 4–5 hours. However, if you don’t have the time, you can place the bowl of warm custard in a second large bowl filled with ice water and stir frequently. This will allow your mixture to cool within 30–40 minutes. Just make sure to keep it well stocked with ice.

INGREDIENTS
4 large egg yolks
3/4 c sugar, divided
1/4 c  brown sugar
1/4 tsp kosher salt
2 c heavy cream
1 cups whole milk
1 tsp vanilla
4 c strawberries, sliced 
1 tbsp lemon juice 

STEPS

  • In large bowl, whisk together the egg yolks, 1/2 cup of the sugar, brown sugar, and salt until it is nice and smooth and set aside.
  • In a large saucepan combine the heavy cream, milk, and vanilla and heat over medium heat until it begins to simmer. 
  • Remove the pot from heat and VERY slowly add the egg mixture to the pot while whisking the entire time. (By slowly mixing in the egg mixture and whisking continuously you are tempering the eggs but not cooking them.) 
  • Return the saucepan with the creamy egg mixture to the stove and heat through over medium heat.
  • Stir the mixture frequently until it just starts the slightly thicken. You do not want to overdo it or the eggs will begin to cook/scramble.
  • Once the custard mixture is done, transfer it to a large metal or glass bowl, cover it with plastic wrap or a lid, and place it in the fridge for 4­–5 hours until it is well chilled. 
  • When you are ready to start making the ice cream, combine the strawberries, lemon juice, and 1/4 cup of the sugar in a large bowl.
  • Using a metal masher, break up the strawberries until they are really saturated in their juices.
  • Add the mashed strawberries to the custard mixture, stirring to combine.
  • Pour the final ice cream mixture into your ice cream maker and churn according to your device’s directions. 
  • Transfer the finished ice cream to an airtight container and store in the freezer. 
  • If you like this recipe, make sure to also check out my recipe for Blackberry Ice Cream, another favorite in our house. 
Sweet Treats

Recipe—Classic Whoopie Pies

There is something so fun about whoopie pies. That creamy marshmallow filling sandwiched between two fluffy chocolate cakes. Yes, please! 

The other day I saw an article about the history of whoopie pies and it is too cute not to share. According to legend, Amish wives would take leftover cake batter and make the tiny cakes. Husbands and kids would then find the little “pies” in their lunch boxes the next day and would exclaim “Whoopee!” Cute right? That would probably be my reaction if I found one of these in my lunch too.

They may seem complicated but actually are super easy to make. You basically make cookies out of cake batter and just bake them for a few minutes, let them cool, and then fill them with gooey goodness. Oh, and then add a glass of milk or a good stout. 

Notes: 

  • This recipe makes about 10–12 assembled pies. 
  • You can put the marshmallow filling between the cakes just by scooping it on, or I like to use a piping bag with a large tip to get really smooth edges. You can have fun using decorative piping tips too. 
  • Store uneaten whoopie pies in an airtight container in the fridge for best results. Then allow them to come to room temperature for about 10–15 minutes. This will allow the cake to soften back up. My husband and son actually like to keep them in the freezer and they eat them frozen so they are like a super indulgent ice cream sandwich. 

CAKE INGREDIENTS
1/2 c unsweetened cocoa
2 c flour
1 1/2 tsp baking soda
1/2 tsp baking powder
1/2 tsp salt
1/2 c vegetable oil
1 c sugar
1 egg
1 c whole milk
2 tsp vanilla

MARSHMALLOW FILLING INGREDIENTS
1 c powdered sugar
1/2 c unsalted butter, softened 
1 tsp vanilla extract
1 1/2 c marshmallow creme/fluff

STEPS

  • Preheat the oven to 400º. 
  • Line a couple of baking sheets with parchment paper or a silicone mat.
  • Stir together the cocoa, flour, baking soda, baking powder, and salt in a medium bowl and set aside. 
  • In a separate mixing bowl, beat together the vegetable oil, sugar, egg, milk, and vanilla extract until well integrated.
  • Slowly add the dry ingredients to the mixing bowl and beat until just combined. 
  • Scoop large equal sized spoonfuls of batter onto the lined baking sheet keeping them a couple of inches apart.
  • Bake the “cakes” for about 6–7 minutes. Make sure they are puffed up and looked cook through but don’t overcook them.
  • Using a spatula, immediately transfer the cakes to a cooling rack and allow them to cool completely.
  • Prepare the marshmallow filling by beating together all the powdered sugar, butter, and vanilla until nice and smooth. Gradually add the marshmallow creme until it is mixed in. (If the frosting doesn’t seem thick enough, add in a bit more powdered sugar a little at a time. You want it to be about the consistency of frosting.)
  • Take one of the cakes, turn it upside down, and put a nice sized dollop of the marshmallow filling in the center of the underside of the cake. (If your filling is squishing out from the weight of the cake on top, you can place the filling in the fridge for about 30 minutes. The butter chilling will help to thicken it up.)
  • Place a matching cake flat side down on top of the filling and push it down to spread the filling evenly from edge to edge. I like my filling to be about 1/2” thick.
  • Repeat until all the pies are complete!

If you like this recipe, check out my recipe for Carrot Cake Whoopie Pies which are made with a cream cheese marshmallow filling.