Beverages, Kitchen Tips, Sweet Treats

How to Build an Epic Hot Cocoa Charcuterie Board or Box

Hot cocoa charcuterie boards are taking off in popularity and there is no better time than the holiday season to try and make your own. Whether you want to make it for just your family to enjoy around the fireplace, a large party, or even for gifting, it is a sure way to spread some holiday cheer.

While a charcuterie board traditionally refers to an assortment of meats, cheeses, and breads served as an appetizer, the term has become much broader and people are getting creative with how they bring foods together. While I never pass up traditional meat and cheese charcuterie to go with a bottle of wine, hot cocoa charcuterie has become one of my favorite Christmas traditions in our home. 
On the day we plan to decorate our Christmas tree and put out all our decorations, I lay out a spread of sweets to snack on and every ingredient my son could dream of to make a big ol’ mug of fully loaded hot cocoa. Do I go overboard? Absolutely. But it makes creating a cup of hot cocoa so much more fun and we love grazing on it throughout the day.

Last year we decided to share that holiday magic and made hot cocoa charcuterie boxes for our friends and delivered them to their doorsteps along with a box of assorted fresh baked cookies. The kids seriously love it! Pair a homemade box with some fun holiday mugs for the cutest gift set ever!
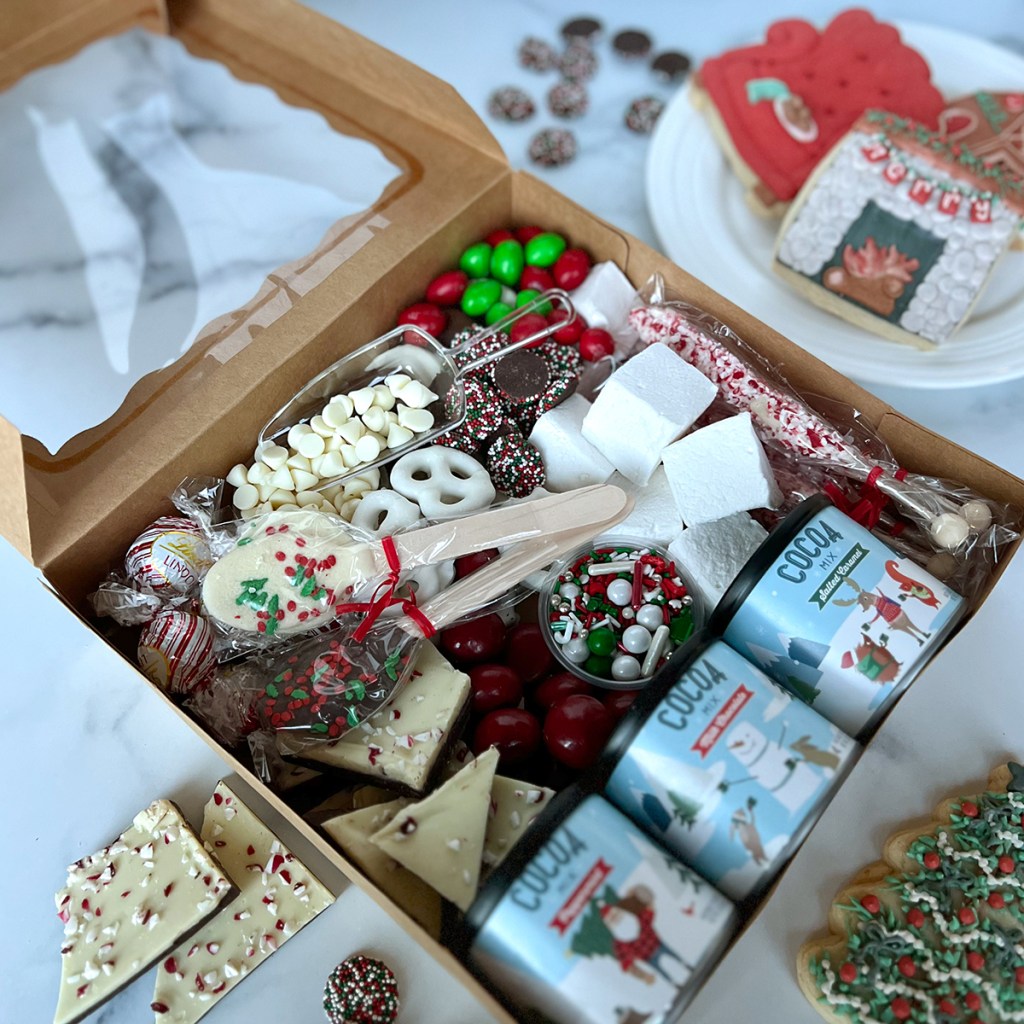
As a special touch I also like to purchase some gorgeously decorated sugar cookies from local bakers. They can include a special saying or message like “Merry Christmas.” They become sort of like an edible card.

There really is no right or wrong way to build a hot cocoa charcuterie board or box, it is about bringing together an assortment of ingredients and letting people use their imagination topping, drizzling, dipping, and sipping. 

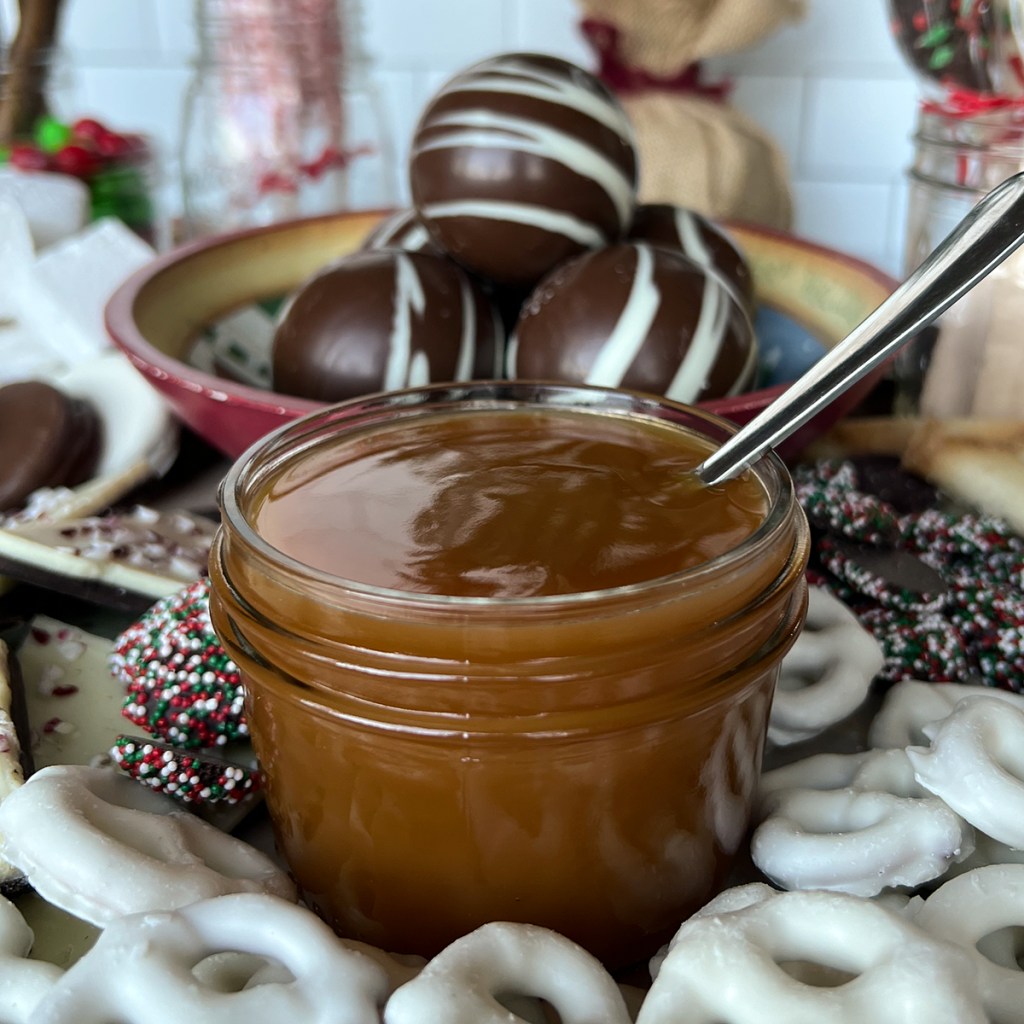
Of course, there are always the obvious choices or marshmallows, whipped cream, and sprinkles, but don’t let the fun stop there. You can fill your board with peppermint bark, caramel sauce, and then make sure to include some tasty treats for dipping too! And don’t for one second think this is just for the kids! Add some holiday spirits for the adults. Nothing like spiking your hot cocoa with some Irish cream or peppermint schnapps. 
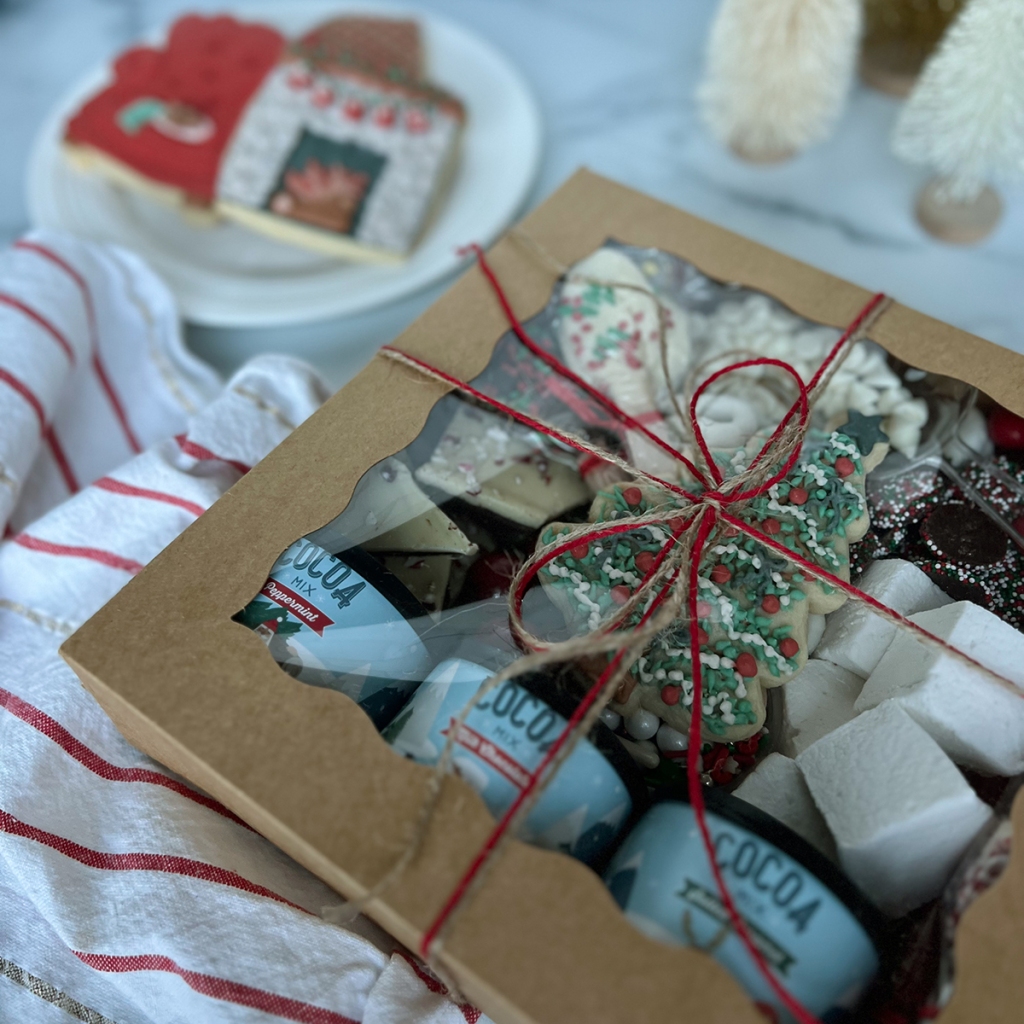
I hope this has inspired you to create your own hot cocoa board or box this holiday season and beyond. And just keep in mind, the number one rule for building a board or box is, there are no rules! Just have fun with it.

How to Build Your Board or Box

Step 1
The first step is selecting your board or box. My best advice is to make sure it is big enough for all your goodies. The bigger the better but just make sure you have enough to fill it so there aren’t any bare spots. 

If you are creating this for a really large group, you could always just line your counter or table with butcher paper or parchment paper and make it a grazing experience.

Step 2
Place your most important ingredient of all, your hot cocoa bombs or container of mix in a corner.

If you want to have your hot cocoa prepared ahead of time, skip this step. When having a party, I like to make my homemade hot cocoa in a crock-pot so it is ready to go. The guests can just ladle it into their mugs. 

Step 3
Place small bowls or containers for sprinkles, chocolate chips, smaller candies, and syrups around the board. If making a gift box, plastic sauce cups with lids work great!

Place longer items, like pirouette cookies, candy canes, and candy coated stir sticks in cups or mason jars to add some height to the board.

Step 4
Arrange cookies in clusters around the board or box.

Step 5
Fill in remaining gaps with candies, marshmallows, and chocolates. You want the board to look full so don’t be shy, add lots and don’t worry about layering things up! 

Step 6
Add some small scoopers and/or tongs in addition to some sort of stir sticks. I love including chocolate dipped spoons and the wood stir sticks coated in crushed peppermints but it could be as simple as some wood stir sticks or spoons.

Fun Toppings and Extra Treats

  • Marshmallows (assorted sizes)
  • Candy canes
  • Festive sprinkles
  • Toffee bits
  • Semi-sweet chocolate chips 
  • White chocolate chips
  • Pirouette cookies 
  • Chocolate coated pretzels
  • Assorted cookies
  • Chocolate coated Oreos
  • Assorted chocolates and candies
  • Caramels         
  • Caramel sauce
  • Chocolate sauce
  • Chocolate truffles 
  • Peppermint bark
  • Chocolate covered spoons
  • Adult mix ins (peppermint or butterscotch schnapps, amaretto, Irish cream, Irish whiskey, etc.)

If you like this, then make sure to also check out my recipes for Homemade Marshmallows or Creamy Hot Cocoa in a Crock-Pot!

A huge thank you to Sugar Sweetery for providing the sugar cookies for this article. Check them out on IG @sugar_sweetery

Beverages

Recipe—Chocolate Chip Cookie Shots

Recipe—Chocolate Chip Cookie Shots

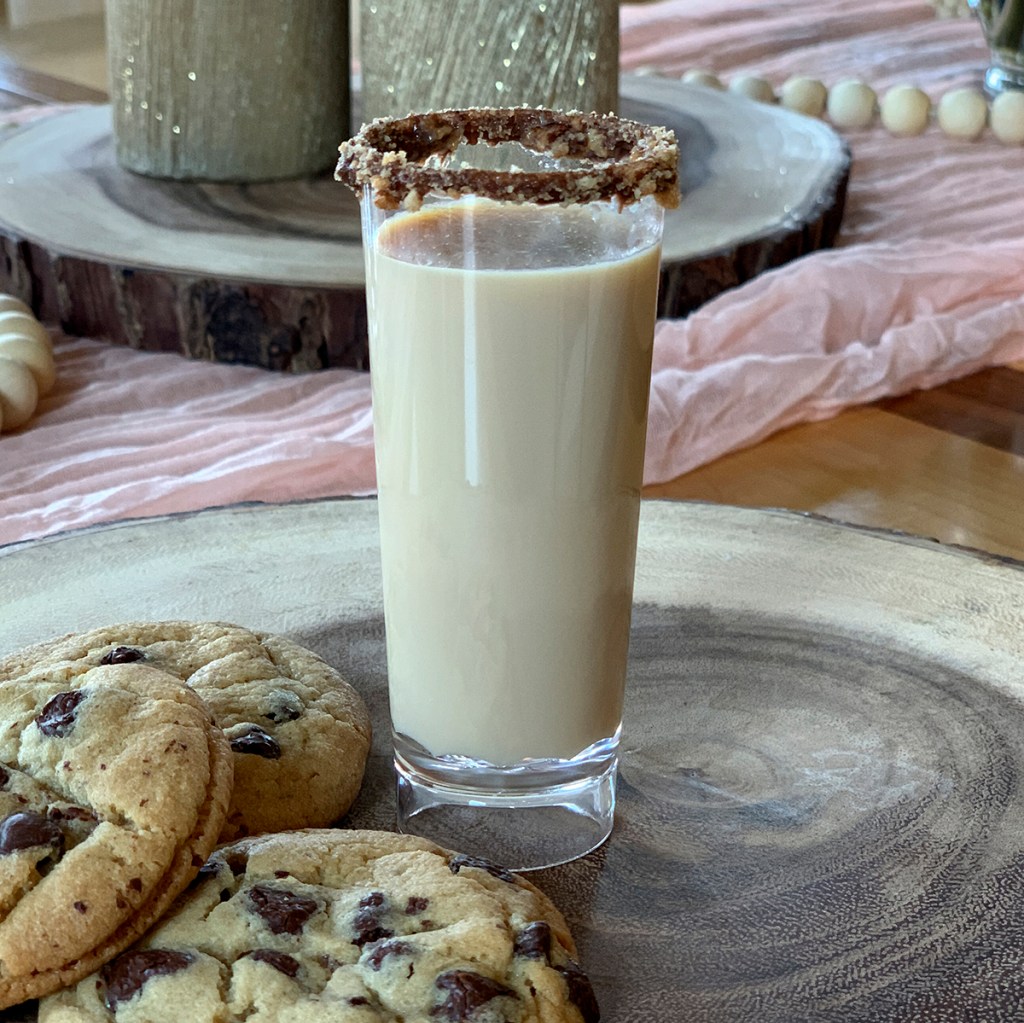
‘Tis the season for indulging in tasty adult beverages and lots of fresh baked goodies. This time of year, I just love having a sweet night cap for dessert cuddled up next to the Christmas tree. Don’t get me wrong, I would honestly make these dessert shots any time of year. I actually made a big batch and served them for dessert at my party over the summer. They were a total hit paired up with a tray of chocolate chip cookies.

This is one of my favorite dessert shots. Every drop packs a punch and you get a nice little bit of cookie on the edge with each sip. This recipe makes two generous shots so there is one for you and one for a friend. Or even better, one for each hand. Enjoy! 

Note: If you don’t have chocolate vodka, you can substitute regular vodka. If you plan on making these for a party, you can pre mix the alcohol but do not put into the shot glasses until you are ready to serve. Otherwise your cookie edge can get a bit soggy.  

INGREDIENTS
1/2 oz Disaronno amaretto
3 oz Bailey’s irish cream
1 1/2 oz chocolate vodka
2 chocolate chip cookies, crushed for garnish
chocolate cake frosting (for rimming the glasses) or light corn syrup

STEPS

  • Put a tbsp chocolate frosting or light corn syrup in a small bowl and add the cookie crumbs to a small plate.
  • Dip the rim of a shot glass into the frosting/corn syrup and then the cookie crumbs to coat the edge. Repeat with the other glass.
  • Fill a shaker with ice and add the amaretto, Irish cream, and chocolate vodka. 
  • Shake well and strain into the prepared shot glasses.

Recipe adapted from Mantitlement.

Snacks

Recipe—Baseball Munchie Mix

My son has been playing little league baseball for the last six years and that means I have six years of experience being the team mom, six years of experience coordinating snack sign ups, and six years of watching moms try to outdo each other with their creativity with their snacks. Myself included.

I made up this baseball munchie mix at the peak of my team mom career (that was two years in) and it was all down hill after that. However, I will never forget the faces of our little farm ball players after their game when I passed these out. They thought the plastic hats were the absolute coolest, especially because it had their team logo on them.

I had found these adorable plastic ball caps on Amazon and knew I had to plan a snack around them. I took all of my son’s favorite salty and sweet snacks, mixed them up in a big bowl, and combined them into one epic snack mix served in the cutest hats. Now, if you don’t want to spend the money on plastic hats, you can absolutely make this mix and just put it in some plastic bags. Trust me, the kids will still be super stoked. I mean after all, there is candy involved.

Now, do you need a recipe for this? Probably not. But my blog is about all things in the kitchen and inspiring people to have fun. And that may even be to help all my fellow baseball moms out with a creative and fun snack idea for your little sluggers. I know Folsom moms aren’t the only baseball moms trying to outdo each other with their creative snack ideas. Plus, this is a fantastic recipe for a baseball or World Series watching party too!

INGREDIENTS
7 oz bag Boom Chicka Pop Kettle Corn
10 oz box Honey Teddy Grahams
8 oz Rold Gold Pretzels (I used the big ones and broke them up)
2 cups M&Ms (I found their team colors available)
6 full size Hershey bars broken up

STEPS

  • Mix all the ingredients together in a big bowl and portion into individual snack bags or plastic ball caps. 
Sweet Treats

Recipe—Classic Whoopie Pies

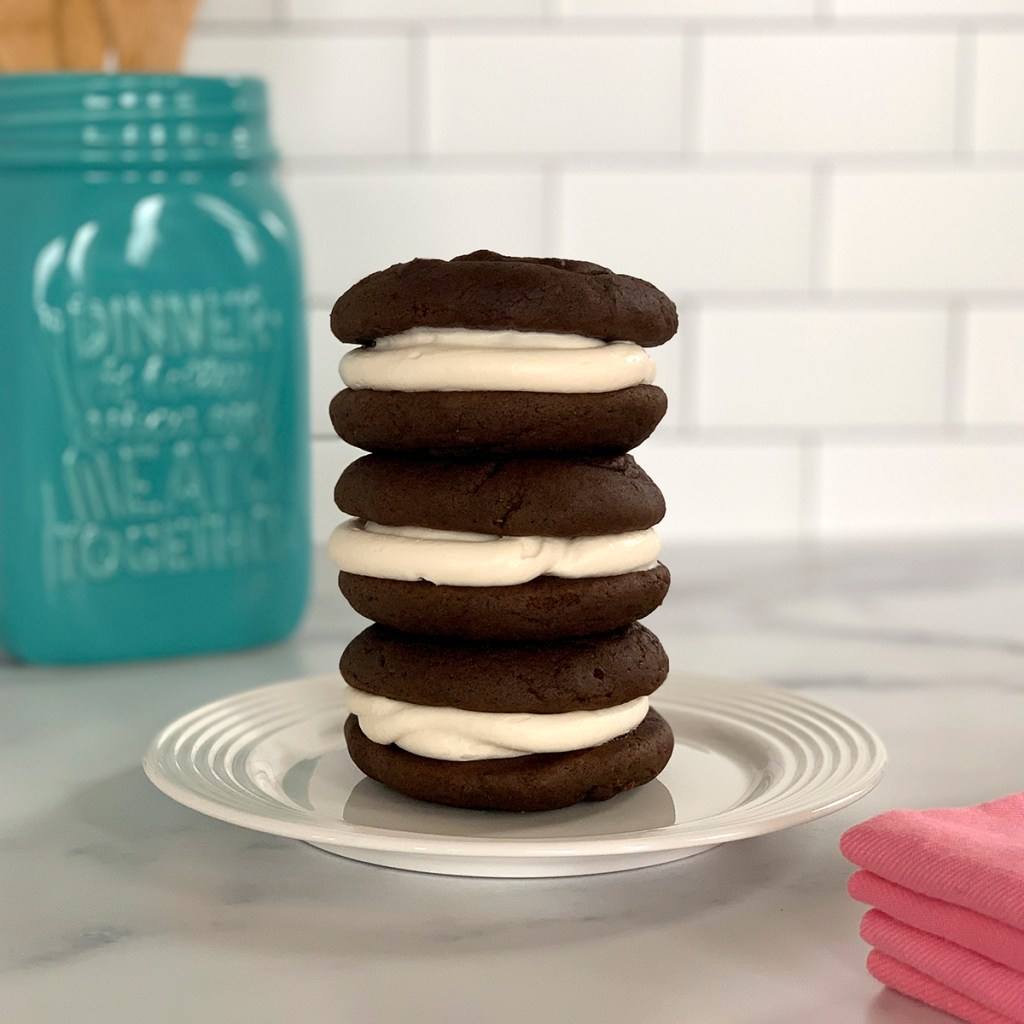
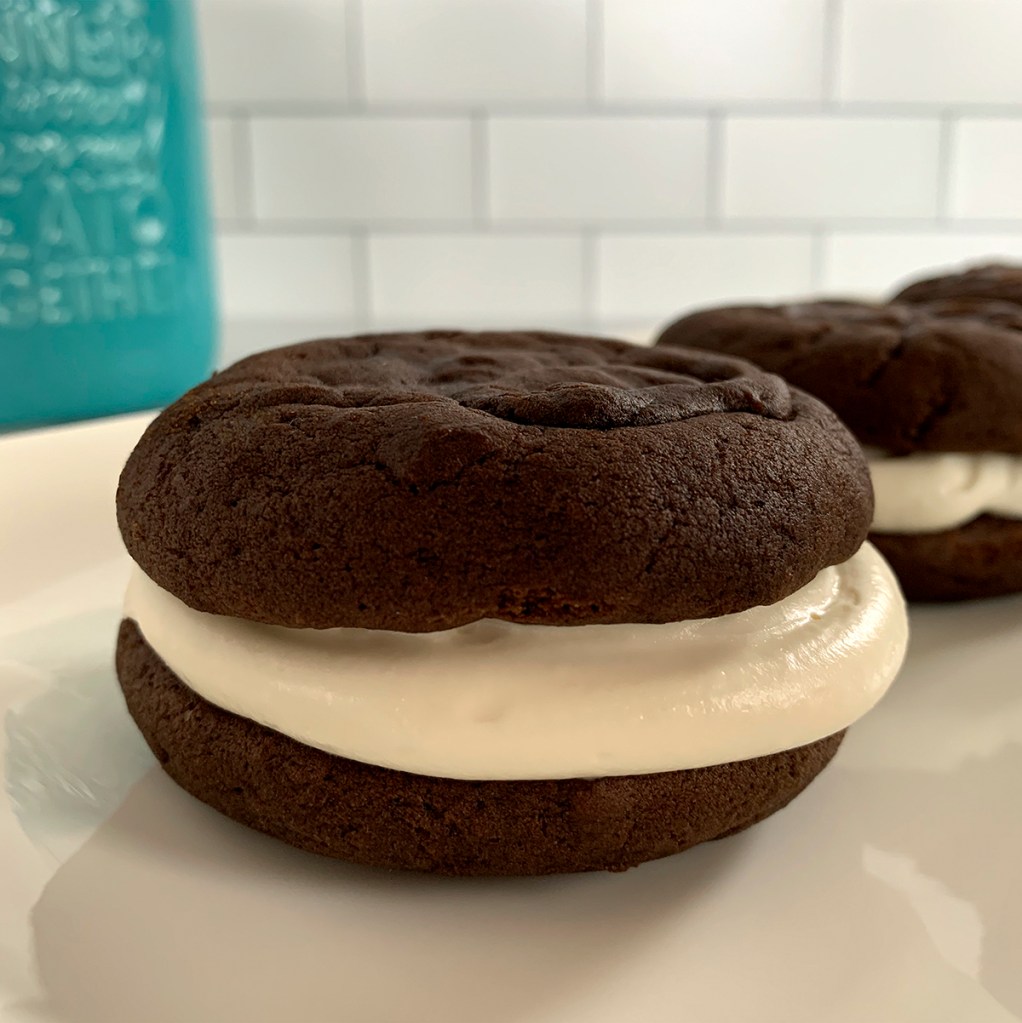
There is something so fun about whoopie pies. That creamy marshmallow filling sandwiched between two fluffy chocolate cakes. Yes, please! 

The other day I saw an article about the history of whoopie pies and it is too cute not to share. According to legend, Amish wives would take leftover cake batter and make the tiny cakes. Husbands and kids would then find the little “pies” in their lunch boxes the next day and would exclaim “Whoopee!” Cute right? That would probably be my reaction if I found one of these in my lunch too.

They may seem complicated but actually are super easy to make. You basically make cookies out of cake batter and just bake them for a few minutes, let them cool, and then fill them with gooey goodness. Oh, and then add a glass of milk or a good stout. 

Notes: 

  • This recipe makes about 10–12 assembled pies. 
  • You can put the marshmallow filling between the cakes just by scooping it on, or I like to use a piping bag with a large tip to get really smooth edges. You can have fun using decorative piping tips too. 
  • Store uneaten whoopie pies in an airtight container in the fridge for best results. Then allow them to come to room temperature for about 10–15 minutes. This will allow the cake to soften back up. My husband and son actually like to keep them in the freezer and they eat them frozen so they are like a super indulgent ice cream sandwich. 

CAKE INGREDIENTS
1/2 c unsweetened cocoa
2 c flour
1 1/2 tsp baking soda
1/2 tsp baking powder
1/2 tsp salt
1/2 c vegetable oil
1 c sugar
1 egg
1 c whole milk
2 tsp vanilla

MARSHMALLOW FILLING INGREDIENTS
1 c powdered sugar
1/2 c unsalted butter, softened 
1 tsp vanilla extract
1 1/2 c marshmallow creme/fluff

STEPS

  • Preheat the oven to 400º. 
  • Line a couple of baking sheets with parchment paper or a silicone mat.
  • Stir together the cocoa, flour, baking soda, baking powder, and salt in a medium bowl and set aside. 
  • In a separate mixing bowl, beat together the vegetable oil, sugar, egg, milk, and vanilla extract until well integrated.
  • Slowly add the dry ingredients to the mixing bowl and beat until just combined. 
  • Scoop large equal sized spoonfuls of batter onto the lined baking sheet keeping them a couple of inches apart.
  • Bake the “cakes” for about 6–7 minutes. Make sure they are puffed up and looked cook through but don’t overcook them.
  • Using a spatula, immediately transfer the cakes to a cooling rack and allow them to cool completely.
  • Prepare the marshmallow filling by beating together all the powdered sugar, butter, and vanilla until nice and smooth. Gradually add the marshmallow creme until it is mixed in. (If the frosting doesn’t seem thick enough, add in a bit more powdered sugar a little at a time. You want it to be about the consistency of frosting.)
  • Take one of the cakes, turn it upside down, and put a nice sized dollop of the marshmallow filling in the center of the underside of the cake. (If your filling is squishing out from the weight of the cake on top, you can place the filling in the fridge for about 30 minutes. The butter chilling will help to thicken it up.)
  • Place a matching cake flat side down on top of the filling and push it down to spread the filling evenly from edge to edge. I like my filling to be about 1/2” thick.
  • Repeat until all the pies are complete!

If you like this recipe, check out my recipe for Carrot Cake Whoopie Pies which are made with a cream cheese marshmallow filling. 

Sweet Treats

Recipe—Sweet Cherry Chip Dip

Does anyone else have a weakness for fruit and chocolate besides me? I love the combination. I will eat chocolate covered bananas, strawberries, mandarins, apples, cherries, you name it. I wont discriminate. Now add in cream cheese, mind blown!

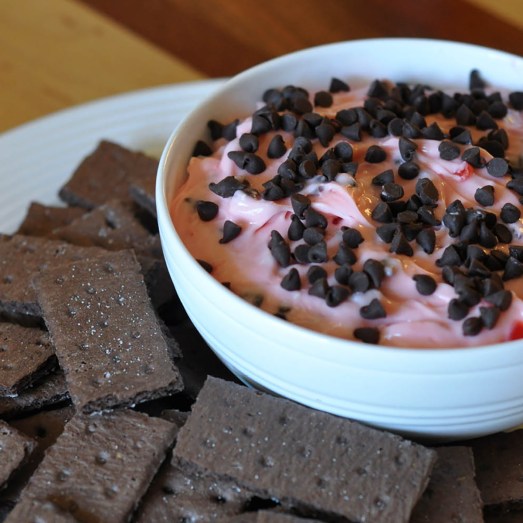
This dip combines the sweet creaminess of a cheesecake with the flavor of cherries and the crunchiness of chocolate chips giving you the best dessert dip ever! I warn you though, if you are like me you will be eating this by the spoonful. (I can sometimes be a pig like that.) I like to serve this with chocolate graham crackers but you can serve it with anything you want. Nilla wafers, animal crackers, Oreos, etc. Go crazy with your dipping vessles! It is perfect to bring to a party and your friends will appreciate the unique dessert that is easy to serve and sure to be enjoyed by all!

Note: This will thicken up once refrigerated. I like to take it out about a half hour before I serve it so that it isn’t so firm that it breaks the crackers when dipping.

INGREDIENTS
8 oz cream cheese, softened
1/4 c butter, softened
1/2 c maraschino cherry juice (the liquid from the jar of cherries)
2 1/2 c powdered sugar
1/2 c maraschino cherries, chopped
1 c mini chocolate chips, divided
Chocolate graham crackers or similar item for dipping

STEPS

  • In a large mixing bowl beat together the cream cheese and butter until well combined.
  • Add in the maraschino cherry juice and powdered sugar until well combined and smooth.
  • Fold in the chopped cherries and 3/4 cup of the mini chocolate chips.
  • Transfer to a serving bowl and sprinkle with the remaining chocolate chips.
  • Refrigerate until ready to serve.

Recipe adapted from Shugary Sweets.

If you like that, then maybe you will love this!

Funfetti Cake Batter Cookie DipFunfetti Cake Batter Cookie Dip

Sweet Treats

Recipe—Snickers Cake

This cake should be called the Devil’s cake. Because that is exactly what it is. It will suck you in and you won’t be able to resist it’s evil chocolately goodness! My husband loves his sweets but isn’t much of a cake guy. (How did I ever marry him?!?!) Just kidding, I love my husband, so much so that I was on the hunt for the PERFECT birthday cake for him. One of his favorite candy bars is a Snickers so I knew if I could make a cake that even remotely resembled a Snickers bar, he would probably like it. I think I gained 10 pounds just making this cake because I was indulging myself while putting it together. That is part of being a good cook right? Taste everything you serve. Well I did. I tasted the cake batter, the caramel sauce, the chocolate chips, the chopped snickers, the whipped cream, etc. I was so bad, and it was soooo good! Every layer of it! If you are or have a Snickers lover in your family bake them this cake. They will love you forever, unless they are on a diet. This is a fabulous cake, not a diet cake.

Note: This cake can be made a day ahead of time and stored in the refrigerator until ready to serve.

INGREDIENTS
16.5 oz box of Duncan Hines Devil’s Food cake mix
1 c water
1/3 c vegetable oil
3 eggs
14 oz can sweetened condensed milk
12 oz jar Smucker’s Hot Caramel ice cream topping sauce
1 c chocolate chips
1 pt heavy whipping cream
1/2 c powdered sugar
1 tsp vanilla
4 Snickers candy bars, chopped
1/2 c peanuts, coarsely chopped
caramel sauce
chocolate sauce

STEPS

  • Preheat oven to 350º.
  • In a large mixing bowl beat together the cake mix, water, oil, and eggs at medium speed for 2 1/2 minutes.
  • Pour the cake batter into a greased 9” x 13” Pyrex.
  • Bake the cake for 25–30 minutes or until a toothpick comes out clean when inserted in the middle.
  • While the cake is baking mix together the condensed milk and jar of caramel sauce until thoroughly blended.
  • When the cake is done cooking, but still hot, poke 20–30 holes in the cake using a straw.
  • Pour the caramel sauce over the entire cake.
  • Allow the cake to finish cooling completely.
  • Sprinkle the chocolate chips over the top of the cake.
  • In a medium mixing bowl beat together the whipping cream, powdered sugar, and vanilla at high speed until it is nice and thick, about 3–5 minutes.
  • Fold the chopped Snickers into the whipped topping.
  • Spread the whipped topping over the top of the cake.
  • Sprinkle the chopped peanuts over the top and drizzle with caramel and chocolate sauce.
  • Place in the refrigerator until ready to serve.

Recipe adapted from Plain Chicken.

Sweet Treats

Recipe—Divine Chocolate Cups

I can give you four reasons why this is the perfect dessert recipe, it is ridiculously easy to make, it looks fabulous, each person gets their own little serving, and you can make it in advance. What more do you need?!? Oh yeah, and it is absolutely delicious! Okay, so there are five reasons why you must try this recipe.

This has got to be one of the best dessert recipes I know and it only takes about five minutes to make. Not only is it incredibly quick and easy, but you probably already have the majority of the ingredients in your kitchen as well. This is perfect if you are looking for something rich and chocolaty. I think of this as a cross between grown up pudding and chocolate mousse. This recipe makes two large servings or four small. If you don’t have any individual dessert serving dishes try putting it in champagne or wine glasses for a fun twist.

Note: Whip crème can be made at the same time as the chocolate cups and stored in the refrigerator covered until you are ready to enjoy or you can make it right before serving.

DIVINE CHOCOLATE INGREDIENTS
2/3 c milk (I prefer whole)
1 egg
2 tbsp sugar
pinch of salt
1 c semisweet chocolate chips
2 tbsp Frangelico (Disaronno, Grand Marnier, and Kahlua are also delicious!)
raspberries and chocolate shavings for garnish (optional)

STEPS

  • Bring milk just to a boil. (You can either do this in a small saucepan over the stovetop or in the microwave.)
  • In a blender combine egg, sugar, salt, chocolate chips, and liqueur.
  • Blend using a low setting.
  • Carefully pour in the hot milk in a slow stream. The hot milk melts the chocolate and cooks the egg.
  • Blend mixture until smooth and creamy making sure there are no chocolate chips remaining, about 1 minute.
  • Pour into your serving dishes.
  • Place serving dishes in the fridge and allow to cool for a couple of hours.
  • When ready to serve top with your whip crème and garnish with raspberries and chocolate shavings.


WHIP CRÈME INGREDIENTS
1 c heavy whipping crème
4 tbsp powdered sugar

STEPS

  • Using a hand mixer beat the whipping crème and sugar together on high for 2–3 minutes or until whip crème is desired consistency. (I like mine really thick.)
  • Store in refrigerator until ready to use, or serve immediately if chocolate has already set.