Sweet Treats

Recipe—Peach Crisp

Peach Crisp

Okay, so I am on a total peach kick here. Hopefully you didn’t miss the recipe I posted last week for Peach Margaritas. I am still recovering from those! 

Now, in my opinion, the peach is the epitome of summer fruit. I just love that this time of year when I walk into the produce section or I’m at the farmers market, I get hit with a wall of the sweet sweet smell of stone fruit. Peaches, apricots, nectarines! Yum! There is just something about that sweet fleshy fruit that is so good anyway you have them.

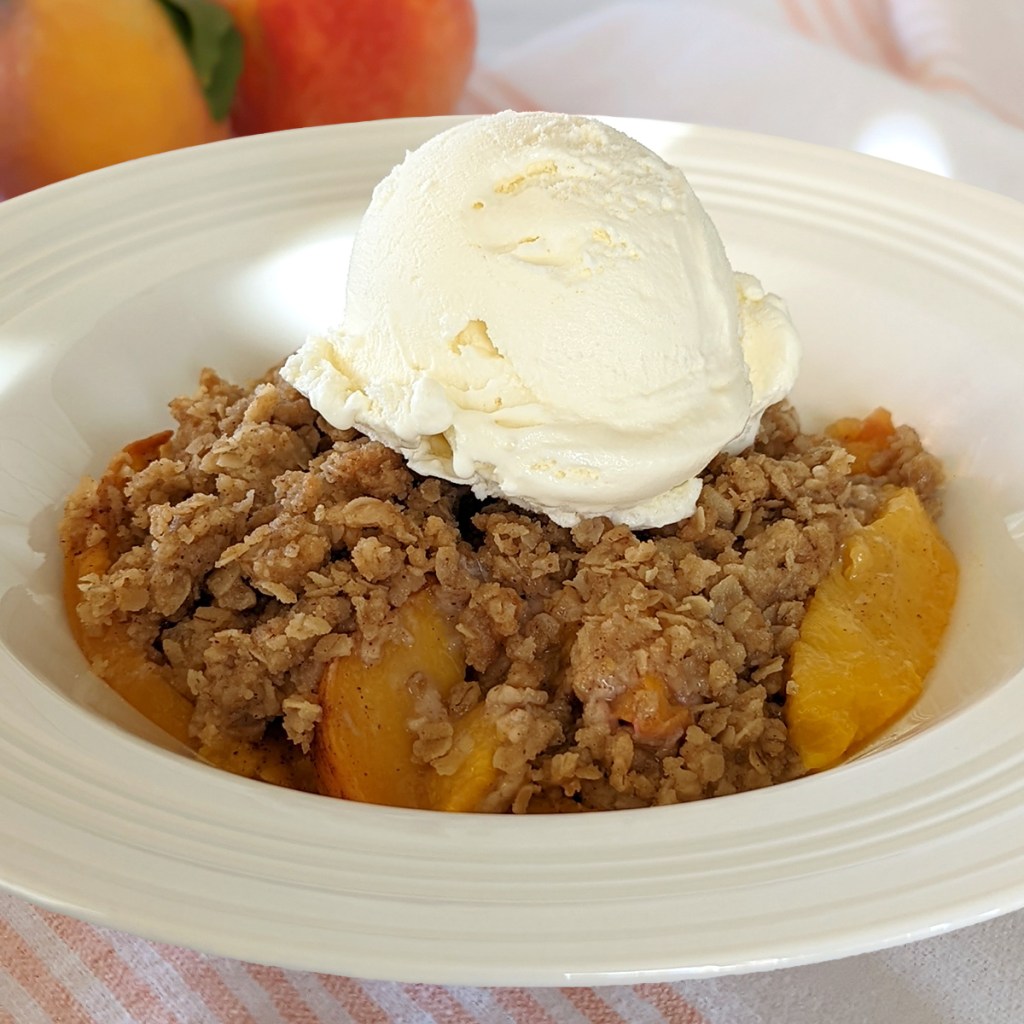
Now when it comes to baking with peaches, I am all about a homecooked peach crisp, not a cobbler. When cooked, peaches get super soft so I like that sweet oatmeal baked to a nice crisp on top with a little bit of cinnamon. This is such a simple recipe, and you just can’t beat it hot out of the oven with a scoop of vanilla ice cream. I could eat it for breakfast, lunch, dinner, and dessert. Trust me, you will want to too!

Note: As much as I love using fresh peaches in my crisp, I want to be able to have peach crisp year round and you can really only get good quality peaches during the summer. So, with that said, I give you permission to substitute canned or frozen peaches in this recipe. If you want to use canned, make sure to completely drain them and if you use frozen, add 10 minutes to the cooking time. 

PEACH FILLING INGREDIENTS
6–8 peaches, sliced
2 tablespoons butter, melted
1/2 tsp cinnamon
2 tbsp cornstarch

CRISP INGREDIENTS
1/2 c old fashioned oats
1 c flour
1/2 tsp cinnamon
3/4 c butter, softened

STEPS

  • Preheat oven to 350º.
  • In a large bowl combine all the filling ingredients and gently fold making sure not to pulverize the peaches.
  • Transferthe fruit mixture to the bottom of a greased 13” x 9” baking dish and evenly spread out. 
  • In that same bowl, mix together the oats, flour, and cinnamon.
  • Add the softened butter to the oat mix and using your hands, or a large electric mixer with a paddle, combine everything until it is all evenly mixed and nice and crumbly. 
  • Distribute the oatmeal topping over the top of your fruit. (It is okay if it is all rough and crumbly. Do not push or pat it down.)
  • Bake uncovered for 30–35 minutes. 
  • Remove from oven and allow it to cool for 10 minutes. 
  • Serve in bowls topped with vanilla ice cream or whip cream.
Sweet Treats

Recipe—Lemon Italian Ice

If you think a cold glass of lemonade is refreshing on a hot summer day, wait until you try this frozen treat, Lemon Italian Ice! There is no comparison. This is better, hands down. Your kiddos will think so too.

My son and I make this during the summer and it is the most refreshing thing I have probably ever had. The lemon mixture with fresh zest is just the perfect amount of tart and sweet and it is crazy how light and fluffy it is! Absolute heaven! 

I absolutely love how easy this recipe is to make. So easy that my 11-year-old does most of the work. I pretty much just zest the lemons and he does the rest. Plus, it is basically 4 ingredients. Fresh lemons, sugar, salt, and water. So simple and relatively healthy compared to other frozen treats.

So as the weather warms up and you are looking for creative ways to cool off, give this a try. It is sure to do the trick!

Notes: 

  • The trick to making this is to work quickly when you are processing the frozen cubes and keep the fluffy ice from melting. We had a container ready to go in the freezer and as soon as I emptied each batch from the blender to the container, it went back into the freezer. This really kept it light and fluffy and it never froze together. 
  • To get 1 1/2 cups of fresh lemon juice, you will probably need between 8–10 lemons.
  • This makes a pretty decent sized batch so you can easily get 6–8 servings out of it. 

INGREDIENTS
grated zest from 2 lemons
1 1/2 c fresh squeezed lemon juice
1 c sugar
1/4 tsp kosher salt
2 c water

GARNISHES (optional)
fresh raspberries
fresh mint leaves

STEPS

  • In a medium saucepan, combine the lemon zest, juice, sugar, salt, and water.
  • Cook over medium heat, stirring frequently until the sugar is dissolved. 
  • Allow the mixture to cool for about 30 minutes.
  • Pour the liquid into ice cube trays and freeze overnight.
  • Put 6–8 ice cubes at a time into a food processor or blender and pulse until all the cubes are broken up and you have a fluffy mixture.
  • Immediately transfer the “fluffy ice” to serving dishes OR a freezer safe container to be enjoyed later.
  • Repeat this process with the remaining cubes.
  • Garnish your Italian ice with some fresh raspberries and mint sprigs.
  • Store the leftover Italian ice in the freezer in a tightly covered container. 
  • To serve later, remove the Italian ice from the freezer and allow it to sit for 5–10 minutes to help soften it up for scooping. 
Sweet Treats

Recipe—Classic Whoopie Pies

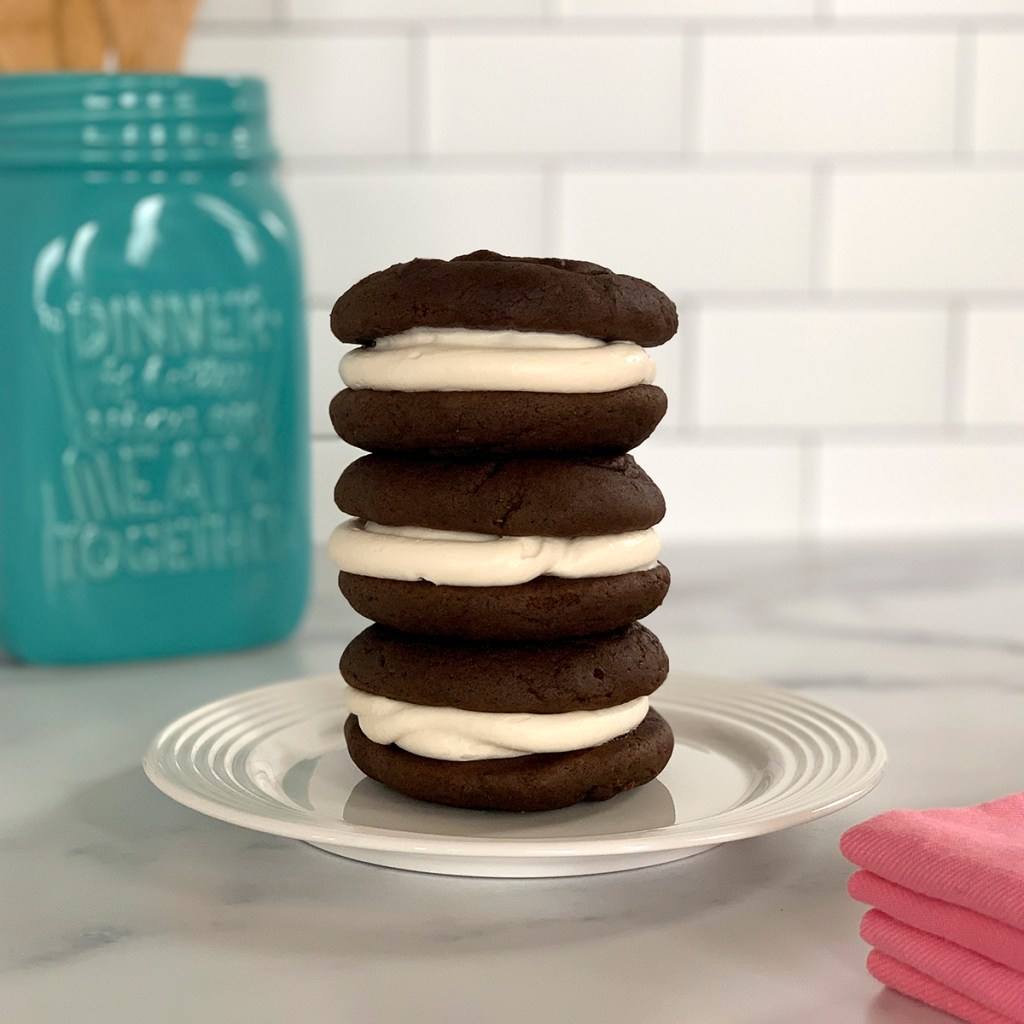
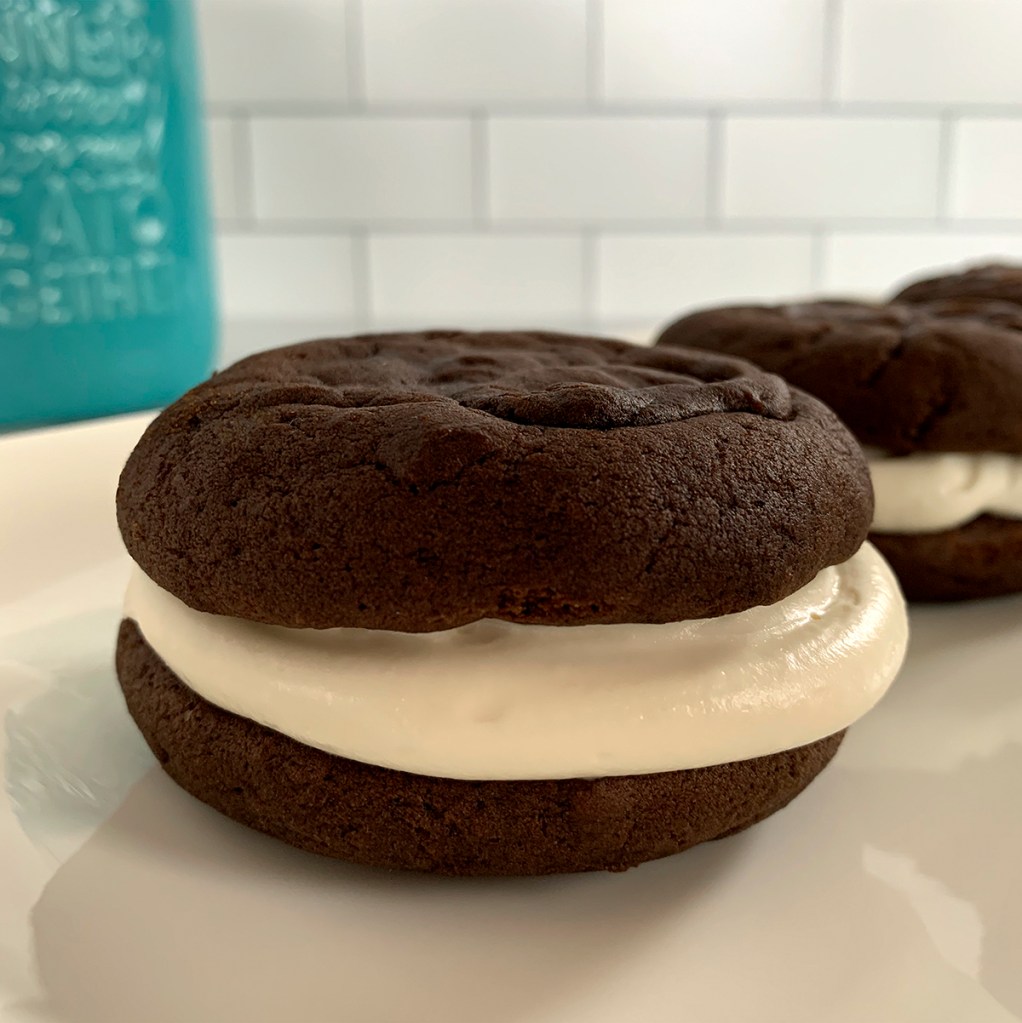
There is something so fun about whoopie pies. That creamy marshmallow filling sandwiched between two fluffy chocolate cakes. Yes, please! 

The other day I saw an article about the history of whoopie pies and it is too cute not to share. According to legend, Amish wives would take leftover cake batter and make the tiny cakes. Husbands and kids would then find the little “pies” in their lunch boxes the next day and would exclaim “Whoopee!” Cute right? That would probably be my reaction if I found one of these in my lunch too.

They may seem complicated but actually are super easy to make. You basically make cookies out of cake batter and just bake them for a few minutes, let them cool, and then fill them with gooey goodness. Oh, and then add a glass of milk or a good stout. 

Notes: 

  • This recipe makes about 10–12 assembled pies. 
  • You can put the marshmallow filling between the cakes just by scooping it on, or I like to use a piping bag with a large tip to get really smooth edges. You can have fun using decorative piping tips too. 
  • Store uneaten whoopie pies in an airtight container in the fridge for best results. Then allow them to come to room temperature for about 10–15 minutes. This will allow the cake to soften back up. My husband and son actually like to keep them in the freezer and they eat them frozen so they are like a super indulgent ice cream sandwich. 

CAKE INGREDIENTS
1/2 c unsweetened cocoa
2 c flour
1 1/2 tsp baking soda
1/2 tsp baking powder
1/2 tsp salt
1/2 c vegetable oil
1 c sugar
1 egg
1 c whole milk
2 tsp vanilla

MARSHMALLOW FILLING INGREDIENTS
1 c powdered sugar
1/2 c unsalted butter, softened 
1 tsp vanilla extract
1 1/2 c marshmallow creme/fluff

STEPS

  • Preheat the oven to 400º. 
  • Line a couple of baking sheets with parchment paper or a silicone mat.
  • Stir together the cocoa, flour, baking soda, baking powder, and salt in a medium bowl and set aside. 
  • In a separate mixing bowl, beat together the vegetable oil, sugar, egg, milk, and vanilla extract until well integrated.
  • Slowly add the dry ingredients to the mixing bowl and beat until just combined. 
  • Scoop large equal sized spoonfuls of batter onto the lined baking sheet keeping them a couple of inches apart.
  • Bake the “cakes” for about 6–7 minutes. Make sure they are puffed up and looked cook through but don’t overcook them.
  • Using a spatula, immediately transfer the cakes to a cooling rack and allow them to cool completely.
  • Prepare the marshmallow filling by beating together all the powdered sugar, butter, and vanilla until nice and smooth. Gradually add the marshmallow creme until it is mixed in. (If the frosting doesn’t seem thick enough, add in a bit more powdered sugar a little at a time. You want it to be about the consistency of frosting.)
  • Take one of the cakes, turn it upside down, and put a nice sized dollop of the marshmallow filling in the center of the underside of the cake. (If your filling is squishing out from the weight of the cake on top, you can place the filling in the fridge for about 30 minutes. The butter chilling will help to thicken it up.)
  • Place a matching cake flat side down on top of the filling and push it down to spread the filling evenly from edge to edge. I like my filling to be about 1/2” thick.
  • Repeat until all the pies are complete!

If you like this recipe, check out my recipe for Carrot Cake Whoopie Pies which are made with a cream cheese marshmallow filling. 

Sweet Treats

Recipe—Blackberry Ice Cream

Blackberry Ice Cream

Homemade ice cream is so easy to make and yet people hardly ever do it. I mean look, 4 ingredients and 3 steps. There is really nothing quite like homemade fresh churned ice cream. As a kid I grew up with an old school hand cranked ice cream maker. My mom would add all the ingredients to the metal container and then we would put it in a wooden bucket and surround that with ice and salt and my sister and I would take turns churning it by hand. Best. Summer. Memories. Ever! Anyone else do that growing up?

Now I have evolved with the times and have a wonderful electrical ice cream maker. You just add in the ingredients, plug it in, and watch it go! I have this one by Cuisinart and LOVE it!

My favorite time to use it is during the summer when we have friends over for a BBQ. The kids always love watching it and they think it is so cool to make their own homemade ice cream!

I’ve tried several different recipes, mint chip, vanilla, mocha almond fudge, cookies and cream, vanilla, and then this blackberry ice cream recipe. I think blackberry has been my all-time favorite! It is truly the flavor of summer.

Blackberry Ice Cream

Notes: I use fresh blackberries but you can always get frozen ones and defrost them. This recipe is for a 2 quart maker so if you have a 5 quart you may want to double it.

INGREDIENTS
3 c blackberries
1 1/2 c sugar
1 pint half and half
1 pint heavy whipping cream

STEPS

  • Combine the blackberries and sugar in a large bowl.
  • Mash all the blackberries and sugar by hand until they are all juicy and syrupy. (You can also place the berries and sugar in a blender if you prefer.)
  • Pour the blackberry mixture, half and half, and heavy whipping cream into your ice cream maker and churn until it is desired thickness.
Sweet Treats

Recipe—Triple Chocolate Parfait

Last weekend we celebrated the hubby’s 35th birthday. (Happy birthday babe!) I wanted to make him a fabulous dessert but he is not much of a cake guy. You may remember this from last year when I shared a recipe for Snickers Cake. He does however like chocolate so I threw together these triple chocolate jars of goodness and they were a real hit! You have the nice cakey layer from the Oreos, a thick rich chocolate pudding layer, and then the Cool Whip combined with pudding creates a lite and airy chocolate mousse. Layer upon layer of tasty goodness! And I am totally loving desserts in mason jars. One of our guests couldn’t finish hers so we just threw a lid on it and she took it home for later. Super convenient and and so cute!

Note: This recipe will make enough to fill four 12 oz mason jars (pictured) or six 8 oz mason jars. These can be made a full day in advance. The Oreos take on a nice cake like consistency the longer they sit. 

INGREDIENTS
5.9 oz box instant chocolate fudge Jell-O pudding
3 1/2 c milk
8 oz container Cool Whip
20 Oreos, crushed

STEPS

  • Prepare instant pudding per package instructions using the milk.
  • Place pudding in fridge and chill for 20 minutes.
  • In a large mixing bowl stir together the container of Cool Whip and about half of the prepared pudding until well combined.
  • Place a heaping spoonful of the crushed Oreos in the bottom of your serving dishes and then top with a couple of tablespoons of the pudding, followed by a couple tablespoons of the Cool Whip mixture.
  • Repeat until the containers are full making sure to finish off with the crumbled Oreos.
  • Chill until ready to serve.
Brunch, Sweet Treats

Recipe—Raspberry Turnovers

Over the summer my mom was coming for a visit and I was trying to think of something fun that we could do outside. I decided to take her, my husband, and son berry picking at Patrick’s Mountain Grown Fresh Berry Farm. It was a total blast!

We ended up picking 12 pounds of delicious raspberries and blackberries.

Within 24 hours of picking we made raspberry jam, blackberry jam, blackberry ice cream, blackberry cobbler, mixed berry hand pies, and these tasty raspberry turnovers. (Don’t worry, I will eventually get around to sharing all of those fabulous recipes.) We ended up making these for breakfast and oh my goodness were they tasty! The perfect balance of sweet and tart. While it may not be berry season right now, you can most certainly find some at your local market. So please, give these a try. They are the perfect treat for breakfast or dessert.

Note: If you don’t think you will eat these all in one sitting, no need to waste. Just freeze some of them! They freeze great and can easily be baked at a later date. Just place any extra unbaked turnovers on a wax paper lined sheet and freeze for at least an hour. Once they are frozen solid, transfer them to an airtight bag or container. When you are ready to cook them just place them on the parchment paper lined baking sheet for 15–20 minutes and then bake as directed below.

INGREDIENTS
1/4 c flour
1 package puff pastry (2 sheets), thawed
1/2 c raspberry jam
1 1/4 c fresh raspberries
1 egg
1 tbsp water
2 tsp sugar

STEPS

  • Spread the flour around your work surface and unfold the puff pastry sheets.
  • Cut each sheet into either 4 or 9 squares. It just depends how small or large you want your turnovers.
  • In a small bowl mix together the jam and raspberries.
  • Place an even amount of the raspberry filling in the center of each square of puff pastry.
  • Fold each puff pastry square in half diagonally gently pinching around the edges to seal.
  • Carefully transfer the turnovers to a parchment paper lined baking sheet as you finish them making sure they are at least an inch apart.
  • Using a the prongs of a fork carefully press down along the unfolded edges “crimping the pastry dough.
  • Whisk together the egg and water and brush the egg wash over the top of each turnover.
  • Sprinkle the top of each with a little bit of the sugar.
  • Using a small paring knife cut one slit in the top to help with venting.
  • Place your baking sheet in the freezer for approximately 15 minutes.
  • Preheat the oven to 350º while the turnovers are chilling.
  • Once they are finished in the freezer and your oven is preheated bake them until they are a nice golden brown, about 18–20 minutes.
  • Transfer to a cooling rack and allow to sit for 5 minutes before serving.
Sweet Treats

Recipe—Chocolate Covered Peanut Butter Truffles

This recipe is definitely an oldie and a goodie. The first time I made these was over 20 years ago when I was a Brownie. We made little boxes of these for our moms for Mother’s Day. (My mom was our troop leader so this is actually her recipe.) These are great for any occasion as individual truffles but you can also have fun with various shapes. Occasionally on Easter, my mom would make us homemade peanut butter eggs. I actually did that this Easter for my son’s teachers.

These are super easy to make and they blow Reese’s out of the water! Come on, you know anything with peanut butter and chocolate is going to be delicious. It is a fun and easy recipe to make, so get the kids involved. What kid doesn’t like to get in the kitchen and use their hands? I hope you and your family love these as much as mine.

Note: Finished truffles should be stored in the refrigerator or freezer. My hubby thinks they are best when frozen.

INGREDIENTS

1 1/2 c creamy peanut butter
4 tbsp butter, softened and divided
3 tbsp light corn syrup
1 tsp vanilla
4 tbsp heavy whipping cream
1 lb powdered sugar
24 oz bag of semi sweet chocolate chips

STEPS


  • In a large mixing bowl beat together the peanut butter, 2 tablespoons of the butter, corn syrup, vanilla, and whipping cream until well incorporated.
  • Add the powdered sugar to the bowl, and using your hands mix until everything is completely incorporated.
  • Pinch off bite size pieces and roll into balls. As you finish the balls place them on a wax paper lined baking sheet.
  • Place the baking sheet in the freezer for at least 30 minutes.
  • Once the balls are frozen, in a medium microwave safe bowl combine the chocolate chips, the remaining 2 tablespoons of butter, and 2 tbsp of water.
  • Microwave the chocolate for 1 minute.
  • Remove the chocolate from the microwave and beat with a fork. If there are still chunks, continue microwaving and stirring in 30 second increments.
  • Once your chocolate is smooth allow it to sit on the counter for a minute.
  • Dip each frozen ball into the melted chocolate and turn until evenly coated and place back on the wax paper covered baking sheet. (I find using a fork works great to remove the balls from the melted wafers so that the extra chocolate can drip off between the prongs.)
  • Once you have finished dipping all the balls place the baking sheet back in the freezer so that the chocolate can set.
  • Enjoy!

Sweet Treats

Recipe—Peanut Butter & Jelly Bars

Peanut and butter jelly sandwiches are an American classic. I love PB & Js! And by love I mean I REAAAALLLLLLY love them! I ate more peanut butter and jelly sandwiches during my pregnancy than the typical American child does in their first 10 years of life. There is just something so nostalgic about smooth peanut butter squished together with a layer of sweet sticky jelly. It is one of those items that takes me back to being a little girl on the playground. When I saw this recipe for peanut butter and jelly bars I knew they had to be mine! My son’s school had a bake sale coming up and I knew it was the perfect occasion to make these. Come on? Toddlers… peanut butter and jelly… they belong together! These bars turned out fabulous! The cookie layer is almost brownie like, the moistest peanut butter cookie you have ever had and then of course you have the layer of jelly and then just the right amount of crunch from the honey roasted peanuts on top. Superb when served with a big cold glass of milk. I may have a new addiction.

Note: These can be tricky to cut when still warm so be sure to allow for adequate chilling time. Otherwise you may find that the bars sort of crumble.

INGREDIENTS
1 c butter, softened
1 1/2 c sugar
2 eggs
2 1/2 c creamy peanut butter
1 tsp vanilla
3 c flour
1 1/2 tsp salt
1 tsp baking powder
2 c of your favorite jelly (I used Strawberry)
1 c honey roasted peanuts, chopped

STEPS

  • Preheat oven to 350º.
  • In a large mixing bowl beat together the butter and sugar for 2 minutes.
  • Add in the eggs, peanut butter, and vanilla and beat for another 2 minutes making sure it’s completely combined.
  • In another bowl combine the flour, salt, and baking powder.
  • Add the dry ingredients to the wet ones and fold in using a rubber spatula until completely combined.
  • Line a 9” x 13” baking dish with parchment paper going both directions and spray parchment paper with cooking spray.
  • Transfer 2/3 of your dough to the prepared baking dish and spread the dough out evenly.
  • Press the dough down firmly in the bottom of the entire baking dish making sure it’s even thickness all over.
  • Place the jelly in a small microwave safe bowl and warm it in the microwave for 1 minute and stir using a fork (this really seems to help in spreading it out).
  • Using a rubber spatula spread the warmed jelly over the top of the cookie dough making sure the dough is completely covered.
  • Using your hands, crumble the remaining dough over the top of the jelly.
  • Sprinkle the chopped peanuts over the top.
  • Bake until golden, about 50–60 minutes.
  • Remove the pan from the oven and set on a trivet to cool for 30minutes.
  • Holding onto the parchment paper, carefully lift the entire contents of the dish and transfer to a large cutting board.
  • Refrigerate the whole dish for 1–2 hours making sure it is completely cool before trying to cut into bars.
  • After bars have cooled cut into squares using a sharp knife or even a pizza wheel.
  • Store in an airtight container at room temperature.