Sweet Treats

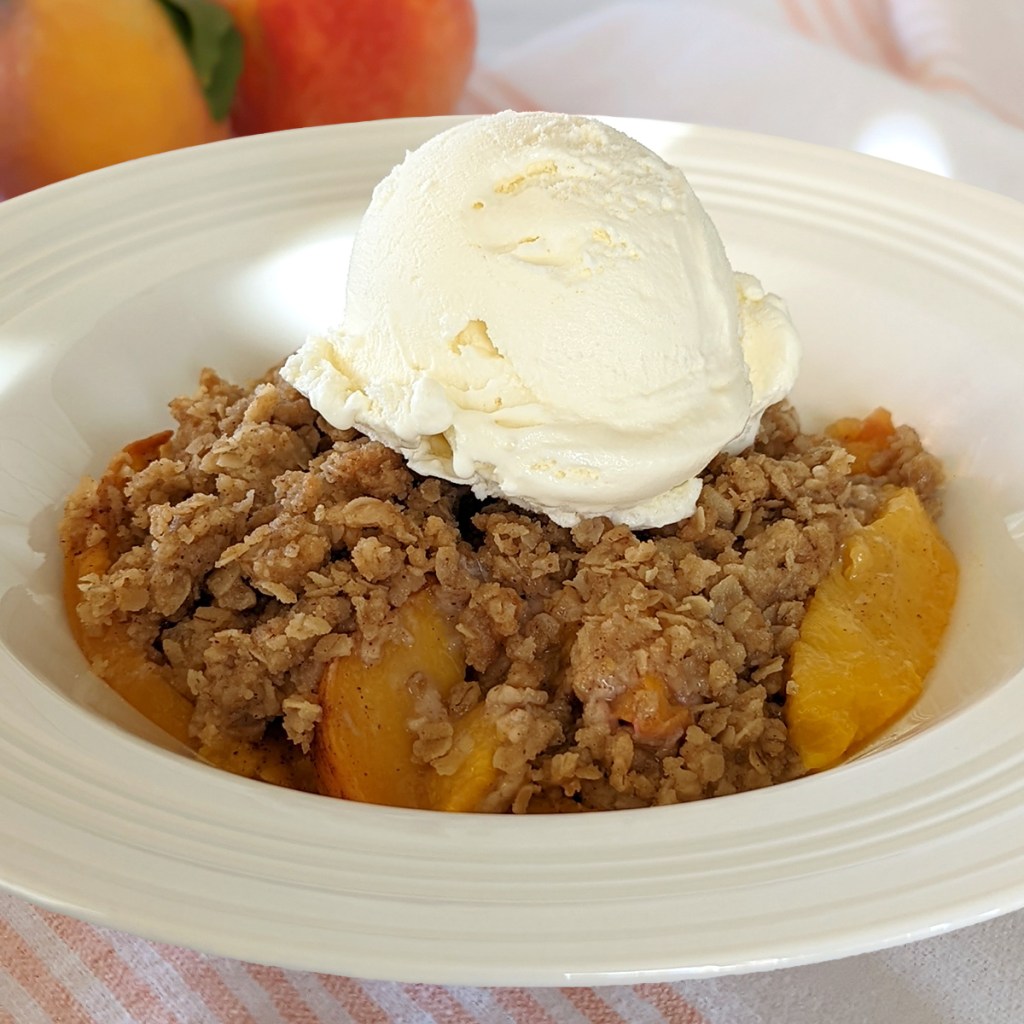
Recipe—Peach Crisp

Peach Crisp

Okay, so I am on a total peach kick here. Hopefully you didn’t miss the recipe I posted last week for Peach Margaritas. I am still recovering from those! 

Now, in my opinion, the peach is the epitome of summer fruit. I just love that this time of year when I walk into the produce section or I’m at the farmers market, I get hit with a wall of the sweet sweet smell of stone fruit. Peaches, apricots, nectarines! Yum! There is just something about that sweet fleshy fruit that is so good anyway you have them.

Now when it comes to baking with peaches, I am all about a homecooked peach crisp, not a cobbler. When cooked, peaches get super soft so I like that sweet oatmeal baked to a nice crisp on top with a little bit of cinnamon. This is such a simple recipe, and you just can’t beat it hot out of the oven with a scoop of vanilla ice cream. I could eat it for breakfast, lunch, dinner, and dessert. Trust me, you will want to too!

Note: As much as I love using fresh peaches in my crisp, I want to be able to have peach crisp year round and you can really only get good quality peaches during the summer. So, with that said, I give you permission to substitute canned or frozen peaches in this recipe. If you want to use canned, make sure to completely drain them and if you use frozen, add 10 minutes to the cooking time. 

PEACH FILLING INGREDIENTS
6–8 peaches, sliced
2 tablespoons butter, melted
1/2 tsp cinnamon
2 tbsp cornstarch

CRISP INGREDIENTS
1/2 c old fashioned oats
1 c flour
1/2 tsp cinnamon
3/4 c butter, softened

STEPS

  • Preheat oven to 350º.
  • In a large bowl combine all the filling ingredients and gently fold making sure not to pulverize the peaches.
  • Transferthe fruit mixture to the bottom of a greased 13” x 9” baking dish and evenly spread out. 
  • In that same bowl, mix together the oats, flour, and cinnamon.
  • Add the softened butter to the oat mix and using your hands, or a large electric mixer with a paddle, combine everything until it is all evenly mixed and nice and crumbly. 
  • Distribute the oatmeal topping over the top of your fruit. (It is okay if it is all rough and crumbly. Do not push or pat it down.)
  • Bake uncovered for 30–35 minutes. 
  • Remove from oven and allow it to cool for 10 minutes. 
  • Serve in bowls topped with vanilla ice cream or whip cream.
Salads, Side Dishes

Recipe—Red, White, & Blue Potato Salad

Hello grilling season! It is great to have you back in my life! (And all of you amazing followers too!) Nothing says summer like lazy days with friends, sun shining on your skin, hot grilled meat, and some tasty side salads! 

With 4th of July just around the corner it feels like the perfect time to share one of my favorite summer side dish recipes with y’all. This Red White and Blue Potato salad is packed with all my favorite flavors and by favorite flavors, I mean bacon and blue cheese. 

This salad is an amazing complement to any bbq dish, but we especially love it with a nice steak and some red wine. Just something about the way all those flavors come together is top notch. *chef’s kiss*

Note: I like to set aside some of the bacon, blue cheese crumbles, and green onions to garnish the top of the salad with.

INGREDIENTS
3 lbs baby red potatoes, chopped into 3/4” cubes
1/2 cup mayonnaise
1/2 cup sour cream
1/2 tsp dill
1/2 tsp salt  
1/4 tsp ground mustard 
1/2 tsp onion powder  
8 slices bacon, cooked and chopped
3/4 c blue cheese
1/2 c green onion, sliced

STEPS

  • Place the chopped potatoes into a large pot and cover with water. 
  • Bring to a boil and cook for approximately 12–15 minutes, or until the potatoes are soft and tender.
  • Drain the potatoes and transfer them into a large bowl and allow to cool for 30 minutes. 
  • In a medium bowl mix together the mayonnaise, sour cream, dill, salt, ground mustard, and onion powder. 
  • Add the bacon, blue cheese, and green onion to the bowl with the potatoes. 
  • Pour the dressing over the top of the potatoes and other ingredients and stir to combine.
  • Cover and chill for at least 2 hours before serving. 

Here are some other amazing summer side dishes to try out!

Soups

Recipe—Zuppa Toscana 

I have been sitting on this recipe for months now just waiting for the right time of year to share. After getting record amounts of rain in Sacramento this last weekend and it FINALLY feeling like fall, I think we are finally ready for one of the best soup recipes ever! Now I can’t even take credit for this soup recipe. My friend made this Olive Garden “copycat” soup for me back in July when I was recovering from a medical procedure, and I was absolutely smitten. I had to ask for the recipe and made it for my family less than a week later. It is now a family fave. I just absolutely love that spicy sausage with the rich creamy broth and the loads of kale. (Not gonna lie, the kale makes me feel like I am eating healthy.)

Note: If you are watching your carbs you can easily leave out the potatoes for a fantastic low carb soup. 

INGREDIENTS

12 oz pack of bacon, chopped
16 oz hot Italian sausage, ground
1/2 yellow onion, chopped
2 tbsp garlic, minced
64 oz chicken broth
5 medium potatoes, cubed into 1/2″ squares
2 bunches kale, stems removed and leave chopped
1 pint heavy cream
2 tsp salt
1 tsp ground pepper
freshly grated parmesan

STEPS

  • Add the bacon to a large pot and cook over medium-high heat.
  • When the bacon is cooked to desired doneness, remove it from the pot and set aside.
  • Add the sausage to the pot breaking it up as it cooks.
  • Once the sausage is cooked through, drain off most of the grease leaving about 1–2 tablespoons.
  • Add the chopped onions and garlic to the pot with the sausage and cook stirring occasionally until the onion starts to brown, about 5–6 minutes.
  • Add the broth and potatoes to the pot and bring to a boil.
  • Simmer the soup for about 15–20 minutes or until the potatoes are just fork tender. 
  • Add the kale, cream, salt, and pepper to the pot and simmer for another 5–10 minutes. 
  • Ladle the soup into bowls and top with parmesan. 
Salads, Side Dishes

Recipe—Creamy Dill Red Potato Salad

Summer is upon us! Well not quite, but we are so close! I can literally smell it! The smell of grilled meat has infiltrated the warm evening air in my subdivision and I am itching for a good ol’ fashioned cookout.

One thing I absolutely love about summer BBQs are all the cold salads. Macaroni salads, potato salads, mmmmmmm… mmmm… mmmm! (I really should not write these posts when I am hungry because right now, I am salivating just thinking back to this potato salad.)

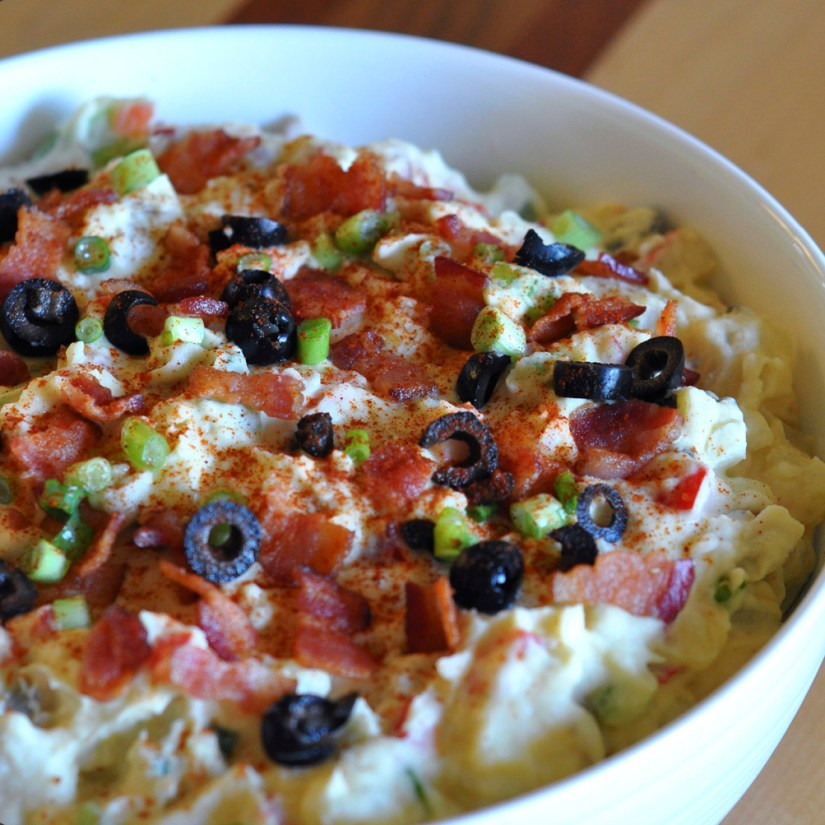
I have a go to potato salad that is loaded with bacon, olives, bell peppers, onions, and so much more and it is amazing, but sometimes I am looking to mix it up with something a little more simple and lighter. 

The red potatoes really come out fluffy and then the super creamy dressing is a little tangy from the vinegar and sour cream and then you have this delicious dill flavor. So simple and so lite. Perfect for these warm summer days!

INGREDIENTS
8 large red potatoes, diced
1 c sour cream
1 c mayonnaise
1/2 c red wine vinegar
1 1/2 tsp dill
salt and pepper
4 green onions, chopped

STEPS

  • Add 1–2 tablespoon of salt to a large pot of water and bring to a boil.
  • Add the diced potatoes and boil for 10–14 minutes or until fork tender.
  • While the potatoes are boiling whisk together the sour cream, mayonnaise, vinegar, dill, salt and pepper in a small bowl.
  • When the potatoes are done cooking drain them in a colander and transfer to a large bowl.
  • Add most of the green onions (saving a handful for garnish) and dressing and toss to coat. 
  • Garnish with the leftover green onions and a little bit of the dill.
  • Cover with a lid or saran wrap and refrigerate for at least 4 hours. The longer it rests, the better the flavors.

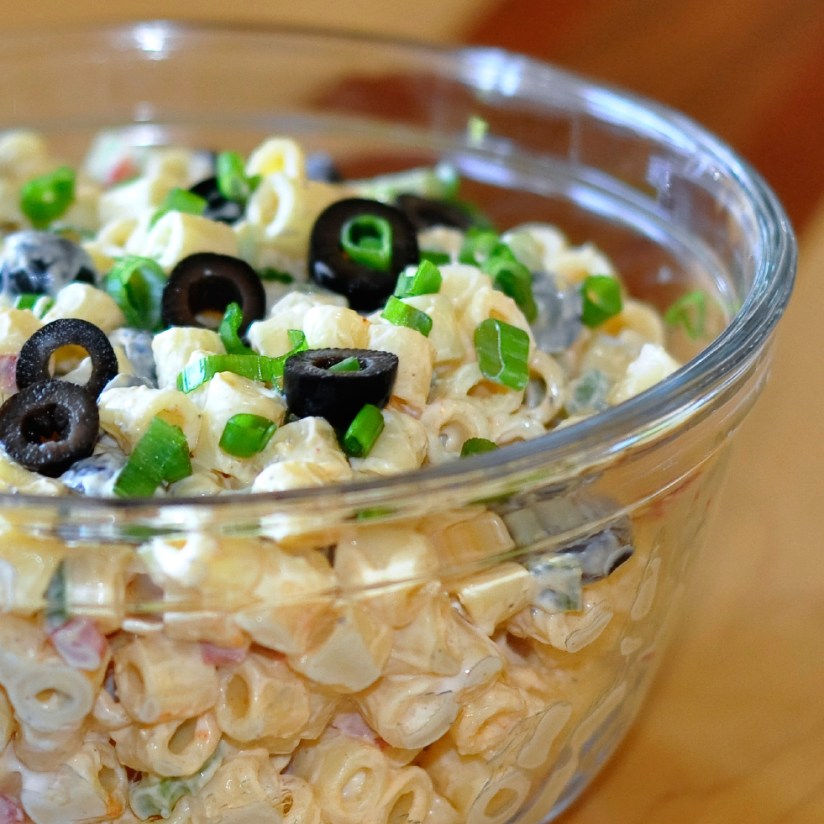
If you like this recipe, then I highly recommend you check out these other awesome salads that make for great additions to your BBQ menu!

Italian Pasta Salad

Italian Pasta Salad

Classic Macaroni Salad

Classic Macaroni Salad

Orzo Pesto Pasta

Orzo Pesto Pasta

Dinners, Soups

Recipe—Keto White Chicken Chili

Okay, you may be thinking, “Why is this Diva posting a chili recipe as the weather is warming up? Isn’t chili a cool weather dish?” Here is my response, this is probably one of the best keto meals I have ever had, and the flavors are so good that I absolutely eat this any time. Plus, it is just so easy to make, and in my opinion, an easy one pot recipe is welcome year-round.

I have been “doing keto” since June 2020 and am down 33 lbs. Yay me! Now don’t worry, this blog is not suddenly turning keto. I am just all about offering variety to my followers and I could not keep this recipe to myself, it is just too good! If you are a long time follower, you know my blog is anything but a keto or diet blog.

Now even if you aren’t on a ketogenic diet, you can absolutely enjoy this recipe as is, or what I do for my husband and son who are full on carbivores (I just made that up), is split the cooked chili into two batches after it is all cooked. One keto batch for me, and one carb loaded version for them. I have integrated carbs two different ways for them. One time I added a can of white cannellini beans to their chili and another time I served this over a bowl of cooked rice. Both of those options were very well received.

Hope you love this recipe as much as I do because it is definitely one of my new favorite “go tos”.

INGREDIENTS
2 tbsp olive oil
1 lb ground chicken (or turkey)
2 tsp cumin
1 tsp oregano
1/4 tsp cayenne pepper
salt and pepper
4 tbsp butter
1 green bell pepper, diced
1/2 a yellow onion, diced
2 tsp garlic, minced
1 jalapeño, deseeded and chopped
1 1/2 c chicken broth
4 oz cream cheese
1/2 c heavy cream
4.5-ounce can diced green chiles, drained

GARNISHES
avocado
cilantro
cotija cheese, crumbled

STEPS

  • Heat the olive oil in a large pot over medium high heat and add the ground chicken breaking it apart as it cooks.
  • Season the meat with cumin, oregano, cayenne pepper, salt and pepper and continue cooking until it is almost cooked through.
  • Add the butter, bell pepper, onion, garlic, and jalapeño to the pot.
  • Sauté until all the veggies are cooked through and tender, about 5–10 minutes.
  • Add the broth to the pot and bring to a simmer.
  • Simmer for 10 minutes and then add the cream cheese, heavy cream, and green chiles.
  • Continue simmering for another 15 minutes stirring every once in a while, making sure that the cream cheese melts and is nicely integrated.
  • Garnish with avocado, cilantro, and crumbled cotija cheese.
Soups

Recipe—20 Minute Sausage, Spinach, & White Bean Soup

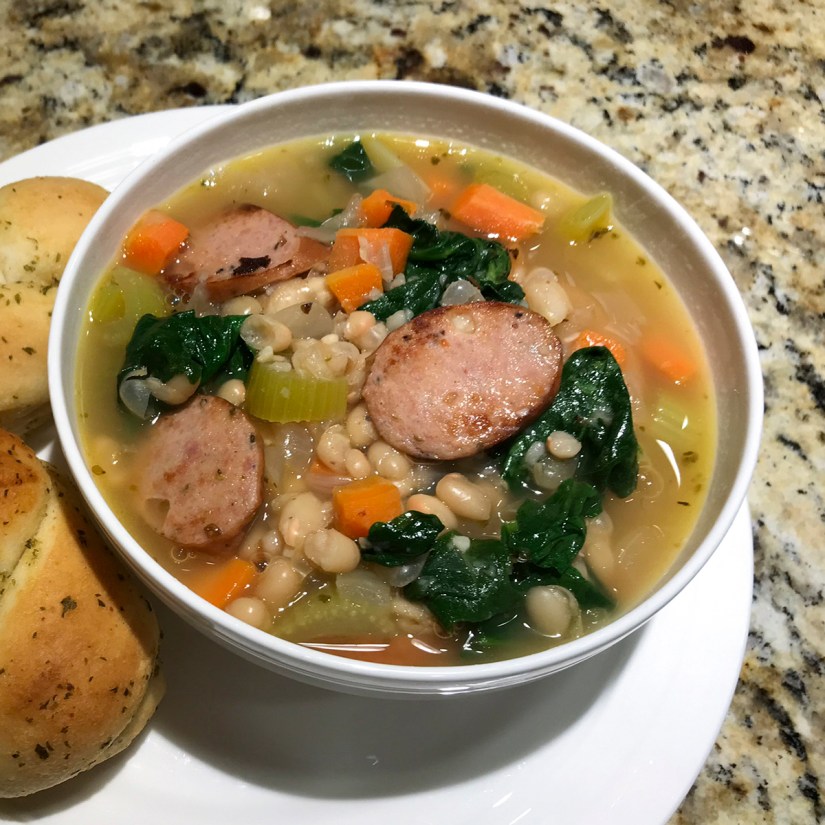
20 Minute Sausage, Spinach, & White Bean Soup

Hello cold weather! It is finally starting to feel like winter out here in California. Just this week we finally have some back to back days of rain and some serious wind going on and I freaking love it! It’s the kind of weather that just makes you want to wrap yourself in a heavy blanket and eat hearty bowls of soup all day long. This soup recipe is awesome because there is so much good flavor and it is really filling, and best of all, it is one of those meals that you can have on the table in 20 minutes. You do not have to be a well-versed chef to make this. You are basically just adding ingredients to a pot and letting your stove do the rest of the work. Sounds like the perfect lazy rainy-day meal to me!

Note: If you have a busy week ahead, chop the onion, carrots, and celery over the weekend and store in a container or a zip loc bag so they are ready to go!

INGREDIENTS
1 tbsp olive oil
1 (12.8-ounce) package smoked andouille sausage, thinly sliced
3 cloves garlic, minced
1 onion, diced
3 carrots, peeled and diced
2 stalks celery, chopped
6 c chicken broth
2 (15-ounce) cans Great Northern beans, drained and rinsed
1/2 tsp dried oregano
2 bay leaves
salt and pepper
3 c baby spinach

STEPS

  • Heat the olive oil in a large pot over medium high heat.
  • Add the sausage to the pot and cook until lightly browned, about 3-4 minutes making sure to stir occasionally.
  • Add the garlic, onion, carrots, and celery to the pot and cook for another 3–4 minutes making sure to stir occasionally.
  • Add the broth, beans, oregano, bay leaves, salt and pepper to the pot and bring to a boil.
  • Reduce the heat to medium low and allow it to simmer for 8–10 minutes.
  • Add the baby spinach to the pot and continue cooking for another 1-2 minutes or until the spinach has wilted.
  • Ladle into bowls and enjoy!
Brunch

Recipe—French Toast Casserole

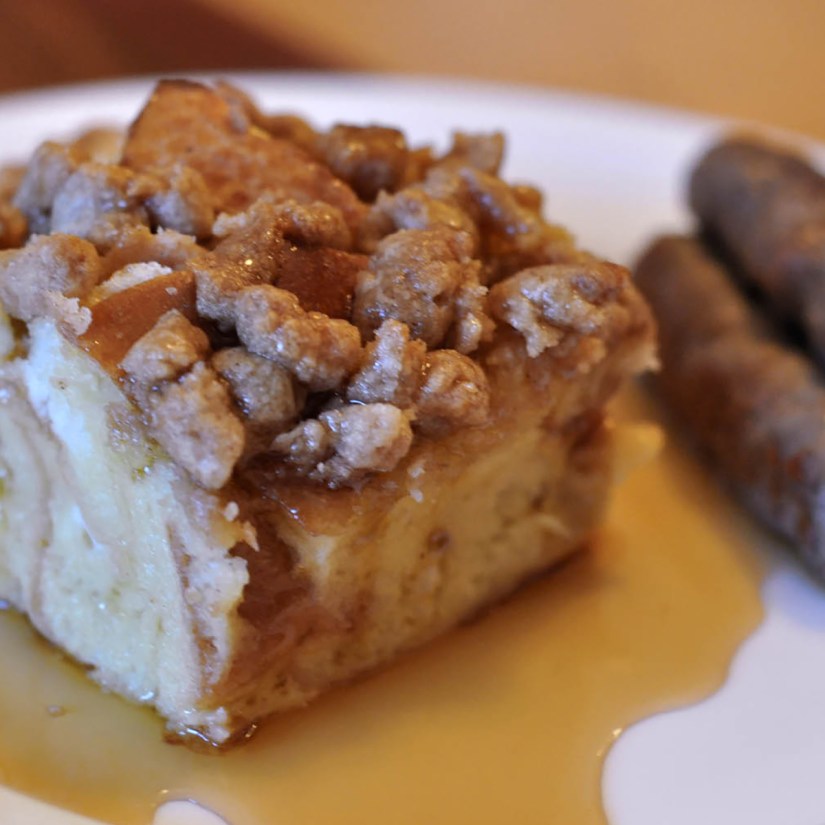
French Toast Casserole

Christmas morning can sometimes be a bit chaotic with hustle and bustle of gift giving, cleaning up of all the shreds of paper and ribbon, and then sometimes the mad dash to clean the house before relatives arrive for round two of Christmas. At least that’s how it is in our home. However, on Christmas morning I always want to sit down and have a nice breakfast with my crew, I just don’t always have the time to make a big Christmas worthy breakfast. However, I do have the time to throw a casserole in the oven. So here you have French Toast Casserole to save the morning!

Several years back I posted a recipe for Blueberry French Toast Casserole. Not to toot my own horn, but toot toot! It’s amazing if you haven’t given it a try. What I love about french toast casserole is you can prep the dish the day before, throw it in the oven in the morning, and boom! Just like that you have a hot and delicious breakfast with almost no work. This recipe has all that delicious cinnamon goodness baked into a sweet bread pudding with a crispy streusel topping. It is so tasty!

So if you are looking for a quick and easy breakfast that you can make in advance, then this is the recipe for you.

French Toast Casserole

INGREDIENTS
12 slices sourdough bread (or a sourdough loaf), cut into 1” cubes
10 eggs
2 c milk
1/2 c heavy cream
2 tbsp vanilla extract
1/2 c sugar
1 c brown sugar, divided
1/2 c flour
1 tsp cinnamon
1/2 c cold butter, cut into small pieces

STEPS

  • Cut the loaf of sourdough into cubes and distribute them in a greased 9” x 13” pan.
  • In a large bowl whisk together the eggs, milk, cream, and vanilla.
  • Whisk in a 1/2 cup of the brown sugar and all the granulated sugar to the egg mixture
  • Pour the egg mixture over the bread.
  • Using your fingers or the back of a spatula gently press all of the bread pieces down into the egg mixture.
  • Cover the baking dish with foil and place in the fridge 8 hours or overnight.
  • For the streusel topping, in a medium bowl, mix together the other 1/2 cup of brown sugar, flour, cinnamon.
  • Add the cut-up butter to the topping mix and using a large fork or pastry cutter mix it all together until it is a nice crumbly consistency.
  • Store the streusel in a Ziploc bag in the fridge until ready to bake.
  • When ready to bake, remove the casserole dish and streusel from the fridge and allow it to sit on the counter for about 30 minutes.
  • Preheat oven to 350º.
  • Sprinkle the streusel topping over the french toast.
  • Cover the dish back up with foil and bake for 45 minutes.
  • Remove the foil and continue baking until the top is a nice golden brown and the egg mixture is set, about an additional 15–20.
  • Remove from oven and allow it to cool for 5 minutes.
  • Cut and serve with a pat of butter and some warm syrup.
Sweet Treats

Recipe—Craisin White Chocolate Chip Oatmeal Cookies (AKA Santa’s Favorite)

Craisin White Chocolate Chip Oatmeal Cookies

One of my favorite things about Christmas is all the traditions that go along with it. Gingerbread house building, baking, listening to Christmas music, hanging the stockings, you catch my drift. There is just so much magic in the month leading up to Christmas. Well, ever since my son with 10 months old we have taken him for annual photos with Santa. They are all framed and sit in chronological order (have a mentioned I have OCD tendencies before? LOL) along the entertainment center leading up to Christmas.

Santa

This year he is 10 years old and he still wanted to go take a pick with Santa. With COVID I didn’t think we could make that happen but sure enough, we found a place that was doing physically distanced photos by appointment only. Yay! Anyways, ever since my son could talk he would make sure to ask Santa what kind of cookies he wanted us to leave out for Christmas, it never fails, he ALWAYS says oatmeal. Now one thing I will fess up to is that I despise raisins! I cannot eat them! Even as an adult I will pick them out of trail mix. I refuse to contaminate a good oatmeal cookie with raisins! However, I do love me some craisins. So, ever since that first time Santa said he wanted oatmeal cookies, this recipe made it into the baking rotation. These are delicious, buttery, and just the right amount of chewy and sweet. To me, these cookies are the cookie of Christmas and I guarantee you they are Santa approved!

INGREDIENTS
1 1/2 c flour
1 tsp baking soda
1/2 tsp salt
1/2 c + 6 tbsp butter, softened
3/4 c brown sugar
1/2 c granulated sugar
2 eggs
1 tsp vanilla
3 c oats uncooked
1 c craisins
11 oz white chocolate chips

STEPS

  • Preheat oven to 350°F.
  • In a medium bowl, stir together flour, baking soda, and salt and set aside.
  • In a large bowl, using an electric mixer, beat together the butter and sugars until creamy.
  • Add eggs and vanilla to the butter mixture.
  • Gradually start to fold in the flour ingredients into the butter mixture.
  • Add oats, craisins, white chocolate chips and mix well.
  • Drop dough by the spoonful onto a parchment paper lined baking sheet.
  • Bake for 8–10 minutes or until light golden brown.
  • Allow cookies to sit on the baking sheet for a couple of minutes before transferring to a cutting board or cooling rack.
Uncategorized

How is it December?!?

Happy December 1! Can you believe Christmas is in just a few short weeks! Yikes! But yay! We have officially entered the last month of 2020. Phew!

So I have to ask, who is ready? I am slowly getting there. The tree is up, most gifts purchased (but not wrapped), holiday music has been blaring, and my oven has been working overtime with holiday baking. Now we just need to get those Christmas lights up. *wink wink* husband dearest. 😉

In honor of the holiday season I have some exciting things happening. Next week I am kicking off my first ever Christmas Cookie Week! I will be posting one cookie recipe a day, all next week. That’s right! FIVE new cookie recipes! These will all be my tried and true Christmas cookie recipes that I have been making for years! They are friend, family, and Santa approved. Make sure you head to the store and stock up on all the baking essentials because you are gonna want to preheat the oven as soon as they hit your inbox.

Cherry Chip Shortbread

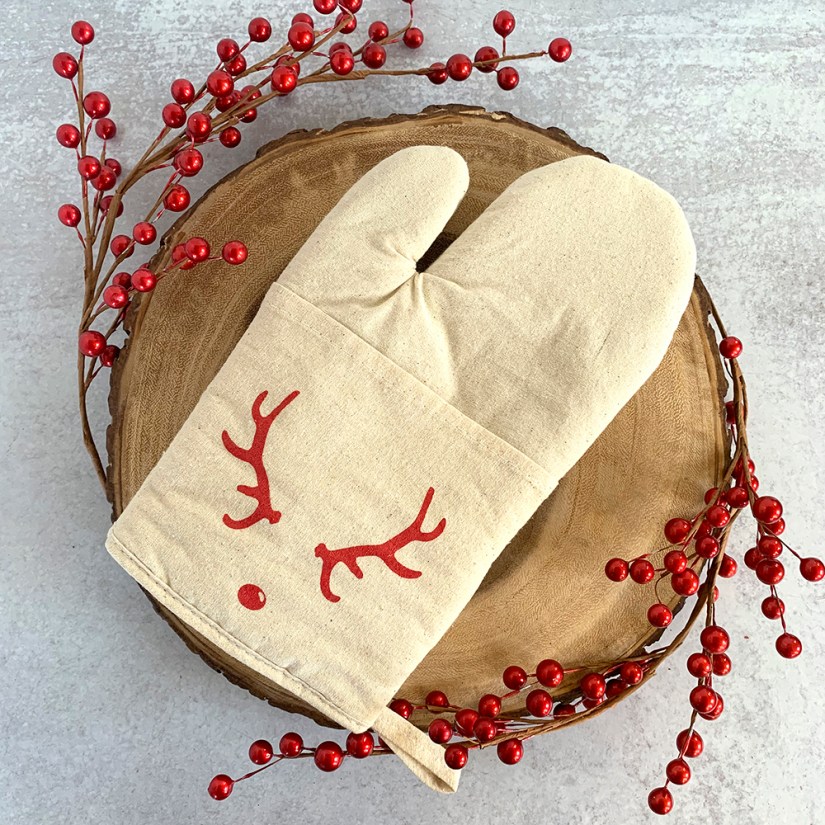
Also, from now through 9:00 pm on Wednesday, December 2, you can get 15% off your entire purchase totaling $25 or more from my Etsy shop! I have added some amazing holiday items that make great gifts. I have the most amazing coffee mugs, towels, oven mitts, and more! Make sure to check it out and save yo self some money! Happy shopping!

Gnome Mug

Reindeer Oven Mitt

Eat, Drink, and Be Merry Towel

I Tried Koozie

Sweet Treats

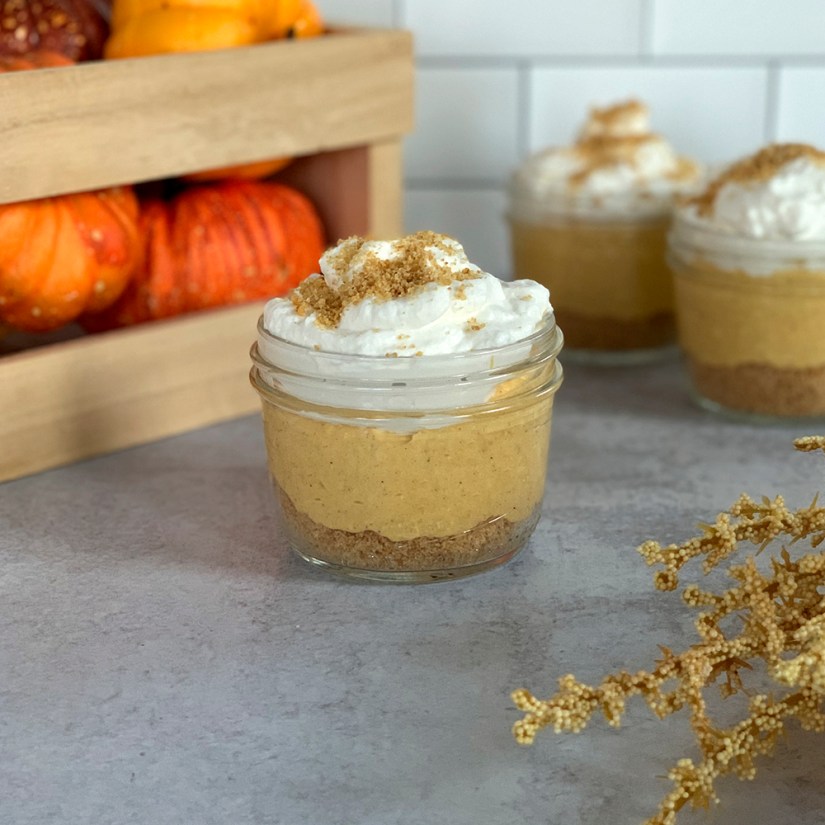
Recipe—Individual Pumpkin Pie Mousse Cups

Pumpkin Pie Mousse Cups

As soon as the summer heat starts to die down and mornings become cooler, my body literally craves pumpkin spice. Yes, I am a pumpkin spice loving, leggings, Ugg, scarf, and sweater wearing, momma. I can’t help it! There is just something about indulging in all things pumpkin that allows me to fully transition into fall.

While I absolutely love a homemade pumpkin pie at Thanksgiving, I don’t always have the time, energy, or space in my oven, to make anything besides the turkey and all the fixings. I absolutely love this dessert because it is quick, easy, and no bake! You get all the flavors of pumpkin pie with the pumpkin puree and pumpkin spice but it is a creamy, light, and fluffy mousse! Plus, you can make it a day or two in advance so you have one less thing to deal with on the big T-Day.

If you are making dessert and then going somewhere one of the most cumbersome tasks is transporting a pie. It slides everywhere and I hate covering pies with foil because it never fails, when you go to uncover it, your crust becomes a crumbly mess and never looks as good as when it came out of the oven. These are great because you can assemble them in mason jars, leave a little air space at the top, and just screw on the lid. Easiest dessert for traveling ever! If you are making these to be served in your home, they look super cute in wine glasses too.

Happy Thanksgiving everyone!

INGREDIENTS

1 1/2 c graham crackers
4 tbsp butter, melted
3/4 c granulated sugar, divided
1 pint heavy whipping cream
1 tsp vanilla
1/2 c powdered sugar
8 oz cream cheese, room temperature
1 c pumpkin puree
1 tsp pumpkin pie spice

STEPS

  • Prepare the crust by stirring together the graham crackers, melted butter, and 1/4 c of the granulated sugar in a small mixing bowl until well combined.
  • Set aside 1/4 cup of the graham cracker crumb mixture to serve as your garnish.
  • Distribute the remaining graham cracker crumbs evenly among 6–8 individual serving dishes.
  • Using the back of a spoon, gently press the graham crackers down into the bottom of the dishes.
  • Combine the heavy whipping cream, powdered sugar, and vanilla in a mixing bowl and beat until the whip cream thickens up.
  • In another mixing bowl blend together the cream cheese, pumpkin puree, pumpkin pie spice, and the remaining 1/2 cup of granulated until well-integrated.
  • Fold in 1 cup of the whip cream into the pumpkin mixture.
  • Evenly distribute the pumpkin mousse into each of the dishes.
  • Garnish each cup with the remaining whip cream and top with the graham crackers crumbs you previously set aside.