Beverages, Kitchen Tips, Sweet Treats

How to Build an Epic Hot Cocoa Charcuterie Board or Box

Hot cocoa charcuterie boards are taking off in popularity and there is no better time than the holiday season to try and make your own. Whether you want to make it for just your family to enjoy around the fireplace, a large party, or even for gifting, it is a sure way to spread some holiday cheer.

While a charcuterie board traditionally refers to an assortment of meats, cheeses, and breads served as an appetizer, the term has become much broader and people are getting creative with how they bring foods together. While I never pass up traditional meat and cheese charcuterie to go with a bottle of wine, hot cocoa charcuterie has become one of my favorite Christmas traditions in our home. 
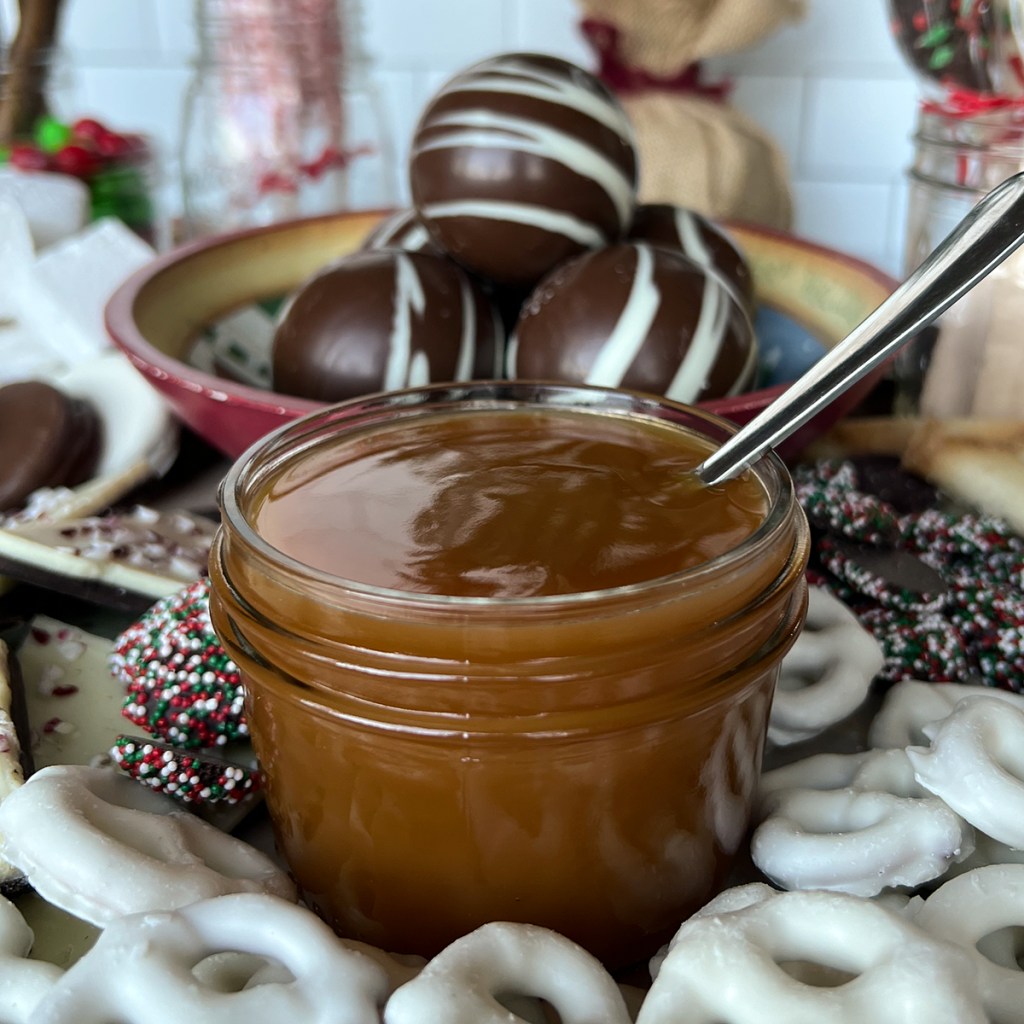
On the day we plan to decorate our Christmas tree and put out all our decorations, I lay out a spread of sweets to snack on and every ingredient my son could dream of to make a big ol’ mug of fully loaded hot cocoa. Do I go overboard? Absolutely. But it makes creating a cup of hot cocoa so much more fun and we love grazing on it throughout the day.

Last year we decided to share that holiday magic and made hot cocoa charcuterie boxes for our friends and delivered them to their doorsteps along with a box of assorted fresh baked cookies. The kids seriously love it! Pair a homemade box with some fun holiday mugs for the cutest gift set ever!
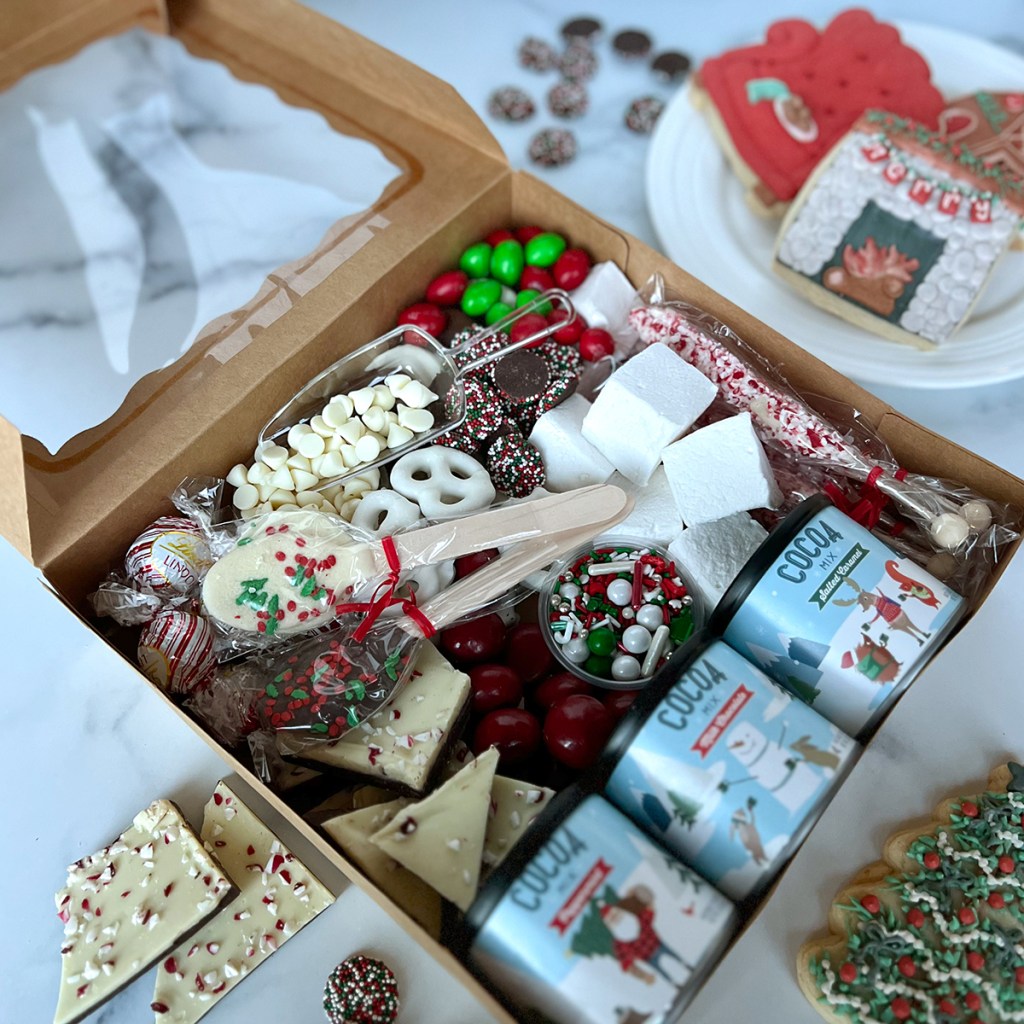
As a special touch I also like to purchase some gorgeously decorated sugar cookies from local bakers. They can include a special saying or message like “Merry Christmas.” They become sort of like an edible card.

There really is no right or wrong way to build a hot cocoa charcuterie board or box, it is about bringing together an assortment of ingredients and letting people use their imagination topping, drizzling, dipping, and sipping. 

Of course, there are always the obvious choices or marshmallows, whipped cream, and sprinkles, but don’t let the fun stop there. You can fill your board with peppermint bark, caramel sauce, and then make sure to include some tasty treats for dipping too! And don’t for one second think this is just for the kids! Add some holiday spirits for the adults. Nothing like spiking your hot cocoa with some Irish cream or peppermint schnapps. 
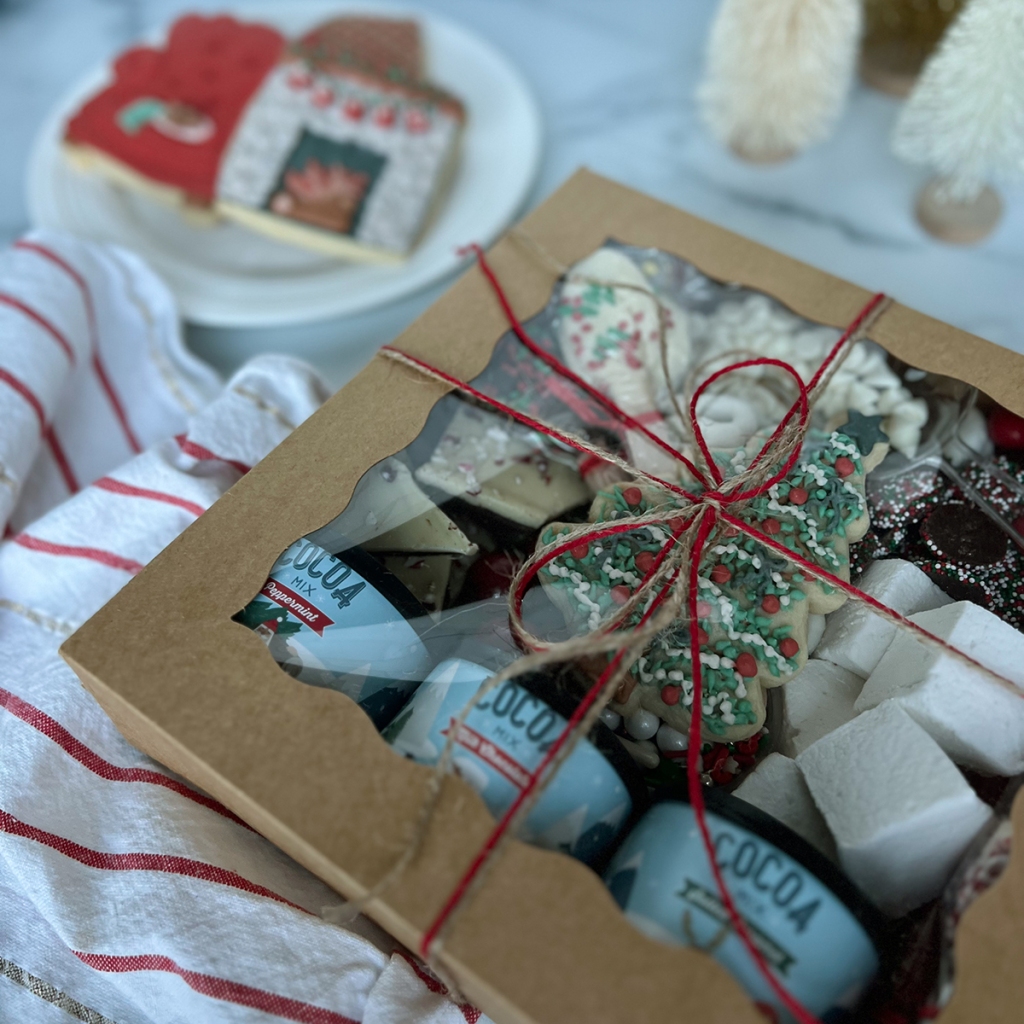
I hope this has inspired you to create your own hot cocoa board or box this holiday season and beyond. And just keep in mind, the number one rule for building a board or box is, there are no rules! Just have fun with it.

How to Build Your Board or Box

Step 1
The first step is selecting your board or box. My best advice is to make sure it is big enough for all your goodies. The bigger the better but just make sure you have enough to fill it so there aren’t any bare spots. 

If you are creating this for a really large group, you could always just line your counter or table with butcher paper or parchment paper and make it a grazing experience.

Step 2
Place your most important ingredient of all, your hot cocoa bombs or container of mix in a corner.

If you want to have your hot cocoa prepared ahead of time, skip this step. When having a party, I like to make my homemade hot cocoa in a crock-pot so it is ready to go. The guests can just ladle it into their mugs. 

Step 3
Place small bowls or containers for sprinkles, chocolate chips, smaller candies, and syrups around the board. If making a gift box, plastic sauce cups with lids work great!

Place longer items, like pirouette cookies, candy canes, and candy coated stir sticks in cups or mason jars to add some height to the board.

Step 4
Arrange cookies in clusters around the board or box.

Step 5
Fill in remaining gaps with candies, marshmallows, and chocolates. You want the board to look full so don’t be shy, add lots and don’t worry about layering things up! 

Step 6
Add some small scoopers and/or tongs in addition to some sort of stir sticks. I love including chocolate dipped spoons and the wood stir sticks coated in crushed peppermints but it could be as simple as some wood stir sticks or spoons.

Fun Toppings and Extra Treats

  • Marshmallows (assorted sizes)
  • Candy canes
  • Festive sprinkles
  • Toffee bits
  • Semi-sweet chocolate chips 
  • White chocolate chips
  • Pirouette cookies 
  • Chocolate coated pretzels
  • Assorted cookies
  • Chocolate coated Oreos
  • Assorted chocolates and candies
  • Caramels         
  • Caramel sauce
  • Chocolate sauce
  • Chocolate truffles 
  • Peppermint bark
  • Chocolate covered spoons
  • Adult mix ins (peppermint or butterscotch schnapps, amaretto, Irish cream, Irish whiskey, etc.)

If you like this, then make sure to also check out my recipes for Homemade Marshmallows or Creamy Hot Cocoa in a Crock-Pot!

A huge thank you to Sugar Sweetery for providing the sugar cookies for this article. Check them out on IG @sugar_sweetery

Brunch

Recipe—French Toast Casserole

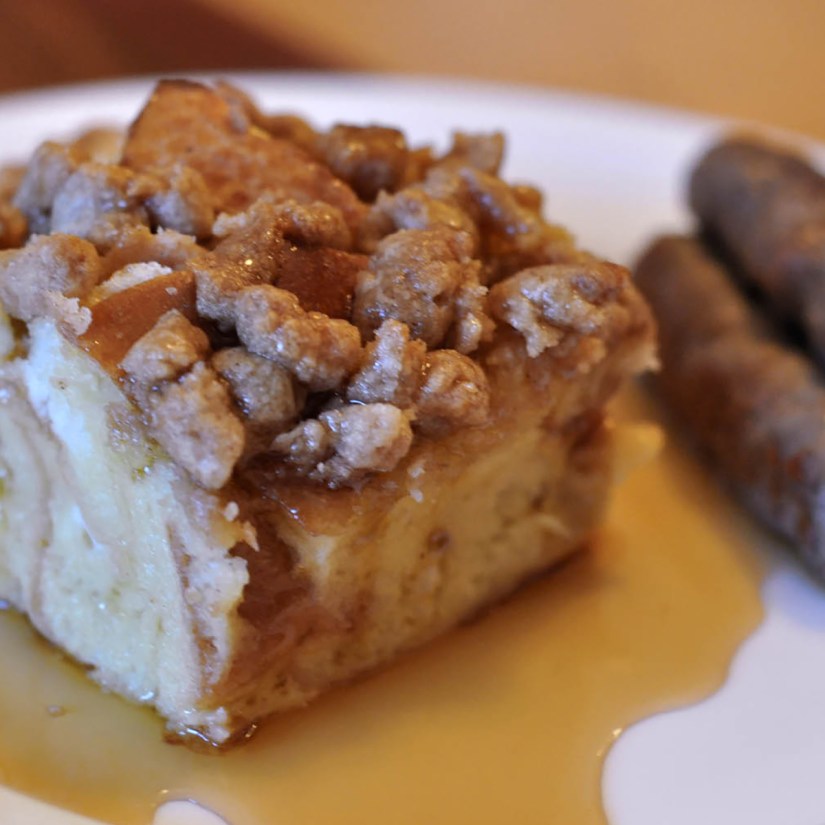
French Toast Casserole

Christmas morning can sometimes be a bit chaotic with hustle and bustle of gift giving, cleaning up of all the shreds of paper and ribbon, and then sometimes the mad dash to clean the house before relatives arrive for round two of Christmas. At least that’s how it is in our home. However, on Christmas morning I always want to sit down and have a nice breakfast with my crew, I just don’t always have the time to make a big Christmas worthy breakfast. However, I do have the time to throw a casserole in the oven. So here you have French Toast Casserole to save the morning!

Several years back I posted a recipe for Blueberry French Toast Casserole. Not to toot my own horn, but toot toot! It’s amazing if you haven’t given it a try. What I love about french toast casserole is you can prep the dish the day before, throw it in the oven in the morning, and boom! Just like that you have a hot and delicious breakfast with almost no work. This recipe has all that delicious cinnamon goodness baked into a sweet bread pudding with a crispy streusel topping. It is so tasty!

So if you are looking for a quick and easy breakfast that you can make in advance, then this is the recipe for you.

French Toast Casserole

INGREDIENTS
12 slices sourdough bread (or a sourdough loaf), cut into 1” cubes
10 eggs
2 c milk
1/2 c heavy cream
2 tbsp vanilla extract
1/2 c sugar
1 c brown sugar, divided
1/2 c flour
1 tsp cinnamon
1/2 c cold butter, cut into small pieces

STEPS

  • Cut the loaf of sourdough into cubes and distribute them in a greased 9” x 13” pan.
  • In a large bowl whisk together the eggs, milk, cream, and vanilla.
  • Whisk in a 1/2 cup of the brown sugar and all the granulated sugar to the egg mixture
  • Pour the egg mixture over the bread.
  • Using your fingers or the back of a spatula gently press all of the bread pieces down into the egg mixture.
  • Cover the baking dish with foil and place in the fridge 8 hours or overnight.
  • For the streusel topping, in a medium bowl, mix together the other 1/2 cup of brown sugar, flour, cinnamon.
  • Add the cut-up butter to the topping mix and using a large fork or pastry cutter mix it all together until it is a nice crumbly consistency.
  • Store the streusel in a Ziploc bag in the fridge until ready to bake.
  • When ready to bake, remove the casserole dish and streusel from the fridge and allow it to sit on the counter for about 30 minutes.
  • Preheat oven to 350º.
  • Sprinkle the streusel topping over the french toast.
  • Cover the dish back up with foil and bake for 45 minutes.
  • Remove the foil and continue baking until the top is a nice golden brown and the egg mixture is set, about an additional 15–20.
  • Remove from oven and allow it to cool for 5 minutes.
  • Cut and serve with a pat of butter and some warm syrup.
Beverages

Recipe—Creamy Hot Cocoa in a Crock-Pot

divadicucina_hotcocoa

Over the weekend we had a holiday cookie decorating party for my son and his little buddies from school. It was wonderful! All the kiddos huddled around the table eating the cookie toppings quicker than they were putting them on the actual frosted cookies getting all hopped up on sugar. I love this time of year!

I wanted to have a little hot cocoa bar where all the kids (and grown ups) could make themselves a fancy cup of cocoa. I’m not talking little envelopes of dry god knows what. I’m talking thick and creamy REAL hot cocoa. The kind that fills you up and warms your belly, the kind that leaves a thick creamy mustache on your upper lip with every sip. I made this a couple of hours before the party and it was perfect! Along with a big crock pot full of pure joy I had bowls of marshmallows, mini chocolate chips, crushed candy canes, chocolate sprinkles, whip cream, and then of course some grown up mixers (Kahlua, Disaronno, Baily’s, Frangelico, and peppermint schnapps). Hey if you know me, you know I don’t half ass anything.

This hot cocoa was by far the best I ever had! If you are having a few people and want to make something very special this holiday season then I recommend you make this hot cocoa. It will take every grown up back to their childhood days and will be memorable for all the kiddos.

Note: Makes 8–12 servings.

INGREDIENTS
14 oz can sweetened condensed milk
12 oz bag chocolate chips (dark, milk, or white chocolate will all work)
2 c heavy whipping cream
6 c milk (2% or whole)
1 tsp vanilla

STEPS

  • Combine all of the ingredients in a large crock-pot.
  • Turn on low.
  • Cook for 2 hours stirring occasionally using a whisk.
  • Ladle into a mug, add in your mixer (optional), and top with your favorite treats or leave as is.
Sweet Treats

‘Tis the Season for Baking

It’s the first week of December and I am going into the baking season full steam ahead! If you are looking for some cookie or bar recipes that are outside the norm then you have come to the right place! Here are some of my favorite sweet treat recipes that are sure to be a hit with your lucky recipients. Enjoy!

Holiday Sweet Treats

  1. Chocolate Chip Cookie Dough Cheesecake Bars
  2. Banana Toffee Cookies
  3. Chocolate Crackle Cookies
  4. Peanut Butter Cookies
  5. Peanut Butter & Jelly Bars
  6. Craisin White Chocolate Chip Pudding Cookies
  7. Sugar Cookie Bars
  8. Chunky Monkey Cookies
  9. Caramel Apple Cheesecake Bars
  10. Lemon Crackle Cookies
  11. Oreo Truffles
  12. Confetti Cake Batter Cookies
Dinners

Recipe—The Perfect Turkey

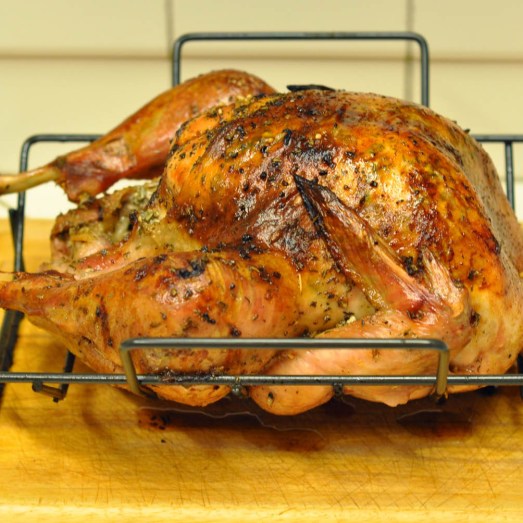
To brine or not to brine? That is the ongoing question I have people ask me about cooking a turkey. Well here is your answer, I am a briner. I have prepared turkeys both brined and not. While I am no professional chef I would consider my self very versed in eating. I personally think brined turkeys come out with more flavor and are more moist than that of a turkey that is not brined. Some of you may be asking, “what the heck is brining?”

Brining is the process of soaking your turkey in a salt (and sometimes herb) infused bath for several hours prior to cooking. I find that your bird will be more evenly flavored and it will also be the moistest bird you ever have.

I make an awesome citrus herb rub (see recipe below) for my turkey. It is flavor packed and will make all your dinner guests ohhhh and ahhhh. The orange zest is not overpowering at all. It actually is a really nice complement to all the other flavors of a thanksgiving dinner. Trust me. I know how to make a delicious turkey.

Notes: Do not brine your turkey if it is self basting, pre seasoned, or kosher. If you do not have a pan that is large enough you may use an oversized bowl, ice chest, or even a baking bag tied off. The key is that the bird is completely submerged.

BRINING INGREDIENTS
1 c kosher salt
2 c sugar
1 c apple cider vinegar
2 tbsp sage
2 tbsp thyme
2 tbsp rosemary
1 tbsp pepper
thawed turkey

STEPS FOR BRINING

  • Find a large pot that will hold your turkey making sure you have at least an inch or two of room at the top.
  • Bring 4 cups of water to a boil in your pot.
  • Add the salt and sugar and stir until completely dissolved.
  • Remove the pan from heat and add in 8 cups of cold water, apple cider vinegar, sage, thyme, rosemary, and pepper.
  • Place the pot in your sink (this will help in case any liquid overflows).
  • Remove all of the giblets and neck from your turkey and gently lower it into the pot.
  • Cover the pot with a lid or saran wrap.
  • Place the pot in the fridge and marinade for 12–16 hours.
  • Rinse the turkey and pat dry.

TURKEY INGREDIENTS
3 tbsp garlic, minced
2 c Italian parsley leaves, chopped
1 tbsp kosher salt
1 tsp ground pepper
2 tsp chili powder
2 oranges, zested and quartered
1 c butter, softened
1 brined turkey

STEPS FOR TURKEY

  • Preheat oven to 325º.
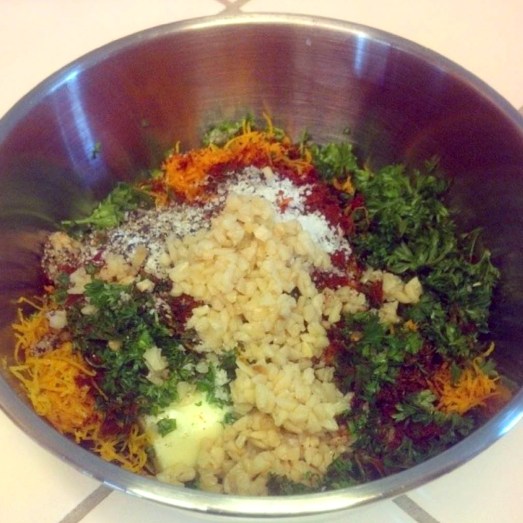
  • In a small bowl combine the garlic, parsley, kosher salt, pepper, chili powder, orange zest, and butter and mix until well combined.
  • Starting from the neck of the turkey, carefully separate the skin from the breast meat with your fingers.
  • Push about half of the herbed butter mixture under the skin and spread it out evenly. (Don’t be afraid really get it all over in there! The butter will melt and all those yummy flavors will just seep into the meat.)
  • Use the other half of the mixture to evenly cover the top and sides of the turkey.
  • Place the orange quarters inside the turkey’s cavity.
  • Place the seasoned turkey in a roasting pan and loosely cover with foil.
  • Roast the turkey for 20–23 minutes per pound and baste every 45 minutes. (Note: If you are running out of juices in the pan just add some chicken broth or cubes of butter.)
  • Remove the foil for the last 45 minutes of cooking.
  • When the temperature in the meatiest part of the turkey reaches 165º remove it from oven and allow it to rest for 25–30 minutes.
  • Carve and gobble up.


Have a wonderful Thanksgiving everyone!


Sweet Treats

Recipe—Homemade Marshmallows

divadicucina_marshmallows

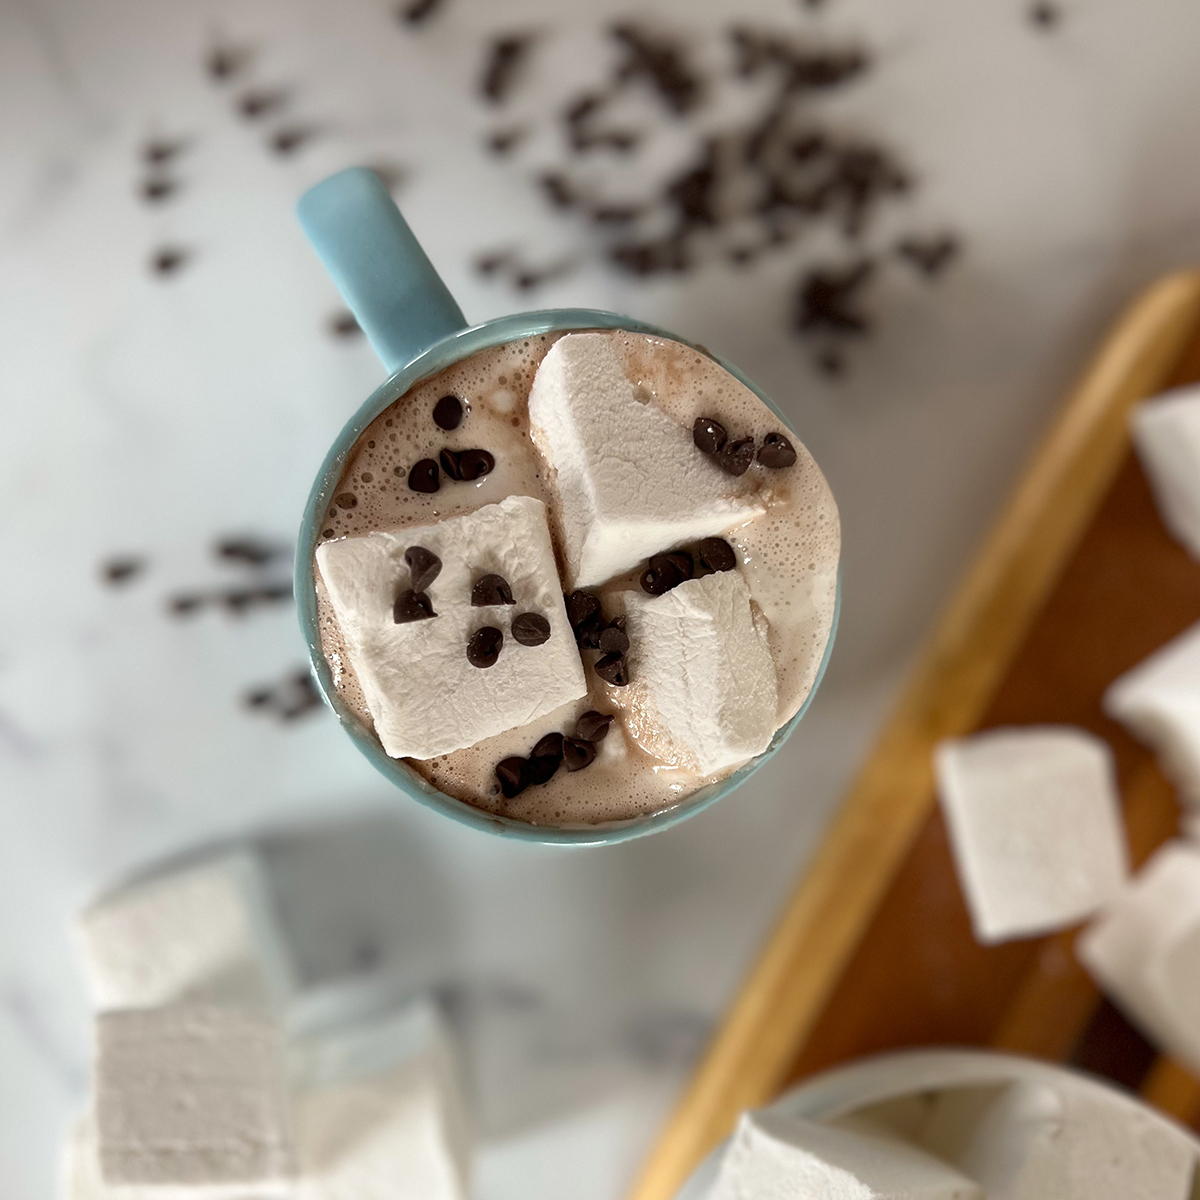
I was trying to come up with a cute idea for a Christmas gift for my son’s teachers and came up with the idea of making hot cocoa gift baskets. You know, a mug, some hot cocoa, some homemade cookies, and marshmallows. Well I am never the person to take the easy way out by just buying an actual bag of jet puffed marshmallows at the store, I wanted these gift baskets to be special, made from the heart. So I decided to attempt to make my very own marshmallows. Gourmet marshmallows seem to be all the rage this season but unfortunately they can cost a fortune. With this recipe you can make your own at home. They are a little bit of work, and one might by intimidated, but they are actually easy. I think the hardest part was waiting for them to set! These homemade marshmallows put store bought marshmallows to shame and are so totally worth making on your own. If making your own marshmallows isn’t on your bucket list it should be. Give these a shot. They will take your hot cocoa on a cold winter night over the top!

divadicucina_hotcocoa

Note: The original recipe I followed called for using a stand up mixer but I used a hand mixer. You can use either. The marshmallows can be very sticky and difficult to handle so the trick to cutting them is to constantly coat them in powdered sugar after every slice of the knife.

INGREDIENTS
3 c sugar
1 1/4 c light corn syrup
water
4 envelopes Knox unflavored gelatin
1/2 tsp salt
1 tbsp vanilla extract
1 c powdered sugar

STEPS

  • Combine sugar, corn syrup, and 3/4 cup water in a large saucepan and bring to a boil over medium-high heat.
  • While sugar water is heating up add 3/4 cup water to a large mixing bowl and sprinkle the 4 packs of gelatin over the top. Set aside.
  • Bring the sugar water mixture to a rolling boil and boil for 5 minutes or until a candy thermometer reads 235º.
  • Carefully pour the hot sugar water into your mixing bowl with the water and gelatin and mix on low.
  • Add the salt and increase mixer speed to high.
  • Beat the sugar mixture on high for 5 minutes and than add vanilla.
  • Continue beating the mixture for another 5 minutes.
  • When you are done, pour the marshmallow cream into a greased 9” x 13” pan.
  • Smooth the top and gently tap to release air.
  • Leave the dish on the counter for at least 10 hours.
  • After the waiting is up sprinkle the entire top of your marshmallows with powdered sugar making sure it’s coated and place a cutting board over the top of your dish.
  • While holding the cutting board and dish together carefully flip the dish and cutting board upside down simultaneously releasing the marshmallows onto the cutting board. (Your set marshmallows will now be upside down on the cutting board.)
  • Lift the baking dish and sprinkle all of the exposed marshmallow with powdered sugar making sure there are no exposed areas.
  • Using a large sharp knife cut into 1” strips and coat each exposed side with powdered sugar.
  • Cut those strips into 1” cubes making sure you coat each cut side with powdered sugar.
  • Once done, sprinkle all of the marshmallows with the remaining powdered sugar making sure there are no exposed sticky areas.
  • Enjoy in a big mug of hot cocoa!
Sweet Treats

Recipe—Confetti Cake Batter Cookies

Awhile back I posted a recipe for lemon crackle cookies. It was a cookie recipe that is primarily made from a box of cake mix. I love the concept of taking cake batter and sprucing it up with a few extra ingredients to make one heck of a fabulous cookie These types of cookies always come out really light and super moist and best of all they are quick and easy to make. Well ‘tis the season for complete chaos and busy schedules so what better time to share a recipe for super quick and scrumptious confetti cake batter cookies. I used red and green sprinkles to make them festive for Christmas but keep this recipe in mind throughout the year. Just change the sprinkle color for the appropriate holiday. Perhaps pink and red for Valentine’s Day?

INGREDIENTS
1-18.25 oz box of white cake mix
1 tsp baking powder
2 eggs
1/3 c vegetable oil
1/2 tsp vanilla
1/2–3/4 c sprinkles

STEPS

  • Preheat oven to 350º.
  • In a large bowl mix together the dry cake mix and baking powder.
  • Whisk together the eggs, oil, and vanilla.
  • Add the egg mixture to the cake mixture and stir until all ingredients are combined.
  • Fold in the sprinkles but be sure not to over mix or the dye will stain the batter.
  • Line a large baking sheet with parchment paper or grease it.
  • Drop 1” balls of dough onto the baking sheet leaving approximately 2” apart.
  • Bakes cookies for 9–10 minutes making sure they don’t brown.
  • Allow the cookies to cool on the sheet for about 3 minutes.
  • Use a spatula to transfer the cookies to a cutting board or cooling rack.