Dinners

Recipe—The Perfect Turkey

To brine or not to brine? That is the ongoing question I have people ask me about cooking a turkey. Well here is your answer, I am a briner. I have prepared turkeys both brined and not. While I am no professional chef I would consider my self very versed in eating. I personally think brined turkeys come out with more flavor and are more moist than that of a turkey that is not brined. Some of you may be asking, “what the heck is brining?”

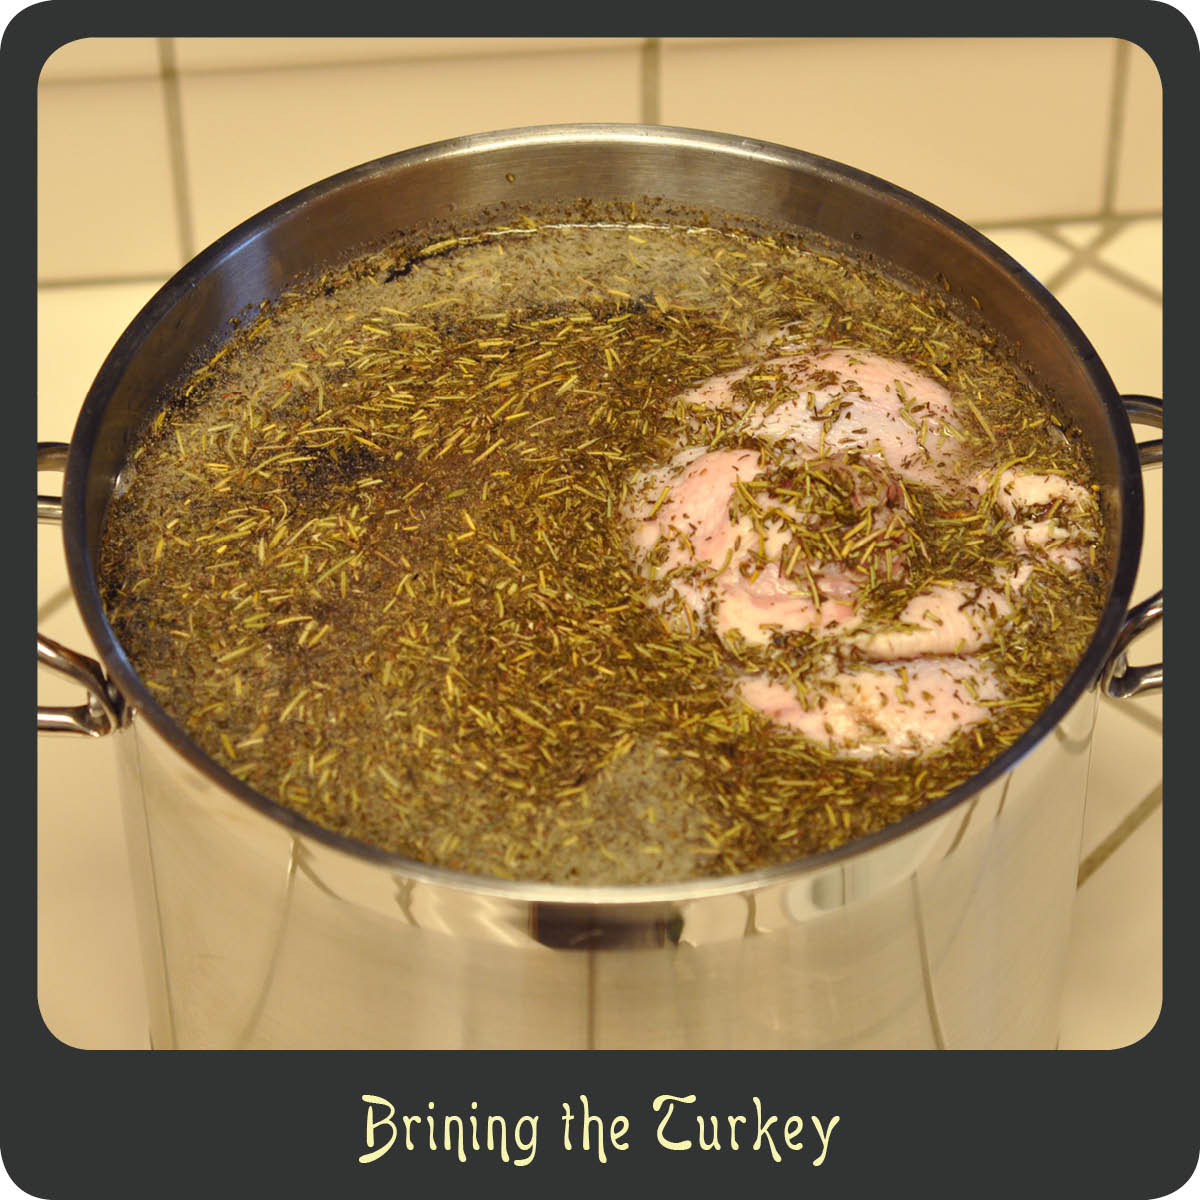
Brining is the process of soaking your turkey in a salt (and sometimes herb) infused bath for several hours prior to cooking. I find that your bird will be more evenly flavored and it will also be the moistest bird you ever have.

I make an awesome citrus herb rub (see recipe below) for my turkey. It is flavor packed and will make all your dinner guests ohhhh and ahhhh. The orange zest is not overpowering at all. It actually is a really nice complement to all the other flavors of a thanksgiving dinner. Trust me. I know how to make a delicious turkey.

Notes: Do not brine your turkey if it is self basting, pre seasoned, or kosher. If you do not have a pan that is large enough you may use an oversized bowl, ice chest, or even a baking bag tied off. The key is that the bird is completely submerged.

BRINING INGREDIENTS
1 c kosher salt
2 c sugar
1 c apple cider vinegar
2 tbsp sage
2 tbsp thyme
2 tbsp rosemary
1 tbsp pepper
thawed turkey

STEPS FOR BRINING

  • Find a large pot that will hold your turkey making sure you have at least an inch or two of room at the top.
  • Bring 4 cups of water to a boil in your pot.
  • Add the salt and sugar and stir until completely dissolved.
  • Remove the pan from heat and add in 8 cups of cold water, apple cider vinegar, sage, thyme, rosemary, and pepper.
  • Place the pot in your sink (this will help in case any liquid overflows).
  • Remove all of the giblets and neck from your turkey and gently lower it into the pot.
  • Cover the pot with a lid or saran wrap.
  • Place the pot in the fridge and marinade for 12–16 hours.
  • Rinse the turkey and pat dry.

TURKEY INGREDIENTS
3 tbsp garlic, minced
2 c Italian parsley leaves, chopped
1 tbsp kosher salt
1 tsp ground pepper
2 tsp chili powder
2 oranges, zested and quartered
1 c butter, softened
1 brined turkey

STEPS FOR TURKEY

  • Preheat oven to 325º.
  • In a small bowl combine the garlic, parsley, kosher salt, pepper, chili powder, orange zest, and butter and mix until well combined.
  • Starting from the neck of the turkey, carefully separate the skin from the breast meat with your fingers.
  • Push about half of the herbed butter mixture under the skin and spread it out evenly. (Don’t be afraid really get it all over in there! The butter will melt and all those yummy flavors will just seep into the meat.)
  • Use the other half of the mixture to evenly cover the top and sides of the turkey.
  • Place the orange quarters inside the turkey’s cavity.
  • Place the seasoned turkey in a roasting pan and loosely cover with foil.
  • Roast the turkey for 20–23 minutes per pound and baste every 45 minutes. (Note: If you are running out of juices in the pan just add some chicken broth or cubes of butter.)
  • Remove the foil for the last 45 minutes of cooking.
  • When the temperature in the meatiest part of the turkey reaches 165º remove it from oven and allow it to rest for 25–30 minutes.
  • Carve and gobble up.


Have a wonderful Thanksgiving everyone!


Advertisement
Dinners

Recipe—Herb Roasted Chicken

I would say 95% of the time when I am cooking chicken I am working solely with the breast. Boneless skinless breasts seem to be the quickest and easiest to work with, but you pay a little bit more for the convenience factor. However, there isn’t really anything special or fancy about a plain chicken breast. On occasion I really do enjoy cooking a whole chicken. It just seems much more impressive to roast the whole thing. While the ingredients are incredibly simple in this recipe, it is the most fabulous and flavorful chicken you will ever have. I’m not one to typically sit there and eat the skin off a chicken but when I am carving up this chicken I can’t stop eating it once I start. The skin has just the perfect amount of crispiness and more flavor than you can imagine. You are lucky if there is any skin left on your piece of chicken by the time it makes it to the table. It is that good! Once you make this recipe you will understand. I guarantee this will be the best roasted chicken you will ever have.

Note: The most complicated part of this recipe is brining the chicken, which really isn’t complicated at all, people just think it is. If you aren’t familiar with brining I will bring you up to speed. Brining a chicken is when you soak it in salt water for a good amount of time. Giving it this “salt bath” ensures your chicken will be moist and juicy and it also allows the salt to soak into the meat, which really enhances the chicken’s natural flavors. I personally feel it makes a huge difference in the taste. In my opinion, brining is the difference between a good chicken, and a great chicken.

INGREDIENTS
3–4 lb chicken
1/2 c kosher salt
2 tbsp butter, melted
2 tsp garlic, minced
1 tsp dried basil
1/2 tsp dried sage
1/2 tsp dried thyme
1/2 tsp salt
1/4 tsp pepper

STEPS

  • Remove the neck and giblets from the chicken and place it in a large pot.
  • Pour the kosher salt over the chicken and fill the pot with water until it is submerged.
  • Cover the pot with the lid and place in the fridge for 4–8 hours.
  • Remove the chicken from the pot, rinse with cold water, and pat dry.
  • Place the chicken on a rack in a shallow roasting pan breast side down. (If you do not have a rack just place it in a large baking dish.)
  • Preheat the oven to 375º.
  • Combine the melted butter and garlic in a small bowl.
  • Combine the basil, sage, thyme, salt, and pepper in a second small bowl.
  • Use a basting brush or your hands to lather the chicken in half of the garlic butter.
  • Sprinkle half of the herb mixture over the chicken.
  • Flip the chicken over so that it is now breast side up.
  • Repeat with remaining butter and herb mixture.
  • Roast the chicken uncovered for 1.5–1.75 hours or until cooked through. (I like to baste mine every 20–30 minutes.)
  • Allow the chicken to sit for 5–10 minutes and then transfer to a cutting board to be carved.
Dinners

Recipe—Crock-Pot Shredded Beef Tacos

How about some delicious tacos to go with the Mexican red rice recipe I recently posted? These are the easiest most flavorful shredded beef tacos ever! And best of all you cook them in the crock-pot. I love my crock-pot! What’s not to love about coming home from work to a house that smells like an authentic taqueria where dinner is practically done when you walk through the door? This recipe gives you the most tender, moist, flavor packed meat. The meat literally falls apart when it’s done cooking. These tacos are definitely at the top of my list of favorite meals. I love loading them up with all my favorite toppings. Serving these with a lime wedge to squeeze over your tacos is a must! The bite of tangy lime just makes all the flavors come together. Serve these tacos with my Mexican red rice and a side of beans and you will feel like you are dining in Mexico. Don’t forget the pitcher of margaritas! 😉

Note: No need to limit yourself to just using this shredded beef for tacos, it is incredibly versatile and can be used for enchiladas, tacos, burritos, you name it!

INGREDIENTS
1 1/2 tbsp chili powder
1/2 tbsp cumin
1/2 tbsp onion powder
1 tsp garlic powder
1 tsp salt
1/4 tsp pepper
2–3 lb tri tip or chuck roast
14 oz can beef broth
2 limes (1 for juicing and 1 sliced to be served with finished tacos)
tortillas

SOME FABULOUS GARNISHES

shredded cheese
chopped green lettuce
diced tomatoes
diced red onion
guacamole or sliced avocado
sour cream
pico de gallo
chopped cilantro

STEPS

  • In a small bowl combine chili powder, cumin, onion powder, garlic powder, salt, and pepper.
  • Spray your crock-pot with cooking spray to make cleanup a breeze!
  • Add your roast to the crock-pot and rub the seasoning into the meat. It’s okay if any extra seasoning is loose in the crock-pot.
  • Pour broth around roast and squeeze the juice of one lime over the roast.
  • Cover and cook on low heat for 8–10 hours.
  • Remove the roast from the crock-pot and place on a cutting board.
  • Using a large fork shred the beef and return it to the crock-pot.
  • Cover and continue to cook on low heat for 30 minutes. This allows your beef to soak up all those yummy juices.
  • Using tongs remove the shredded beef and place directly on tortillas or into a serving dish.
  • Serve with lime wedges and some of your favorite garnishes.
Brunch

Recipe—Moist Banana Nut Bread

This recipe makes the moistest most delicious banana nut bread ever! I have been making it for years. It is the perfect amount of sweetness for a morning treat. I love it warmed up with a little bit of butter spread. Mmmmmmm… It is dense and filling to help you get your day started. I have even added chocolate chips for something different and it was a real treat. This recipe makes two full size loaves. If you don’t think you can eat both it’s okay, they freeze great! Or you can make your neighbor very very happy and give them one. I’m sure it will earn you a few points. Next time you pick up bananas at the store be sure to grab a few extra and give this recipe a try.

Note: For holidays I have made a bunch of mini loaves as gifts using the foil mini loaf pans and they were perfectly sized. If you do this be sure to adjust baking time accordingly. 

INGREDIENTS
4–5 overripe bananas (almost all black)
1/4 c buttermilk
1 1/3 tsp baking soda
3 eggs
1 tsp vanilla
3/4 c vegetable oil or melted butter
2 1/4 c flour
2 c sugar
1/2 tsp salt
1 c pecans, chopped (optional)

STEPS

  • Preheat oven to 350º
  • Mash the bananas in a large bowl.
  • In a small bowl mix the buttermilk and baking soda using a whisk until nice and frothy and slightly foamed up.
  • Add all remaining ingredients and your baking soda mixture to the large bowl with bananas and mix thoroughly.
  • Pour batter into two greased loaf pans.
  • Bake for 55–65 minutes or until a toothpick when inserted comes out almost clean. (I like my bread moist so I pull it out when the toothpick still has a little bit of crumbly residue on it. A totally clean toothpick will mean a dryer loaf.)
  • Allow loaves to sit for 15 minutes. (If you decide to use chocolate chips only allow to sit for 5 minutes.)
  • Gently remove loaves from pans and place on a cutting board or cooling rack to cool.