Dinners, Salads

Recipe—Thai Shrimp Lettuce Wraps

During the hot summer months my body craves lighter refreshing meals and I just hate running the oven when it is 105º outside. We eat a lot of salads and tacos to keep it quick and simple, but it is always fun to mix it up with some new flavors. 

I just absolutely LOVE this peanut sauce with all the other ingredients coming together. You have this flavor medley of peanuts, garlic, and ginger which are so good together and then you get this nice sweetness from the mangos and a little kick from the jalapeño, and that is all just in the sauce and toppings! Don’t forget about all those flavor packed veggies and shrimp in the layered in the lettuce cup too.

This recipe is incredibly versatile. While I myself enjoyed these as lettuce wraps, my husband and son had theirs in a flour tortilla as more of a fusion style taco (they like their carbs) but this would make an amazing entrée salad too if you just wanted to chop up the lettuce and use the sauce as a dressings. Either way, you will not be disappointed!

Note: These take less than 15 minutes to cook and assemble but there is a little bit of prep time needed to slice and dice all the veggies. If you have a busy week ahead, you can absolutely prep ahead of time by chopping up all the veggies and storing them in some sealed containers or bags.

PEANUT SAUCE INGREDIENTS
1 1/2 tbsp peanut butter
2 tsp rice vinegar 
2 tsp coconut milk  
3 tbsp soy sauce 
2 tbsp honey 
1 tsp ginger paste
1 tsp garlic, minced

SHRIMP LETTUCE WRAP INGREDIENTS
1 tbsp olive oil  
1 onion, sliced
2 carrots, julienned
1 red bell pepper, sliced
1 lb raw shrimp, peeled and deveined
1 zucchini, julienned
1/4 c soy sauce
2 tsp garlic, minced
1 tbsp ginger paste
1 tsp crushed red pepper  
1/2 tsp cumin 
1 jalapeños, seeded and sliced
3 green onions, chopped
1 mango, diced
1 head butter leaf lettuce, leaves separated 

STEPS

  • In a small bowl whisk together all the peanut sauce ingredients until smooth and set aside.
  • In a large skillet or wok, heat the olive oil over medium high heat.
  • Add the onion, carrots, and bell pepper to the skillet and cook until they begin to soften, about 3–4 minutes.
  • Add the shrimp, zucchini, and soy sauce to the skillet and cook until the shrimp are golden and almost cooked through, about 3–4 minutes.
  • Stir in the garlic, ginger paste, crushed red pepper, and cumin and cook for another 1–2 minutes.
  • Remove the skillet from the stove top and set aside.
  • To prepare, scoop some of the vegetables into the lettuce cups and top with a few of the shrimp. 
  • Garnish with a couple of jalapeño slices, some green onions, and diced mangos and then drizzle with the peanut sauce.
  • Grab a napkin or three and enjoy!
Dinners, Soups

Recipe—Keto White Chicken Chili

Okay, you may be thinking, “Why is this Diva posting a chili recipe as the weather is warming up? Isn’t chili a cool weather dish?” Here is my response, this is probably one of the best keto meals I have ever had, and the flavors are so good that I absolutely eat this any time. Plus, it is just so easy to make, and in my opinion, an easy one pot recipe is welcome year-round.

I have been “doing keto” since June 2020 and am down 33 lbs. Yay me! Now don’t worry, this blog is not suddenly turning keto. I am just all about offering variety to my followers and I could not keep this recipe to myself, it is just too good! If you are a long time follower, you know my blog is anything but a keto or diet blog.

Now even if you aren’t on a ketogenic diet, you can absolutely enjoy this recipe as is, or what I do for my husband and son who are full on carbivores (I just made that up), is split the cooked chili into two batches after it is all cooked. One keto batch for me, and one carb loaded version for them. I have integrated carbs two different ways for them. One time I added a can of white cannellini beans to their chili and another time I served this over a bowl of cooked rice. Both of those options were very well received.

Hope you love this recipe as much as I do because it is definitely one of my new favorite “go tos”.

INGREDIENTS
2 tbsp olive oil
1 lb ground chicken (or turkey)
2 tsp cumin
1 tsp oregano
1/4 tsp cayenne pepper
salt and pepper
4 tbsp butter
1 green bell pepper, diced
1/2 a yellow onion, diced
2 tsp garlic, minced
1 jalapeño, deseeded and chopped
1 1/2 c chicken broth
4 oz cream cheese
1/2 c heavy cream
4.5-ounce can diced green chiles, drained

GARNISHES
avocado
cilantro
cotija cheese, crumbled

STEPS

  • Heat the olive oil in a large pot over medium high heat and add the ground chicken breaking it apart as it cooks.
  • Season the meat with cumin, oregano, cayenne pepper, salt and pepper and continue cooking until it is almost cooked through.
  • Add the butter, bell pepper, onion, garlic, and jalapeño to the pot.
  • Sauté until all the veggies are cooked through and tender, about 5–10 minutes.
  • Add the broth to the pot and bring to a simmer.
  • Simmer for 10 minutes and then add the cream cheese, heavy cream, and green chiles.
  • Continue simmering for another 15 minutes stirring every once in a while, making sure that the cream cheese melts and is nicely integrated.
  • Garnish with avocado, cilantro, and crumbled cotija cheese.
Salads, Side Dishes

Recipe—Summertime Marinated Tomatoes

Summertime Marinated Tomatoes

Summertime means my garden is going nuts and producing more tomatoes than we can get through in a day. No joke. I am sometimes getting 4–5 huge ripe tomatoes a day! I love it! You just can’t beat the smell and flavor of a tomato that has been able to fully ripen on the vine. Even if you go to the grocery store or farmers market, the smell of fresh tomatoes wafts through the air. That is the smell of summer!

The other day I was looking at a pile of 10–12 tomatoes on the counter that needed to be eaten within the day and I knew just what to do with them. Marinade them! The marinade for this recipe is out of this world! The red wine vinegar really brings out the flavors of the tomatoes and then you get all these great flavors from the fresh herbs and garlic. I mean seriously, just look at that layer of herbs over the top of the tomatoes!

Summertime Marinated Tomatoes

These make for a great side dish with some grilled meat or even as a salad. I served it with some garlic bread and it was so good to soak up all those yummy tomato juices, olive oil, and vinegar with the bread. This recipe is for sure a summertime staple as it is so easy to make and I am all about cooking with what is in season.

Notes:

  • The key to this recipe is making sure to marinade the tomatoes at room temperature for at the very least 2 hours. You MUST let them marinade! The tomatoes need time to soak up all the red wine and herb flavors.
  • Do not refrigerate as the texture and natural flavor of the tomatoes will change.
  • Consume within 6–8 hours of marinating.
  • If you want to prepare in advance, just make the marinade ahead of time and store in a jar in your refrigerator until 3 hours before you plan to serve. Then pour the chilled marinade over the tomatoes.

INGREDIENTS
5 or 6 extra-large tomatoes, cut into 1/2″ slices
2/3 c extra-virgin olive oil
1/2 c red wine vinegar
4 tbsp red onion, minced
2 tbsp garlic, minced
2 tbsp parsley, chopped
2 tbsp basil, chopped
2 tsp kosher salt
1/2 tsp black pepper

STEPS

  • Arrange the sliced tomatoes in a shallow serving dish.
  • Combine all the remaining ingredients and mix to combine.
  • Pour the marinade over the tomatoes.
  • Cover the dish with a lid or saran wrap.
  • Allow the tomatoes to rest/marinade at room temperature for 2–3 hours.
  • Enjoy!
Appetizers

Recipe—Herbed Cucumber Bites

I have been wanting to host a tea party type of event and this year Easter was the perfect occasion. We were just having a couple of people over so I did all sorts of small bites. So fun and classy! The cucumber rounds were one of my faves! They were so light and refreshing and reminded me of the typical cucumber sandwiches you would have at a tea party, minus the rye bread. These are definitely the perfect snack for bridal showers, baby showers, or an afternoon tea.

INGREDIENTS
8 oz block of cream cheese, softened
1/4 c fresh dill (or 1 tbsp dried)
2 tbsp dill pickle juice (just the stuff form the jar)
3/4 tsp onion powder
1/2 tsp garlic powder
pepper
1 green onion, finely chopped
1 cucumber, sliced
parsley to garnish (optional)

STEPS

  • In a medium bowl beat together the cream cheese, dill, pickle juice, onion powder, garlic powder, pepper, and green onion until smooth.
  • Transfer the mixture to a pastry bag or a Ziploc bag.
  • Pipe the herbed cream cheese mixture onto each cucumber round.
  • Garnish each cucumber with a sprig of parsley on top.
  • Serve immediately or cover and store in the fridge until ready to enjoy.
Dinners

Recipe—Creamy Tomatillo Chicken

Tomatillos are one of those things that I am just figuring out what to do with. I remember as a kid peeling the husks off them all summer long since my mom grew them in her garden but all I remember her really making was her tomatillo salsa.

Every once in awhile I end up with a small bag of them from a friend or our produce delivery. Never enough to actually make a whole batch of salsa with. But now I can say I have two recipes that use tomatillos. One is my green chicken chili, which I promise to post soon, and the other is this incredible Creamy Tomatillo Chicken recipe.

If you can prepare the sauce the night before it is perfect for a busy workday. Just come home, take the marinated chicken out of the bag, and bake. After marinating for that long you are sure to get a super juicy and flavorful chicken breast. The ranch gives it a nice refreshing quality while the cilantro and lime give it a little zip! While I served this with rice which was awesome, I really want to try the chicken chopped up over some greens with corn, black beans, and some red bell pepper. The sauce would make for an amazing dressing over a little southwest salad!

INGREDIENTS
1 c mayonnaise
1/2 cup buttermilk
1 package dry ranch dressing mix
2 1/2 tsp garlic
1 c cilantro leaves
4 tomatillos, husked and chopped
1 tsp lime juice
4 boneless skinless chicken breasts

GARNISHES (Optional)
Lime wedges
Extra cilantro leaves

STEPS

  • Add into a blender the mayonnaise, buttermilk, ranch dressing mix, garlic, cilantro, tomatillos, and lime juice.
    Blend until well combined and transfer about half of the mix to a one-gallon Ziploc Bag.
  • Add the chicken to the bag and seal tightly.
  • Store the chicken in the fridge and marinade anywhere from 30 minutes to overnight.
  • Transfer the remaining marinade in a small bowl, cover, and place in the fridge until ready to serve.
  • When ready to begin cooking preheat the oven to 375º and transfer the chicken breasts to a baking dish.
  • Dispose of the leftover marinade.
  • Bake the chicken for 20–25 minutes or until cooked completely through.
  • Transfer the cooked chicken to the plate and poor the additional sauce over the top.
  • Garnish with a lime wedge and some fresh cilantro leaves.
  • Enjoy! 

Recipe adapted from Creme de la Crumb.

Dinners

Recipe—Chicken Breasts with Mushroom and Onion Dijon Sauce

Something about cooler weather makes me crave comfort food. I just love a good hearty meal on a cool night. My chicken breasts with mushroom and onion Dijon sauce is one of those delicious and soul warming meals. This is a sophisticated recipe that is just absolutely wonderful. The sauce is rich and creamy and really allows the flavors of the fresh herbs to come out and complement the zestiness of the mustard. With the holiday season approaching and people getting together this is the perfect dish to prepare for a small group. This recipe comes together relatively easy and you are sure to impress your guests with your culinary abilities.

Note: If you are feeding more than four people consider butterflying the breasts or even getting thin breast cutlets at the store. If you use a thinner breast you will need to adjust the cooking times for the chicken slightly to avoid overcooking. 

INGREDIENTS
1/4 c flour
1/2 tsp salt
1/4 tsp freshly ground black pepper
4 boneless skinless chicken breasts
4 tbsp extra virgin olive oil
4 c white mushrooms, sliced
1 small red onion, thinly sliced
2 tbsp fresh rosemary, chopped
1 tbsp whole grain mustard
2 tbsp Dijon mustard
1/2 c white wine
2 tbsp fresh parsley, chopped
1/4 c chicken broth
1/4 c heavy cream
2 tbsp butter
2 tbsp fresh parsley, chopped (optional)


STEPS

  • In a large Ziploc bag mix together the flour, salt, and pepper.
  • Add the chicken to the bag and toss to coat.
  • Heat the olive oil in a large skillet over medium-high heat.
  • Remove the chicken from the bag and shake off excess flour before placing in the pan.
  • Cook the chicken for 4–6 minutes per side and transfer to a platter.
  • Add the mushrooms to the pan and cook for about 5 minutes making sure to stir a few times.
  • Add the sliced red onions and rosemary to the pan and continue to cook for 3–4 minutes.
  • Mix in the mustards and wine and gently scrape the bottom of the pan making sure to get everything well incorporated.
  • Add in the parsley, broth, cream, and butter and mix to combine.
    Place the chicken back into the pan and spoon the sauce over the top.
  • Reduce heat to medium-low and cook at a simmer until the chicken is cooked through.
  • Transfer the chicken breast to a plate and spoon sauce over the top.
  • Sprinkle with a little chopped parsley garnish for some added color.


Recipe adapted from A Family Feast.

Dinners

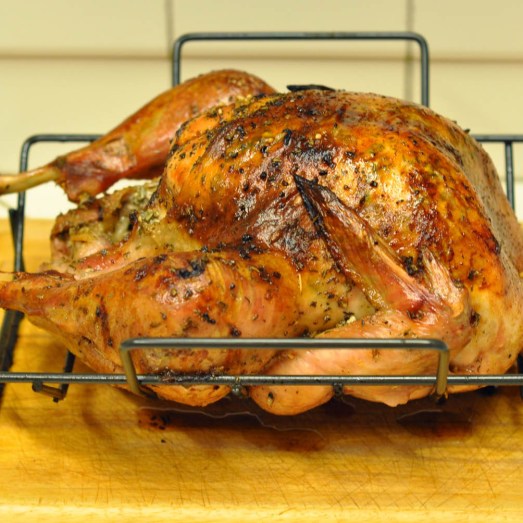
Recipe—The Perfect Turkey

To brine or not to brine? That is the ongoing question I have people ask me about cooking a turkey. Well here is your answer, I am a briner. I have prepared turkeys both brined and not. While I am no professional chef I would consider my self very versed in eating. I personally think brined turkeys come out with more flavor and are more moist than that of a turkey that is not brined. Some of you may be asking, “what the heck is brining?”

Brining is the process of soaking your turkey in a salt (and sometimes herb) infused bath for several hours prior to cooking. I find that your bird will be more evenly flavored and it will also be the moistest bird you ever have.

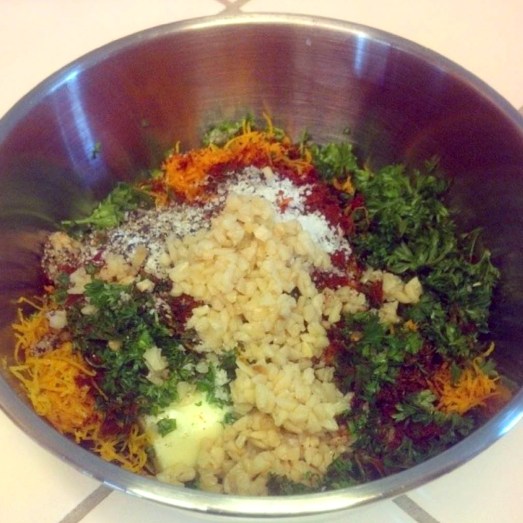
I make an awesome citrus herb rub (see recipe below) for my turkey. It is flavor packed and will make all your dinner guests ohhhh and ahhhh. The orange zest is not overpowering at all. It actually is a really nice complement to all the other flavors of a thanksgiving dinner. Trust me. I know how to make a delicious turkey.

Notes: Do not brine your turkey if it is self basting, pre seasoned, or kosher. If you do not have a pan that is large enough you may use an oversized bowl, ice chest, or even a baking bag tied off. The key is that the bird is completely submerged.

BRINING INGREDIENTS
1 c kosher salt
2 c sugar
1 c apple cider vinegar
2 tbsp sage
2 tbsp thyme
2 tbsp rosemary
1 tbsp pepper
thawed turkey

STEPS FOR BRINING

  • Find a large pot that will hold your turkey making sure you have at least an inch or two of room at the top.
  • Bring 4 cups of water to a boil in your pot.
  • Add the salt and sugar and stir until completely dissolved.
  • Remove the pan from heat and add in 8 cups of cold water, apple cider vinegar, sage, thyme, rosemary, and pepper.
  • Place the pot in your sink (this will help in case any liquid overflows).
  • Remove all of the giblets and neck from your turkey and gently lower it into the pot.
  • Cover the pot with a lid or saran wrap.
  • Place the pot in the fridge and marinade for 12–16 hours.
  • Rinse the turkey and pat dry.

TURKEY INGREDIENTS
3 tbsp garlic, minced
2 c Italian parsley leaves, chopped
1 tbsp kosher salt
1 tsp ground pepper
2 tsp chili powder
2 oranges, zested and quartered
1 c butter, softened
1 brined turkey

STEPS FOR TURKEY

  • Preheat oven to 325º.
  • In a small bowl combine the garlic, parsley, kosher salt, pepper, chili powder, orange zest, and butter and mix until well combined.
  • Starting from the neck of the turkey, carefully separate the skin from the breast meat with your fingers.
  • Push about half of the herbed butter mixture under the skin and spread it out evenly. (Don’t be afraid really get it all over in there! The butter will melt and all those yummy flavors will just seep into the meat.)
  • Use the other half of the mixture to evenly cover the top and sides of the turkey.
  • Place the orange quarters inside the turkey’s cavity.
  • Place the seasoned turkey in a roasting pan and loosely cover with foil.
  • Roast the turkey for 20–23 minutes per pound and baste every 45 minutes. (Note: If you are running out of juices in the pan just add some chicken broth or cubes of butter.)
  • Remove the foil for the last 45 minutes of cooking.
  • When the temperature in the meatiest part of the turkey reaches 165º remove it from oven and allow it to rest for 25–30 minutes.
  • Carve and gobble up.


Have a wonderful Thanksgiving everyone!


Brunch, Side Dishes

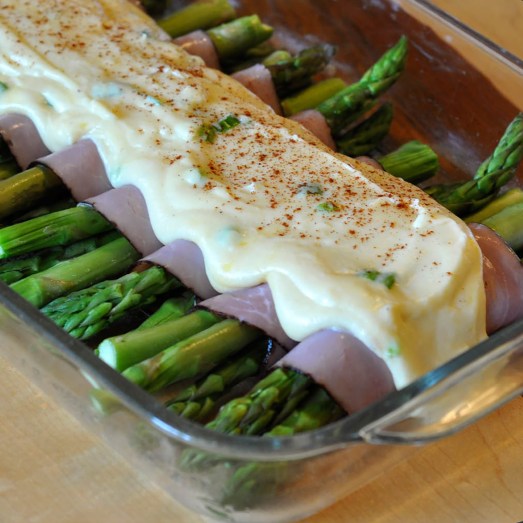
Recipe—Asparagus Ham Rolls

This was a side dish I recently made for Sunday brunch. It was easy, delicious, and made for a great presentation. Ham and asparagus has always been a classic combination and when you have the nice mild bite of Dijon mustard along with a creamy cheese sauce it’s suddenly even a little more fabulous. Be sure to bookmark this recipe if you are like me and always looking for brunch ideas. It is sure to be a great addition to any menu. Perhaps a Father’s Day brunch item?

Note: I prepared the asparagus rolls the night before and refrigerated them ahead of time. Then the morning of I just had to put together the sauce and bake it. One less thing to be dealing with in the morning.

INGREDIENTS
24 asparagus spears
8 slices deli ham
dijon mustard
3 tbsp butter
1 tbsp flour
1 c milk
salt and pepper
1 c cheddar cheese, shredded
3 green onions, thinly sliced
paprika

STEPS

  • Preheat oven to 350.
  • Trim off approximately 1″ from the cut ends of the asparagus.
  • Steam the asparagus for approximately 3 minutes or until crisp tender.
  • Season the asparagus with salt and pepper.
  • Spread a tad of the Dijon mustard on one side of each slice of ham.
  • Place 3 spears of asparagus on each slice of ham and roll up. As you finish each one place them seam side down in a greased baking dish.
  • Once you have prepared all the rolls get started on the sauce by melting the butter in a small sauce pan over medium heat.
  • Mix in flour until well combined.
  • Slowly whisk in milk, season with salt and pepper, and bring to a boil.
  • Cook for 2 minutes until it begins to thicken.
  • Stir in the cheese and green onions until cheese melts.
  • Pour the sauce over the asparagus rolls and sprinkle with a dash of paprika.
  • Bake for 20 minutes.
  • Remove from oven and serve.

Recipe adapted from a Taste of Home.

Dinners

Recipe—Pesto Chicken Kabobs

Over the past year or so I have been using pesto more and more. Last summer we got a massive amount of basil from our garden, which yielded lots and lots of tasty homemade pesto. I was able to freeze tons and use it throughout the whole year. Awesome! I have found that pesto actually makes a really great marinade. Recently I am totally hooked on pesto chicken kabobs. Not only are they super fun to eat but they cook in a fraction of the time. Perfect meal for this coming summer.

Tip From the Diva: When using wooden skewers, soak them in water for about 10 minutes before putting all your goodies on them. It keeps them from catching fire and are much easier to handle. Genius right?

INGREDIENTS
3–4 chicken breasts, cut into 1” pieces/cubes
salt and pepper
1/2 c pesto
half of a red onion, cut into 1” squares
red bell pepper, cut into 1” pieces
yellow bell pepper, cut into 1” pieces

STEPS

  • Season the cubed chicken with salt and pepper.
  • Place in a container and toss with the pesto.
  • Allow chicken to marinade for at least 30 minutes. (I like to let mine soak up all the flavors for 7–8 hours.)
  • Thread the meat and the veggies onto the skewers making sure to alternate and discard the leftover marinade.
  • Grill skewers for 10 minutes, turning as needed, or until meat is cooked through and vegetables are tender.
Dinners

Recipe—Stewed Italian Sausages with Peppers

Perhaps it’s the Italian in me but I absolutely LOVE a good Italian sausage with peppers and onions. Ta-sty! This is a recipe I tried awhile back when I was trying to trim down on my carb consumption. You can use any Italian sausages but I really like Aidells Italian Style Chicken Sausages. They are flavor packed and the chicken helps cut down on some of the calories from the traditional pork or beef. The whole family loved this recipe! For those not watching their carbs, I served it with some crusty French bread and it was a perfect meal! Quick, easy, and delicious. That’s my style!

Note: The sausage and veggies are absolutely awesome in a sandwich too. Just grab a pack of sandwich rolls, load ’em up, and chow down!

INGREDIENTS
2 pounds Italian sausage (I love Aidells Italian Style Smoked Chicken Sausage with Mozzarella)
4 tbsp olive oil, divided
2 red bell peppers, chopped
2 yellow bell peppers, chopped
1 red onion, chopped
1 fennel bulb, chopped
salt
1 c dry red wine
1 c fresh parmesan, grated

STEPS

  • Heat 1 tablespoon of the olive oil in a large skillet over medium high heat.
  • Add the sausage and cook turning frequently until they turn a nice golden color and are cooked through, about 15 minutes.
  • Transfer to the sausages to a large plate and cover with foil to keep warm.
  • Add the remaining 3 tablespoons of oil to the skillet along with all the veggies.
  • Cook stirring occasionally until the vegetables are softened, about 12–14 minutes.
  • Season the veggies with salt and add the sausages back into the skillet.
  • Add the wine to the skillet and bring to a simmer.
  • Continue to cook for about 4 minutes or until the wine has reduced by about half.
  • Sprinkle with the grated parmesan and serve.

Recipe adapted from Food and Wine.