Dinners

Recipe—Loaded Up Buffalo Chicken Tacos

I am a huge fan of buffalo chicken or anything smothered in buffalo sauce. As a matter of fact the buffalo chicken salad at Chili’s is one of my all time favorite salads. Something about the hot and spicy chicken paired with all the crunchy fresh vegetables in a cool ranch dressing is just darn right tasty. My husband is not nearly a big of fan as I when it comes to buffalo chicken, however he LOVES anything Mexican, especially tacos. So basically these “fusion” tacos were my way to morph one of my favorite dishes into something he would be eager to try. And they were a hit! These loaded tacos are spicy, cheesy, crunchy goodness; all wrapped up in a nice little tortilla. And this is the type of dish that takes me to my happy place. Hmmmm…

INGREDIENTS
2 boneless, skinless chicken breast, chopped into bite size pieces
salt and pepper
3 tbsp butter
1/2 c buffalo sauce (I love Frank’s Red Hot Buffalo Wings Sauce!)
6–10 soft taco sized tortillas

DELICIOUS TOPPINGS
2 c green leaf lettuce, chopped
1 large carrot, grated
2 stalks celery, thinly sliced
1 tomato, chopped
1 avocado chopped
1/2–3/4 c blue cheese crumbles
1/4 c ranch dressing
2 green onions, chopped
buffalo sauce for drizzling

STEPS

  • Season chopped chicken pieces with salt and pepper.
  • Melt butter in a large skillet over medium-high heat.
  • Add the chicken to the skillet and cook turning occasionally for 6–8 minutes.
  • Add the buffalo sauce to the skillet and reduce heat to medium-low.
  • Cook for another 6–8 minutes or until the sauce has cooked into the meat and the chicken is cooked thoroughly.
  • Place the tortillas on a microwave safe plate and cover with a paper towel.
  • Warm the tortillas in the microwave for 30 seconds. Flip the tortillas over and heat for an additional 30 seconds.
  • Fill each tortilla with a spoonful of the cooked meat and then finish off with all those delicious toppings.
Sauces

Recipe—Alfredo Sauce

One of my son’s first favorite foods was cheese tortellini smothered in alfredo sauce. I personally love alfredo sauce over fettuccine noodles and served with a grilled chicken breast and some broccoli. Either way alfredo sauce is a great indulgence to enjoy anytime. Who doesn’t love the thick creamy Italian cheese sauce over their favorite pasta? It is popular with people of all ages and can be extremely versatile. I have even used it as a white pizza sauce or poured over a baked potato. Homemade alfredo sauce is actually really easy and quick to make and so worth it. The quality does not compare to anything store bought. Give it a try! It will be a home run with the whole family!

Note: If you want a high quality sauce equal to that of one served in a restaurant (or better) use high quality ingredients. I recommend getting a fresh ball of mozzarella and a block of Parmesan over in the deli. You will notice the difference! Kraft will leave it gritty and we want it to be smooth.

INGREDIENTS
2 tbsp butter
2 tbsp olive oil
2 tsp garlic, minced
1/3 c white wine
2 c heavy cream
1/4 tsp white pepper
1/2 c parmesan cheese, shredded
3/4 c mozzarella cheese, shredded

STEPS

  • In a large saucepan over medium heat melt the butter and add olive oil.
  • Add the garlic and sauté for 1–2 minutes.
  • Carefully pour in the wine and heat until it begins to simmer.
  • Stir in the heavy cream and the white pepper and bring to a simmer stirring often.
  • Add in the Parmesan cheese and simmer for 8–10 minutes. By this point the sauce should be smooth and start to thicken.
  • Add the mozzarella cheese and stir frequently until smooth and completely incorporated.
  • Reduce heat to low and begin cooking your noodle of choice while the sauce simmers and continues to thicken.
  • Remove sauce from the stovetop and allow it to sit for a few minutes. It will thicken up a bit more.
  • Serve sauce over cooked pasta.
Dinners

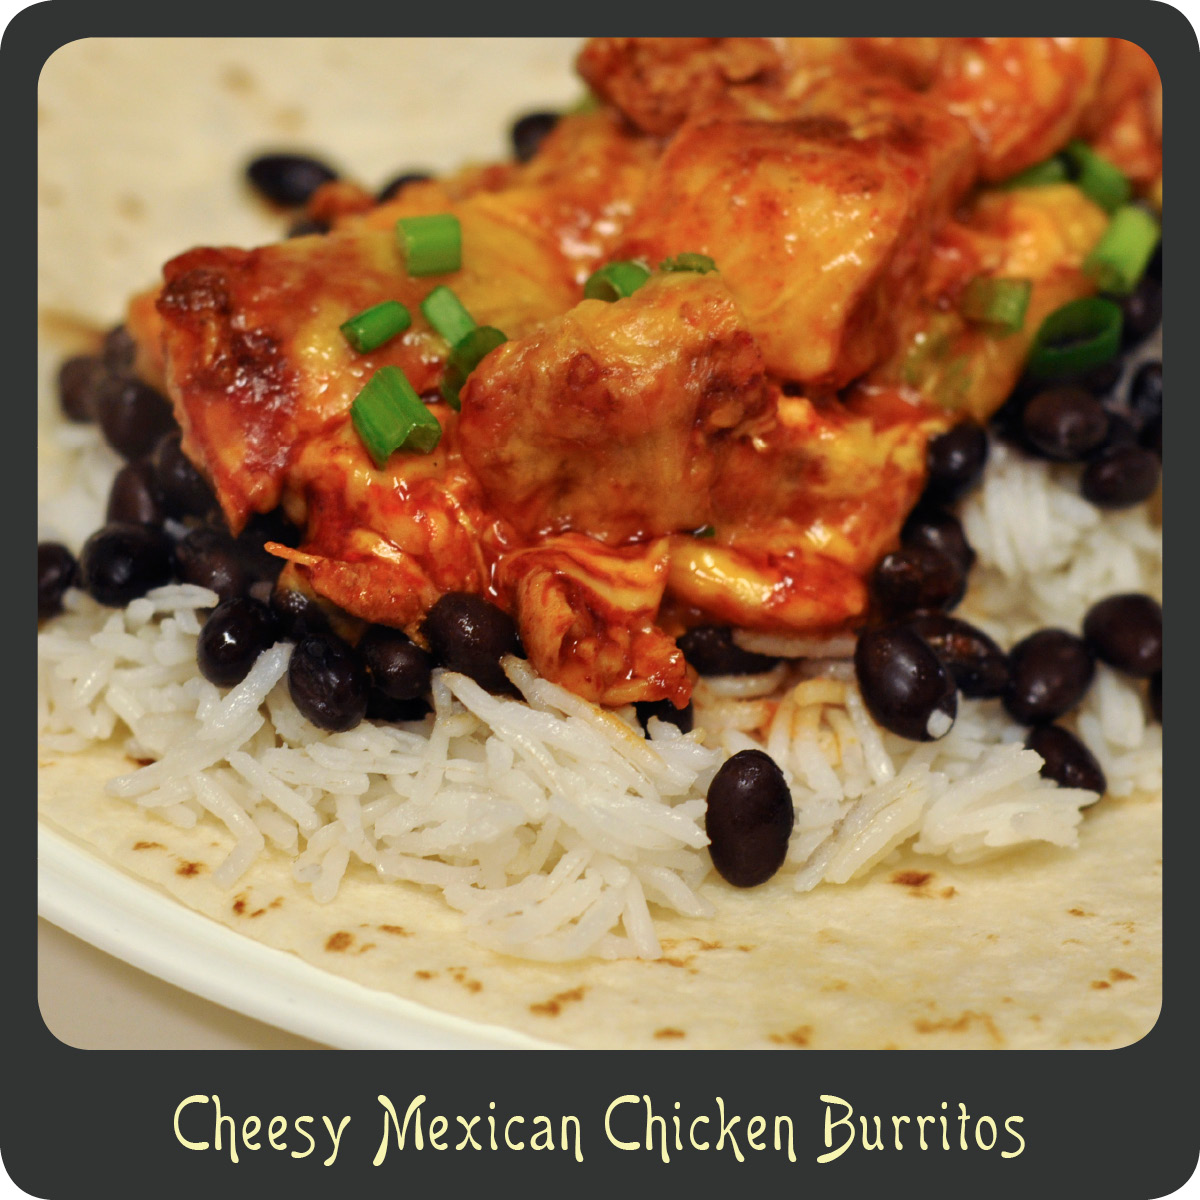
Recipe—Cheesy Mexican Chicken

Saucy and cheesy, I love almost any dish with those qualities. This recipe has both of those and is also delicious and low-carb. And best of all there are only 5 ingredients! Win, win, win! A working mom’s dream come true! My saucy chicken is great all on it’s own, served over rice, with some warmed tortillas, or even as burrito filler. I love how quick and easy it is to put together, perfect for a week night. While I love red sauce my husband is a big fan of green. Next time I may try this with green enchilada sauce and pepper jack cheese just for something different.

INGREDIENTS
1 lb boneless skinless chicken breasts
1 pack taco seasoning or a batch of my homemade taco seasoning
10 oz can red enchilada sauce, mild (I love Las Palmas!)
1 c cheddar cheese, shredded
3 green onions, chopped

STEPS

  • Preheat oven to 350º.
  • Cut the chicken into cubes and sprinkle with the taco seasoning.
  • Sauté the chicken in a skillet over medium high heat stirring occasionally until cooked through, about 10 minutes.
  • Place the cooked chicken pieces in a greased 8” x 8” baking dish.
  • Drizzle the enchilada sauce over the top of the chicken and toss to coat.
  • Sprinkle the cheese over the chicken.
  • Bake for 15–20 minutes or until it is bubbling.
  • Remove from oven and sprinkle with the green onions.
Appetizers

Recipe—Pizza Rolls

For this years Super Bowl I was trying to come up with some fun new recipes and was contemplating making a stromboli. If you don’t know what that is, it is basically a big baked pizza log. Since half our guests this year were kids I thought it might get a little messy. So I decided to slice up my stromboli and make pizza rolls. I just served them up with a warm side of my homemade marinara and they turned out great! The kids had a blast eating them. I won’t lie, they were a hit with the adults too. They were perfect little fun size pizzas! (And who doesn’t like miniature stuff?) If you have kids that like to help out in the kitchen this is a great recipe for them to assist with. Let them help sprinkle on the toppings and roll that bad boy up. Get creative and use your favorite pizza toppings. I just went basic since I had pepperoni on hand. These pizza rolls are a great appetizer to make any time of year. Enjoy!

Note: You can prepare your log a day in advance and keep it in the fridge. Then just pull it out, slice it up, and toss the rolls in the oven for a super quick and easy appetizer. 

INGREDIENTS
1 can refrigerated pizza dough (I like Pillsbury)
1 tsp garlic salt
2 tsp Italian seasoning
2 c mozzarella, shredded
1 cup pepperoni, chopped
marinara, alfredo, or pesto sauce for dipping (optional)

STEPS

  • Preheat oven to 425º.
  • Open pizza dough and roll it out flat, about 1/4 “ thick.
  • Sprinkle with garlic salt, Italian seasoning, cheese, and pepperoni.
  • Starting at the long end roll the pizza dough up tightly to form a log.
  • Carefully wrap the log in saran wrap and place in the freezer for 30 minutes. (It will slice much easier if it is firm.)
  • Cut the log into 1/2”–3/4” thick slices.
  • Place the slices on a lightly greased baking sheet.
  • Bake for 10–12 minutes or until lightly brown on top.
  • Serve with some warm marinara for dipping.
Uncategorized

Recipe Box Upgrade!

Have you checked out my Recipe Box recently? I’ve made some great improvements over the last couple of weeks so be sure to give it a looksy! Dinners are now grouped by meat type (beef, chicken, fish, and pork) to help you more easily find a recipe that works with what you have on hand. There is even a vegetarian section! (It may be limited, but it’s there and growing!) I have also broken up my side dishes into starch and vegetable based dishes to help you plan a balanced meal. You will also see that Cookies and Breads are newly added categories.

To get to my Recipe Box you can use the link on the home page under “About” or you can even use the link provided below. Keep checking back as the Recipe Box will always be getting added to. Happy Browsing!

https://divadicucina.com/recipe-box/ 

Sweet Treats

Recipe—Peanut Butter & Jelly Bars

Peanut and butter jelly sandwiches are an American classic. I love PB & Js! And by love I mean I REAAAALLLLLLY love them! I ate more peanut butter and jelly sandwiches during my pregnancy than the typical American child does in their first 10 years of life. There is just something so nostalgic about smooth peanut butter squished together with a layer of sweet sticky jelly. It is one of those items that takes me back to being a little girl on the playground. When I saw this recipe for peanut butter and jelly bars I knew they had to be mine! My son’s school had a bake sale coming up and I knew it was the perfect occasion to make these. Come on? Toddlers… peanut butter and jelly… they belong together! These bars turned out fabulous! The cookie layer is almost brownie like, the moistest peanut butter cookie you have ever had and then of course you have the layer of jelly and then just the right amount of crunch from the honey roasted peanuts on top. Superb when served with a big cold glass of milk. I may have a new addiction.

Note: These can be tricky to cut when still warm so be sure to allow for adequate chilling time. Otherwise you may find that the bars sort of crumble.

INGREDIENTS
1 c butter, softened
1 1/2 c sugar
2 eggs
2 1/2 c creamy peanut butter
1 tsp vanilla
3 c flour
1 1/2 tsp salt
1 tsp baking powder
2 c of your favorite jelly (I used Strawberry)
1 c honey roasted peanuts, chopped

STEPS

  • Preheat oven to 350º.
  • In a large mixing bowl beat together the butter and sugar for 2 minutes.
  • Add in the eggs, peanut butter, and vanilla and beat for another 2 minutes making sure it’s completely combined.
  • In another bowl combine the flour, salt, and baking powder.
  • Add the dry ingredients to the wet ones and fold in using a rubber spatula until completely combined.
  • Line a 9” x 13” baking dish with parchment paper going both directions and spray parchment paper with cooking spray.
  • Transfer 2/3 of your dough to the prepared baking dish and spread the dough out evenly.
  • Press the dough down firmly in the bottom of the entire baking dish making sure it’s even thickness all over.
  • Place the jelly in a small microwave safe bowl and warm it in the microwave for 1 minute and stir using a fork (this really seems to help in spreading it out).
  • Using a rubber spatula spread the warmed jelly over the top of the cookie dough making sure the dough is completely covered.
  • Using your hands, crumble the remaining dough over the top of the jelly.
  • Sprinkle the chopped peanuts over the top.
  • Bake until golden, about 50–60 minutes.
  • Remove the pan from the oven and set on a trivet to cool for 30minutes.
  • Holding onto the parchment paper, carefully lift the entire contents of the dish and transfer to a large cutting board.
  • Refrigerate the whole dish for 1–2 hours making sure it is completely cool before trying to cut into bars.
  • After bars have cooled cut into squares using a sharp knife or even a pizza wheel.
  • Store in an airtight container at room temperature.
Dinners

Recipe—Honey Pecan Crusted Salmon

I remember when I was younger going to a restaurant with my dad and ordering the honey pecan crusted salmon. It was one of those dishes you never forget. It was unlike anything I had ever had before. The pecan crust brings a wonderful texture to the salmon filet, just the right amount of crunch. And that nutty pecan flavor with the sweet honey mustard glaze turns the ordinary salmon filet into something truly wonderful. While this dish may look more complex it actually is a really easy way to prepare salmon. Between prep and baking you are looking at no more than 30 minutes. Thirty minutes for a spectacular dinner, you can’t beat that! I served this with a really simple salad of butter leaf lettuce and red onions and some honey mustard dressing. It was really light and the simple salad was a perfect complement to the savory fish. Even if your family members aren’t big fish fans I’m sure they will love this.

INGREDIENTS
2 salmon filets
salt and pepper
paprika
2 tbsp Dijon mustard
2 tbsp honey
2 tbsp butter, melted
1 tsp Worcestershire sauce
1/2 c pecans, finely chopped
1/4 c fresh parsley chopped

STEPS

  • Preheat oven to 400º.
  • Rinse off your fish filets and pat dry.
  • Season your filets with salt, pepper, and paprika.
  • Place skin side down on a parchment paper lined baking sheet.
  • Whisk together the mustard, honey, butter, and Worcestershire.
  • In a small bowl combine the pecans and parsley.
  • Spoon a tablespoon worth of the sauce in with the nuts and stir to combine.
  • Brush the remaining sauce onto the salmon filets.
  • Press the sticky pecan mixture to the top of your salmon filets.
  • Place the baking sheet in the oven and cook for 15–18 minutes or until the thickest part of the fish flakes off when tested with a fork.
Sandwiches

Recipe—Chicken and Cheese Stuffed Sammy

I am in love with almost any recipe that can be prepared in advance and then just tossed in the oven. This recipe is one of those! I recently made it when a couple of friends would be stopping by for lunch. It was a quick visit so I knew I didn’t want to be in the kitchen while they were there. I assembled the whole thing that morning and then just put it in the oven when they arrived. Not only is great if you are having a couple of guests over for lunch but it is perfect for a picnic or even camping. You can make the sandwich ahead of time and then just toss the foil wrapped sandwich on the grille and turn it once or twice to keep the bottom from getting too crisp.

This sandwich is made in one large sourdough loaf that can be cut into 3-5 individual servings. It is literally packed with delicious flavors that go together really well. There’s just something perfect about the combination of hearty chicken pieces and thinly sliced pastrami, especially when smothered with gooey melted Swiss cheese and pressed together with perfectly toasted bread. I promise that you won’t find anything like this is your local deli. De-lish!

INGREDIENTS
large sourdough loaf
Dijon mustard
mayonnaise
1 1/2 c Swiss, shredded
1/2 lb sliced pastrami
2 c shredded rotisserie chicken
1/2 c roasted red bell peppers
3 thin slices of red onion
salt and pepper

STEPS

  • Preheat oven to 400º.
  • Cut an oval out of the top of the loaf and remove it.
  • Tear out the inside of the bread leaving 1/2” thick bread shell.
  • Spread mayonnaise and Dijon mustard on the inside of the loaf and the underside of the lid.
  • Sprinkle half of the shredded Swiss in the bottom of the bread shell.
  • Layer in pastrami, shredded chicken, roasted red peppers, onions, and remaining cheese.
  • Season with salt and pepper.
  • Place the sandwich lid back in place and wrap tightly in foil.
  • Bake for 20–22 minutes or until the cheese is melted and all of the ingredients are warmed through.
  • Remove sandwich from foil and place on cutting board.
  • Cut into desired number of servings.
Dinners

Recipe—Cheesy Sausage Pasta

I can make a mean batch of homemade macaroni and cheese but the classic dish just doesn’t cut it as a main course in our house. Sometimes you need a grown up version of the classic dish but with a little more substance. This right here fits that bill. It is a creamy cheesy pasta dish with bits of tomatoes and sliced up smoky beef sausage. Delish! This is the perfect meal for a busy day since the whole things takes less than 25 minutes AND it only uses one pot! I love meals like that! Makes dish duty so much easier. Who am I kidding? I don’t do dishes. That’s the hubby’s job, so this recipe makes his job easier. This comfort dish screams simplicity and is easy on the wallet too. What’s not to love?

Note: This recipe is written to use a cast iron skillet. If you don’t have one, no biggie. Just use whatever large skillet you have and before placing in the oven transfer the pasta to a large baking dish and then top with the green onions and cheese and finish off under the broiler.

INGREDIENTS
1 tbsp olive oil
1 package beef sausage cut into rounds
1 small yellow onion, diced
2 tsp garlic, minced
2 c chicken broth
14.5 oz can petite diced tomatoes
1/2 c heavy cream
1/4 tsp pepper
8 oz uncooked penne pasta noodles
2 c Monterey jack cheese, shredded
2 green onions, thinly sliced
salt

STEPS

  • Heat oil over medium high heat in a cast iron skillet.
  • Add the sausage and onion and cook until lightly browned.
  • Add in the garlic and cook for another minute.
  • Add the chicken broth, petite diced tomatoes, heavy cream, and pepper.
  • Bring to a boil.
  • Add pasta and simmer until the pasta is tender, about 12–15 minutes, stirring once or twice while cooking.
  • Turn on the oven broiler.
  • Remove the skillet from heat and stir in 1 cup of the cheese.
  • Add salt as needed.
  • Top with the green onions and remaining cheese.
  • Place skillet under the broiler and leave in the oven until the cheese is melted and lightly browned.
Side Dishes

Recipe—Roasted Garlic and Cauliflower Mash

As I’ve mentioned in some of my previous posts I am always looking for delicious low-carb recipes. One of my weaknesses is steak and potatoes. I will eat potatoes in any form. Mashed, au gratin, baked, you name it! One of the closest substitutions that I have found for potatoes when watching my carbs is cauliflower.  Last year I posted a recipe for loaded baked cauliflower. It is now by far my most popular recipe on my blog. (If you haven’t tried it, do. It is fantastic!) This is another wonderful cauliflower recipe I have been loving when I need something to replace those starchy potatoes. The mild roasted garlic flavor is not overpowering at all, and the Romano cheese is just right.  These flavors really are fantastic complements to the roasted cauliflower. Cauliflower is in season right now so it is incredibly affordable and a great addition to your dinner menu.

Note: This recipe can be made up to a day ahead of time and placed in an oven safe baking dish in the fridge until ready to eat. To reheat it, bake in the oven at 350º for 20–25 minutes or until hot all the way through. 

INGREDIENTS
1 head of cauliflower, washed and broken up into florets
4–6 cloves garlic, peeled
4 tbsp olive oil
salt and pepper
4 tbsp butter
1/3 c heavy cream
1/3 c Romano cheese
2 green onions, chopped

STEPS

  • Preheat oven to 350º.
  • Lay out two large sheets of aluminum foil on top of each other.
  • Place the cauliflower florets and garlic cloves in the middle of the foil.
  • Drizzle with the olive oil and season with salt and pepper.
  • Bake for 55–60 minutes or until the cauliflower is fork tender.
  • Place the roasted cauliflower and garlic in a large mixing bowl.
  • Add the butter and cream.
  • Using an electric mixer or a hand held masher, mash the cauliflower until desired consistency. (Add more cream if needed.)
  • Stir in the Romano cheese and season with additional salt and pepper if desired.
  • Serve the mashed cauliflower and garnish with chopped green onions.