Dinners

Recipe—Busy Mom’s Beef Wellington

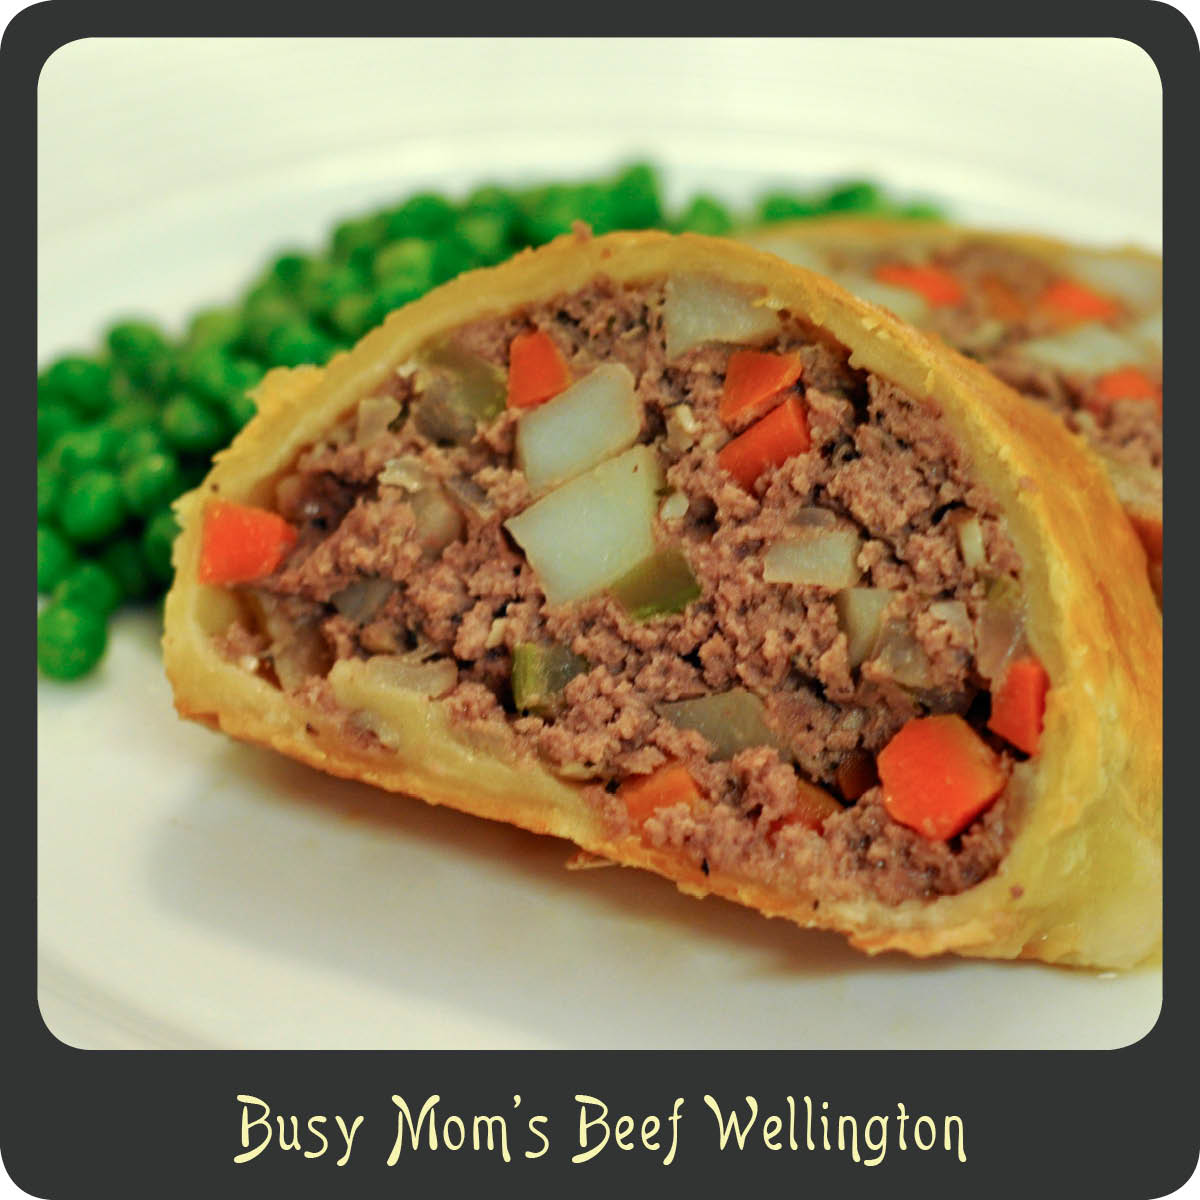
Traditional beef wellington has got to be one of the most glamorous meals ever prepared. It is so rich and attractive but certainly not something you want to be making Monday–Friday. It is a wonderful dish but it is a lot of work! Certainly not in the regular rotation for this busy momma! I saw this recipe the other day for a beef wellington made from ground beef and had to give it a try. It was absolutely delicious! It was relatively easy to throw together and the flavors were very close to that of traditional wellington, just with some added veggies, which are always welcome in our house. This will most certainly be a go to recipe for me from here on out.

Note: Try to dice your veggies so that they are all about the same size. This will help them to cook evenly. This will make two wellington “logs”. Each log will feed 2–3 people. If you don’t think you will eat both, place one prepared and uncooked “log” on a wax paper lined baking sheet and freeze for 2–3 hours. Transfer to an airtight bag or seal o’ meal pouch and freeze for a future dinner. (See Steps below for cooking a frozen one.)

INGREDIENTS
2 tbsp olive oil
1 yellow onion, diced
1 carrot, diced
1 celery stalk, diced
1 potato, cubed
1 tbsp garlic, minced
1 portobello mushroom or 5 baby portobello mushrooms, chopped
2 tsp thyme
1 lb ground beef
salt and pepper
1 package puff pastry (2 sheets), thawed
flour for dusting and rolling
1 egg

STEPS

  • Heat the olive oil in a large skillet over medium-high heat.
  • Add the onion, carrot, potato, garlic, mushrooms, and thyme to the skillet and sauté until your vegetables are fork tender and onions are translucent, about 8–10 minutes.
  • Transfer your cooked veggies to a bowl and place in the freezer for 10–15 minutes to cool.
  • While your veggies cool preheat the oven to 350º.
  • Remove the veggies from the freezer and add in the ground beef, salt, and pepper.
  • Mix everything together until well combined. (I recommend just getting in there and using your hands.)
  • Set your meat mixture to the side.
  • Dust a large cutting board with flour and unfold your pastry. Dust the side of the dough facing up with additional flour and roll out to 1/4″ thickness.
  • Divide your meat mixture into two portions and shape one of those portions into a log in the center of the dough.
  • Wrap the dough around the meat “log” like you would a burrito, making sure to tuck in both ends.
  • Place seam side down on a baking sheet.
  • In a small bowl whisk the egg until broken up.
  • Brush the egg wash over the entire outside of the prepared wellington.
  • Place in the oven and bake for 45 minutes until it is a nice golden brown.
  • Transfer the baked wellington to a cutting board and allow it to sit for 5 minutes before slicing and serving.
  • Enjoy!

Recipe adapted from Jaime Oliver.

Snacks

Recipe—S’More Snack Mix

S’more snack mix please! Last year I made a Valentine’s Day Snack Mix that was a total hit with my followers and also my little man’s little buddies at school. Well it’s that time of year again and I was trying to come up with something fun. All kids love Teddy Grahams so those were a given ingredient. What goes better with graham crackers than M&M’s and marshmallows? This was a no brainer! I had to make s’more snack mix. This is a perfect treat whether or not it’s Valentine’s Day. I’m thinking I will make a big batch for our next summer camping trip (with traditional M&M’s of course). You can just serve it in a large bowl (perfect for a party) ORRRRR you can make your own Valentine’s Day snack bags to pass out!

Last year I had a couple people contact me requesting that I share my valentine snack bag design so that they could print and make their own. This year I thought I would just go ahead and include it right here on my blog. That’s right! You can download a pdf of the cute cards I designed and print and make your own! How fun is that?!? A special homemade bag of snack mix for the kiddos to share with their friends! You’re welcome.

Click to Download PDF

I hope you enjoy this fabulous mix as much as me and my munchkin do! I wish all of my followers a wonderful Valentine’s Day filled with lots of love and happiness.

xoxox
The Diva

Note: This recipe makes enough to fill 24–26 snack size Ziploc bags or 1 large bowl. IF you don’t want to print and trim these on your own just take the pdf file to Kinkos or Staples and they can do the work for you. 😉

INGREDIENTS
3 (8 oz) bags Honey Teddy Grahams
10 oz bag mini marshmallows
2 (12.6) oz bags Valentine’s M&M’s

STEPS

  • Combine all ingredients in a large bowl and mix.

STEPS TO CREATE THE VALENTINE’S DAY SNACK BAGS

  • Make snack mix as directed above.
  • Distribute mix into snack sized ziplock bags.
  • Click on the above picture of the Valentine’s Day tabs.
  • Save the pdf to your computer.
  • Print out however many pages you will need to a heavy card stock.
  • Cut out the valentines along the black trim marks.
  • Fill in the “To” and “From” portion of the valentine.
  • Fold each valentine in half.
  • Staple along the top of the ziploc bag.
  • Wellah!


If you like this recipe, perhaps you will LOVE this!

Appetizers, Side Dishes, Snacks

Recipe—Roasted Carrot Fries

A couple of weeks back we got these GORGEOUS rainbow carrots in our box of organic produce and when my son saw them he honestly didn’t believe me that they were carrots.  They ranged from a deep purple to red and even white. They were just too pretty to get tossed into a salad or cooked any ordinary way. I wanted these to stand on their own. I know I have mentioned in many previous posts that I am always looking for fun and healthy after school snacks for my little man so we decided to make roasted carrot fries. They were awesome! I just sliced, baked, and served them with a little side of ranch (because every 3 year old loves to dip their food in sauce).  These were super quick and a wonderful way to enjoy these rainbow carrots.

INGREDIENTS
4–5 large carrots (I used rainbow carrots)
olive oil for drizzling
salt
ranch for dipping (optional)

STEPS

  • Preheat oven to 425º.
  • Carefully cut the carrots into “fry sized” pieces.
  • Place the carrots on a parchment paper lined baking sheet and drizzle with olive oil.
  • Toss the carrots to coat and season with salt.
  • Bake the carrots for 15–18 minutes or until crisp tender, flipping once halfway through cooking.
  • Remove from oven and transfer to a serving dish or plate.
  • Serve with a side of your favorite dressing or enjoy all on their own.
Soups

Recipe—Crock-Pot Creamy Chicken and Wild Rice Soup

Happy new year! How is 2014 treating you all so far? Hopefully absolutely fabulously!

First off I want to apologize for my absence over the past few months. Life has been super busy! I started a new job back in September managing one of the most awesome design studios and it has taken some time to find the right balance in life. My resolution for 2014 is to get back to some regular blogging so I have lots of great things coming for you. I have still been cookin’ up a storm while away so I have plenty of tasty new recipes to share. Now the question is, where to start!

Since it’s winter and we are all still recovering from the holiday madness how about one of my all time favorite soup recipes? It is a quick and easy crock-pot recipe that will be sure to warm you up.

When I was in high school I used to work in a little mom and pop owned coffee shop called Full O’ Beans. (People actually came in thinking it was a Mexican restaurant.) This coffee shop had the best soups and sandwiches! One of my all time favorite soups they served on occasion was the chicken and wild rice. It was delicious! I would have a big bowl at work and then fill up a big styrofoam cup to take home for later. It was one of those comfort soups that I just couldn’t get enough of. Well I finally put together this recipe that is out of this world good and reminds me of the coffee shop’s homemade chicken soup. This soup is easy, delicious, “souper” filling, and best of all it is made in the crock-pot. What more can a girl ask for? Now go make a big pot of this soup and snuggle up under a blanket on the couch while you wait for it to cook. Or do like I do, and just go to work. 😉

INGREDIENTS
4 c chicken broth
2 c water
1 box Rice-a-Roni long grain and wild rice
2 boneless, skinless chicken breasts
1 c carrots, chopped
1 cup celery, sliced
1/2 c butter
1/3 c flour
2 c half and half
1/2 tsp pepper
1/2 tsp salt

STEPS

  • In your crock-pot mix together broth, water, and rice (including seasoning pack).
  • Add in the chicken breasts, carrots, and celery.
  • Cook on low for 6–8 hours or on high for 3–4 hours.
  • Remove the chicken breasts from the crock-pot and break it up into pieces using a fork. Return the chicken to the crock-pot.
  • In a medium saucepan melt your butter over medium heat.
  • Gradually mix in the flour until well combined.
  • Whisk in the half and half and season with the salt and pepper.
  • Add the creamy base mixture to the crock-pot and stir until well combined.
  • Allow the soup to cook on low for another 15 minutes.
  • Try the soup and season to taste. If it is too thick you can add a little water to thin it out.
Side Dishes

Recipe—Cilantro Lime Rice

Being frequent consumers of Mexican food we eat lots of rice. Rarely do we consume “plain” white rice. My go to recipes are my Mexican red rice (arroz rojo) or this cilantro lime rice. It just depends on what I’m pairing it with. This rice is very light and refreshing, a perfect complement to any spicy meat. If you have been to Chipotle before, you will recognize the flavors instantly as it is very similar to their recipe. Next time you are looking for a way to make your ordinary rice extraordinary, spend a couple extra minutes and give this flavorful rice recipe a try.

INGREDIENTS
1 c basmati rice
1 1/2 c water
2 tbsp olive oil, divided
1/2–1 tsp kosher salt
1 lime
1/4 c fresh cilantro, chopped

STEPS

  • In a 2 quart saucepan combine the rice, water, 1 tablespoon of the olive oil, and a 1/2 teaspoon of the salt.
  • Bring to a full boil over medium-high heat.
  • Cover and reduce heat to low.
  • Simmer for 16–18 minutes.
  • Remove from heat and let rice sit covered for 8–10 minutes.
  • Fluff rice with a fork.
  • Drizzle with remaining tablespoon of olive oil and add the juice from the lime and the chopped cilantro.
  • Stir to combine and add additional salt to taste.

Looking for more rice recipes? Maybe you will love these!

Mexican Red Rice (Arroz Rojo)

Tropical Macadamia Nut Rice

Rice Pilaf

Brunch, Dinners

Recipe—Mushroom and Swiss Cheeseburger Pie

Finding family friendly low-carb recipes can be a struggle. One go to ingredient you can work miracles with are eggs. Yes, the incredible, edible egg! I love that you can mix in practically any ingredients with eggs, throw the mixture in a pie dish and voilá! Dinner is done! Call it a frittata, a quiche, a pie, whatever your heart desires. My son is a cheeseburger fanatic (what 3 year old boy isn’t?) so when I told him we were having a cheeseburger pie for dinner his little blue eyes lit up. (It amazes me that all I have to do to get him to try something new is give it a fun name. Now if only that trick worked with my husband…) When I initially made this it was for dinner, but I will tell you the leftovers make an awesome breakfast too. Who would have thought of throwing all your favorite hamburger toppings right into a pie dish? I will tell you who, this crazy diva!

INGREDIENTS
3/4–1 lb of lean ground beef
1/4 tsp salt
1/4 tsp pepper
1/4 tsp garlic powder
1 yellow onion, chopped
2 c slice white mushrooms
6 large eggs
3 tbsp milk
1 1/2 c shredded Swiss cheese

STEPS

  • Preheat oven to 400º.
  • In a large skillet cook the ground beef over medium high heat.
  • When the meat is still a little pink add in the salt, pepper, garlic powder, onion, and mushrooms.
  • Cook until the onions are translucent and meat cooked through.
  • Remove from heat and drain off any excess fat.
  • In a large mixing bowl whisk together the eggs, milk, and 1 cup of the shredded Swiss cheese.
  • Add the cooked meat mixture to the mixing bowl and stir to combine.
  • Transfer the egg mixture to a greased pie dish.
  • Sprinkle the remaining Swiss cheese over the top.
  • Bake for 25–35 minutes or until set and no longer “jiggly” in the middle.
  • Allow to cool for 5 minutes before cutting and serving.
Salads, Side Dishes

Recipe—Broccoli Salad

Broccoli SAlad

Over the past several months I have been on a total broccoli salad kick. Whenever we go to the store I can’t resist getting some at the deli counter. I figured I might as well learn to make my own, and so I did. And it was the bomb diggity! This broccoli salad is the perfect balance of crunchy and creamy, and sweet and salty. I could seriously eat this as a meal all on it’s own, okay I did eat this as a meal all on it’s own. I ate it by the bowlful! It is the perfect summer salad. It’s super light and refreshing. I don’t care if you are a fan of broccoli or not, you will love this recipe. I will make broccoli lovers out of all of you yet!

INGREDIENTS
3 heads of broccoli, chopped into small pieces
1 lb bacon, cooked and crumbled
1/2 red onion, chopped
1 c craisins
1/2 c salted sunflower seeds
1 c mayonnaise
1 tbsp sugar
2 tbsp white vinegar

STEPS

  • In a large bowl combine the broccoli, bacon, red onion, craisins, and sunflower seeds.
  • In a small bowl whisk together the mayonnaise, sugar, and vinegar.
  • Drizzle the dressing over the broccoli salad and toss to coat.
  • Cover the salad and place in the refrigerator for several hours or overnight.
  • Stir right before serving.
Dinners

Recipe—Chicken Tamale Pie

Chicken Tamale Pie

I’m all for one-pot dinners that are quick, easy, and save me from washing any extra dishes. This dinner is all of the above and it is absolutely delicious. If you love tamales then you will love this recipe. Think tamales, but on steroids. The cornbread has so many wonderful flavors and great texture. And then you get way more meat than you will ever find in some little hand rolled tamale, plus cheese. Glorious cheese! If you have a family that loves all the flavors of Mexican food and you are looking for something new that will save you some time in the kitchen give this recipe a try. You wont regret it!

Del Real Shredded Chicken

Note: I love Del Real products. I frequently use them as a way to save me time in the kitchen. For this recipe I used a package of the Del Real Shredded Chicken. It shaved off prep time and their products are super affordable. You can also purchase a rotisserie chicken, or if you have time just boil 2 chicken breasts for about 20 minutes and shred them yourself.

INGREDIENTS
1/3 c milk
1 egg
1/4 tsp chili powder
14.75 oz creamed corn
8.5 oz package of Jiffy corn muffin mix
4 oz can diced green chilies, drained
10 oz can red enchilada sauce (I love Las Palmas)
2 c chicken, cooked and shredded
1 1/2 tbsp taco seasoning
1 c pepper jack cheese, shredded
2 tbsp fresh cilantro, chopped
2 tbsp Cotija cheese, crumbled

STEPS

  • Preheat oven to 400º.
  • Combine milk, egg, chili powder, creamed corn, Jiffy, and green chilies in a medium mixing bowl and stir just until combined.
  • Pour the cornbread mix into a greased pie dish.
  • Bake the cornbread for 23–28 minutes or until it is just cooked through and golden on top.
  • While the cornbread is baking toss the shredded chicken with the taco seasoning and 1/3 cup of the enchilada sauce.
  • Using a fork, poke a liberal amount of holes into the cornbread.
  • Pour the remaining enchilada sauce over the top of the baked cornbread.
  • Add the seasoned shredded chicken to the top of the cornbread spreading it around evenly.
  • Sprinkle the shredded pepper jack cheese over the top of the chicken.
  • Bake for an additional 15 minutes.
  • Remove from the oven and allow it to set for 5 minutes.
  • Sprinkle with the cilantro and Cotija cheese.
  • Cut and serve as you would a pie.
  • Enjoy!

Recipe adapted from Cooking Light.

Do you like using Del Real Products? Then perhaps you will love this fabulous recipe!

Chile Verde Stuffed Poblano Chiles

Chile Verde Stuffed Poblano Chilies

Salads, Side Dishes

Recipe—Italian Pasta Salad

Italian Pasta Salad

My husband and I grew up in a very small town so on the weekends it was not out of the norm for us to drive an hour to go to the closest mall or to go find some entertainment outside of town. On our way back home we frequently passed this wonderful little Italian deli. They had the BEST sandwiches and side salads. One of the side salads, which my husband absolutely loved, was their Italian pasta salad. I did my best to recreate this salad just for him. This makes a party sized batch, so if you are just making it for the family I recommend halving it. This is a perfect salad for a bbq or potluck and is sure to be a hit with all partygoers.

Note: This pasta salad will last approximately 4 days in the fridge. It gets better each and every day as the Italian dressing soaks into the pasta and veggies.

INGREDIENTS
1 lb rotini noodles
2 tbsp salt
1 1/2 c Newman’s Family Recipe Italian dressing
2 tsp garlic, minced
1/2 c red bell pepper, chopped
1/2 c red onion, chopped
1/2 c celery, sliced
2-6 oz jars artichoke hearts. drained
1 1/2 c cherry tomatoes, cut in half
1 c mozzarella cheese, cut into squares
2.25 oz can black olives, sliced
salt and pepper

STEPS

  • Bring a large pot of water and the 2 tbsp of salt to a boil.
  • Add noodles and cook per package instructions.
  • Drain the cooked pasta and rinse with cold water.
  • Transfer the cooked pasta to a large bow.
  • Add the Italian dressing, garlic, red bell pepper, red onion, celery, artichoke hearts, cherry tomatoes, mozzarella, and olives.
  • Stir to combine.
  • Season with additional salt and pepper if desired.
  • Refrigerate the pasta for 3 or more hours.  The longer the better.
  • Stir well before serving.
Dinners, Sandwiches

Recipe—Patty Melt

Patty Melt

Whenever I am getting ready to go on my bi-annual cleanse I allow myself one binge day and of course that includes my “last meal.” (It’s not really a last meal per say, but my last “bad” meal for 11 days.) This round I knew I needed something completely indulgent. I decided on one of my favorite types of burgers, a classic patty melt. A juicy ground beef patty smothered in cheddar and Swiss cheeses, some caramelized onions, and of course some 1000 island dressing. Heaven between two toasted slices of buttered sourdough toast. Go big or go home right? Well if you are looking for one of the best burger recipes ever give this a try. It is totally basic and completely wonderful!

INGREDIENTS
1 lb ground beef
2 tbsp Worcestershire sauce
salt and pepper
4 tbsp butter, divided
1 large yellow onion thinly sliced
4 slices cheddar cheese
4 slices Swiss cheese
8 slices sourdough bread
1000 island dressing

STEPS

  • Mix together the ground beef, Worcestershire sauce, salt, and pepper.
  • Form the meet into four thin patties.
  • Melt two tablespoons of the butter in a skillet over medium high heat.
  • Add the sliced onions and cook stirring frequently until they are a nice golden brown color, about 15 minutes.
  • While the onions are cooking heat a large skillet over medium-high heat and add the patties.
  • Cook the patties for 5 minutes and then flip over.
  • Add a slice of Swiss and a slice of cheddar to each patty.
  • Continue cooking the burgers for another 5 minutes or until cooked through.
  • Toast the slices of sourdough bread and spread one side of each slice with butter.
  • Spread the opposite side of each slice with a generous amount of 1000 island and keep them dressing side up.
  • Place a heap of the caramelized onions on 4 slices of the bread.
  • Add the cooked patty to the piles of onions and place the remaining slices of bread on top, dressing side down.
  • Binge!