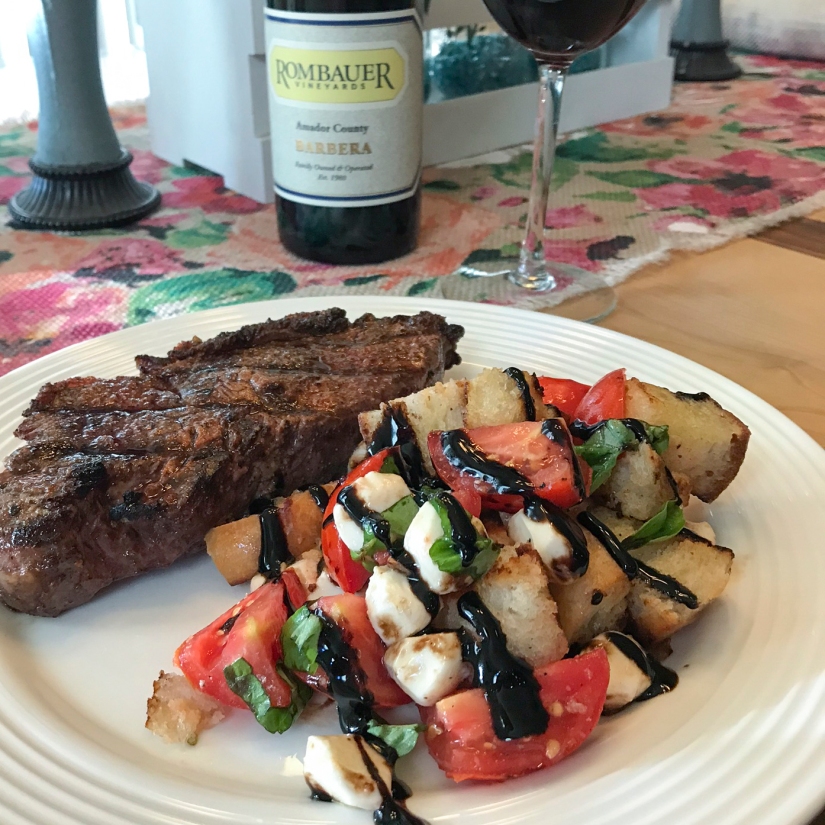
Panzanella salad is essentially just an Italian tomato and bread salad. This is one of my all-time favorite summertime dishes. It is so easy and comes together in minutes. You can make this with pretty much any tomatoes, just make sure they are juicy and ripe. Heirloom are always a good safe bet. Traditional panzanella salads don’t have mozzarella but I am a girl who LOVES her cheese. Call me a rebel. This salad is all about taking simple ingredients and bringing them together to create a fresh and flavorful dish perfect for those warm spring and summer nights out on the patio.
Note: This salad pairs perfectly with grilled steak and some red wine. My favorite is the Rombauer Vineyards Barbera.
INGREDIENTS
4 c tomatoes, chopped
1/2 c fresh basil, chopped
1/4 c shallots, thinly sliced
8 oz mini mozzarella balls
4 tbsp butter
1 tsp garlic, minced
4 c sour dough bread, cut into cubes
1 tbsp olive oil
balsamic glaze
salt and pepper
STEPS
Place your chopped tomatoes, basil, shallots, and mozzarella balls in a large bowl.
Melt the butter in a large skillet over medium high heat and add garlic cooking until the garlic is nice and fragrant.
Add the bread cubes to the skillet and toss to coat in the melted garlic butter.
Toast the bread cubes on all sides until they are golden and crispy on the outside.
Add the toasted bread cubes to the bowl.
Toss the “salad” and season with salt and pepper.
Drizzle with a little extra olive oil and finish with some balsamic glaze.
Okay, here we go, first recipe post of 2020! I feel like it should be something super extreme and mind blowing since you have all been waiting for so long but here we are in the middle of a pandemic and that just seems unrealistic. How are you all doing? Are you cooking at home more than ever? I know I am. I’m trying to use this as an opportunity to eat at home more and save some moolah.
These pork tacos were one of the first meals I made when we went into official “lock down” a couple of weeks ago. When all this really started I did an inventory of what we had in our box freezer and noticed we had TONS of ground pork so I wanted to do something different with that. Ground pork is just not a typical protein to cook with since it has such a different flavor compared to ground beef or ground turkey.
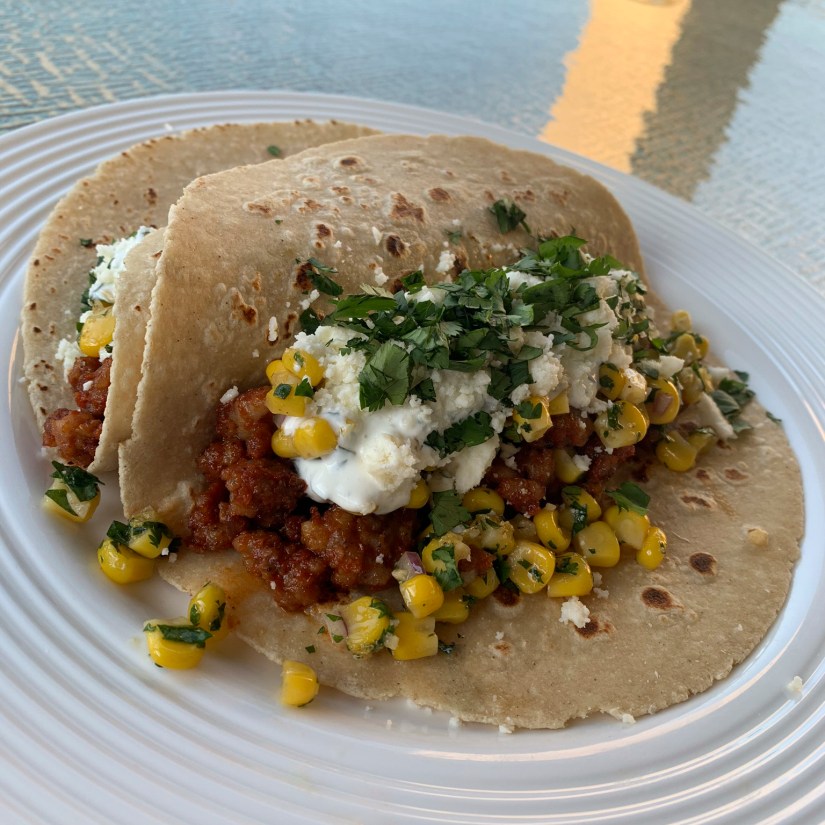
Not to go tooting my own horn or anything, buuuuuut these turned out so freaking good! There are so many great flavors wrapped up in the tortilla. You have the sweet corn salsa, the tangy cilantro lime crema, and then the savory pork cooked in a tomato sauce that has a nice little kick to it thanks to the jalapeño. Nothing too crazy heat wise, my ten-year-old chowed down on them. If you are looking to spice up your typical “Taco Tuesday” give these a try.
Hang in there folks! We are all in this together! Huge virtual hugs (and more recipes) coming your way! xoxox—Diva di Cucina
INGREDIENTS FOR THE CORN SALSA
1 tbsp olive oil
15.25 oz canned corn
2 tbsp red onion, finely chopped
1/3 c cilantro, chopped
1 tsp garlic, minced
1 1/2 tsp cumin
1 tbsp lime juice
3 tbsp olive oil
salt and pepper
INGREDIENTS FOR THE CILANTRO LIME CREMA
1/3 c sour cream
2 tsp lime juice
2 tbsp cilantro, chopped
1 tbsp water
INGREDIENTS FOR THE PORK
1 tbsp olive oil
1 lb ground pork
1 jalapeño, thinly sliced
1/4 c red onion, finely chopped
1 tbsp garlic, minced
6 tbsp tomato paste
2 tsp cumin
1/3 c water
salt and pepper
OTHER INGREDIENTS
tortillas (I loved these with white corn tortillas)
cotija cheese
cilantro, chopped
STEPS FOR CORN SALSA
Heat 1 tablespoon of olive oil in large skillet over medium high heat and add the corn.
Cook the corn for about 5 minutes stirring every minute or so.
Transfer the corn to a medium sized bowl and add the remaining corn salsa ingredients.
Season with salt and pepper to taste.
Stir and set aside.
STEPS FOR THE CILANTRO LIME CREMA
In a small bowl, whisk together all the cilantro lime crema ingredients and set aside.
STEPS FOR THE PORK
Add 1 tablespoon of oil to the pan the corn was cooked in and turn up to medium-high heat.
Add the pork to the skillet and break apart using a spatula.
Once the pork has started to brown, add in the jalapeño, red onion, and garlic.
Continue to cook until the pork is all brown and cooked through and the onion and peppers are tender.
Mix in the tomato paste, cumin, and water and season with salt and pepper to taste.
Cook for another 2–3 minutes allowing the sauce to thicken up.
TACO ASSEMBLY
Warm up your tortillas and top each one with a scoop of the meat, a scoop of the corn salsa, a drizzle of the cream, some cotija cheese crumbles on top, and finish it off with a sprinkling of cilantro.
Hello there my lovely followers! It’s been a minute since I’ve posted. Okay, more like 15 months. That is just far too long but as you can imagine, life happens. First and foremost, I wanted to let you know I am in fact alive and well. I have been busy working full time managing a design studio, doing lots of freelance design work, carting my son around to sports which he does about 10 months out of the year, and squeezing in as much family time as I can during our down time.
But here I am, dealing with all the craziness that has come along with the COVID-19 pandemic. I am currently safe in my home with my family. My husband and I are both thankfully still working (from home), and trying to also juggle the schooling of our 10-year-old son. With so many events and youth sports cancelled, I find myself with more free time than I ever remember having. (At least since becoming a mom.) I am trying to make the best of it and just enjoying playing games with my family, doing puzzles, binge watching shows, finally finding the time again to get back to running a few days a week, sitting down and having at least two meals a day with my family, and in all that, trying to carve out a little extra time to get back to blogging. I am determined to let some good come out of all of this.
I absolutely love sharing recipes with all of you, so much so that I am literally getting teary as I am trying to post this. They are happy tears though. I hope that I can get you at least an email a week to bring a little sunshine your way.
So, what better post to come back with than, how on earth I manage my busy schedule and getting meals on the table. It is all about meal planning! It is the only way I can get through the week. When people ask me how I manage to cook as much as I do, I tell them it is all about meal planning. It seems like such a simple task but I realize so many people don’t even know where to begin. So, consider this my beginners guide to meal planning.
I am going to share with you my tips, tricks, and even a handy shopping list you can print and use at home. This is the same one I use myself every week. I have it organized by categories that follow the flow of most grocery stores. I absolutely hate it when I feel like a pin ball at the grocery store bouncing back and forth from one end of the store to the other. Organization and order is key!
It has been about four years of me using this list and I noticed that as soon as I started spending the 30 minutes doing my meal planning each weekend I was saving so much money by not eating out as often and not buying things I didn’t need, I reduced our wasted food to almost nothing, and best of all, eliminated so much extra stress! It is an easy routine that takes some time to adopt but so worth it once you get into the groove.
MY TIPS AND TRICKS FOR MEAL PLANNING
Print out several of my shopping lists at once. I do about 10 at a time. You probably won’t be as consistent if you are only printing out one at a time. If they are nearby and ready to go, you are more likely to use them.
If you find yourself running low on or finishing off any items, add that to the shopping list throughout the week. For example, if my husband finishes off the oregano, he just writes it on the shopping list clipped to the fridge. This helps keep you stocked on the essentials and you aren’t trying to rack your brain trying to remember what it was you finished off earlier in the week when you do go to sit down and write out your list.
When you are ready to do your planning for the week, look at your calendar and write in your evening commitments so you know what you need to plan around. If you have to work late, or your child has a game, plan to do quick and easy dinners those nights or maybe even takeout.
Clean out your fridge each weekend of anything that has gone bad or you know you won’t use. It is good to know what you do have in there.
Do a quick inventory of what you have that you need to use. For example, if I have half a bag of shredded cabbage or a handful of tortillas from a few days ago that I know will go bad if I don’t use it soon, I try to plan a meal around that early in the week. This helps you cut down on waste and can save you money.
When doing your planning, look at what recipes take common ingredients. For example, last Sunday I wanted to make pork tacos for dinner and those took cotija cheese, chopped red onions, and sliced jalapeños. I decided to make juevos rancheros for breakfast that day since they shared so many of the same ingredients. I was able to prep and chop all my ingredients for dinner while I was doing it for breakfast so come dinner time, I already had all my ingredients ready to go and I got two meals out of those ingredients.
Use leftover ingredients from one meal as part of the next one. I will cook twice as much broccoli as I need for a dinner, and then make a broccoli and egg quiche the next day or grill extra chicken for dinner on Sunday, to go on my salads for lunch throughout the week.
Plan your meals around seasonal produce. You will get the best quality ingredients and the best prices.
Make a shopping list every weekend for the week ahead. Once you have all your meals planned for the week, start filling in the bottom portion with what grocery items you need to make them. Having an organized and written shopping list keeps you on track at the grocery store. You are more likely to buy items you don’t need and spend more money if you go to the store and just try and wing it. Plus, you then only need to make one trip to the store a week.
Keep your dinner menu for the week on the fridge and check it each day. That way you remember if you need to defrost any meat, get anything marinated, or load up the crock pot before leaving for the day.
PREPPING FOR THE WEEK
Chopping and slicing can quickly become one of the most time-consuming parts of any meal. If you have a busy week ahead, consider washing and prepping all your produce on Sunday. I will wash and chop broccoli, onions, peppers, zucchini, pretty much any veggie ahead of time and then just put them in Ziploc bags in the produce drawer of the fridge.
If you have a recipe that calls for a marinade, combine all your marinade ingredients in a mason jar ahead of time. Before you leave for work in the morning just pour the marinade into a Ziploc bag with the meat.
If you are making a crockpot meal that calls for seasoning and liquid ingredients, combine all those together in a Tupperware or mason jar over the weekend or the night before so that in the morning you just have to dump it over the meat into the crockpot. I do not want to be spending my morning trying to open cans and measure seasonings when I am already running late for work.
OTHER TID BITS
Make a double batch of any of your recipes that freeze well. One for now and one for later. My enchiladas freeze awesome! I will make a triple batch, eat one batch fresh and freeze two more. It isn’t that much more work to just double a recipe if you are already taking the time to make it once. Then later on you have a quick dinner that you can just toss in the oven. Soups, lasagna, and baked pasta casseroles also freeze great.
Keep foil baking dishes on hand. They are great for your freezer meals! I love the 8” x 8” square foil dishes. They hold 4 enchiladas perfectly and slide right into a gallon Ziploc bag.
Purchase meat in bulk and separate into meal size portions. Huge money saver!
Invest in a FoodSaver so you can package items in a way that allows them to last a long time.
Click on the above image to save a printable pdf of my shopping list.
Is there anything I missed or do you have any advice? I always love hearing ideas from other people. Please feel free to share in the comments below.
The first time I actually made this recipe was Christmas Eve. Some of you might be thinking, who makes a crock-pot meal on Christmas Eve? The answer is, this lady! Why is it that people feel the need to spend half the day in the kitchen and half their paychecks on holiday dinners? You can have an amazing meal with minimal time in the kitchen and by spending less than $25. Thennnnnnn you can use that money you saved on groceries and buy some nice red wine that will compliment this dinner perfectly.
That Christmas Eve I just wanted to be able to fully relax and enjoy the day with my family. I didn’t want to be in the kitchen for most of the day slaving over the oven. And guess what, this dinner was just as good as many of the dinners I spent the entire day making. And best of all, my family loved it!
The meat had so much flavor and was so juicy! The sauce is a very mild tomato-based sauce that goes so fabulously with the parmesan risotto. This is probably in the top 5 recipes I have ever made. It is so filling and hearty. A perfect comfort meal for the cooler weather. I love that this recipe is “fancy” enough for a special occasion or a holiday but is quick and easy enough that you can pull it off on a Thursday night after a long day of work. Literally an all occasion dinner.
POT ROAST INGREDIENTS
3 lb beef chuck roast
1 tbsp dried minced onion
2 tbsp garlic, minced
1 (.6 oz) package au jus mix
1 (.7 oz) package dried Italian salad dressing mix
2 tsp black pepper
1 pinch cayenne pepper
1 1/2 c tomato juice (like V8)
RISOTTO INGREDIENTS
3 tsp olive oil
1 lb arborio rice
6 c chicken broth, room temperature
1 c parmesan cheese
1 tsp onion powder
ground pepper
In a bowl, whisk together all the remaining pot roast ingredients.
Pour the tomato mixture over the top of the roast.
Cook on low heat for 8–10 hours, or high heat for 5–6 hours.
When the roast is done cooking, transfer it to a cutting board and allow it to rest for 5 minutes.
Using two forks, shred the roast and place back into the crock-pot.
Cover the crock-pot and keep on low.
While the meat is soaking in all that yummy sauce, begin to prepare the risotto by putting the olive oil in a large saucepan over medium high heat.
Add the rice and stir to evenly coat the rice with the oil.
Cook for about 2–3 minutes.
Add 1 cup of the broth and simmer, stirring constantly, until the broth has completely reduced and the pan is nearly dry, about 3 minutes.
Repeat the above step incrementally using 1 cup of broth at a time. The gradual addition of broth is key to getting the rice to develop a nice and creamy sauce.
Once all the broth is cooked down, stir in the cheese and onion powder and season with pepper.
Scoop a large spoonful of risotto into a serving dish and top with the shredded meat, additional parmesan cheese, and some parsley.
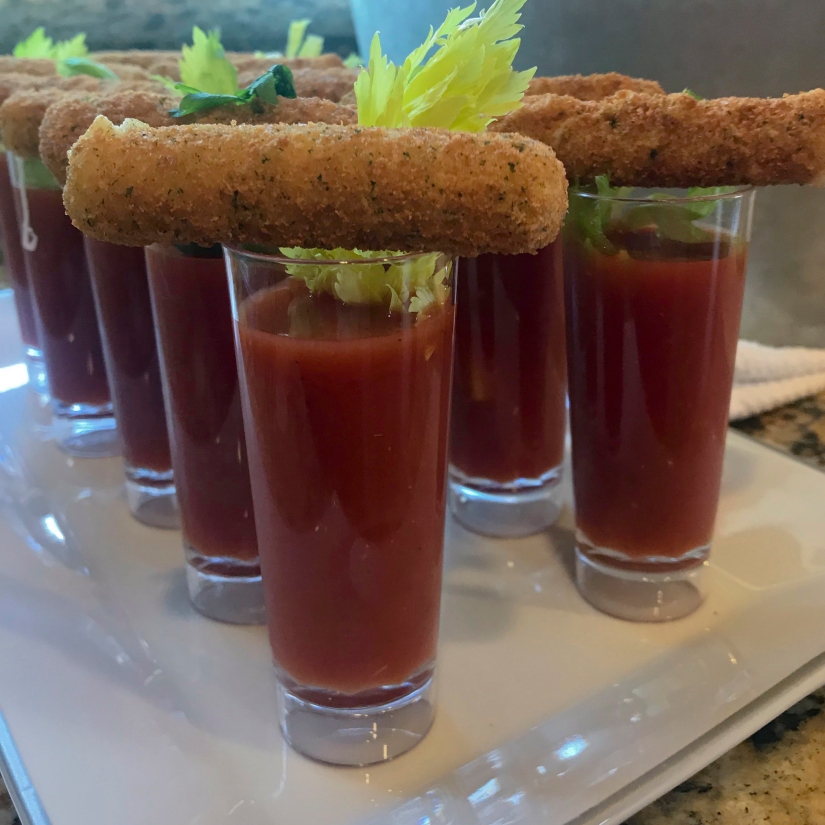
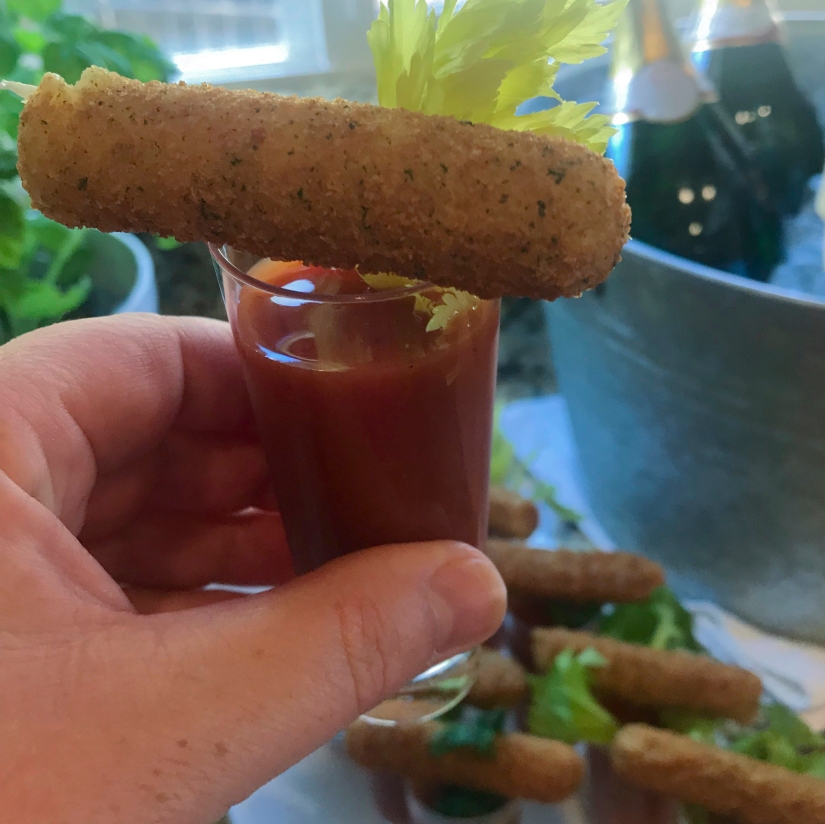
I recently hosted a bridal shower brunch and of course we had bottomless mimosas but I also made these super cute bloody mary shooters that are the adult equivalent of grilled cheese and tomato soup. I used a spicy bloody mary mix so it had a nice kick but then you take a bite of that crispy mozzarella stick to cool down your mouth. Just the best combination ever! Plus, how cute are they?!?!
This recipe makes 12 but I recommend you make double from whatever you think you will need. Just trust me on this one. These will disappear!
Note: I made these using 2 ounce shooter glasses. If you use 2 ounce glasses this recipe will make 12 portions. You can find the mozzarella sticks in the freezer section of your local grocery store.
INGREDIENTS
12 mozzarella sticks
14 oz your favorite bloody mary mix
10 oz vodka
celery greens
STEPS
Bake the mozzarella sticks per the package instructions.
In a pitcher, mix together bloody mary mix and vodka.
Distribute the mix evenly among the shot glasses.
Garnish with a sprig of celery greens and lay a mozzarella stick across the top.
Right now, I am drowning in youth sports. My son is currently playing soccer and baseball which takes up about 5–6 days a week and sometimes we have both on the same day. I lost my sanity a few weeks ago.
Don’t get me wrong, I absolutely love it! It just means that I need to be diligent in my menu planning and have some recipes that allow me to have dinner on the table quickly. We certainly have nights where dinner consists of sandwiches, Kraft Mac N Cheese, or takeout, but I try and cook a real dinner at least 4–5 nights a week. That means whatever I am making needs to be quick!
This recipe takes less than 30 minutes to make and costs about $15, assuming you have the basic stuff on hand. It is so simple, fast, and tasty! My family loves this recipe! The chicken comes out so juicy and flavorful after simmering in the creamy lemon sauce. Hope you enjoy it as much as we do!
INGREDIENTS
4–5 boneless, skinless chicken breasts
salt and pepper
1/4 c flour
2 tbsp butter
2 tbsp olive oil
1 lb penne
1 c chicken broth
3 lemons, 2 for juicing and 1 sliced
3/4 c heavy cream
1/4 c capers
parsley, chopped
STEPS
Season both sides of the chicken breasts with salt and pepper.
Place the flour in a large Ziploc bag and add chicken breasts.
Toss the chicken breast in the Ziploc bag until they are all evenly coated in the flour.
In a large skillet, heat the butter and olive oil over medium-high heat.
Place the chicken breasts in the skillet.
Cook the chicken for 6–7 minutes per side or until cooked all the way through.
While the chicken is cooking, bring a large pot of water to a boil and cook the pasta per the package instructions.
Add the broth, juice from two lemons, sliced lemon, heavy cream, and capers to the skillet with the chicken.
Season the sauce with salt and pepper to taste.
Bring the sauce to boil and reduce heat to medium-low heat.
Continue cooking the sauce until it has thickened up, about 3–4 minutes.
Transfer the chicken breasts to a plate or cutting board.
Drain the pasta and add it to the skillet with the sauce, tossing to coat all the noodles.
Serve the pasta on plates and top with a chicken breast.
Sprinkle the dish with fresh chopped parsley and serve.
Tis the season for apples and cinnamon! If you are having a hard time transitioning into the fall season and all that goes with it, then make yourself a big batch of this apple cider sangria, get out your pumpkin pie candle, and slip on a cozy flannel.
I made a double batch of this recipe for Thanksgiving last year and it was gone before I knew it. It went down just a little too easy. If you could take all that is fall and contain it in a drink, this would be it. It is literally the perfect drink for all your fall festivities, or even just a lazy fall Sunday.
Note: This recipe is best when made right before serving as the champagne and club soda can lose their fizz and the apples can brown.
INGREDIENTS
750 ml bottle champagne
2 1/2 c apple cider
1 c club soda
1/2 c Disaronno or Frangelico
2 apples, sliced
cinnamon sticks
STEPS
In a large pitcher or serving container, combine the champagne, apple cider, club soda, and Disaronno or Frangelico.
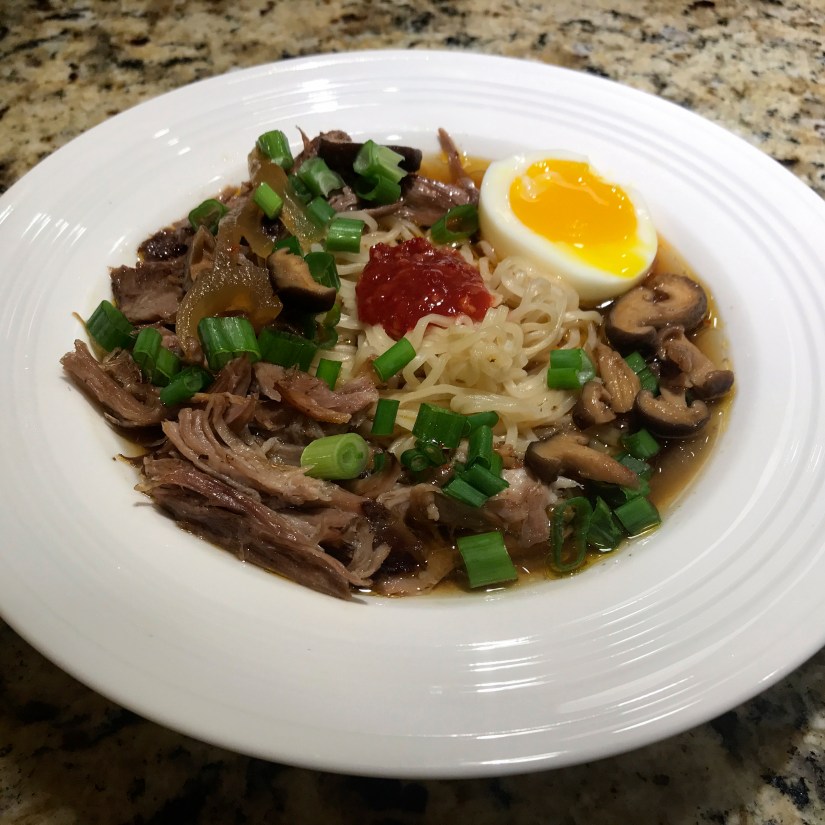
Last year for our anniversary dinner, my husband took me to this swanky restaurant in downtown Sacramento. Their special of the night was a spicy pork ramen bowl. It is totally not something I would typically order but that chilly October night, it just sounded so good. And it was. The spicy broth warmed me right up and it was just so rich and flavorful. Not at all what I had expected. I thought it would be similar to a beef broth but it had so much depth to it.
Ever since then, I have been experimenting with perfecting my version of a pork ramen bowl. I think I have the delicious meal pretty much dialed in. The broth is flavorful and the meat so juicy and tender. This dish warms you from the core out and is a perfect dinner as evenings start to cool with the seasons.
Note: This recipe will make between 4–6 ramen bowls.
INGREDIENTS
3 lb boneless pork shoulder
salt and pepper
6 c chicken broth
3 tbsp soy sauce
2 tbsp miso broth concentrate
8 tsp chile garlic sauce (4 for the broth, 4 for finishing)
2 tsp ginger paste
2 c shiitake mushrooms
large yellow onion, halved and thinly sliced
3 (3 oz) packages ramen noodles (dispose of flavor packets)
4-6 boiled eggs, peeled and halved
1/2 c green onions, chopped
STEPS
Season the pork with salt and pepper and place in a crock-pot.
In a large bowl whisk together the broth, soy sauce, miso broth concentrate, 4 teaspoons chile garlic sauce, and the ginger paste.
Place the mushrooms and sliced onions around the pork shoulder in the crock-pot.
Pour the broth mix into the crock-pot.
Cook on high for 4–5 hours or low for 7–8 hours.
When ready to serve, carefully transfer the pork from the crock-pot to a cutting board.
Allow the meat to rest for 5 minutes and then shred using forks.
While the meat is resting, cook the ramen per package instructions and drain completely.
Distribute the noodles among 4–6 bowls.
Top each pile of noodles with a scoop of the shredded pork.
Using a slotted spoon, remove the onions and mushrooms from the crock-pot and place around the bowls.
Using a ladle, top off each bowl with broth from the crock-pot.
Add two boiled egg halves to each bowl.
Place a teaspoon of the chile garlic sauce on the top of each pile of meat.
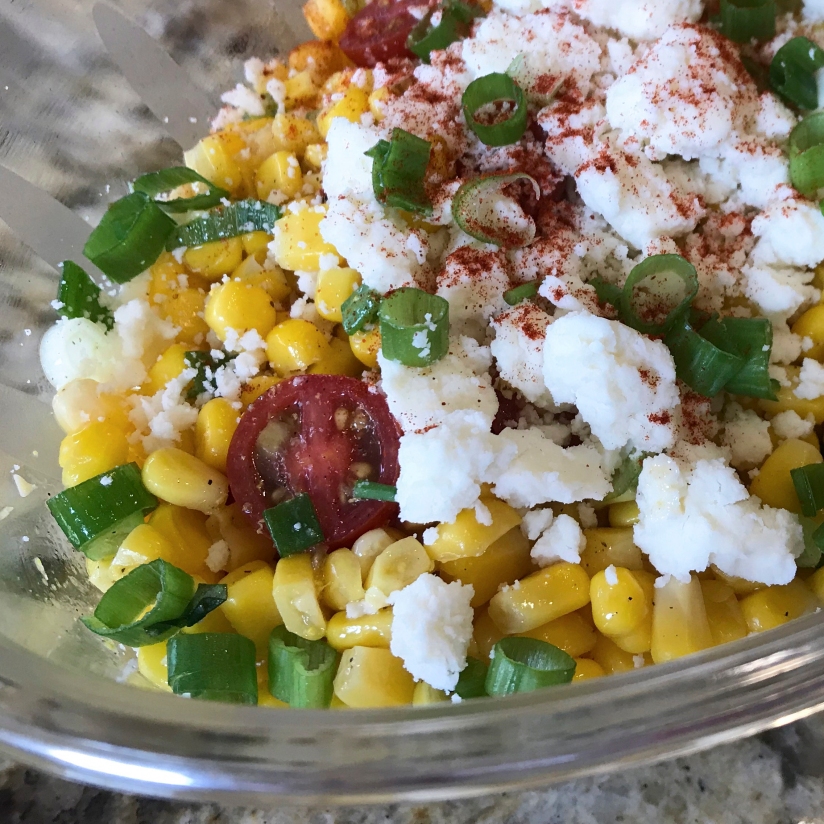
I made this salad last month for a final end of summer hoorah BBQ and let me just tell you, it was delish! The olive oil mixed with vinegar and lime juice creates a zesty vinaigrette dressing and just pairs so nicely with the sweetness of the corn and the saltiness of the quest fresco and then don’t forget the smoky flavor from the paprika. It hits all those flavor points your mouth desires.
This recipe goes great with grilled meats or any Mexican dish. Tacos, enchiladas, you name it. It is cheap, easy, and so quick to make. Like really quick. This recipe literally took me 5 minutes from start to finish.
Note: You can make this with fresh corn on the cob or canned. It is great both ways. If you are using fresh corn you will need about 6-8 cobs of corn. Cook them as you normally would, whether that be on the grill or in a pot of water. Then allow the cobs to cool completely and cut the kernels off the cob and prepare the salad as directed.
INGREDIENTS
3 (15.25 oz) cans whole kernel corn, drained
1 c cherry tomatoes, cut in half
1/2 c green onions, chopped
2 tbsp vinegar
2 tbsp olive oil
2 tbsp lime juice
1/2 c queso fresco, crumbled
paprika
STEPS
Place the corn kernels, tomatoes, and green onions into a serving bowl.
In a small bowl, whisk together the vinegar, olive oil, and lime juice.
Pour the dressing over the corn and stir to coat.
Top with the queso fresco and a sprinkling of paprika.
Every once in awhile you find a recipe that is perfect for entertaining, this is it! There is nothing fancy about it but it is delicious and it will feed an army. No joke, this recipe can feed anywhere from 6-8 people. Or in my case, made 2 dinners for 3 of us, which I have no complaints about. I would eat leftovers of this recipe every day. The flavors just get better and better while all those yummy flavors fuse together. This recipe is so filling and hearty which is great PLUS it all comes together easily in one large pot which means fewer dishes to wash. And who is going to complain about having fewer dishes? NO ONE!
Just serve this dish along with a big green salad and you will have some happy and lucky folks sitting at your table.
INGREDIENTS
olive oil
1 lb chicken, cut into 1/2 inch pieces
12 oz andouille sausage, cut into 1/2 inch pieces
salt & pepper
large yellow onion, chopped
red bell pepper, chopped
yellow bell pepper, chopped
4 stalks celery, chopped
2 tbsp garlic, minced
1 tsp dried thyme
1 tsp dried basil
1/4 tsp cayenne pepper
1 tbsp Worcestershire sauce
6 oz can tomato sauce
14.5 oz can diced tomatoes
2 1/2 c long grain white rice
32 oz chicken broth
3 green onions, chopped
STEPS
Heat 1 tbsp olive oil in a large pot and add sausage.
Cook sausage for 3–4 minutes and then add chicken.
Continue cooking for 8–10 minutes or until the chicken is cooked through.
Transfer the cooked sausage and chicken to a bowl or plate and set aside.
Add another 1 tbsp of olive oil to the pot and add in the onion, bell peppers, celery and garlic.
Cook the vegetables for 6–8 minutes or until they are tender.
Place the chicken and sausage back in the pot and add in 1 tsp salt, 1/2 tsp pepper, thyme, basil, cayenne pepper, Worcestershire sauce, tomato sauce, diced tomatoes, rice, and chicken broth.
Stir the pot and bring to a boil.
Once the pot starts to boil, cover with a lid and reduce heat to low.
Allow the jambalaya to simmer for 30–40 minutes. (Check it after 25 minutes and add an additional 1/2 c of water or broth if all the fluid is already absorbed and give it a good stir to ensure it isn’t burning to the bottom of the pot.)
Remove the jambalaya from heat and allow it to sit for 3–5 minutes.
Transfer a heaping spoonful to a plate or bowl and topped with the chopped green onions.