To me, spring means transitioning those hearty comfort foods to lighter more refreshing dishes. Gotta start getting this body bikini ready! Just kidding, this mom bod hasn’t rocked a bikini in over 11 years. A good ol’ tankini is more my style. LOL In reality, I just crave lighter foods as the weather warms up, and the produce section of the grocery store transitions with the season. Everything just seems more vibrant and robust.
This cauliflower tabbouleh is perfect for warmer weather as it requires no cooking, so you can leave that hot stove off. The flavors in this dish are so refreshing as it is PACKED with herbs! You have lemon zest, mint, garlic, and red pepper. Freaking delish!
This dish is one of those that actually gets better as it sits. I like to make it the day before I plan on eating it so the cauliflower bits really take on all those yummy flavors. It is one of those perfect dishes to make on Sunday to have for lunches throughout the week. You know I am all about that meal prep! (Just beware, you may have some garlic breath so pack some gum too.)
While traditional tabbouleh is made from bulgar wheat, I actually use a bag of riced cauliflower in this recipe making it keto friendly and low calorie. It goes fantastic with some grilled Greek chicken and tzatziki!
INGREDIENTS 10 oz bag frozen riced cauliflower, thawed cucumber, peeled and chopped 1 cup small tomatoes, cut in half 1 c fresh parsley, chopped 1/4 c mint leaves, chopped 2 green onions, thinly sliced 1 tsp garlic, minced 2 tbsp extra virgin olive oil 1/4 tsp lemon zest 2 tbsp lemon juice 1/4 tsp crushed red pepper flakes 1 tsp salt
STEPS
Combine all ingredients in a large bowl and stir to combine. (Yes, it really is that easy.)
Hello there my lovely followers! It’s been a minute since I’ve posted. Okay, more like 15 months. That is just far too long but as you can imagine, life happens. First and foremost, I wanted to let you know I am in fact alive and well. I have been busy working full time managing a design studio, doing lots of freelance design work, carting my son around to sports which he does about 10 months out of the year, and squeezing in as much family time as I can during our down time.
But here I am, dealing with all the craziness that has come along with the COVID-19 pandemic. I am currently safe in my home with my family. My husband and I are both thankfully still working (from home), and trying to also juggle the schooling of our 10-year-old son. With so many events and youth sports cancelled, I find myself with more free time than I ever remember having. (At least since becoming a mom.) I am trying to make the best of it and just enjoying playing games with my family, doing puzzles, binge watching shows, finally finding the time again to get back to running a few days a week, sitting down and having at least two meals a day with my family, and in all that, trying to carve out a little extra time to get back to blogging. I am determined to let some good come out of all of this.
I absolutely love sharing recipes with all of you, so much so that I am literally getting teary as I am trying to post this. They are happy tears though. I hope that I can get you at least an email a week to bring a little sunshine your way.
So, what better post to come back with than, how on earth I manage my busy schedule and getting meals on the table. It is all about meal planning! It is the only way I can get through the week. When people ask me how I manage to cook as much as I do, I tell them it is all about meal planning. It seems like such a simple task but I realize so many people don’t even know where to begin. So, consider this my beginners guide to meal planning.
I am going to share with you my tips, tricks, and even a handy shopping list you can print and use at home. This is the same one I use myself every week. I have it organized by categories that follow the flow of most grocery stores. I absolutely hate it when I feel like a pin ball at the grocery store bouncing back and forth from one end of the store to the other. Organization and order is key!
It has been about four years of me using this list and I noticed that as soon as I started spending the 30 minutes doing my meal planning each weekend I was saving so much money by not eating out as often and not buying things I didn’t need, I reduced our wasted food to almost nothing, and best of all, eliminated so much extra stress! It is an easy routine that takes some time to adopt but so worth it once you get into the groove.
MY TIPS AND TRICKS FOR MEAL PLANNING
Print out several of my shopping lists at once. I do about 10 at a time. You probably won’t be as consistent if you are only printing out one at a time. If they are nearby and ready to go, you are more likely to use them.
If you find yourself running low on or finishing off any items, add that to the shopping list throughout the week. For example, if my husband finishes off the oregano, he just writes it on the shopping list clipped to the fridge. This helps keep you stocked on the essentials and you aren’t trying to rack your brain trying to remember what it was you finished off earlier in the week when you do go to sit down and write out your list.
When you are ready to do your planning for the week, look at your calendar and write in your evening commitments so you know what you need to plan around. If you have to work late, or your child has a game, plan to do quick and easy dinners those nights or maybe even takeout.
Clean out your fridge each weekend of anything that has gone bad or you know you won’t use. It is good to know what you do have in there.
Do a quick inventory of what you have that you need to use. For example, if I have half a bag of shredded cabbage or a handful of tortillas from a few days ago that I know will go bad if I don’t use it soon, I try to plan a meal around that early in the week. This helps you cut down on waste and can save you money.
When doing your planning, look at what recipes take common ingredients. For example, last Sunday I wanted to make pork tacos for dinner and those took cotija cheese, chopped red onions, and sliced jalapeños. I decided to make juevos rancheros for breakfast that day since they shared so many of the same ingredients. I was able to prep and chop all my ingredients for dinner while I was doing it for breakfast so come dinner time, I already had all my ingredients ready to go and I got two meals out of those ingredients.
Use leftover ingredients from one meal as part of the next one. I will cook twice as much broccoli as I need for a dinner, and then make a broccoli and egg quiche the next day or grill extra chicken for dinner on Sunday, to go on my salads for lunch throughout the week.
Plan your meals around seasonal produce. You will get the best quality ingredients and the best prices.
Make a shopping list every weekend for the week ahead. Once you have all your meals planned for the week, start filling in the bottom portion with what grocery items you need to make them. Having an organized and written shopping list keeps you on track at the grocery store. You are more likely to buy items you don’t need and spend more money if you go to the store and just try and wing it. Plus, you then only need to make one trip to the store a week.
Keep your dinner menu for the week on the fridge and check it each day. That way you remember if you need to defrost any meat, get anything marinated, or load up the crock pot before leaving for the day.
PREPPING FOR THE WEEK
Chopping and slicing can quickly become one of the most time-consuming parts of any meal. If you have a busy week ahead, consider washing and prepping all your produce on Sunday. I will wash and chop broccoli, onions, peppers, zucchini, pretty much any veggie ahead of time and then just put them in Ziploc bags in the produce drawer of the fridge.
If you have a recipe that calls for a marinade, combine all your marinade ingredients in a mason jar ahead of time. Before you leave for work in the morning just pour the marinade into a Ziploc bag with the meat.
If you are making a crockpot meal that calls for seasoning and liquid ingredients, combine all those together in a Tupperware or mason jar over the weekend or the night before so that in the morning you just have to dump it over the meat into the crockpot. I do not want to be spending my morning trying to open cans and measure seasonings when I am already running late for work.
OTHER TID BITS
Make a double batch of any of your recipes that freeze well. One for now and one for later. My enchiladas freeze awesome! I will make a triple batch, eat one batch fresh and freeze two more. It isn’t that much more work to just double a recipe if you are already taking the time to make it once. Then later on you have a quick dinner that you can just toss in the oven. Soups, lasagna, and baked pasta casseroles also freeze great.
Keep foil baking dishes on hand. They are great for your freezer meals! I love the 8” x 8” square foil dishes. They hold 4 enchiladas perfectly and slide right into a gallon Ziploc bag.
Purchase meat in bulk and separate into meal size portions. Huge money saver!
Invest in a FoodSaver so you can package items in a way that allows them to last a long time.
Click on the above image to save a printable pdf of my shopping list.
Is there anything I missed or do you have any advice? I always love hearing ideas from other people. Please feel free to share in the comments below.
Ooey, gooey, cheesy white sauce goodness. What more do I need to say about this lasagna. It is layer upon layer of creamy mozzarella sauce, noodles, ricotta, chicken, spinach, and cheese. My mouth is literally watering.
This dinner is the ultimate comfort food. So rich, creamy, and filling. A perfect family dinner as the weather starts to cool down. Seriously though, what is better on a cold night then a big filling serving of pasta? Nothing, the answer is nothing.
This is one of those recipes that is great to make ahead on the weekend when you have some extra time and then during the week all you have to is pop it in the oven and bake. Boom! Dinner is done!
INGREDIENTS
16 oz lasagna noodles
salt
1/2 c butter
1 yellow onion, finely diced
2 tsp garlic, minced
1/2 c flour
2 c chicken broth
1 1/2 c milk
5 c mozzarella cheese, shredded
1 1/2 c parmesan cheese, shredded
1 tsp basil
1 tsp oregano
1/2 tsp pepper
2 c ricotta
2 c cooked chicken breast, chopped
10 oz package frozen cooked spinach, thawed and drained
1 tbsp fresh parsley, chopped
STEPS
Preheat oven to 350º.
Bring a large pot of water to a boil and add 1 tablespoon of salt.
Cook the noodles per the package instructions, drain, and rinse with cold water. Set aside until ready to assemble the lasagna.
Melt the butter in a large saucepan over medium-high heat.
Cook the onion and garlic in the butter until cooked through.
Stir in the flour until it begins to brown.
Gradually add the broth and milk to the saucepan and whisk together.
Allow the sauce to come to a boil and simmer for 2–3 minutes.
Mix in 2 cups of the mozzarella, 3/4 cup of the parmesan, basil, oregano, 1/4 teaspoon each of salt and pepper. Stir until all the cheese is melted and well integrated.
Remove the sauce from the stove and set aside.
Spray a 9” x 13” baking dish with cooking spray.
Ladle a quarter of the sauce into the bottom of the baking dish.
Layer a quarter of the cooked noodles in the bottom of the baking dish and top with half of the ricotta, half of the chicken, and half of the spinach. Sprinkle with some of the mozzarella and parmesan and ladle another quarter of the sauce over the top.
Repeat the previous step. Noodles, ricotta, chicken, spinach, cheese sauce.
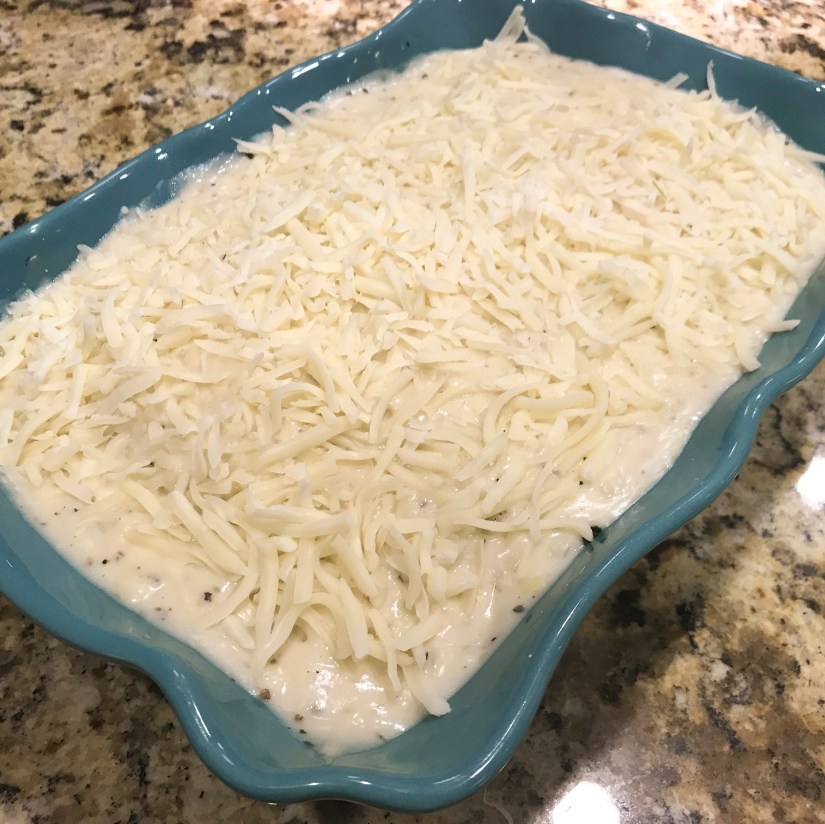
Add the final layer of noodles and top with all the remaining sauce and cheeses.
Bake for 40–45 minutes or until the cheese is all melted and just starts to brown on top.
Remove the lasagna from the oven and allow it to rest for 5–10 minutes.