Sandwiches

Recipe—Crock-Pot Shredded Chicken Jalapeño Popper Sammy

I swear, I take one look at this photo and I instantly start to salivate. Jalapenos, cheddar, and cream cheese coming together in the perfect combination. Add in some flavor packed shredded chicken on big warm bun and you will have a super tasty sandwich. Not only do I love this recipe because it tastes amazing but I also love it because it takes no more than 3 minutes to prepare and maybe 5 minutes to finish. Just throw together some greens for a salad or some fries in the oven and you have a meal ready to go. Perfect for us working folks who never seem to have enough time at the end of the day.

INGREDIENTS
2 lb boneless skinless chicken breast
1 small onion, diced
2 tbsp garlic, minced
2 (10 oz) cans original Rotel Diced Tomatoes and Green Chilies
2 tbsp chili powder
1 tbsp cumin
1 tsp salt
1/2 c heavy cream
2 oz cream cheese
1 c cheddar cheese, shredded
1/4 c canned jalapeños, chopped
extra canned jalapeños for topping

STEPS

  • Place the chicken, onion, garlic, and Rotel in the crock-pot.
  • In a small bowl mix together the chili powder, cumin, and salt and sprinkle over all the items in the crock-pot.
  • Cover and cook on low for 8 hours or high for 4 hours.
  • Remove the cooked breasts from the pot and transfer to a cutting board.
  • Using two forks shred the chicken and place back into the crock-pot.
  • Cover the crock-pot and keep on low.
  • While the chicken is soaking up all those tasty flavors start the cheese sauce by heating the heavy cream over medium-high heat.
  • Allow the cream to come to a boil stirring constantly.
  • Whisk in the cream cheese until melted.
  • Add in the cheddar and chopped jalapeños and stir until smooth.
  • Assemble the sandwiches by placing a scoop of the shredded chicken onto the bottom of the bun (I use tongs to try and squeeze out the excess juice), then add a spoonful of the cheese sauce, add additional sliced jalapeños if desired, and top with the other half of the bun.
  • Chow down!

Recipe adapted from Food Fanatic.

Beverages

Recipe—Creamy Hot Cocoa in a Crock-Pot

divadicucina_hotcocoa

Over the weekend we had a holiday cookie decorating party for my son and his little buddies from school. It was wonderful! All the kiddos huddled around the table eating the cookie toppings quicker than they were putting them on the actual frosted cookies getting all hopped up on sugar. I love this time of year!

I wanted to have a little hot cocoa bar where all the kids (and grown ups) could make themselves a fancy cup of cocoa. I’m not talking little envelopes of dry god knows what. I’m talking thick and creamy REAL hot cocoa. The kind that fills you up and warms your belly, the kind that leaves a thick creamy mustache on your upper lip with every sip. I made this a couple of hours before the party and it was perfect! Along with a big crock pot full of pure joy I had bowls of marshmallows, mini chocolate chips, crushed candy canes, chocolate sprinkles, whip cream, and then of course some grown up mixers (Kahlua, Disaronno, Baily’s, Frangelico, and peppermint schnapps). Hey if you know me, you know I don’t half ass anything.

This hot cocoa was by far the best I ever had! If you are having a few people and want to make something very special this holiday season then I recommend you make this hot cocoa. It will take every grown up back to their childhood days and will be memorable for all the kiddos.

Note: Makes 8–12 servings.

INGREDIENTS
14 oz can sweetened condensed milk
12 oz bag chocolate chips (dark, milk, or white chocolate will all work)
2 c heavy whipping cream
6 c milk (2% or whole)
1 tsp vanilla

STEPS

  • Combine all of the ingredients in a large crock-pot.
  • Turn on low.
  • Cook for 2 hours stirring occasionally using a whisk.
  • Ladle into a mug, add in your mixer (optional), and top with your favorite treats or leave as is.
Dinners

Recipe—Chicken Breasts with Mushroom and Onion Dijon Sauce

Something about cooler weather makes me crave comfort food. I just love a good hearty meal on a cool night. My chicken breasts with mushroom and onion Dijon sauce is one of those delicious and soul warming meals. This is a sophisticated recipe that is just absolutely wonderful. The sauce is rich and creamy and really allows the flavors of the fresh herbs to come out and complement the zestiness of the mustard. With the holiday season approaching and people getting together this is the perfect dish to prepare for a small group. This recipe comes together relatively easy and you are sure to impress your guests with your culinary abilities.

Note: If you are feeding more than four people consider butterflying the breasts or even getting thin breast cutlets at the store. If you use a thinner breast you will need to adjust the cooking times for the chicken slightly to avoid overcooking. 

INGREDIENTS
1/4 c flour
1/2 tsp salt
1/4 tsp freshly ground black pepper
4 boneless skinless chicken breasts
4 tbsp extra virgin olive oil
4 c white mushrooms, sliced
1 small red onion, thinly sliced
2 tbsp fresh rosemary, chopped
1 tbsp whole grain mustard
2 tbsp Dijon mustard
1/2 c white wine
2 tbsp fresh parsley, chopped
1/4 c chicken broth
1/4 c heavy cream
2 tbsp butter
2 tbsp fresh parsley, chopped (optional)


STEPS

  • In a large Ziploc bag mix together the flour, salt, and pepper.
  • Add the chicken to the bag and toss to coat.
  • Heat the olive oil in a large skillet over medium-high heat.
  • Remove the chicken from the bag and shake off excess flour before placing in the pan.
  • Cook the chicken for 4–6 minutes per side and transfer to a platter.
  • Add the mushrooms to the pan and cook for about 5 minutes making sure to stir a few times.
  • Add the sliced red onions and rosemary to the pan and continue to cook for 3–4 minutes.
  • Mix in the mustards and wine and gently scrape the bottom of the pan making sure to get everything well incorporated.
  • Add in the parsley, broth, cream, and butter and mix to combine.
    Place the chicken back into the pan and spoon the sauce over the top.
  • Reduce heat to medium-low and cook at a simmer until the chicken is cooked through.
  • Transfer the chicken breast to a plate and spoon sauce over the top.
  • Sprinkle with a little chopped parsley garnish for some added color.


Recipe adapted from A Family Feast.

Sweet Treats

Recipe—Chocolate Crackle Cookies

A long time ago in a land far far away, I posted a recipe for Lemon Crackle Cookies. (Okay, it wasn’t that long ago nor that far away.) They were awesome! Perhaps the name Chocolate Crack Cookies would be more appropriate for this recipe since you will not be able to stop eating them! Since the base for my crackle cookies is a box of cake mix they are perfectly fluffy, super moist, ultra fudgy, and easier to make than any cookie should be. This recipe is very straightforward and easy. Anyone can make them. Really. I promise! While they may look complicated all you are doing is rolling the dough into balls, coating them generously with powdered sugar, and then baking them. They do all the fancy crackling while baking. Give them a try. Everyone you share with will be very pleased you did.

INGREDIENTS

2 (18.25 oz) boxes Duncan Hines chocolate cake mix
4 eggs
2/3 c vegetable oil
1 1/2 c powdered sugar

STEPS

  • Preheat oven to 375º.
  • In a large bowl mix together dry cake mix, eggs, and oil.
  • Put the powdered sugar in a shallow bowl or plate.
  • Form small balls with the dough and then roll them in the powdered sugar. Be sure the cookies have a really thick coating of the sugar if you want them to have that crackle look.
  • Place at least 2 inches apart on a parchment paper lined baking sheet.
  • Bake for 7–9 minutes or until golden brown on the bottom.
  • Allow cookies to sit on the baking sheet for a couple of minutes before transferring to a cutting board or cooling rack.
Dinners

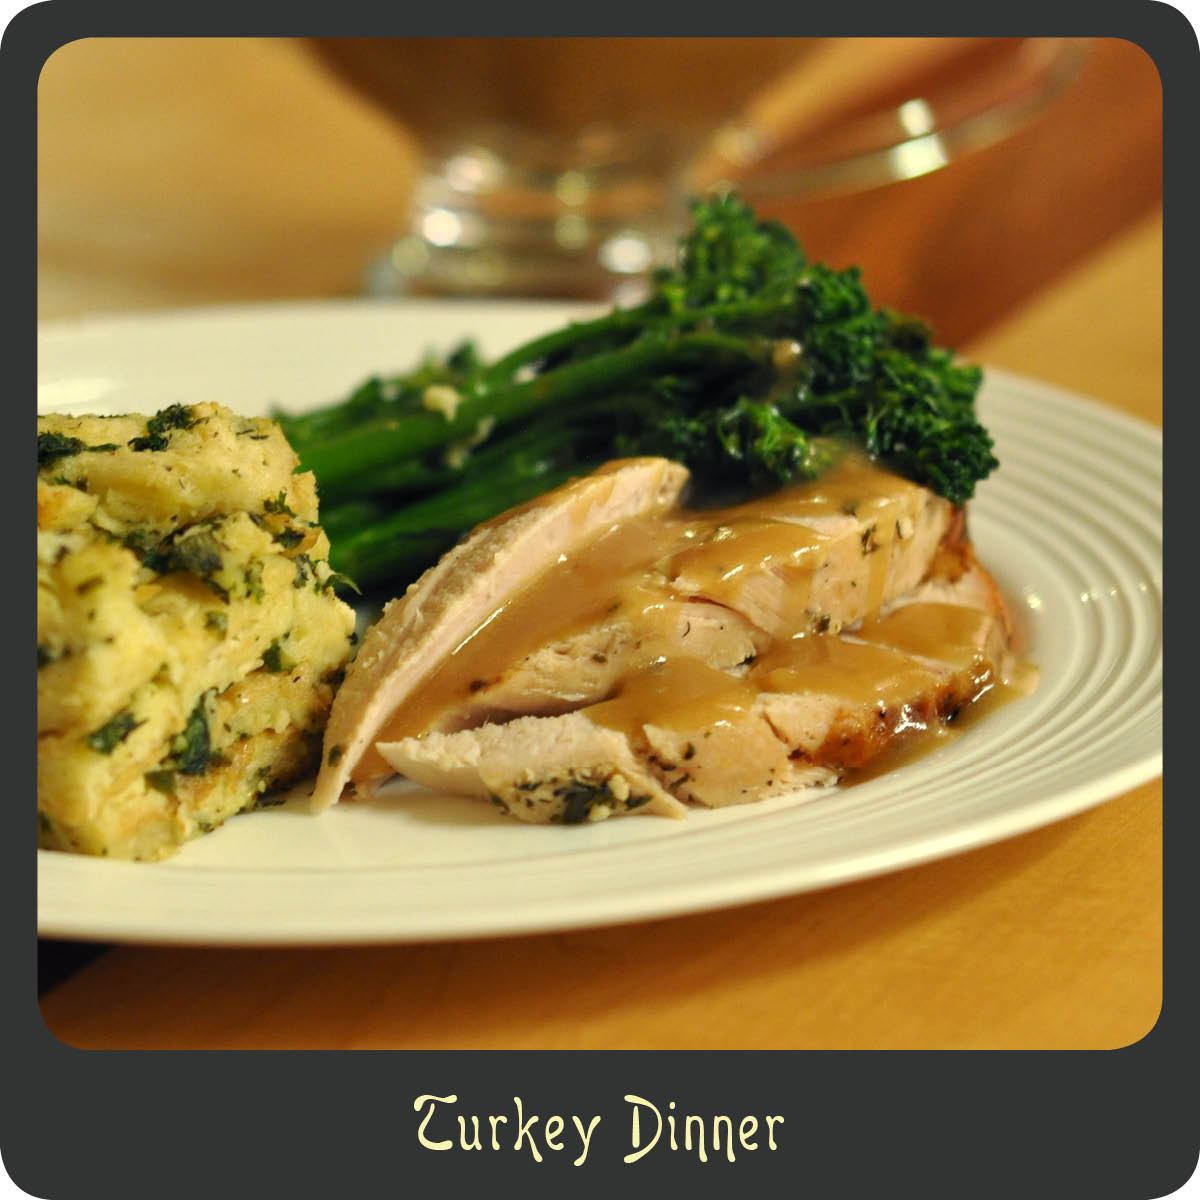
Recipe—The Perfect Turkey

To brine or not to brine? That is the ongoing question I have people ask me about cooking a turkey. Well here is your answer, I am a briner. I have prepared turkeys both brined and not. While I am no professional chef I would consider my self very versed in eating. I personally think brined turkeys come out with more flavor and are more moist than that of a turkey that is not brined. Some of you may be asking, “what the heck is brining?”

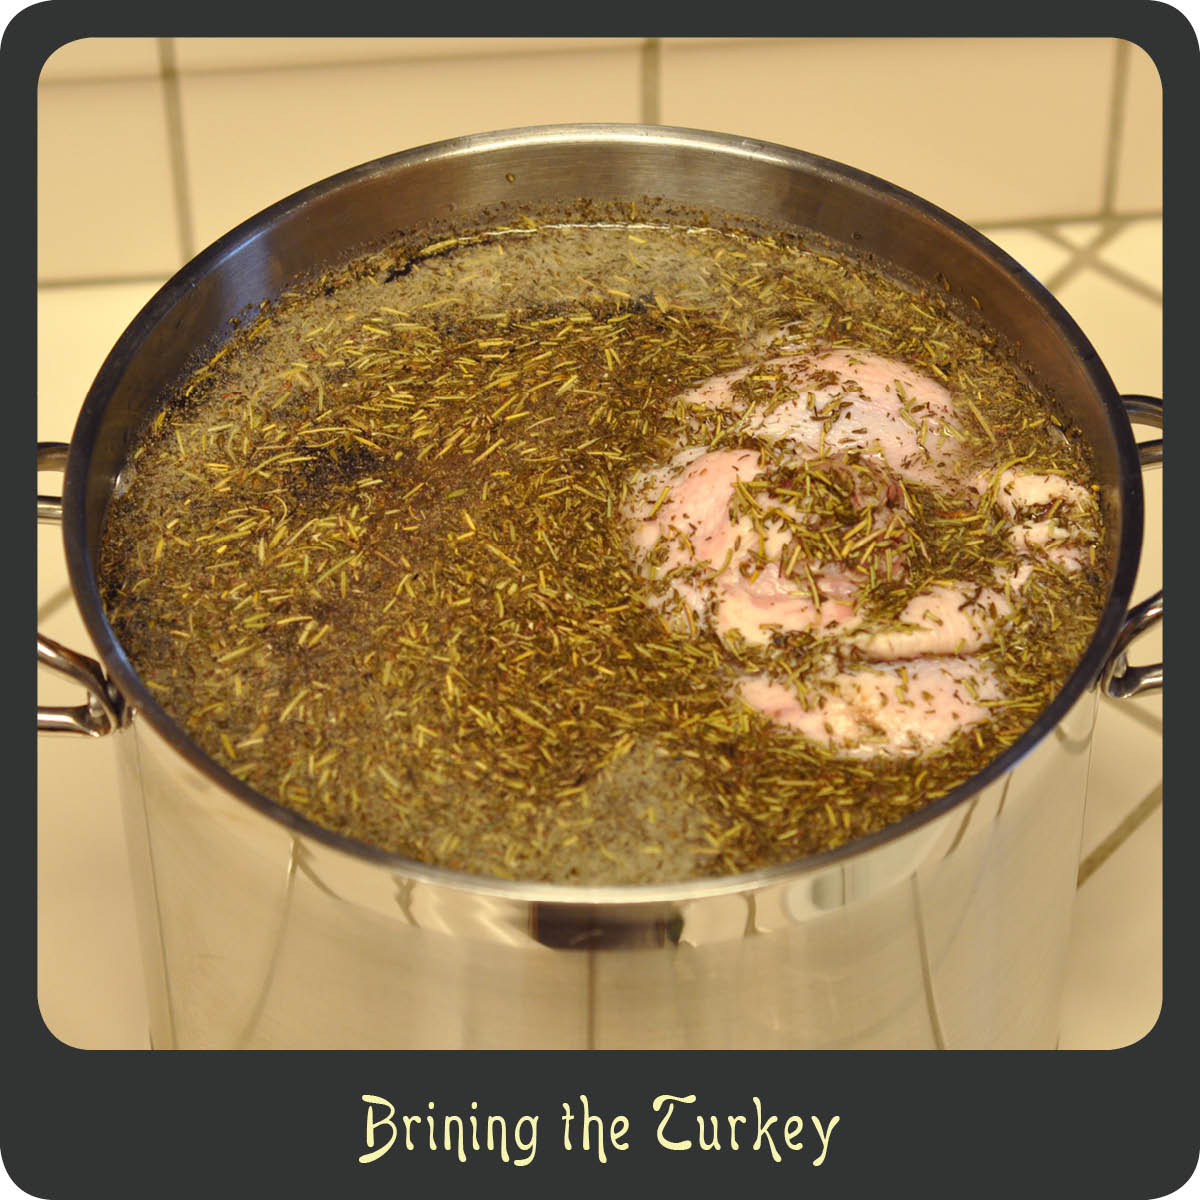
Brining is the process of soaking your turkey in a salt (and sometimes herb) infused bath for several hours prior to cooking. I find that your bird will be more evenly flavored and it will also be the moistest bird you ever have.

I make an awesome citrus herb rub (see recipe below) for my turkey. It is flavor packed and will make all your dinner guests ohhhh and ahhhh. The orange zest is not overpowering at all. It actually is a really nice complement to all the other flavors of a thanksgiving dinner. Trust me. I know how to make a delicious turkey.

Notes: Do not brine your turkey if it is self basting, pre seasoned, or kosher. If you do not have a pan that is large enough you may use an oversized bowl, ice chest, or even a baking bag tied off. The key is that the bird is completely submerged.

BRINING INGREDIENTS
1 c kosher salt
2 c sugar
1 c apple cider vinegar
2 tbsp sage
2 tbsp thyme
2 tbsp rosemary
1 tbsp pepper
thawed turkey

STEPS FOR BRINING

  • Find a large pot that will hold your turkey making sure you have at least an inch or two of room at the top.
  • Bring 4 cups of water to a boil in your pot.
  • Add the salt and sugar and stir until completely dissolved.
  • Remove the pan from heat and add in 8 cups of cold water, apple cider vinegar, sage, thyme, rosemary, and pepper.
  • Place the pot in your sink (this will help in case any liquid overflows).
  • Remove all of the giblets and neck from your turkey and gently lower it into the pot.
  • Cover the pot with a lid or saran wrap.
  • Place the pot in the fridge and marinade for 12–16 hours.
  • Rinse the turkey and pat dry.

TURKEY INGREDIENTS
3 tbsp garlic, minced
2 c Italian parsley leaves, chopped
1 tbsp kosher salt
1 tsp ground pepper
2 tsp chili powder
2 oranges, zested and quartered
1 c butter, softened
1 brined turkey

STEPS FOR TURKEY

  • Preheat oven to 325º.
  • In a small bowl combine the garlic, parsley, kosher salt, pepper, chili powder, orange zest, and butter and mix until well combined.
  • Starting from the neck of the turkey, carefully separate the skin from the breast meat with your fingers.
  • Push about half of the herbed butter mixture under the skin and spread it out evenly. (Don’t be afraid really get it all over in there! The butter will melt and all those yummy flavors will just seep into the meat.)
  • Use the other half of the mixture to evenly cover the top and sides of the turkey.
  • Place the orange quarters inside the turkey’s cavity.
  • Place the seasoned turkey in a roasting pan and loosely cover with foil.
  • Roast the turkey for 20–23 minutes per pound and baste every 45 minutes. (Note: If you are running out of juices in the pan just add some chicken broth or cubes of butter.)
  • Remove the foil for the last 45 minutes of cooking.
  • When the temperature in the meatiest part of the turkey reaches 165º remove it from oven and allow it to rest for 25–30 minutes.
  • Carve and gobble up.


Have a wonderful Thanksgiving everyone!


Dinners, Sandwiches

Recipe—Black and Blue Sammy

Is your mouth watering just looking at this picture. Okay good. That means you are still alive. I am a sucker for beef with any kind of blue cheese. A filet with a blue cheese crust, I’m all over it. A burger with blue cheese crumbles, yes please. Just something about those flavors together is so perfect. When I saw this recipe I knew I had to try it. This sandwich is beyond decadent. The little bit or horseradish mixed in with mayo gives it a nice little bite and all the cheese melted over the tender beef. OMG! So good! And guess what? It is easy to boot! You cook the meat in a crock-pot allowing all those flavors to soak in and then all you have to do when you are ready to get your grub on is assemble them. Perfect lunch or dinner for these Sunday football games.

Note: I made these as meal sized sandwiches but they were super rich. If you are someone who really just wants rich food in a smaller quantity or want to feed more than four people, then consider making these as sliders. This recipe will make about a dozen sliders if you use small dinner rolls.

INGREDIENTS
2 lb beef chuck roast
1 tbsp brown sugar
1/4 tsp dried thyme
1/4 tsp celery seed
1 tsp granulated garlic
1 bay leaf
1/4 c soy sauce
4 large sandwich rolls
1 c mozzarella cheese, shredded
4 oz blue cheese crumbles
1/4 c mayonnaise
2 tsp prepared horseradish
1/8 tsp ground black pepper
1/4 c butter
2 tsp Worcestershire sauce
1/2 tsp poppy seeds
1/2 tsp sesame seeds
2 tsp dehydrated onion

STEPS

  • Place your roast in a crock-pot that has been sprayed with a non-stick spray. (This helps with cleanup.)
  • Sprinkle with the sugar, thyme, celery seed, and garlic.
  • Add the bay leaf and soy sauce to the crock-pot.
  • Cook for 4–5 hours on high of 7–8 hours on low.
  • Remove the meat from the crock-pot and shred using 2 forks making sure to pull out any fatty bits.
  • Add the prepared meat back to the crock-pot and keep on low heat.
  • Preheat oven to 375º.
  • Cut your dinner rolls in half and lay the bottoms on a baking sheet.
  • Using tongs grab a heap of the shredded meat and squeeze out all the excess juices and place on each bun bottom.
  • Sprinkle each meat pile with a bit of the shredded mozzarella and blue cheese crumbles.
  • Combine the mayonnaise with the horseradish and spread on the underside of each bun top.
  • Place the lids on the sandwiches.
  • Melt the butter in a small bowl and mix in the Worcestershire sauce, poppy seeds, sesame seeds, and onion.
  • Brush the butter mixture evenly over the tops of the sandwiches.
  • Cover the baking sheet with foil and bake for 10 minutes.
  • Remove foil and bake for an additional 10 minutes.
  • Chow down!


Recipe adapted from Heather Likes Food.

Sweet Treats

Recipe—Individual Peanut Butter Mousse Pies

I’m baaaaack! And with a bang at that! What? Were you getting worried? My apologies for taking another long break from the word of blogging but life has been crazy and busy and I just needed to step away for a bit. But I am back and with a lineup of some great recipes for all my wonderful followers. And I have some very exciting news that I will share in a few weeks if all goes as planned. Still working on fine-tuning so keep your fingers crossed for me would you please?

So even though I wasn’t posting recipes over the past couple of months I was still cooking up a storm and making sure to photograph my delicious meals so that when I was ready to get back to posting I was prepared with some great materials. So here we go, let’s get to it!

Individual peanut butter mousse pies=a heavenly dessert in super cute little mason jars. As my followers know I LOVE mason jar desserts. And if you didn’t know that then you must be new here. Welcome! Mason jars are perfect because there is no serving involved other than getting out a handful of spoons and they travel great! I made these for a bbq we went to over the summer and they were very well received. Right, Sabrina and Sandy? 😉 The peanut butter is so light and just the perfect amount of sweet. And then you get this yummy crisp chocolate crust to add in a little texture. Nom nom nom! I actually ate one of these a couple of days after I initially made them and it was still great! It didn’t separate or get funky so they will hold up for a few days if you have leftover or even if you want to make them the day before you plan on serving them. Well it is great to be back and thanks for all the continued support! I will be in touch soon!

Xoxox
The Diva

Note: The number of “pies” you get will depend on the size of your jars or serving dishes. I was able to make 12 half pint jars. If you are planning on traveling with them be sure that you don’t fill past the brim so that you can get the lids on them.

INGREDIENTS
20 Oreo cookies, crushed
4 tbsp butter, melted
1 pint heavy cream
1 1/2 c confectioner’s sugar, divided
2 tsp vanilla, divided
8 oz cream cheese, softened
1 c creamy peanut butter
14 oz can sweetened condensed milk

STEPS

  • In a medium sized bowl mix together the crushed Oreos and melted butter.
  • Distribute the crumbs evenly among the jars leaving about a 1/4 cup for garnishing.
  • Using the back of a spoon gently pres the crumbs into the bottom of the jars.
  • Pour the whipping cream into a mixing bowl and add in a 1/2 cup of the confectioner’s sugar and 1 teaspoon of the vanilla.
  • Beat the whipping cream using an electric mixer on high until it begins to thicken and peaks start to form.
  • Put the prepared whipping cream in the fridge for the time being.
  • Place the cream cheese, peanut butter, and remaining cup of confectioner’s sugar in a large mixing bowl and beat on medium speed until well combined.
  • Add in the condensed milk and the remaining tablespoon of vanilla and continue beating until mixture is creamy and smooth.
  • Remove the prepared whip cream from the fridge and add about 1/3 of it to the peanut butter filling and fold in using a rubber spatula.
  • Transfer all of the peanut butter filling to a one-gallon Ziploc bag, seal, and cut off the corner.
  • Pipe the filling into the jars filling up about 2/3 of the way.
  • Next, transfer the whip cream to a one-gallon Ziploc bag, seal, and cut off the corner.
  • Top each mousse cup with some whip cream.
  • Garnish each jar with leftover oreo crumbs and refrigerate for at least 2 hours before serving.
Brunch, Side Dishes

Recipe—Asparagus Ham Rolls

This was a side dish I recently made for Sunday brunch. It was easy, delicious, and made for a great presentation. Ham and asparagus has always been a classic combination and when you have the nice mild bite of Dijon mustard along with a creamy cheese sauce it’s suddenly even a little more fabulous. Be sure to bookmark this recipe if you are like me and always looking for brunch ideas. It is sure to be a great addition to any menu. Perhaps a Father’s Day brunch item?

Note: I prepared the asparagus rolls the night before and refrigerated them ahead of time. Then the morning of I just had to put together the sauce and bake it. One less thing to be dealing with in the morning.

INGREDIENTS
24 asparagus spears
8 slices deli ham
dijon mustard
3 tbsp butter
1 tbsp flour
1 c milk
salt and pepper
1 c cheddar cheese, shredded
3 green onions, thinly sliced
paprika

STEPS

  • Preheat oven to 350.
  • Trim off approximately 1″ from the cut ends of the asparagus.
  • Steam the asparagus for approximately 3 minutes or until crisp tender.
  • Season the asparagus with salt and pepper.
  • Spread a tad of the Dijon mustard on one side of each slice of ham.
  • Place 3 spears of asparagus on each slice of ham and roll up. As you finish each one place them seam side down in a greased baking dish.
  • Once you have prepared all the rolls get started on the sauce by melting the butter in a small sauce pan over medium heat.
  • Mix in flour until well combined.
  • Slowly whisk in milk, season with salt and pepper, and bring to a boil.
  • Cook for 2 minutes until it begins to thicken.
  • Stir in the cheese and green onions until cheese melts.
  • Pour the sauce over the asparagus rolls and sprinkle with a dash of paprika.
  • Bake for 20 minutes.
  • Remove from oven and serve.

Recipe adapted from a Taste of Home.

Brunch, Sweet Treats

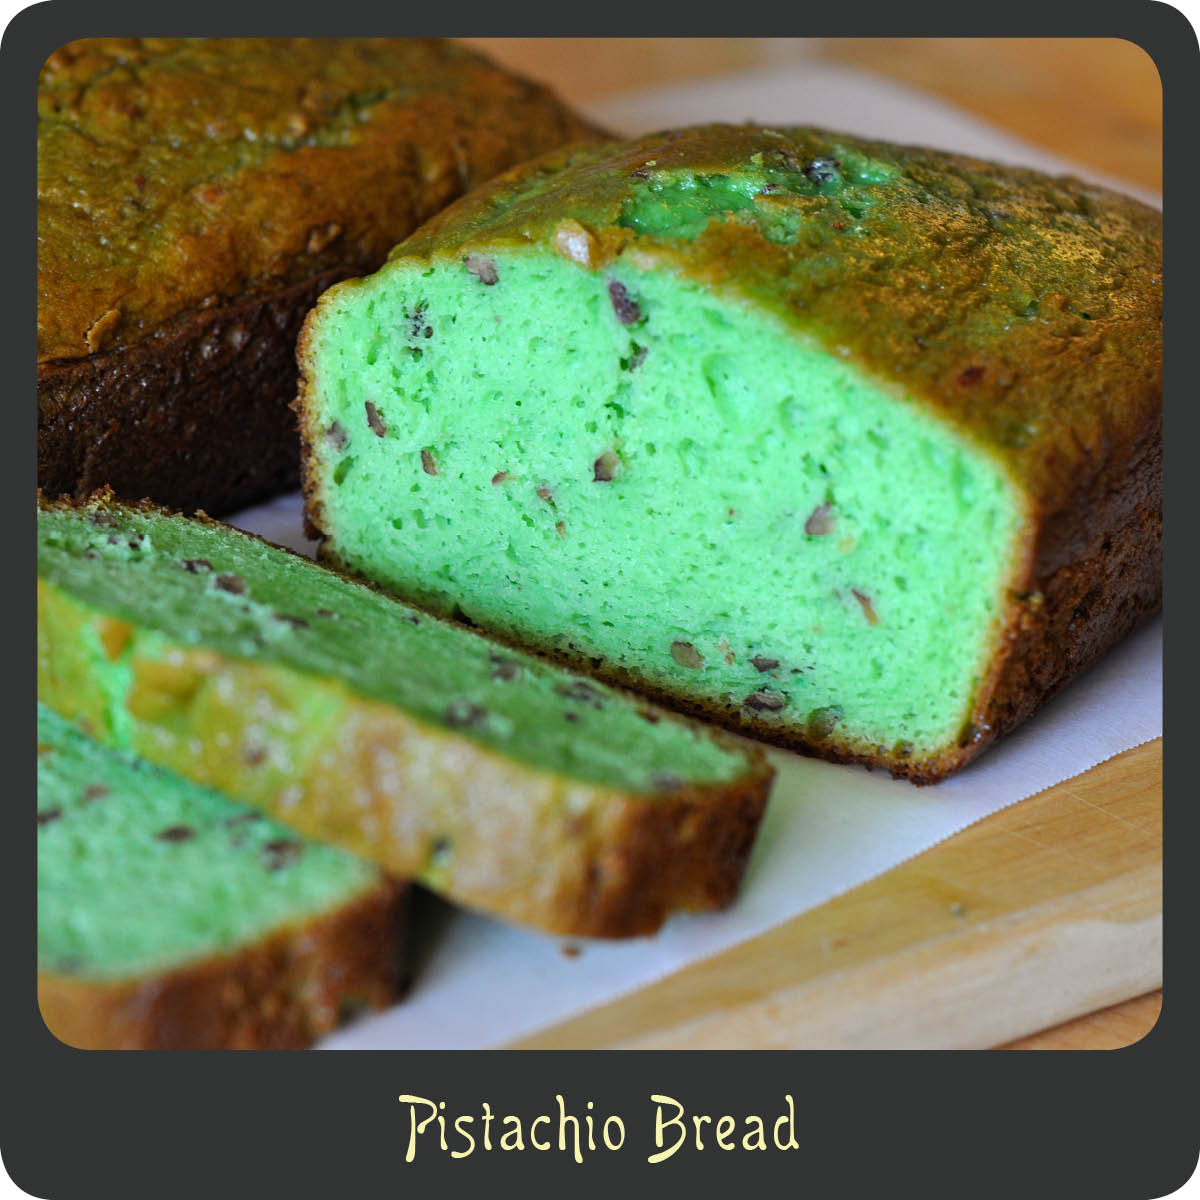
Recipe—Pistachio Bread

When it comes to the classic Jell-O one of my favorite flavors has always been pistachio. I know, I’m kind of a freak. Don’t get me wrong, I love chocolate but there is just something about the pistachio that is pretty fabulous too. When I saw this recipe for pistachio bread that called for my favorite tasty green pudding I knew I had to give it a try. I served this bread as a brunch item but with it’s cake base it could easily be a dessert. It ended up super moist, fluffy, and had just the right amount of nutty pistachio flavor. My four-year-old son got a kick out of making and eating green bread. It is so easy to make that I recommend putting the kiddos in the kitchen and letting them help. Such a fun recipe to make together!

INGREDIENTS
15 oz box yellow cake mix
3 eggs
1/4 c oil
3/4 c water
3.4 oz package instant pistachio Jell-O pudding, unprepared
1 c sour cream
10 drops green food coloring
1 tsp almond extract
1/2 c pistachios or pecans, chopped

STEPS

  • Preheat oven to 350º.
  • Grease two bread loaf pans.
  • Mix together all ingredients in a large bowl until well combined.
  • Divide the batter among the two loaf pans.
  • Bake for 40-45 minutes or until a toothpick comes out clean when inserted.
  • Cool 10 minutes and remove from bread pans.
  • Allow to cool an additional 15 minutes or more before slicing.
Dinners

Recipe—Pesto Chicken Kabobs

Over the past year or so I have been using pesto more and more. Last summer we got a massive amount of basil from our garden, which yielded lots and lots of tasty homemade pesto. I was able to freeze tons and use it throughout the whole year. Awesome! I have found that pesto actually makes a really great marinade. Recently I am totally hooked on pesto chicken kabobs. Not only are they super fun to eat but they cook in a fraction of the time. Perfect meal for this coming summer.

Tip From the Diva: When using wooden skewers, soak them in water for about 10 minutes before putting all your goodies on them. It keeps them from catching fire and are much easier to handle. Genius right?

INGREDIENTS
3–4 chicken breasts, cut into 1” pieces/cubes
salt and pepper
1/2 c pesto
half of a red onion, cut into 1” squares
red bell pepper, cut into 1” pieces
yellow bell pepper, cut into 1” pieces

STEPS

  • Season the cubed chicken with salt and pepper.
  • Place in a container and toss with the pesto.
  • Allow chicken to marinade for at least 30 minutes. (I like to let mine soak up all the flavors for 7–8 hours.)
  • Thread the meat and the veggies onto the skewers making sure to alternate and discard the leftover marinade.
  • Grill skewers for 10 minutes, turning as needed, or until meat is cooked through and vegetables are tender.