
Sandwiches

Recipe—Jalapeño Popper Grilled Cheese

This was one of my recipes in the running for the Hot and Spicy Week I did back in September but I just had too many good jalapeño recipes to share so this one got the boot. Well my jalapeño plant was still producing in November thanks to this unseasonably warm weather so here it is, the jalapeño popper grilled cheese sammy! It is creamy, cheesy, and spicy, all the qualities a person looks for in a popper. Enjoy!

INGREDIENTS
2–3 large jalapeños, roasted
2 tbsp butter, softened
4 large slices of sourdough
1/3 c cream cheese
8 slices cheddar cheese

STEPS

  • Heat a large skillet over medium-high heat.
  • Spread one side of each piece of the bread with butter.
  • Place two slices of bread butter side down in the skillet.
  • Top the bread in the skillet with the sliced cheddar cheese.
  • Add the roasted jalapeños to the sandwich.
  • Spread the remaining two slices of bread with cream cheese on the sides without butter.
  • Place the bread cream cheese side down on the sandwich.
  • Cook for approximately 3 minutes or until the bread is a toasty brown.
  • Flip and cook for another 3 minutes until cheese is melted and the other side is a nice toasty brown.
Soups

Recipe—Velvety Celery Cream Soup

I have gotten big bundles of celery in my organic produce delivery several weeks in a row now. I certainly love my celery sticks but I just don’t think I will be able to eat another one for a few days. While recovering from celery stick overload I made one of my favorite vegetable soups, celery cream. This is one of the easiest soups to make and even though it is very simple it is wonderful. It is super creamy and the lemon and hot sauce gives it just the right kick. I made a big batch to take to my mother in law who just had knee replacement surgery a couple of weeks ago. One thing I love about this soup is you can make a big batch of it and it reheats great! I typically double the recipe and then divvy the soup up into several containers for future dinners and lunches. It’s a perfect dinner for cool evenings or even on a rainy Sunday afternoon.

Note: When using a blender to puree the soup you will need to do it in batches. I recommend placing a towel over the top of your blender and holding the lid firmly in place as the heat will make the lid blow off and it makes a huge hot mess and can burn you if not secured.

INGREDIENTS
4 tbsp (1/2 stick) butter
1 bunch of celery, sliced
2 yellow onions, chopped
1 tbsp garlic, minced
4 tbsp flour
6 c chicken broth
1 bay leaf
1 c heavy cream
1 tbsp lemon juice
4–5 dashes of hot sauce
1/2 tsp ground white pepper
salt (optional)

STEPS

  • In a large soup pot melt the butter and add the celery, onions, and garlic.
  • Cook over medium-high heat until soft.
  • Sprinkle the flour in the pot and stir while cooking for 1–2 minutes.
  • Add the chicken broth and bay leaf.
  • Bring pot to a boil, cover, and reduce heat allowing to simmer for 30 minutes.
  • Remove the bay leaf.
  • Using a blender puree the soup in small batches until nice and smooth. (See above note)
  • Transfer the soup back into the pot.
  • Add in the cream, lemon juice, hot sauce, pepper, and salt. (Be sure to sample the soup before adding in the salt. Unless you are using a reduced sodium you may not need it.)
  • Bring pot to a boil, cover, and reduce heat allowing to simmer for an additional 10 minutes or until desired thickness.
Dinners

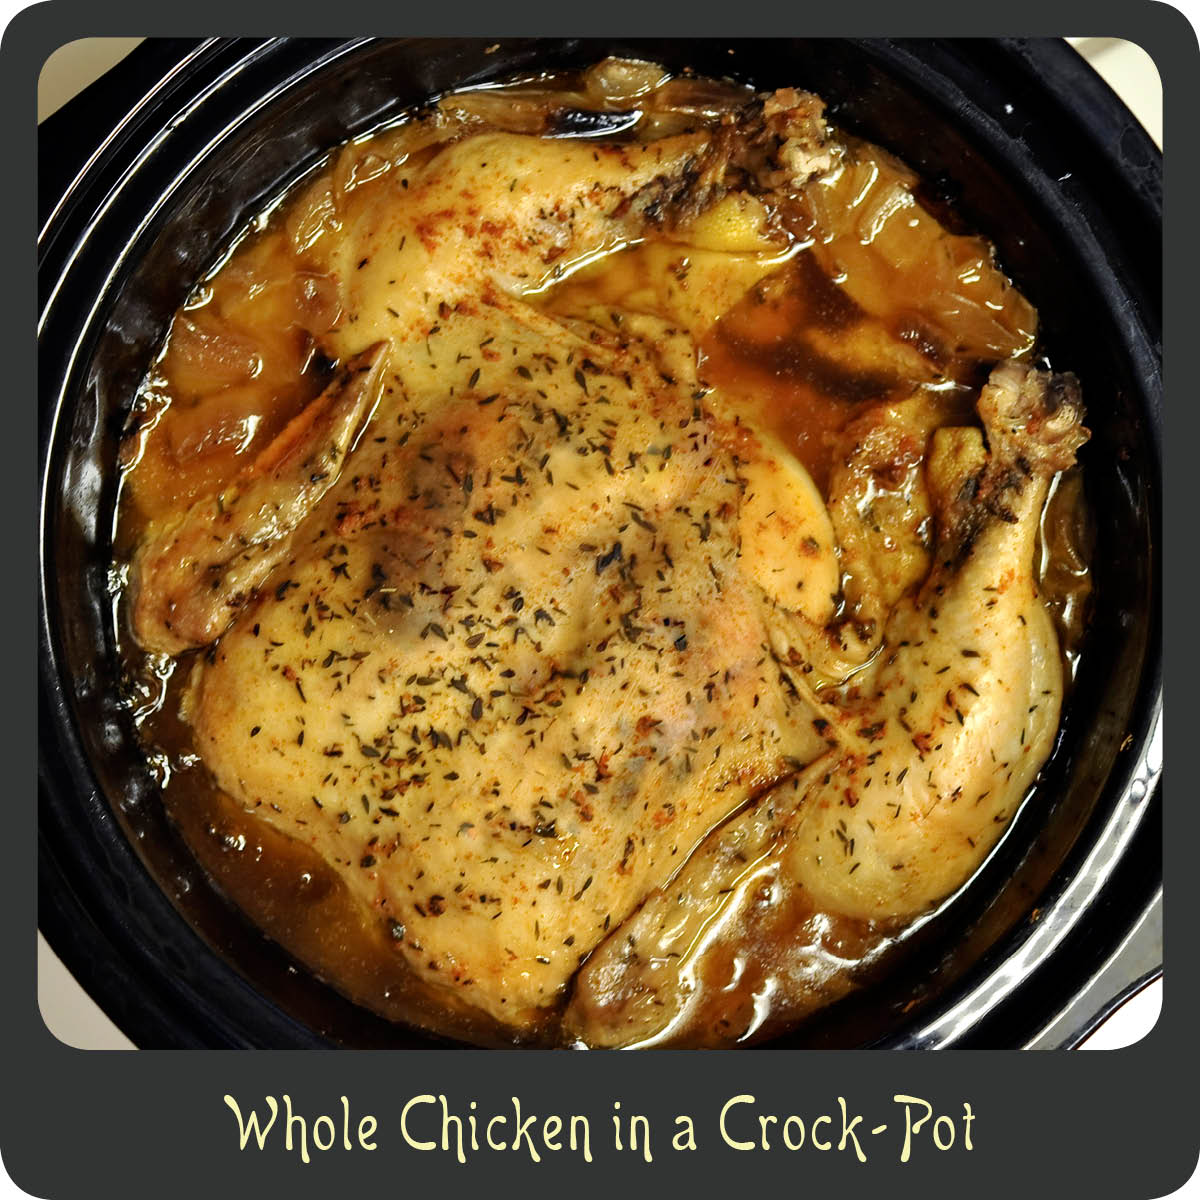
Recipe—Whole Chicken in a Crock-Pot

I absolutely love roasting chicken in the oven but I just don’t usually have time during the workweek. Using a crock-pot is a wonderful alternative way to cook an entire chicken. This recipe is super easy and the chicken comes out incredibly moist and is pretty much falling off the bone. Just be sure to be very careful when removing the whole chicken from the crock-pot because it will be on the verge of falling apart. Serve this up with a side of mashed potatoes and your favorite veggie for a dinner made of comfort foods. I even used the drippings from the crock-pot to make a quick and easy gravy which went great with mashed potatoes and chicken.

Note: If you are really short on time in the mornings prepare the entire chicken in the ceramic crock-pot insert the night before and just place the entire thing with the lid on in the refrigerator. Then in the morning you just drop the insert into the crock-pot and turn it on. Wellah! Dinner really can be this easy!

INGREDIENTS
2 tsp paprika
1 tsp salt
1 tsp onion powder
1 tsp thyme
1/2 tsp garlic powder
1/4 tsp cayenne pepper
1/4 tsp black pepper
1 yellow onion, chopped
2 stalks of celery, chopped
1 large chicken

STEPS

  • Combine all the spices in a small bowl.
  • Place the chopped onion and celery in the bottom of the crock-pot.
  • Remove any parts from inside the chicken.
  • Rub the seasonings all over the chicken. (I like to rub some of the seasonings under the skin covering the breasts. This allows the flavors to really seep into the meat.)
  • Place the prepared chicken in the crock-pot on top of the onions breast side up.
  • Cook on high for 4–5 hours or on low for 8–10.
Dinners, Sandwiches

Recipe—Chicken Caesar Burgers

Everything delicious about a chicken Caesar salad can be found in this chicken burger. It’s got the lemon zest, rich parmesan, and creamy dressing. Many people think of ground chicken patties as bland and dry. After trying these one’s opinion of them will completely change. These are not only really moist but they are also super tasty.  When I cooked these the other night I made my hubby the burger on the bun and I just enjoyed the patty along with a big side Caesar. This gave me a fabulous low-carb alternative. These sandwiches are incredibly quick and easy to make and give you a really great healthy alternative to a beef burger.

INGREDIENTS
1 lb ground chicken breast
2 tsp garlic, minced
1/3 c grated parmesan
salt and pepper
1 tbsp Worcestershire sauce
1/3 c fresh parsley, finely chopped
1 tbsp lemon zest
4 tbsp olive oil, divided
1/2 c parmesan, shredded
4 sandwich rolls
1/4 c Caesar dressing
8 large romaine leaves
1 large red tomato, sliced

STEPS

  • Preheat oven to 400º.
  • In a large bowl combine the chicken, garlic, parmesan, salt, pepper, Worcestershire sauce, parsley, and lemon zest.
  • Mix the meat and ingredients and form into 4 patties making sure they are the same shape and size as your rolls.
  • Heat 2 tablespoons of olive oil in a large non-stick skillet.
  • Add the chicken patties to the heated skillet and cook for 4–5 minutes per side.
  • While the patties are cooking place the buns cut side up on a cookie sheet and drizzle with the remaining 2 tablespoons of olive oil.
  • Flip the buns over so they are cut side down.
  • Remove the patties from the skillet and transfer them to the baking sheet if there is room, if not use a second baking sheet.
  • Top the chicken burger patties with the shredded parmesan cheese.
  • Bake the buns and patties in the oven for 5 minutes or until the cheese is melted and the buns are nice and toasty.
  • Spread each cut side of the buns with Caesar dressing.
  • Place 2 romaine leaves and two slices of tomatoes on each bun bottom.
  • Add the chicken patty and finish off with the top bun.

Recipe adapted from Rachel Ray.

Dinners

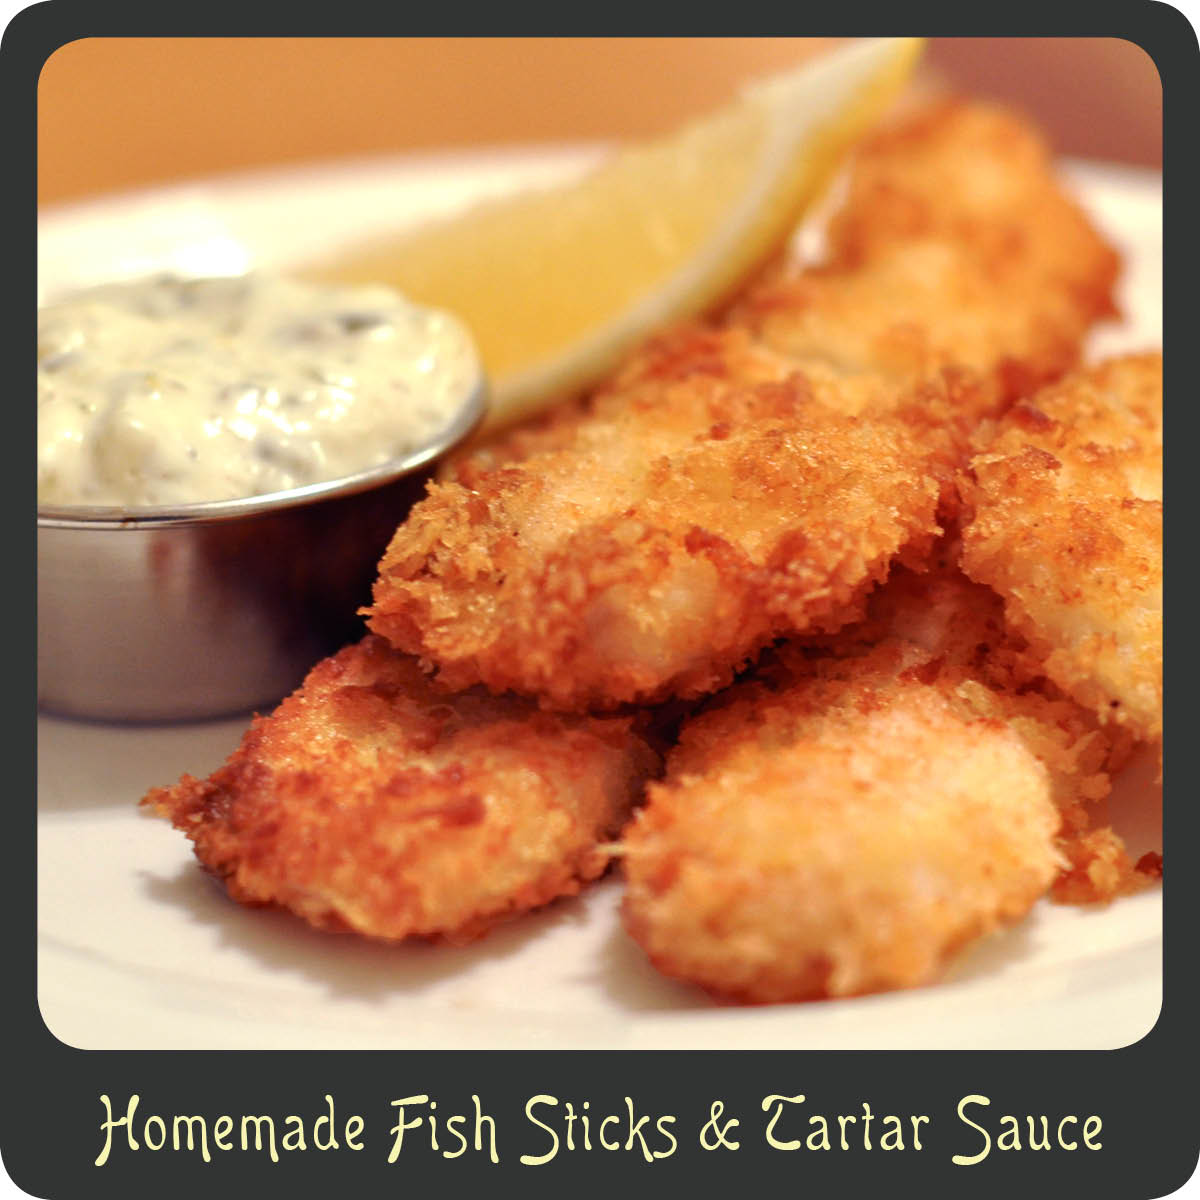
Recipe—Homemade Fish Sticks & Tartar Sauce

The other night I asked my son what he would like for dinner. His reply, an enthusiastic “FISH STICKS!” I was not so enthusiastic. I have never been a fan of the frozen mystery fish sticks you get in your store’s frozen section, I am however a huge fan of good, quality, fresh fish. So I was on a mission to make some out of this world homemade fish sticks. Why not go with one of the best pieces of fish on the market, halibut. These turned out incredible! By far the best fish sticks I have ever had. These were a huge hit not for only my husband and I, but my son loved them. We had a happy family all around. I served them with my macadamia nut rice and some coleslaw. Talk about totally indulgent. We will be making these again very soon.

Note: Halibut filets typically come with a layer of skin on them. Many butchers will remove it for you if you bat your eyes and ask them nicely. So unless you want to remove the skin yourself, see if you can get a butcher to remove the skin from the filet for you. Trust me, it’s worth it.

FISH STICK INGREDIENTS
2 eggs
1 tbsp milk
1 lb halibut filets cut into 1” strips
1 1/2 c panko
1/2 tsp kosher salt
1/2 tsp pepper
1/4 c vegetable oil

TARTAR SAUCE INGREDIENTS
1/4 c sour cream
3 tbsp mayo
2 tbsp sweet pickle relish
2 tsp capers, minced
1/8 tsp salt
1/8 tsp pepper

GARNISH
lemon wedges

STEPS

  • Make tartar sauce by combining all ingredients in a small bowl mixing well. Place tartar sauce in fridge until ready to use.
  • For the fish sticks, whisk together eggs and milk.
  • Add fish strips to the egg wash and gently toss to coat.
  • In a shallow bowl combine panko, salt, and pepper.
  • Remove the fish strips one at a time from the egg wash and coat them in the panko mixture. Set the breaded fish to the side on a cutting board as you finish them.
  • Heat the oil in a large skillet over medium-high heat.
  • Add as many of the fish sticks to the hot oil as you can making sure not to overlap.
  • Cook for 4 minutes turning once to making sure all sides are a golden brown.
  • Remove the fish sticks from the oil as they are done cooking and place on a paper towel lined sheet.
  • Repeat the last 3 steps until all of the fish sticks are done.
  • Serve fish sticks with the tartar sauce and a lemon wedge.
Side Dishes

Recipe—Tropical Macadamia Nut Rice

How many times have you served a side of plain white rice with your favorite dishes? With how quick and easy this macadamia nut rice is you will be looking to spruce up your rice more often. This takes rice to a whole new level. It is sweet and salty and has a great balance of textures with the crunchy nuts mixed in. This is a great side dish if you are looking for food for a luau. I love to serve it with teriyaki chicken and grilled pineapple. Yummy in my tummy! This rice pairs nicely with my homemade halibut fish sticks, any grilled fish, or even grilled pork or shrimp with Caribbean seasonings. Try this out and give your taste buds a real tropical treat. Aloooooohaaaaa!

INGREDIENTS
2 cups jasmine rice, uncooked
1/2 cup shredded coconut
2 tbsp olive oil
1/3 c green onions, thinly sliced
2/3 cup roasted macadamia nuts, chopped
salt

STEPS

  • Cook rice according to package instructions.
  • While the rice is cooking, lightly toast your coconut in a skillet over medium heat until it turns a nice golden color.  Set aside.
  • After the rice has sat covered per the package instructions, drizzle with olive oil and gently fluff with a fork.
  • Stir in toasted coconut, green onions, macadamia nuts, and season with salt.
Brunch, Salads, Side Dishes

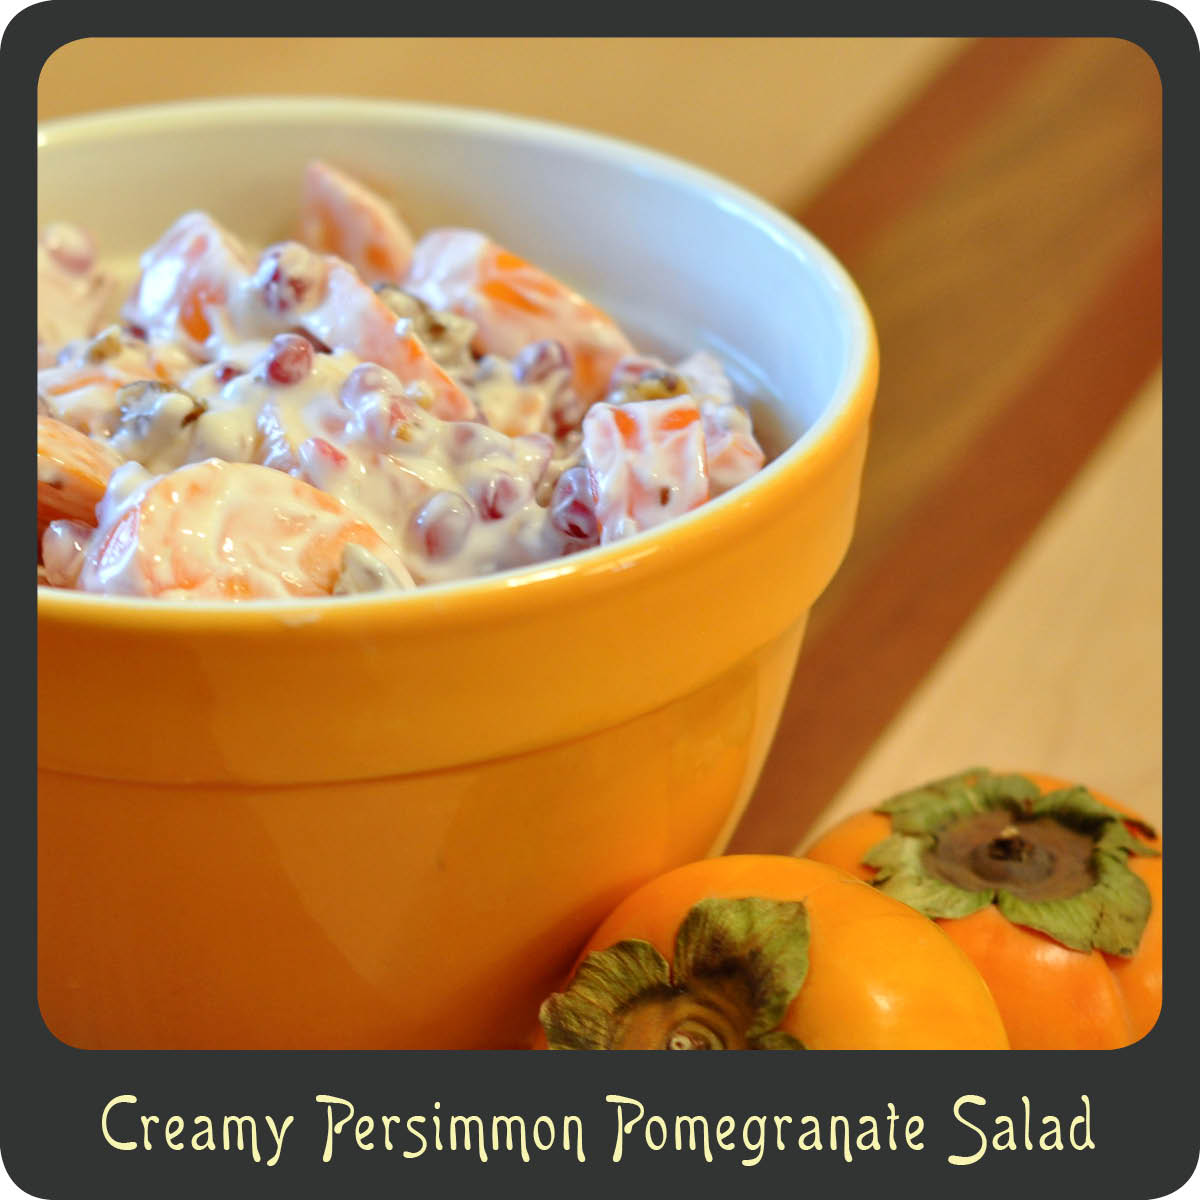
Recipe—Creamy Persimmon Pomegranate Salad

During the fall and winter months it can be difficult to find quality ripe fruit for a fruit salad. And when you do find some, you pay an arm and a leg. This is a fabulously simple salad you can whip up in minutes using some seasonal fall fruits. This sweet and creamy salad is great for breakfast or even as an addition to your Thanksgiving meal. I think the walnuts and pomegranate seeds give it a nice little crunch and best of all, it is really healthy!

Note: You may or may not find seeds in your persimmons. I have found them both ways. When you chop them be sure to keep a watch for them and discard any you find.

INGREDIENTS
6 fuyu or amagaki persimmons, chopped
3/4 c pomegranate seeds
1/2 c candied walnuts, chopped
1 c plain Greek yogurt
2 tbsp honey

STEPS

  • Combine the persimmons, pomegranate seeds, and walnuts in a medium bowl.
  • In a small bowl, stir together the honey and yogurt.
  • Pour the yogurt over the fruit and gently stir to combine.
Dinners, Side Dishes

Recipe—Quinoa and Cheese

I am a huge fan of macaroni and cheese; I mean come on, who isn’t? It has to be one of my all time favorite comfort foods. Problem for me is that it is not the healthiest item to be consuming on a regular basis. I thought to myself, there has to be a way to enjoy a healthier version of this classic comfort food. So here it is, quinoa and cheese!

Quinoa (pronounced KEEN-wah) is a super grain comparable to couscous or rice and has been around since ancient times. The Incas called it “The Mother Grain.” It contains more protein and fewer carbohydrates than any other grain. It’s also an awesome source of calcium, iron, phosphorous, and vitamins B and E. Quinoa is a great ingredient to work with if you are watching carbs or are on a gluten free diet.

This recipe has all the great qualities a person loves about macaroni and cheese, the rich creaminess, the cheesiness, the crunchy topping, except it makes it healthier. (Shhh don’t tell the kids!) You can even spruce it up by adding in some steamed broccoli or fresh chopped jalapeños. While I wouldn’t call this an equal to macaroni and cheese, it certainly is a great alternative.

Note: If you are only feeding a couple of mouths divvy it up into two 8″ x 8″ dishes and freeze one for later. I love the disposable foil containers you can get at the grocery store. 

INGREDIENTS
1 1/2 cups quinoa, uncooked
1/2 c milk
1/2 c sour cream
2 large eggs
1/2 tsp garlic powder
salt and pepper
2 c shredded cheddar cheese
1 c crushed croutons (optional)

STEPS

  • Cook quinoa according to the package instructions.
  • Preheat oven to 350º.
  • Grease a 7” x 11” baking dish.
  • Whisk together milk, sour cream, eggs, garlic powder, salt, and pepper.
  • Stir in cheese and then the cooked quinoa.
  • Transfer the quinoa and cheese mixture to the prepared baking dish.
  • Top with the crushed croutons if you are using them.
  • Bake for 30–35 minutes or until it is a nice golden brown on top.
Dinners, Side Dishes

Recipe—Baked Acorn Squash

I have a confession to make, I know this will make me sound like a total blonde but I want to be sure you all know I’m human and that I don’t know everything about cooking. I am still learning every day. So here I go… until I got my first acorn squash in my organic produce box a few weeks back I thought they were a decorative item. Seriously. Okay, go ahead and laugh now.  I remember seeing them in the grocery stores with all the gourds and pumpkins every fall but I was oblivious to the fact that people actually ate them. I am so glad I discovered that these were in fact edible because they are delicious and I now love cooking with them. I am sharing a recipe for a classic oven baked acorn squash. This is a really sweet treat and a fun way to enjoy the veggie. These squash remind me of my favorite Thanksgiving side dish, sweet potatoes with brown sugar and pecans. Yum! Depending on how many people I have over for turkey day this year I may just even make these instead. Why not mix it up and break out of tradition?

INGREDIENTS
1 acorn squash
1 tbsp butter, softened
salt
2 tbsp brown sugar
2 tsp maple syrup

STEPS

  • Preheat oven to 400º.
  • Carefully cut acorn squash in half and using a spoon clean out the seeds and stringy pulp.
  • Coat the inside of each squash half with the softened butter and sprinkle with salt.
  • Add 1 tablespoon of the brown sugar to the cavity of each half.
  • Drizzle a teaspoon of maple sugar over each half.
  • Put a 1/4” of water in a baking dish (This keeps the squash from drying out.)
  • Place the prepared acorn squash in the water cut side up.
  • Bake squash for 1 hour or until they are soft and easily pierced with a fork.
  • Allow to cool for 5 minutes before serving.
Dinners, Sauces

Recipe—Peppercorn Crusted Steak with Bourbon Cream Sauce

Usually when we have steak in our house my hubby does his magic on the grille. The other weekend he was taking his first of many architectural exams. I wanted to surprise him with a nice steak fit for a king to reward him for all his hard work, without having him fire up the barbie. These really turned out to be some great skillet cooked steaks. The sauce was rich and creamy and really dresses up what is already a fabulous cut of meat. This recipe is perfect for a romantic dinner in or a special indulgence.

STEAK INGREDIENTS
2 New York steaks, rib eyes, or filets
1/2 tbsp kosher salt
1 tbsp fresh ground pepper
2 tbsp olive oil

SAUCE INGREDIENTS
1 tbsp olive oil
1 tsp garlic, minced
1 tbsp yellow onion, minced
1 tsp peppercorns
2 tbsp bourbon
1/2 c beef broth
1/2 c heavy whipping cream

STEAK STEPS

  • Season both sides of the steaks with salt and pepper making sure to rub it in.
  • Heat a medium sized skillet over medium-high heat.
  • Add olive oil to the pan and heat.
  • Carefully add the steaks to the pan and cook for 4–5 minutes.
  • Reduce the heat to medium and flip the steaks.
  • Cook the steaks for another 4–5 minutes.
  • Transfer the steaks to a large plate and cover with foil.

SAUCE STEPS

  • Add oil to the skillet the steaks were cooked in.
  • Add garlic, onions, and peppercorns to the skillet and cook over medium heat until onions are translucent.
  • Carefully add the bourbon to the pan to deglaze. It may ignite so stand back and poor in slowly.
  • Use a whisk to stir and break up all the bits in the bottom of the pan.
  • Add the beef broth and the heavy cream to the pan and bring to a gentle boil.
  • Turn heat to low and simmer.
  • Cook sauce for 3–5 minutes until it begins to thicken, stirring occasionally.
  • Plate the steaks and pour the sauce over the top of them.