Soups

Recipe—Crock-Pot Chicken Enchilada Soup

Today is day 4 of my hot & spicy week! My jalapeño plant has been giving me more peppers than I know what to do with so this week I will be featuring five different jalapeño based recipes. I hope you enjoy each and every one! 

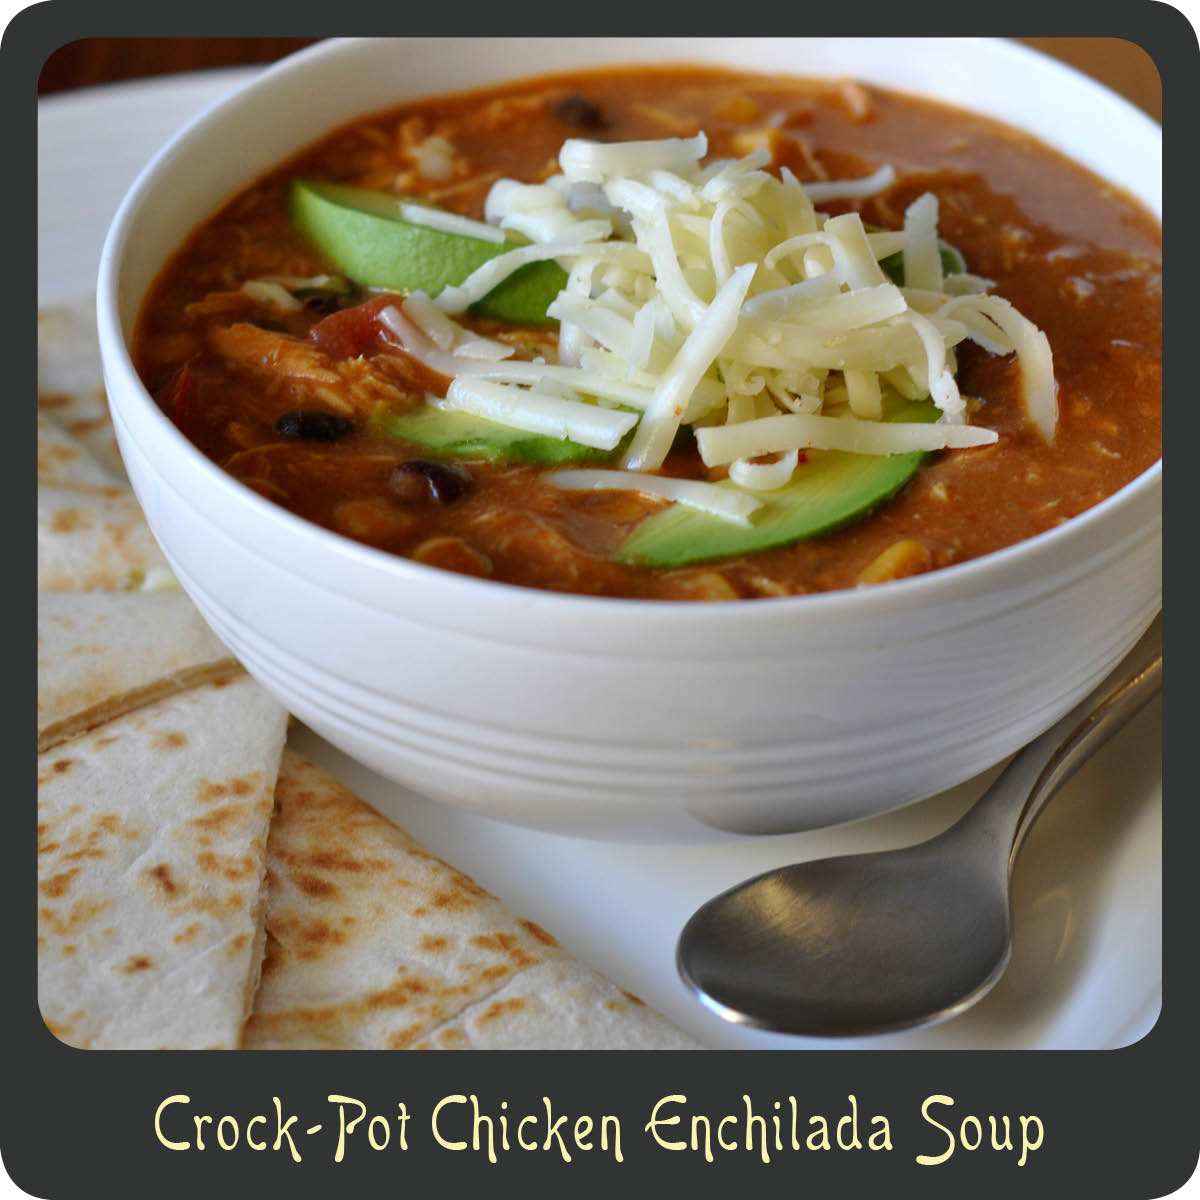
This is everything you could ever hope for in a soup recipe. Quick, easy, and delicious! I love using my crock-pot. Not only because it makes dinner a total breeze but also because the house smells so incredibly good when you get home from work. If you are a fan of Mexican food then you will enjoy this. It’s not too mild, and it’s not too spicy, it’s just right. This soup is thick and creamy and warms you from the belly out. Try it with some of my jalapeño cheddar corn bread muffins for a perfect dinner. Heck now that I think about it, it would be perfect for some Monday night football this fall!

Note: If the soup is too thick for your liking add a splash of milk to the crock-pot before serving. If you have leftovers put it in a freezer safe container and save it for a rainy day. It reheats great!

INGREDIENTS
15 oz can black beans, rinsed and drained
14.5 oz can petite diced tomatoes
15 oz can whole kernel corn
1/2 yellow onion, chopped
1/2 red bell pepper chopped
1 jalapeño, deseeded and chopped
2 chicken breasts
10 oz can enchilada sauce (I’m a fan of Las Palmas)
10.75 oz can condensed cream of chicken soup
1 1/2 c milk

GREAT GARNISHES
shredded cheese
sliced avocado
sour cream
crushed tortilla chips

STEPS

  • In a large crock-pot combine black beans, tomatoes, corn, onion, and peppers.
  • Place chicken breasts on top of veggies.
  • In a medium-mixing bowl whisk together enchilada sauce, soup, and milk.
  • Pour sauce mixture into the crock-pot.
  • Cover and cook on low heat for 7–8 hours or on high for 3–4.
  • Remove chicken and using 2 forks shred into bite size pieces
  • Add chicken back into soup and continue to cook covered on low heat for another 25–30 minutes.
  • Serve in large soup bowls and top with some of the suggested garnishes.

Side Dishes

Recipe—Jalapeño Cheddar Corn Bread Muffins

Today is day 3 of my hot & spicy week! My jalapeño plant has been giving me more peppers than I know what to do with so this week I will be featuring five different jalapeño based recipes. I hope you enjoy each and every one! 

Jalapeño Cheddar Corn Bread Muffins

Looking for a quick and easy side dish you can serve with your bowl of chili this coming winter? This is a great recipe I have been making for years. This takes the typical corn bread muffin and gives it a little extra kick.  In my opinion, there is no better complement to a fresh jalapeño than cheese. These go great with a spicy rubbed steak and some grilled veggies or even a side of your favorite soup. They are incredibly easy to make since you’re taking a box mix and just spicing it up with a couple simple ingredients. Perfect for busy moms, or dads, short on time.

Note: You can use any corn bread mix you prefer. I just really like Marie Callender’s. These proportions are perfect for a mix that makes a dozen muffins. You also don’t have to use the muffin pan liners as the recipe is written. I just find that sometimes the cheese adheres to the muffin pan and can make it difficult to get the little rascals out when they aren’t used.

INGREDIENTS
Marie Callender’s Original Corn Bread Mix, 16 oz
water
1 1/4 c shredded cheddar, divided
1 jalapeño, deseeded and chopped
1 jalapeño, deseeded and sliced
muffin cup liners (optional)

STEPS

  • Preheat oven to 375º.
  • Prepare corn bread mix according to instructions.
  • Stir in 1 cup of the shredded cheddar and the diced jalapeños, making sure not to over mix.
  • Prepare muffin pan with liner cups and evenly distribute the muffin mix in each cup filling up about 2/3 of the way.
  • Top each muffin with a slice of jalapeño and sprinkle remaining 1/4 cup of cheddar on top of each.
  • Bake for 20–25 minutes or until a toothpick comes out clean when inserted into the middle.
  • Remove from oven and allow to cool for a couple of minutes before serving.

Appetizers

Recipe—Queso Fundido

Today is day 1 of my hot & spicy week! My jalapeño plant has been giving me more peppers than I know what to do with so this week I will be featuring five different jalapeño based recipes. I hope you enjoy each and every one!
Planning a fiesta anytime soon? If so, this is a perfect appetizer sure to start the party off right. It is quick and easy. I have made this for two social gatherings in the last couple of weeks since jalapeños are in abundance at our house and both times the dish was practically licked clean. It is one of those appetizers that you just can’t get enough of. Just serve it up with your favorite tortilla chips and watch it disappear.

Note: If you have a small appetizer sized crock-pot you can put the finished queso fundido in it on low heat to stay warm.

INGREDIENTS
2 tbsp olive oil
1 tomato, diced
1/2 yellow onion, diced
2 jalapenos, deseeded, deveined, and finely chopped
3 tbsp tequila
2 c jack cheese, shredded
1/4 c milk
1/4 fresh cilantro, chopped

STEPS

  • In a medium saucepan heat oil over medium high heat and add tomatoes, onions, and jalapeños.
  • Cook until onions are translucent and soft, about 4–5 minutes.
  • Carefully add in tequila and simmer for 2–3 minutes.
  • Mix in cheese and milk and stir until melted and smooth.
  • Remove from heat and stir in cilantro.
  • You can serve as it is OR you can put the cheese mixture in an oven safe dish and finish off under the broiler for 3–4 minutes or until just starting to turn a golden brown on top.

Sweet Treats

Recipe—Caramel Pecan Cheesecake Balls

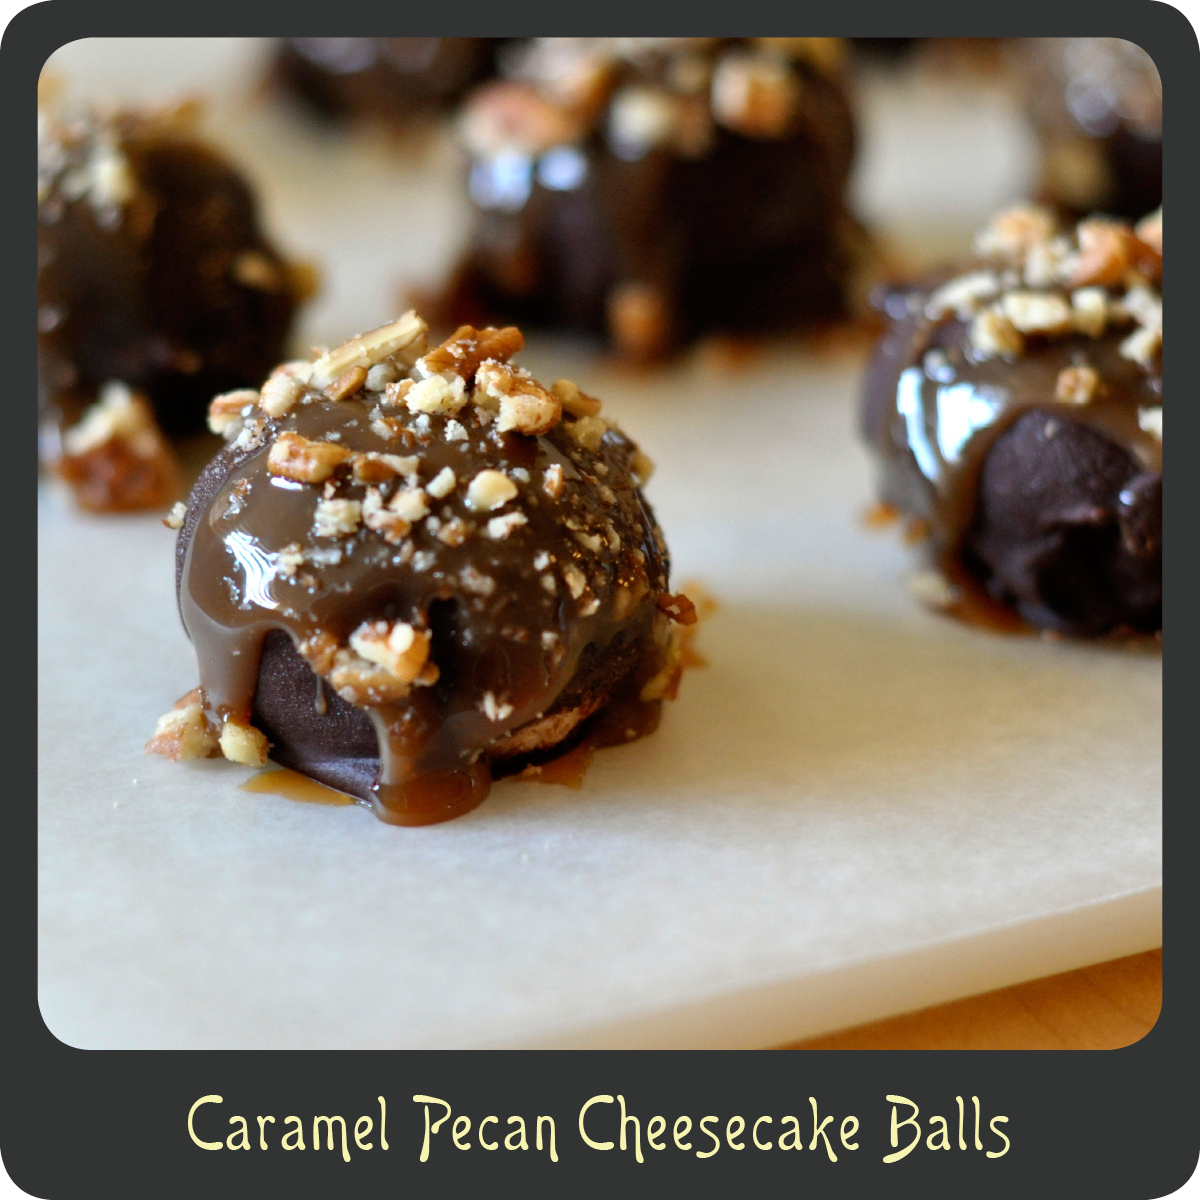
These no-bake caramel pecan cheesecake balls are the type of dessert that make your teeth hurt just looking at them. And I mean that in the best way possible. There is a reason these are bite size servings. They are so rich that you really will only want to eat one, but will probably devour a couple. You just wont be able to resist. They are dangerous like that so beware! I made these for a recent birthday party and had at least half the people ask for the recipe. I’m pretty sure that’s a good thing. These are the perfect party dessert if you are looking for something that is absolutely delicious and bite size.

Note: I ate these frozen as well as refrigerated and they were delicious both ways.

INGREDIENTS
8 oz cream cheese, softened
1 1/2 c graham cracker crumbs
1 c powder sugar
1 bag semi sweet chocolate chips
2 tbsp butter
1/2 c pecans, chopped
1/4 cup caramel sauce

STEPS

  • In a medium mixing bowl combine the cream cheese, graham cracker crumbs, and powdered sugar. Beat using a mixer until well combined and smooth.
  • Add in more powdered sugar and graham cracker crumbs as needed to make the consistency of a cookie dough so that it is easy to work with.
  • Place bowl in the fridge for a half hour to allow “dough” to set.
  • Using a tablespoon or melon baller scoop up balls and roll in your hand until round in shape.
  • Place each ball on a wax paper lined baking sheet.
  • Place the baking sheet in the freezer for an hour so that the cheesecake balls harden and don’t melt when you are dipping them in the hot chocolate.Melt the chocolate and butter in a double boiler whisking with a fork until smooth. (The step can also be done in the microwave just be sure to check on it and stir every 30 seconds. The chocolate can burn easily.)
  • Dip each ball into the melted chocolate and turn until evenly coated. (I find using a fork works great to remove the balls from the chocolate so that the excess can drip off between the prongs.)
  • Place the chocolate-coated cheesecake balls back on the wax paper covered baking sheet.
  • When you are done dipping each ball drizzle with the caramel sauce. (I find using a zip loc bag with the corner cut off works great. And it is a breeze to clean up, just throw the bag away!)
  • Sprinkle the cheesecake balls with crushed nuts and place in the fridge for at least one hour before consuming.
Sweet Treats

Recipe—Piña Colada Pie with Drunken Rum Sauce

Looking for that perfect summer dessert that takes you away to a tropical island? Then look no further! My piña colada pie is a little slice of paradise. This crust less pie could not be easier to make. You literally combine all the ingredients and put it in the oven to bake. It is a creamy custard based pie which is great all on it’s own but add in the drunken rum sauce and ooo-weeee! That’s good stuff, like a party in your mouth! I like to top mine with some homemade whip cream and crushed macadamia nuts to dress it up a bit. I made this for some friends the other night and they said it was like nothing they had ever had before (I am pretty sure it was a compliment). It is a one of a kind dessert that will make your mouth happy.

PIE INGREDIENTS
1 1/2 c heavy whipping cream
1/2 c sugar
6 eggs
1 tbsp vanilla
1/2 c flour
2 c shredded coconut
8 oz can crushed pineapple, drained

DRUNKEN RUM SAUCE INGREDIENTS
1 c butter
1 c Myers dark rum
1 c brown sugar

GARNISHES
whipped cream
crushed macadamia nuts

STEPS

  • Preheat oven to 350º.
  • In a large mixing bowl combine cream, sugar, eggs, vanilla, and flour.
  • Mix using a hand mixer for about 2 minutes on medium speed.
  • Fold in coconut and pineapple until completely combined.
  • Pour your pie mixture into a greased pie dish.
  • Bake for 40–45 minutes.
  • Remove pie from oven and allow to cool.
  • While pie is cooling start the rum sauce by melting the butter in a small saucepan.
  • Stir in brown sugar and whisk until sugar is dissolved.
  • Add in rum and bring to a gentle boil.
  • Turn heat to low and simmer for 2–3 minutes.
  • Pour sauce over a warm slice of pie and top with whipped cream and some macadamia nuts.
Dinners, Side Dishes

Recipe—Ratatouille

Ratatouille Over Penne

When most people hear the word ratatouille they think of a movie about a little rat named Remy who dreams about becoming a chef. Ratatouille is not just a very cute Pixar movie; it is also a delicious dish loaded with succulent Mediterranean vegetables that your family is sure to enjoy.

Ratatouille is a traditional French vegetable stew that originated in Nice. The full name is ratatouille niçoise. It is a flavorful, hearty, low calorie fare that can be served as an excellent main dish, to accompany a protein, or tossed with pasta. This recipe is a great way to utilize all those wonderful summer garden veggies that are in season. Aside from all the chopping this recipe is very easy to prepare.

Ratatouille

I will state that this makes a pretty hearty amount so you will probably have leftovers unless you are serving a whole army. The leftovers are incredible, as the flavors seem to intensify with time. I made lasagna with my leftovers and I must say it is one of the best lasagnas I have ever had! The big chunky vegetables were awesome, especially when I paired them with Italian sausage and some ricotta. I will be sure to share that recipe with you next. Delish!

INGREDIENTS
1/4 c olive oil
1 yellow onion, chopped
4 cloves garlic, minced
1 eggplant, cut into 1/2-inch cubes
2 zucchini, cut into 1/2-inch cubes
Coarse salt and ground pepper
1 yellow bell pepper, deseeded and cut into 1/2-inch cubes
1 red bell pepper, deseeded and cut into 1/2-inch cubes
15 oz can diced tomatoes
1/2 tsp dried thyme
1/4 c fresh basil, chopped

STEPS

  • In a large pot that has a lid, heat olive oil over medium heat.
  • Cook onions until soft, about 5 minutes.
  • Stir in garlic and cook for about 1 min.
  • Add in eggplant and zucchini and season with salt and pepper.
  • Add 1/2 cup of water, cover, and simmer stirring once until vegetables begin to soften, about 5 minutes.
  • Stir in bell peppers, cover, and simmer for another 5 minutes.
  • Add in tomatoes and thyme and bring to a boil.
  • Reduce heat to medium-low and cover.
  • Stir occasionally until vegetables are cooked to desired consistency. Mine take about 12–15 minutes.
  • Remove from heat, stir in basil, and serve immediately.
Dinners

Recipe—Mandarin Beef Stir-Fry

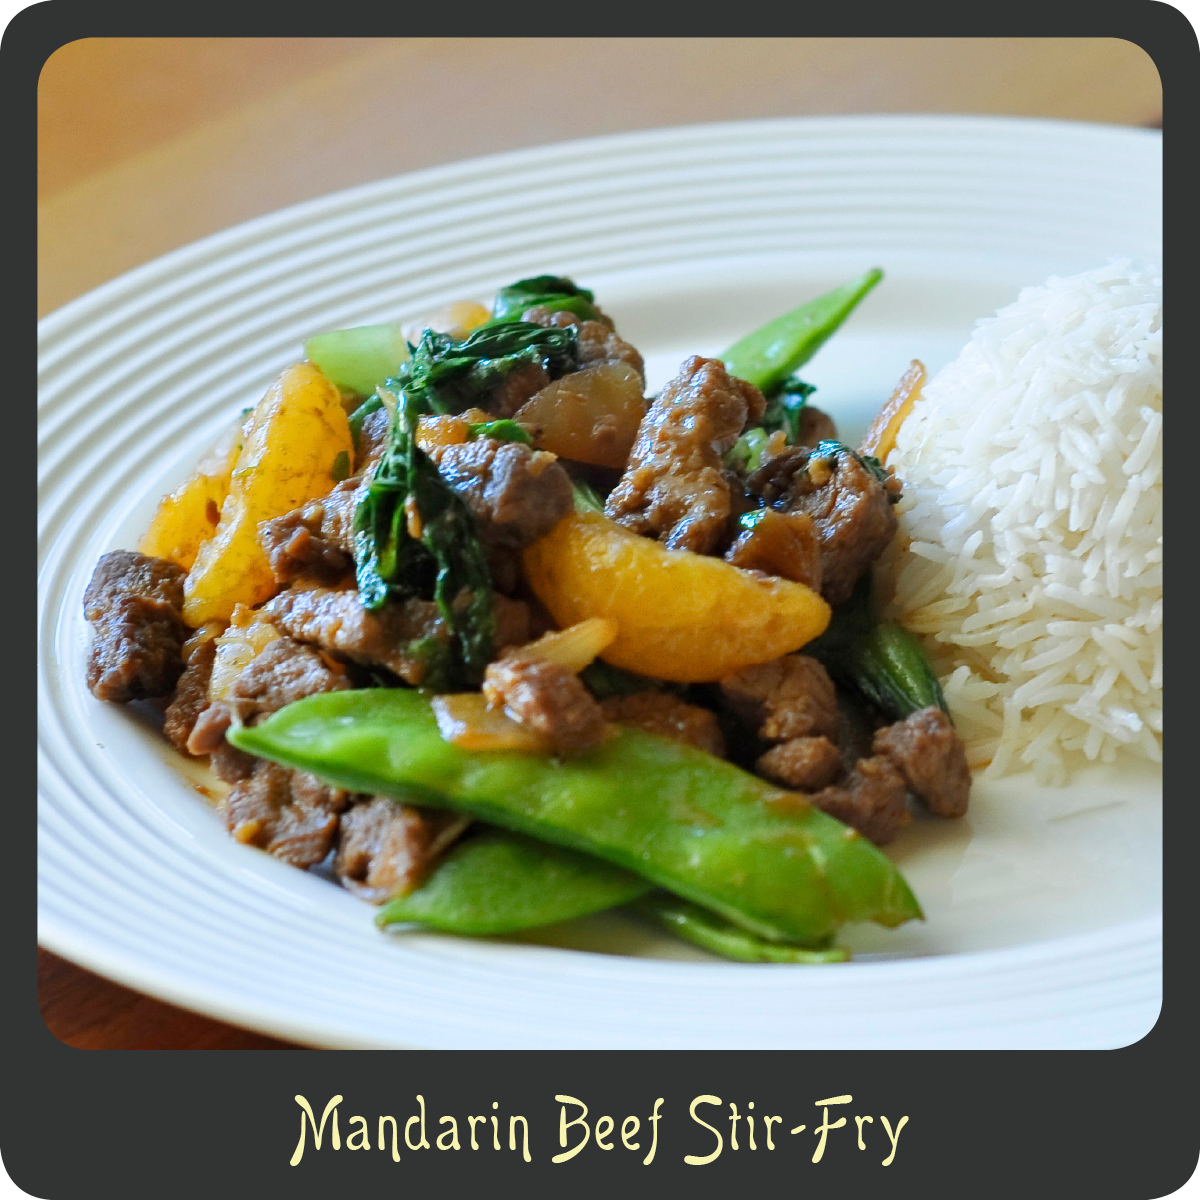
It’s always great when you can find a healthy low fat dinner that has incredible flavor. This stir-fry is one of those dinners. Stir-fries are typically Asian dishes jam packed with veggies and sometimes meat. They are great because they cook fast, are usually really good for you, and can be a one dish main course saving on dirty dishes! When you cook stir-fries quickly over high heat the juice is seared inside the vegetables and meat retaining texture and flavor. The ginger in this recipe goes so nicely with the sweetness of the mandarins and the beef is tender and flavorful. Whip up this quick and delicious stir-fry for dinner tonight!

Note: The meat requires quite a bit of time to marinade so don’t forget to do the first few steps well ahead of time. If you like heat, add a dash of crushed red peppers. The spicy with the sweet from the oranges is a lovely combination. 

INGREDIENTS
1–1 1/2 lbs rump steak, thinly sliced
2 tbsp soy sauce
1 tbsp dry sherry
2 garlic cloves, minced
1 tsp fresh grated ginger
salt and pepper
2 tbsp peanut oil, divided
1 large yellow onion, chopped
5 mandarin oranges/clementine’s
1/2 c beef stock
4 baby bok choy, sliced
1 c snow peas

STEPS

  • In a large bowl, stir together soy sauce, sherry, garlic, ginger, salt and pepper.
  • Add meat, cover, and allow to marinade for several hours.
  • Heat 1 tablespoon of the peanut oil in a large non-stick wok and fry onions until softened and golden.
  • Remove onions from heat and set aside.
  • Add the remaining tablespoon of oil to the wok, turn heat to high, and add beef.
  • Cook the beef over the high heat moving constantly until all sides are brown. The high heat will sear all the juices inside.
  • Lower the heat and return the onion to the pan.
  • Squeeze the juice from 2 mandarins into the pan.
  • Cook down for a few minutes until liquid is reduced.
  • Add the beef broth slowly while stirring.
  • Continue to cook until the liquid is reduced to almost nothing, about a tablespoon. Note that this will take awhile
  • Add the bok choy and segments from the 3 remaining mandarins.
  • Turn the heat down and toss gently until the vegetables are cooked to desired doneness.
  • Add the snow peas to the wok for the last minute.
  • Remove from heat and serve. 
Appetizers, Side Dishes, Snacks

Recipe—Kale Chips

I am someone who does all my menu planning and grocery shopping on the weekend so that I don’t have to worry about making any extra trips to the grocery store during the week. Being the working mom of a toddler keeps me busy enough Monday–Friday. I receive my produce delivery early in the week and one of my recent deliveries had an unexpected bunch of kale that didn’t really fit with anything I had planned on the dinner menu. I decided to use it for a healthy after school snack for my munchkin.

I have seen kale chips popping up all over the place so thought I would give them a try. While they may not look ultra appealing, they are delicious! My son and I gobbled them up. They are so addicting! Even my son kept coming in to the kitchen asking for more chips. While they totally taste best fresh out of the oven, they were still good the next day. They just loose some of that fresh crispiness over time. These are a perfect snack for those people watching their carbs or calories and they really were quick and easy to make. Perfect for snacking!

INGREDIENTS
1 bunch kale
olive oil
kosher or sea salt

STEPS

  • Preheat oven to 350º.
  • Tear the kale leaves into bite sized pieces stripping out the inner stalks.
  • Wash well in water and dry as much as you can. (I used my salad spinner and it worked great!)
  • Evenly distribute the leaf pieces on a large cookie sheet and drizzle with olive oil.
  • Toss to coat.
  • Sprinkle with salt.
  • Place in oven and bake for 10–15 minutes or until the kale is crisp.
  • Best enjoyed while warm and fresh!
Salads, Sandwiches

Recipe—Classic Chicken Salad

Trying to figure out what to make for your next luncheon or picnic? Search no further! This classic chicken salad recipe is perfect for these warm summer months. During the summer I like cool refreshing sandwiches and chicken salad is always at the top of the list. This recipe is simple, delicious, and a classic. It is perfect in sandwiches or served in a tomato over a bed of lettuce. Heck, I’ve even just gone at it with a fork, I won’t lie. I will say this is better than anything you will find at the deli counter and it is so easy to make. The inclusion of lemon juice and parsley gives this chicken salad a certain freshness that others don’t have.  This is one of those recipes that just gets better over time. I ate this three days after I had made it and it was amazing how much the flavors all intensified. It’s good stuff, Maynard!

Note: This calls for boiled chicken breasts but I have also made it with leftover grilled chicken and it gave the salad a really nice flavor and texture.

INGREDIENTS
4 boneless skinless chicken breasts
1 stalk celery, sliced
1 c mayonnaise
1 tsp mustard
2 tsp lemon juice
1 green onion, thinly sliced
2 tbsp fresh parsley, chopped
1 tsp salt
pepper

STEPS

  • Bring a large pot of water to a boil and add chicken breasts.
  • Boil chicken for 20–25 minutes.
  • Remove chicken from pot and place on a large cutting board to cool.
  • Dice chicken into small pieces.
  • In a large bowl combine chicken and celery.
  • To make your dressing mix together the mayonnaise, mustard, lemon juice, green onion, parsley, salt and pepper.
  • Pour the dressing over the chicken and celery and stir to coat.
  • Refrigerate until ready to serve.
Salads, Side Dishes

Recipe—Kohlrabi Dill Coleslaw

A couple of weeks ago in my produce box I got a green turnip like item that had leafy greens coming out of the top and sides. I thought what on earth is this funny looking vegetable. Turns out it was kohlrabi and that I love it!

Kohlrabi is a member of the cabbage family and it looks like a light green turnip. It is crisp like an apple and has a bit of a bite to it like a radish but a mild sweetness to it similar to a coconut. I would like to say kohlrabi is delicious and I am hooked on it! I am forever a fan of this fabulous vegetable. It makes the greatest coleslaw ever!

My husband is not a huge fan of coleslaw or dill and when he ate this, the exact words out of his mouth were, “Oh my god babe, this is so good.” We both went back for seconds.This is not overly sweet like many typical types of coleslaw so it was the perfect low-carb complement to the sweet bbq sauce I used on my ribs. It was nice and crunchy and the bit of dill gave it a wonderful freshness. Kohlrabi dill coleslaw will be a regular summer side dish in our house from here on out!

INGREDIENTS
2 tbsp very finely chopped onions
1/3 c sour cream
1/3 c mayonnaise
1/2 tbsp mustard
1 tbsp lemon juice
1 tbsp fresh dill, chopped
2 tbsp parsley, chopped
salt and pepper
2 kohlrabi, peeled and grated
2 carrots, peeled and grated

STEPS

  • In a large bowl whisk together onions, sour cream, mayonnaise, mustard, lemon juice, dill, parsley, salt and pepper.
  • Mix in shredded kohlrabi and carrots.