Dinners

Recipe—Shrimp Enchiladas with Jalapeño Cream Sauce

Today is day 2 of my hot & spicy week! My jalapeño plant has been giving me more peppers than I know what to do with so this week I will be featuring five different jalapeño based recipes. I hope you enjoy each and every one!
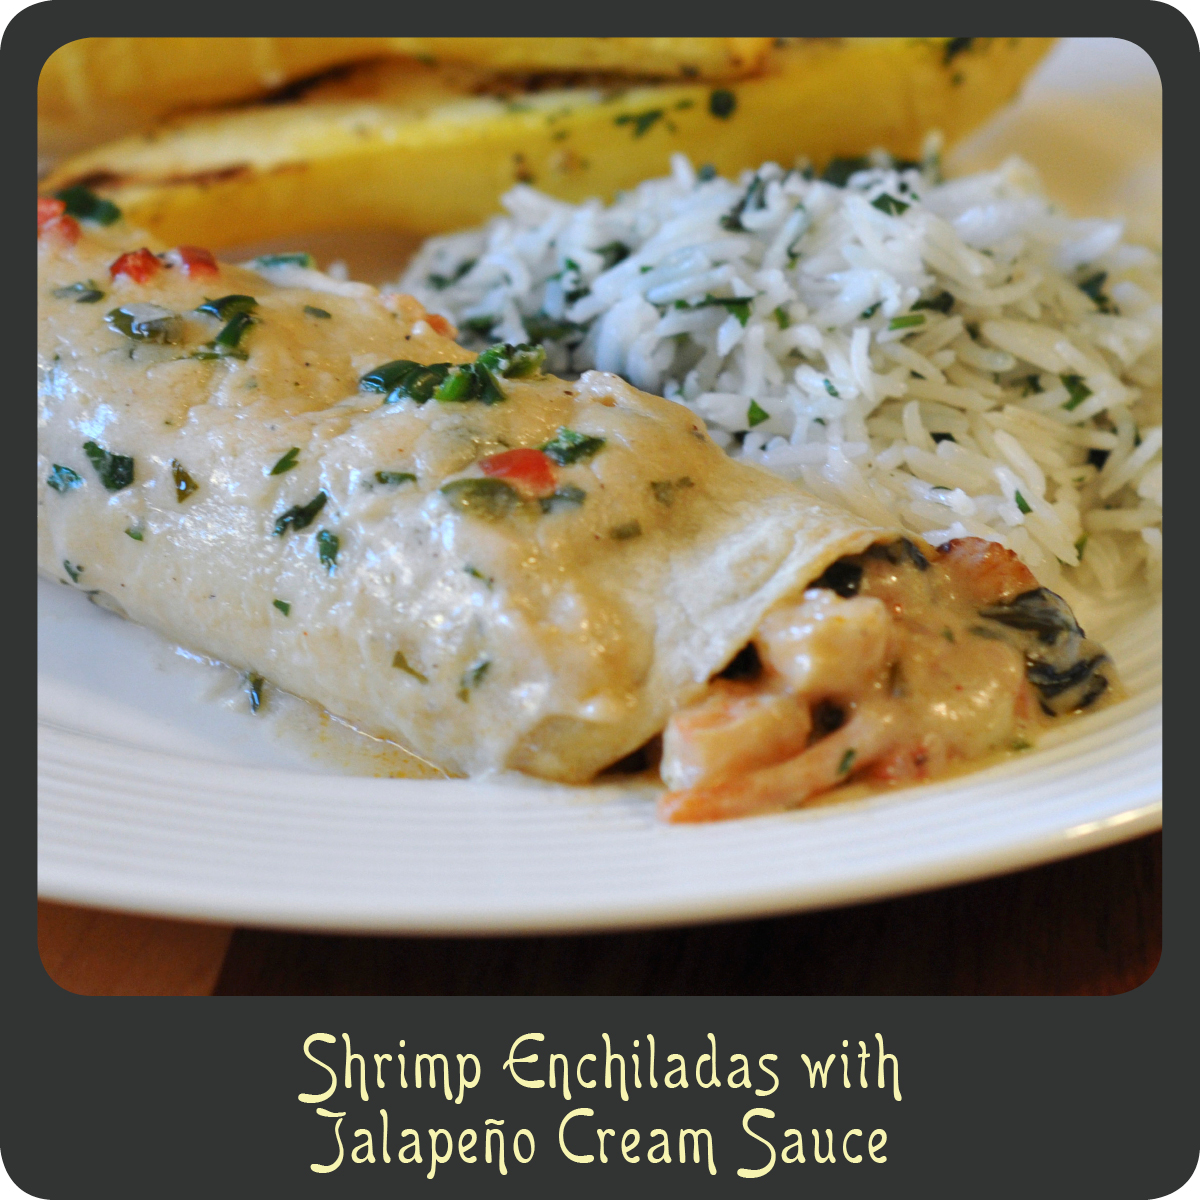
Looking to add some spice to your life? These shrimp enchiladas will do the trick! While the enchilada filling has a good kick to it, the jalapeño cream sauce balances out the heat nicely giving the enchilada a cooling creamy exterior. I love that these are packed with some serious veggies. The sweetness from the corn goes great with the roasted shrimp. It is probably one of my favorite flavor combinations. While these are a little more time consuming to make they are well worth it! Enjoy!

Note: I would like to advise that these do pack a bit of heat so beware. You can leave out the chipotle peppers and add a teaspoon of chili powder to tone it down if spicy isn’t for you.

ENCHILADA FILLING INGREDIENTS
2 lbs medium shrimp, cleaned and peeled
4 tbsp olive oil (divided)
salt and pepper
2 tbsp garlic, minced
1 white onion, diced
2 tbsp chipotle pepper in adobo sauce, finely chopped
1/2 tsp oregano
1 1/2 c shredded carrots
8 oz canned corn, drained
5 c baby spinach
8–10 tortillas
2 c jack cheese, shredded

JALAPENO CREAM SAUCE INGREDIENTS
2 tbsp butter
2 tbsp flour
1 1/2 c chicken broth
3/4 c sour cream
2 jalapeños, seeded and minced (I used 1 red and 1 green)
1/2 tsp garlic powder
1/4 c fresh cilantro, chopped

STEPS

  • Preheat oven to 400º.
  • Place cleaned shrimp on a baking sheet and drizzle with 2 tablespoons of olive oil. Season with salt and pepper.
  • Toss to coat.
  • Place sheet in oven and bake for 8 minutes or until cooked through.
  • Remove from oven and allow to cool.
  • Reduce oven temperature to 350º.
  • Heat the remaining 2 tablespoons of olive oil in a large skillet or wok.
  • Add the garlic and onion and cook over medium high heat until onions are translucent.
  • Toss the peppers, oregano, carrots, corn, and spinach into the skillet and cook until the spinach just begins to wilt and reduce heat to low.
  • While the filling mixture is cooking cut the shrimp into bite size pieces.
  • Add the shrimp to the skillet and toss to combine.
  • Remove skillet from heat.
  • In a large saucepan melt the butter and whisk in the flour until light gold in color.
  • Slowly whisk in the chicken stock and cook until simmering.
  • Stir in the sour cream, jalapeños, and garlic powder and simmer until nice and thick.
  • Remove from heat and stir in the cilantro.
  • Warm the tortillas a couple at a time and place on a large flat surface.
  • Place a scoop of the shrimp filling on each tortilla and top with cheese.
  • Roll up each enchilada and place seam side down in a greased baking dish. Repeat this step until the shrimp filling is gone.
  • Pour the jalapeño cream sauce evenly over the top of the enchiladas.
  • Put finished enchiladas in the oven and bake until tortillas are golden on the edges, about 20 minutes.

Appetizers

Recipe—Queso Fundido

Today is day 1 of my hot & spicy week! My jalapeño plant has been giving me more peppers than I know what to do with so this week I will be featuring five different jalapeño based recipes. I hope you enjoy each and every one!

Planning a fiesta anytime soon? If so, this is a perfect appetizer sure to start the party off right. It is quick and easy. I have made this for two social gatherings in the last couple of weeks since jalapeños are in abundance at our house and both times the dish was practically licked clean. It is one of those appetizers that you just can’t get enough of. Just serve it up with your favorite tortilla chips and watch it disappear.

Note: If you have a small appetizer sized crock-pot you can put the finished queso fundido in it on low heat to stay warm.

INGREDIENTS
2 tbsp olive oil
1 tomato, diced
1/2 yellow onion, diced
2 jalapenos, deseeded, deveined, and finely chopped
3 tbsp tequila
2 c jack cheese, shredded
1/4 c milk
1/4 fresh cilantro, chopped

STEPS

  • In a medium saucepan heat oil over medium high heat and add tomatoes, onions, and jalapeños.
  • Cook until onions are translucent and soft, about 4–5 minutes.
  • Carefully add in tequila and simmer for 2–3 minutes.
  • Mix in cheese and milk and stir until melted and smooth.
  • Remove from heat and stir in cilantro.
  • You can serve as it is OR you can put the cheese mixture in an oven safe dish and finish off under the broiler for 3–4 minutes or until just starting to turn a golden brown on top.

Sweet Treats

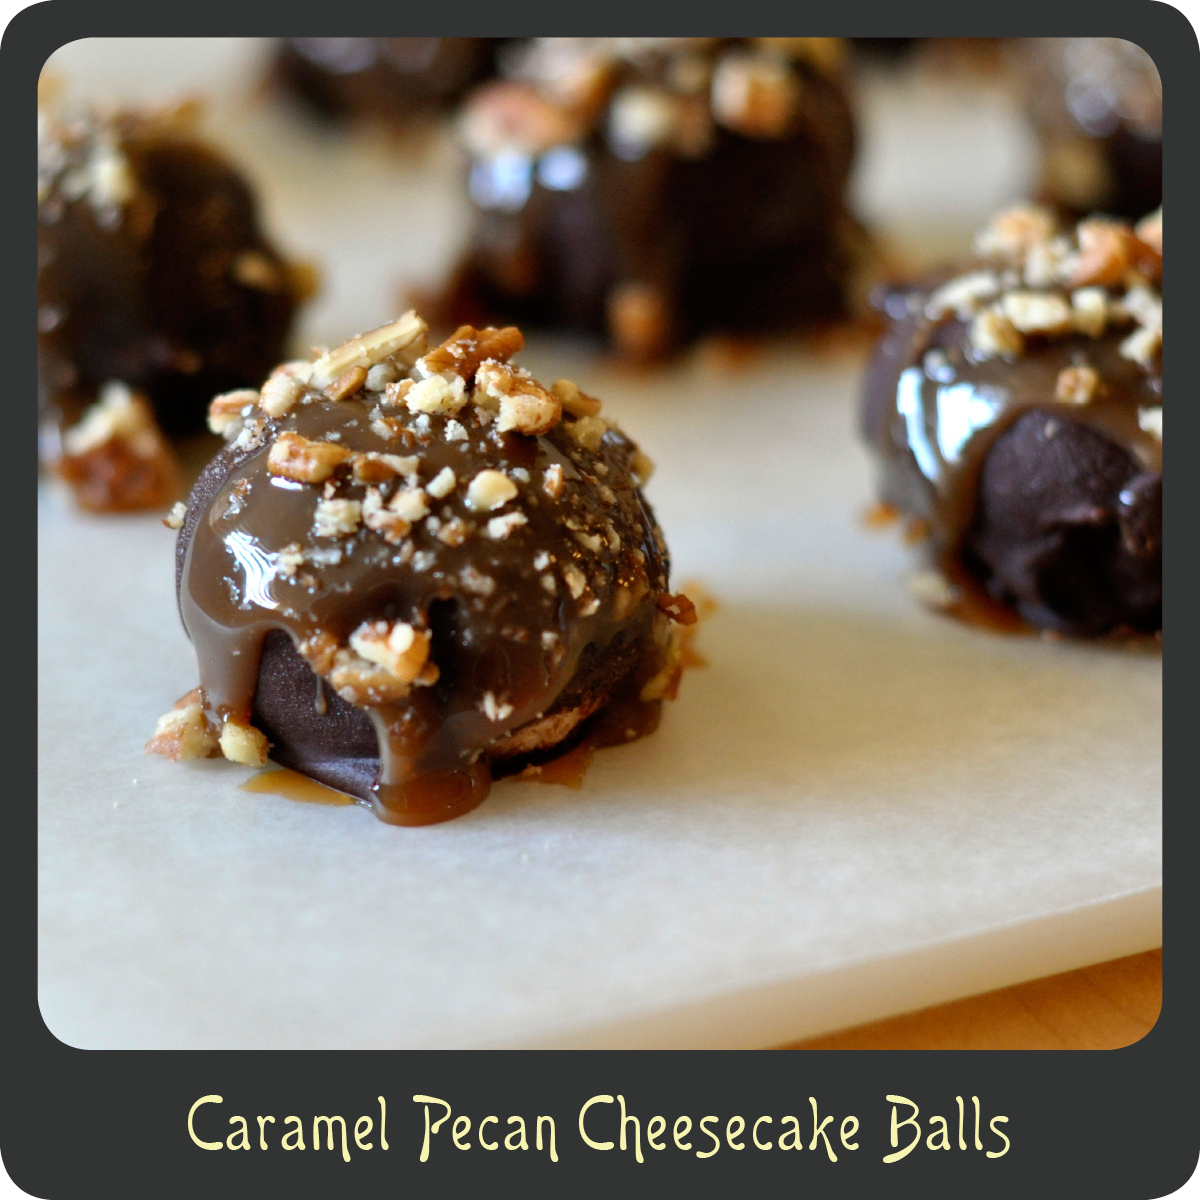
Recipe—Caramel Pecan Cheesecake Balls

These no-bake caramel pecan cheesecake balls are the type of dessert that make your teeth hurt just looking at them. And I mean that in the best way possible. There is a reason these are bite size servings. They are so rich that you really will only want to eat one, but will probably devour a couple. You just wont be able to resist. They are dangerous like that so beware! I made these for a recent birthday party and had at least half the people ask for the recipe. I’m pretty sure that’s a good thing. These are the perfect party dessert if you are looking for something that is absolutely delicious and bite size.

Note: I ate these frozen as well as refrigerated and they were delicious both ways.

INGREDIENTS
8 oz cream cheese, softened
1 1/2 c graham cracker crumbs
1 c powder sugar
1 bag semi sweet chocolate chips
2 tbsp butter
1/2 c pecans, chopped
1/4 cup caramel sauce

STEPS

  • In a medium mixing bowl combine the cream cheese, graham cracker crumbs, and powdered sugar. Beat using a mixer until well combined and smooth.
  • Add in more powdered sugar and graham cracker crumbs as needed to make the consistency of a cookie dough so that it is easy to work with.
  • Place bowl in the fridge for a half hour to allow “dough” to set.
  • Using a tablespoon or melon baller scoop up balls and roll in your hand until round in shape.
  • Place each ball on a wax paper lined baking sheet.
  • Place the baking sheet in the freezer for an hour so that the cheesecake balls harden and don’t melt when you are dipping them in the hot chocolate.Melt the chocolate and butter in a double boiler whisking with a fork until smooth. (The step can also be done in the microwave just be sure to check on it and stir every 30 seconds. The chocolate can burn easily.)
  • Dip each ball into the melted chocolate and turn until evenly coated. (I find using a fork works great to remove the balls from the chocolate so that the excess can drip off between the prongs.)
  • Place the chocolate-coated cheesecake balls back on the wax paper covered baking sheet.
  • When you are done dipping each ball drizzle with the caramel sauce. (I find using a zip loc bag with the corner cut off works great. And it is a breeze to clean up, just throw the bag away!)
  • Sprinkle the cheesecake balls with crushed nuts and place in the fridge for at least one hour before consuming.
Appetizers

Recipe—Cheesy Stuffed Mushrooms Wrapped in Bacon

The other night I wanted to surprise my husband with a nice steak dinner because, well… that’s what good wives should do for their hardworking men. I wanted to come up with a “manly” appetizer that would complement a nice steak. I love my steaks with mushrooms as well as blue cheese so this is what I came up with. A steakhouse worthy appetizer of baby portobellos filled with rich blue cheese and a dash of tangy steak sauce and finished off with salty bacon. They were delish! The cream cheese really helps to cut the overpowering blue cheese flavor giving these just the right balance. These could easily be prepared ahead of time and stored in the fridge until you are ready to bake them making them perfect for dinner parties. They are absolutely delectable and worth the effort.

Note: For an easy and mess free way to fill your mushroom caps, put the cheese filling in a Ziploc bag and cut off the corner to create a disposable pastry bag.

INGREDIENTS
12 slices of bacon
12 baby portobello mushrooms
1/2 c cream cheese, softened
1/4 c blue cheese crumbles
1 tsp steak sauce (I like A1)
salt and pepper
2 tbsp chopped green onions

STEPS

  • Preheat oven to 400º.
  • Arrange bacon slices in a large Pyrex baking dish and cook for 8 minutes.
  • Flip bacon over and cook for an additional 8 minutes. You want it to only be partially cooked and pliable so that it is easy to work with.
  • While the bacon is cooking clean the mushrooms and remove the stems.
  • Remove bacon from oven and place slices on a paper towel lined plate.
  • Reduce oven temp to 350º.
  • In a small bowl combine the cream cheese, blue cheese, steak sauce, salt and pepper and stir thoroughly breaking up the large chunks of blue cheese.
  • Once your cheese mixture is well combined stir in the green onions.
  • Fill your mushroom caps with the cheese mixture. (See above note)
  • Wrap each mushroom in a piece of the bacon and secure using a toothpick.
  • Place the finished mushroom caps on a foil lined baking sheet and cook for 15–18 minutes or until mushrooms are soft and the filling has melted.
Sweet Treats

Recipe—Piña Colada Pie with Drunken Rum Sauce

Looking for that perfect summer dessert that takes you away to a tropical island? Then look no further! My piña colada pie is a little slice of paradise. This crust less pie could not be easier to make. You literally combine all the ingredients and put it in the oven to bake. It is a creamy custard based pie which is great all on it’s own but add in the drunken rum sauce and ooo-weeee! That’s good stuff, like a party in your mouth! I like to top mine with some homemade whip cream and crushed macadamia nuts to dress it up a bit. I made this for some friends the other night and they said it was like nothing they had ever had before (I am pretty sure it was a compliment). It is a one of a kind dessert that will make your mouth happy.

PIE INGREDIENTS
1 1/2 c heavy whipping cream
1/2 c sugar
6 eggs
1 tbsp vanilla
1/2 c flour
2 c shredded coconut
8 oz can crushed pineapple, drained

DRUNKEN RUM SAUCE INGREDIENTS
1 c butter
1 c Myers dark rum
1 c brown sugar

GARNISHES
whipped cream
crushed macadamia nuts

STEPS

  • Preheat oven to 350º.
  • In a large mixing bowl combine cream, sugar, eggs, vanilla, and flour.
  • Mix using a hand mixer for about 2 minutes on medium speed.
  • Fold in coconut and pineapple until completely combined.
  • Pour your pie mixture into a greased pie dish.
  • Bake for 40–45 minutes.
  • Remove pie from oven and allow to cool.
  • While pie is cooling start the rum sauce by melting the butter in a small saucepan.
  • Stir in brown sugar and whisk until sugar is dissolved.
  • Add in rum and bring to a gentle boil.
  • Turn heat to low and simmer for 2–3 minutes.
  • Pour sauce over a warm slice of pie and top with whipped cream and some macadamia nuts.
Dinners

Recipe—Ratatouille Lasagna

My last recipe post was for very fabulous ratatouille. Well if you are like me you probably had leftovers. The leftovers can be used for a whole plethora of things but my favorite has to be lasagna. I love the big hearty pieces of vegetables cooked together with Italian sausage and some rich cheeses. This ended up being the best lasagna I have ever had! You can make one large lasagna in a 9” x 13” baking dish or two small ones in 8” x 8” dishes. I opted to make 2 so that I could freeze one for another night. That means I get to enjoy this delish dish twice! Oh lucky me! Gotta love this French meal turned Italian.

Note: When I make lasagna I like to double up the noodles on the top and bottom layers. I feel like it helps hold it together better for ease of serving. This requires that you cook one and a half boxes of noodles since just one isn’t enough for this method. If you don’t want to double up then one box is completely adequate.

INGREDIENTS
1 lb Italian sausage
15 oz can tomato sauce
4 c leftover ratatouille
1 1/2 boxes wavy lasagna noodles
15 oz container ricotta cheese
1/4 c fresh basil chopped
salt and pepper
4 c mozzarella, shredded

STEPS

  • In a large skillet brown your sausage and drain off any excess grease.
  • Add tomato sauce and ratatouille to skillet and warm through over medium heat.
  • While the ratatouille is heating through cook your lasagna noodles according to the package instructions, drain, and separate.
  • In a small bowl combine the ricotta, basil, salt and pepper.
  • Preheat oven to 400º.
  • Prepare a 9” x 13” baking dish with butter or cooking spray.
  • Cover the bottom of the baking dish with a layer of the cooked noodles and then place a second layer of the cooked noodles on top of that going the opposite direction.
  • Spoon in about 1/3 of your ratatouille sauce over your lasagna noodles and spread evenly.
  • Top sauce with half the ricotta mixture and sprinkle a handful of the mozzarella over the top of the ricotta.
  • Place a single layer of noodles over the ricotta and spoon in about 1/3 of your ratatouille sauce over your lasagna noodles and spread evenly.
  • Top sauce with half the ricotta mixture and sprinkle a handful of the mozzarella over the top of the ricotta.
  • Top the lasagna with cooked noodles and place a second layer of the cooked noodles on top of that going the opposite direction.
  • Spoon remaining sauce over the top and sprinkle with remaining cheese.
  • Bake for 25–30 minutes or until the top is bubbling and the cheese is golden brown.
  • Allow to cool for at least 10 minutes before serving.
Dinners, Side Dishes

Recipe—Ratatouille

Ratatouille Over Penne

When most people hear the word ratatouille they think of a movie about a little rat named Remy who dreams about becoming a chef. Ratatouille is not just a very cute Pixar movie; it is also a delicious dish loaded with succulent Mediterranean vegetables that your family is sure to enjoy.

Ratatouille is a traditional French vegetable stew that originated in Nice. The full name is ratatouille niçoise. It is a flavorful, hearty, low calorie fare that can be served as an excellent main dish, to accompany a protein, or tossed with pasta. This recipe is a great way to utilize all those wonderful summer garden veggies that are in season. Aside from all the chopping this recipe is very easy to prepare.

Ratatouille

I will state that this makes a pretty hearty amount so you will probably have leftovers unless you are serving a whole army. The leftovers are incredible, as the flavors seem to intensify with time. I made lasagna with my leftovers and I must say it is one of the best lasagnas I have ever had! The big chunky vegetables were awesome, especially when I paired them with Italian sausage and some ricotta. I will be sure to share that recipe with you next. Delish!

INGREDIENTS
1/4 c olive oil
1 yellow onion, chopped
4 cloves garlic, minced
1 eggplant, cut into 1/2-inch cubes
2 zucchini, cut into 1/2-inch cubes
Coarse salt and ground pepper
1 yellow bell pepper, deseeded and cut into 1/2-inch cubes
1 red bell pepper, deseeded and cut into 1/2-inch cubes
15 oz can diced tomatoes
1/2 tsp dried thyme
1/4 c fresh basil, chopped

STEPS

  • In a large pot that has a lid, heat olive oil over medium heat.
  • Cook onions until soft, about 5 minutes.
  • Stir in garlic and cook for about 1 min.
  • Add in eggplant and zucchini and season with salt and pepper.
  • Add 1/2 cup of water, cover, and simmer stirring once until vegetables begin to soften, about 5 minutes.
  • Stir in bell peppers, cover, and simmer for another 5 minutes.
  • Add in tomatoes and thyme and bring to a boil.
  • Reduce heat to medium-low and cover.
  • Stir occasionally until vegetables are cooked to desired consistency. Mine take about 12–15 minutes.
  • Remove from heat, stir in basil, and serve immediately.
Dinners

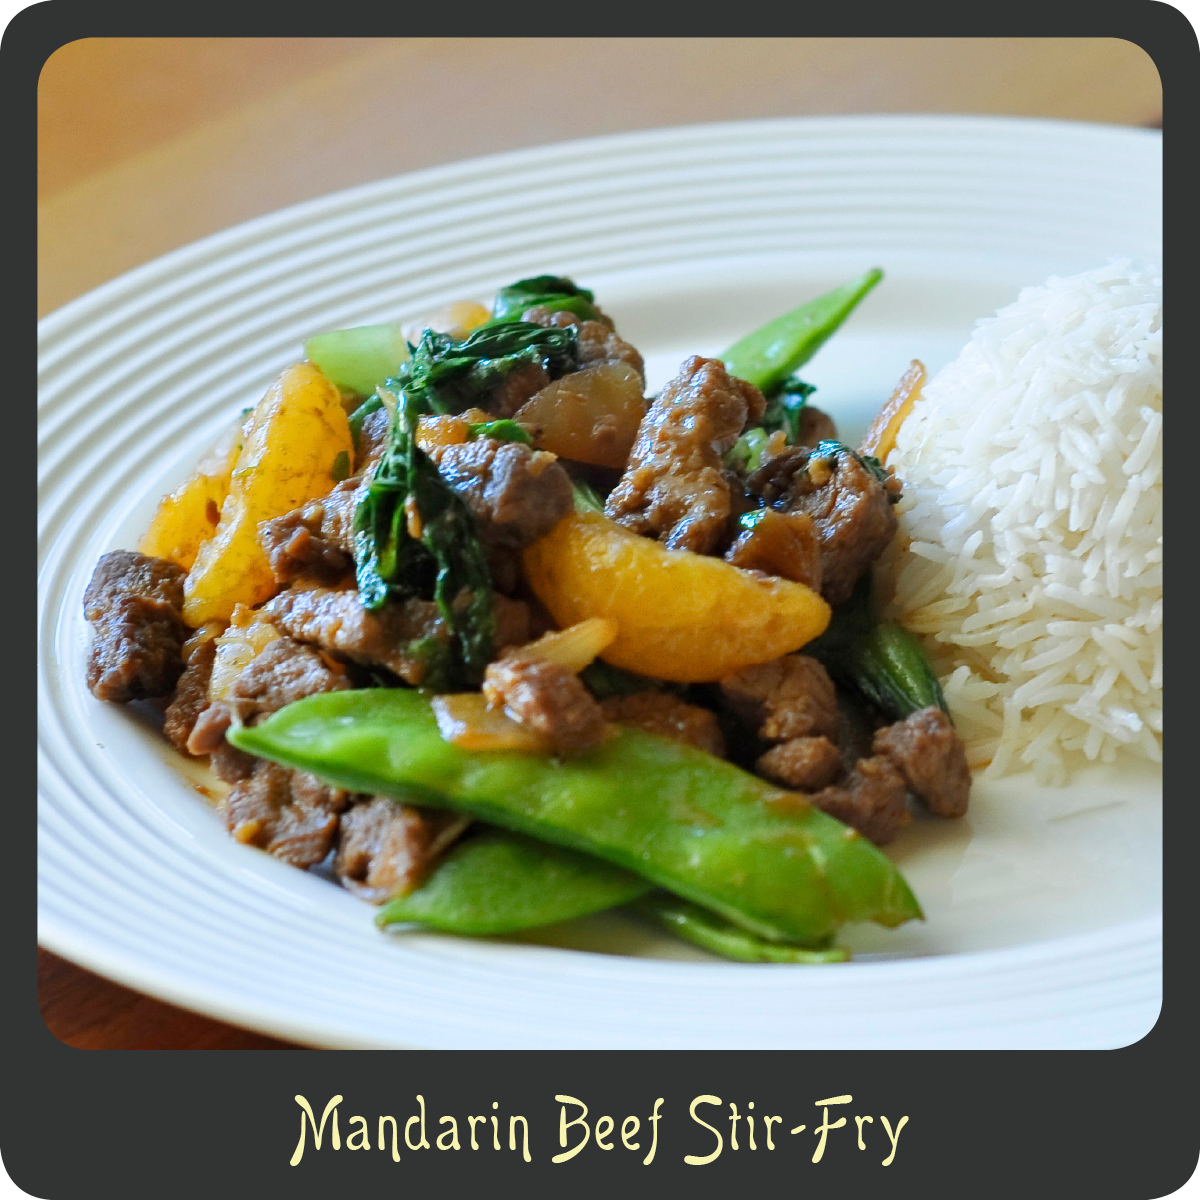
Recipe—Mandarin Beef Stir-Fry

It’s always great when you can find a healthy low fat dinner that has incredible flavor. This stir-fry is one of those dinners. Stir-fries are typically Asian dishes jam packed with veggies and sometimes meat. They are great because they cook fast, are usually really good for you, and can be a one dish main course saving on dirty dishes! When you cook stir-fries quickly over high heat the juice is seared inside the vegetables and meat retaining texture and flavor. The ginger in this recipe goes so nicely with the sweetness of the mandarins and the beef is tender and flavorful. Whip up this quick and delicious stir-fry for dinner tonight!

Note: The meat requires quite a bit of time to marinade so don’t forget to do the first few steps well ahead of time. If you like heat, add a dash of crushed red peppers. The spicy with the sweet from the oranges is a lovely combination. 

INGREDIENTS
1–1 1/2 lbs rump steak, thinly sliced
2 tbsp soy sauce
1 tbsp dry sherry
2 garlic cloves, minced
1 tsp fresh grated ginger
salt and pepper
2 tbsp peanut oil, divided
1 large yellow onion, chopped
5 mandarin oranges/clementine’s
1/2 c beef stock
4 baby bok choy, sliced
1 c snow peas

STEPS

  • In a large bowl, stir together soy sauce, sherry, garlic, ginger, salt and pepper.
  • Add meat, cover, and allow to marinade for several hours.
  • Heat 1 tablespoon of the peanut oil in a large non-stick wok and fry onions until softened and golden.
  • Remove onions from heat and set aside.
  • Add the remaining tablespoon of oil to the wok, turn heat to high, and add beef.
  • Cook the beef over the high heat moving constantly until all sides are brown. The high heat will sear all the juices inside.
  • Lower the heat and return the onion to the pan.
  • Squeeze the juice from 2 mandarins into the pan.
  • Cook down for a few minutes until liquid is reduced.
  • Add the beef broth slowly while stirring.
  • Continue to cook until the liquid is reduced to almost nothing, about a tablespoon. Note that this will take awhile
  • Add the bok choy and segments from the 3 remaining mandarins.
  • Turn the heat down and toss gently until the vegetables are cooked to desired doneness.
  • Add the snow peas to the wok for the last minute.
  • Remove from heat and serve. 
Appetizers, Side Dishes, Snacks

Recipe—Kale Chips

I am someone who does all my menu planning and grocery shopping on the weekend so that I don’t have to worry about making any extra trips to the grocery store during the week. Being the working mom of a toddler keeps me busy enough Monday–Friday. I receive my produce delivery early in the week and one of my recent deliveries had an unexpected bunch of kale that didn’t really fit with anything I had planned on the dinner menu. I decided to use it for a healthy after school snack for my munchkin.

I have seen kale chips popping up all over the place so thought I would give them a try. While they may not look ultra appealing, they are delicious! My son and I gobbled them up. They are so addicting! Even my son kept coming in to the kitchen asking for more chips. While they totally taste best fresh out of the oven, they were still good the next day. They just loose some of that fresh crispiness over time. These are a perfect snack for those people watching their carbs or calories and they really were quick and easy to make. Perfect for snacking!

INGREDIENTS
1 bunch kale
olive oil
kosher or sea salt

STEPS

  • Preheat oven to 350º.
  • Tear the kale leaves into bite sized pieces stripping out the inner stalks.
  • Wash well in water and dry as much as you can. (I used my salad spinner and it worked great!)
  • Evenly distribute the leaf pieces on a large cookie sheet and drizzle with olive oil.
  • Toss to coat.
  • Sprinkle with salt.
  • Place in oven and bake for 10–15 minutes or until the kale is crisp.
  • Best enjoyed while warm and fresh!
Salads, Sandwiches

Recipe—Classic Chicken Salad

Trying to figure out what to make for your next luncheon or picnic? Search no further! This classic chicken salad recipe is perfect for these warm summer months. During the summer I like cool refreshing sandwiches and chicken salad is always at the top of the list. This recipe is simple, delicious, and a classic. It is perfect in sandwiches or served in a tomato over a bed of lettuce. Heck, I’ve even just gone at it with a fork, I won’t lie. I will say this is better than anything you will find at the deli counter and it is so easy to make. The inclusion of lemon juice and parsley gives this chicken salad a certain freshness that others don’t have.  This is one of those recipes that just gets better over time. I ate this three days after I had made it and it was amazing how much the flavors all intensified. It’s good stuff, Maynard!

Note: This calls for boiled chicken breasts but I have also made it with leftover grilled chicken and it gave the salad a really nice flavor and texture.

INGREDIENTS
4 boneless skinless chicken breasts
1 stalk celery, sliced
1 c mayonnaise
1 tsp mustard
2 tsp lemon juice
1 green onion, thinly sliced
2 tbsp fresh parsley, chopped
1 tsp salt
pepper

STEPS

  • Bring a large pot of water to a boil and add chicken breasts.
  • Boil chicken for 20–25 minutes.
  • Remove chicken from pot and place on a large cutting board to cool.
  • Dice chicken into small pieces.
  • In a large bowl combine chicken and celery.
  • To make your dressing mix together the mayonnaise, mustard, lemon juice, green onion, parsley, salt and pepper.
  • Pour the dressing over the chicken and celery and stir to coat.
  • Refrigerate until ready to serve.