Dinners

Recipe—Pork Chops with Apples and Stuffing

Apple Pie Pork Chop

Fall is just around the corner and I can taste it. Literally! I have been in the mood for fall for a couple weeks now and I’m loving all the seasonal recipes, this one especially. It is an herb crusted pan seared pork chop topped with apple pie filling and stuffing and finished off in the oven to give the stuffing just a little bit of crunchiness. It goes great with some mashed potatoes and green beans. This is an all time fall favorite in our house and I love that it is really quick and easy. I use a little bit of cinnamon and rosemary to bring in some bold flavors. It’s like having apple pie with a side of pork for diner. What’s not to love!?!

INGREDIENTS
4 boneless pork chops
2 cloves garlic, minced
1 tbsp fresh rosemary, chopped
salt and pepper
1 1/2 c water
4 tbsp butter
6 oz box Stove Top pork stuffing
2 tbsp olive oil
21 oz can apple pie filling
cinnamon

STEPS

  • Preheat oven to 350º.
  • Season the pork chops with the garlic, rosemary, salt, and pepper. Set aside.
  • Place the water and butter in a saucepan and bring to a boil. Stir in the stuffing, cover, and set aside.
  • In a large skillet heat up the olive oil and sear the pork chops over medium high heat for 3–4 minutes on each side.
  • Place the seared pork chops in a baking dish.
  • Top pork chops with apple pie filling and place any extra around the pork chops in the baking dish. Sprinkle with cinnamon.
  • Uncover the stuffing and gently fluff with a fork.
  • Place a mound of stuffing on top of each pork chop and put any extra around the chops in the baking dish.
  • Cover and bake for 25 minutes.
  • Remove foil and cook for an addition 10 minutes.
  • Allow to cool slightly before serving.
Sweet Treats

Recipe—Personal Pineapple Upside Down Cakes

Pineapple upside down cake is one of those traditional all American classics that has been around forever, well at least since the 1920s. These personal versions are great for entertaining a small group and so easy to whip up and serve. One of the many great things about this recipe is that you can keep the items stocked in your pantry and whip these up in a very short amount of time. They are quick and so incredibly easy to make. I made them for our dinner party the other night and they were a real hit. My husband said he could have kept eating them and my 2-year-old son liked them so much he didn’t even have an interest in the ice cream I served with it. He just wanted the cake, or as he called it, “birthday.”

Note: This recipe is written to make 6 personal cakes using a Texas muffin pan. If you don’t own one of these you can use a standard muffin pan and substitute pineapple rings with pineapple chunks and adjust the baking time to 17–20 minutes.

INGREDIENTS
2 eggs
2/3 c sugar
4 tbsp pineapple juice (use the stuff in your can of pineapple rings)
1 tsp vanilla
2/3 c flour
1 tsp baking powder
1/4 tsp salt
1/4 c butter
2/3 c brown sugar
1-20 oz can pineapple rings
maraschino cherries

STEPS

  • Preheat oven to 350º.
  • In a medium mixing bowl beat together eggs, sugar, pineapple juice, and vanilla.
  • Using a separate bowl mix together the flour, baking powder, and salt.
  • Stir the dry ingredients into the wet ones and set aside.
  • In a small saucepan melt the butter and stir in the brown sugar until almost dissolved.
  • Grease a 6-cup Texas muffin pan.
  • Evenly distribute the brown sugar sauce in each cup.
  • Place a pineapple ring in the bottom of each muffin cup and a cherry in the center of the pineapple ring.
  • Pour the cake mixture into each cup until there is none left. They will probably be about 3/4 of the way full.
  • Place muffin pan in oven and bake for 22–25 minutes or until a toothpick comes out clean when inserted in the center.
  • Allow to sit for 3 minutes.
  • Place a cutting board over the top of the muffin pan and quickly flip the muffin pan upside down.
  • If the mini cakes don’t release from the pan lightly tap the pan with a rubber spatula until it releases.
  • Serve warm with a scoop of vanilla ice cream and enjoy!
Dinners

Recipe—Jalapeño Popper Chicken

Today is the 5th and final day of my hot & spicy week! My jalapeño plant has been giving me more peppers than I know what to do with so this week I will be featuring five different jalapeño based recipes. I hope you enjoy each and every one! 

One of my all time favorite appetizers has got to be jalapeño poppers. I pretty much like anything with jalapeños but when you combine them with cream cheese and cheddar, oh my, it is good! This dinner recipe combines this awesome appetizer with a meaty chicken breast that ends up being so moist and tender. For this recipe I used crushed Ritz because I really like the crunchy buttery exterior but I really want to try it with Cheez-Its instead next time. I think that would be pretty darn tasty giving it that extra layer of cheesy crispiness.

Note: As much as I like my fried chicken this recipe has you bake it. If you aren’t concerned about cutting the extra calories you can certainly fry it up and then finish it in the oven for an even crispier exterior.

INGREDIENTS
4 chicken breasts
salt and pepper
2 jalapeños, deseeded and chopped
1/4 c cream cheese, softened
1/2 c cheddar, shredded
1 egg
1 1/2 c crushed Ritz crackers

STEPS

  • Preheat oven to 375º.
  • Season chicken with salt and pepper and set aside.
  • In a small bowl combine the cream cheese, cheddar, and peppers.
  • Using a small sharp knife carefully cut a pocket into the side of the thickest part of the chicken breasts.
  • Using your fingers work the cream cheese filling inside each breasts until they are packed full.
  • Secure the opening in each breast with a toothpick
  • Using a shallow bowl beat the egg.
  • Dip the chicken pieces into the egg and then the crushed crackers making sure to cover the chicken completely.
  • Place the chicken breasts in a greased baking dish.
  • Bake for 30–35 minutes or until the chicken is cooked through.
  • Remove the chicken from the oven and allow it to sit for a couple of minutes before serving. The cheese filling will be very hot!

Soups

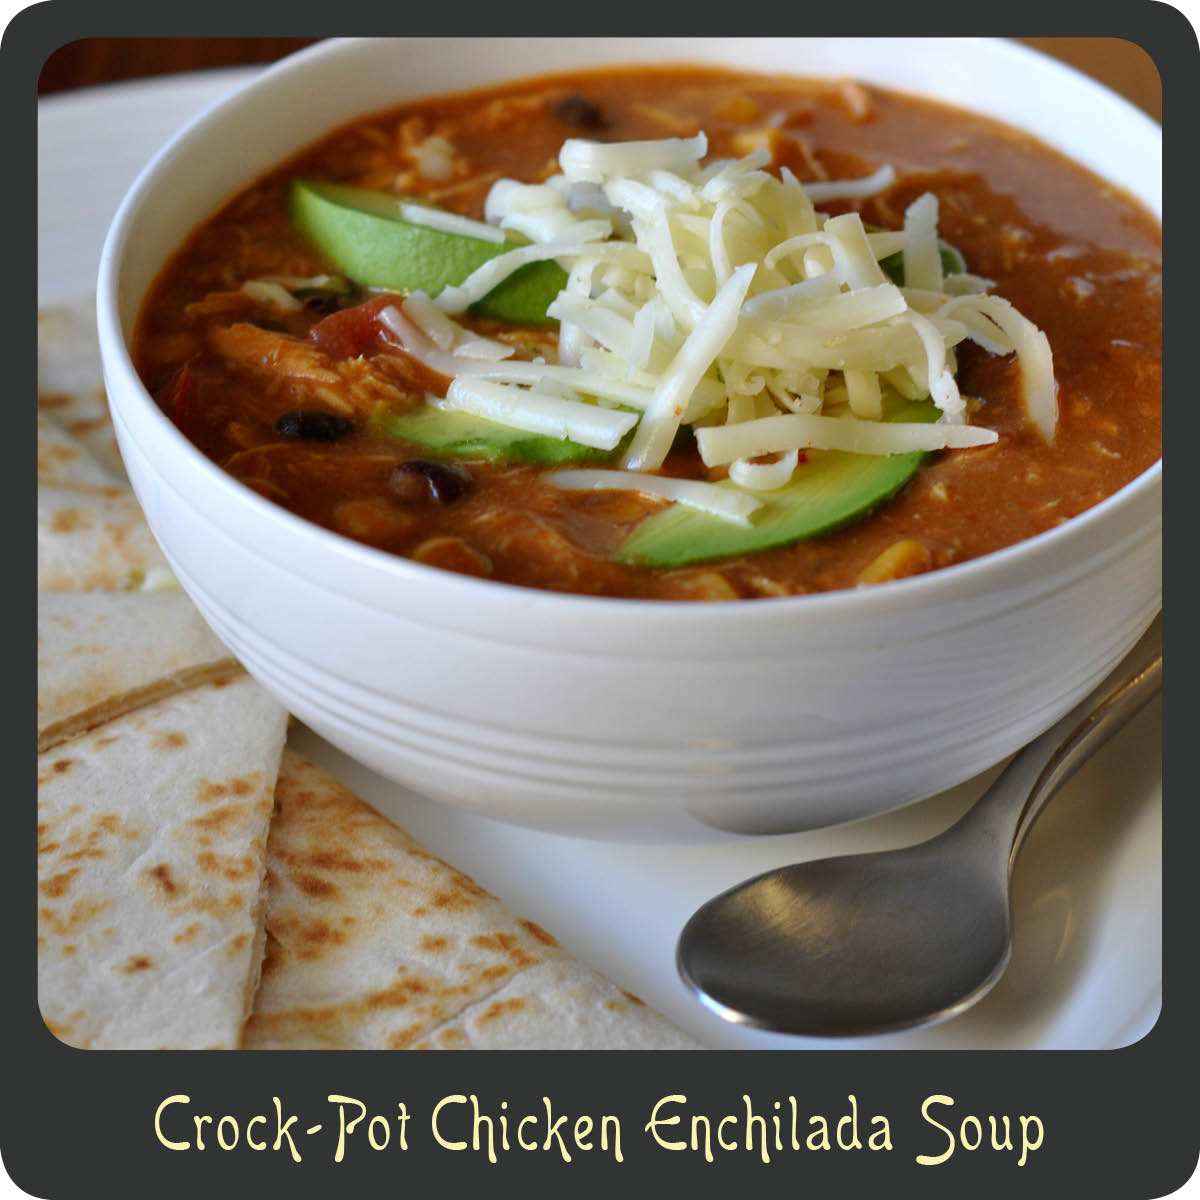
Recipe—Crock-Pot Chicken Enchilada Soup

Today is day 4 of my hot & spicy week! My jalapeño plant has been giving me more peppers than I know what to do with so this week I will be featuring five different jalapeño based recipes. I hope you enjoy each and every one! 

This is everything you could ever hope for in a soup recipe. Quick, easy, and delicious! I love using my crock-pot. Not only because it makes dinner a total breeze but also because the house smells so incredibly good when you get home from work. If you are a fan of Mexican food then you will enjoy this. It’s not too mild, and it’s not too spicy, it’s just right. This soup is thick and creamy and warms you from the belly out. Try it with some of my jalapeño cheddar corn bread muffins for a perfect dinner. Heck now that I think about it, it would be perfect for some Monday night football this fall!

Note: If the soup is too thick for your liking add a splash of milk to the crock-pot before serving. If you have leftovers put it in a freezer safe container and save it for a rainy day. It reheats great!

INGREDIENTS
15 oz can black beans, rinsed and drained
14.5 oz can petite diced tomatoes
15 oz can whole kernel corn
1/2 yellow onion, chopped
1/2 red bell pepper chopped
1 jalapeño, deseeded and chopped
2 chicken breasts
10 oz can enchilada sauce (I’m a fan of Las Palmas)
10.75 oz can condensed cream of chicken soup
1 1/2 c milk

GREAT GARNISHES
shredded cheese
sliced avocado
sour cream
crushed tortilla chips

STEPS

  • In a large crock-pot combine black beans, tomatoes, corn, onion, and peppers.
  • Place chicken breasts on top of veggies.
  • In a medium-mixing bowl whisk together enchilada sauce, soup, and milk.
  • Pour sauce mixture into the crock-pot.
  • Cover and cook on low heat for 7–8 hours or on high for 3–4.
  • Remove chicken and using 2 forks shred into bite size pieces
  • Add chicken back into soup and continue to cook covered on low heat for another 25–30 minutes.
  • Serve in large soup bowls and top with some of the suggested garnishes.

Side Dishes

Recipe—Jalapeño Cheddar Corn Bread Muffins

Today is day 3 of my hot & spicy week! My jalapeño plant has been giving me more peppers than I know what to do with so this week I will be featuring five different jalapeño based recipes. I hope you enjoy each and every one! 

Jalapeño Cheddar Corn Bread Muffins

Looking for a quick and easy side dish you can serve with your bowl of chili this coming winter? This is a great recipe I have been making for years. This takes the typical corn bread muffin and gives it a little extra kick.  In my opinion, there is no better complement to a fresh jalapeño than cheese. These go great with a spicy rubbed steak and some grilled veggies or even a side of your favorite soup. They are incredibly easy to make since you’re taking a box mix and just spicing it up with a couple simple ingredients. Perfect for busy moms, or dads, short on time.

Note: You can use any corn bread mix you prefer. I just really like Marie Callender’s. These proportions are perfect for a mix that makes a dozen muffins. You also don’t have to use the muffin pan liners as the recipe is written. I just find that sometimes the cheese adheres to the muffin pan and can make it difficult to get the little rascals out when they aren’t used.

INGREDIENTS
Marie Callender’s Original Corn Bread Mix, 16 oz
water
1 1/4 c shredded cheddar, divided
1 jalapeño, deseeded and chopped
1 jalapeño, deseeded and sliced
muffin cup liners (optional)

STEPS

  • Preheat oven to 375º.
  • Prepare corn bread mix according to instructions.
  • Stir in 1 cup of the shredded cheddar and the diced jalapeños, making sure not to over mix.
  • Prepare muffin pan with liner cups and evenly distribute the muffin mix in each cup filling up about 2/3 of the way.
  • Top each muffin with a slice of jalapeño and sprinkle remaining 1/4 cup of cheddar on top of each.
  • Bake for 20–25 minutes or until a toothpick comes out clean when inserted into the middle.
  • Remove from oven and allow to cool for a couple of minutes before serving.

Dinners

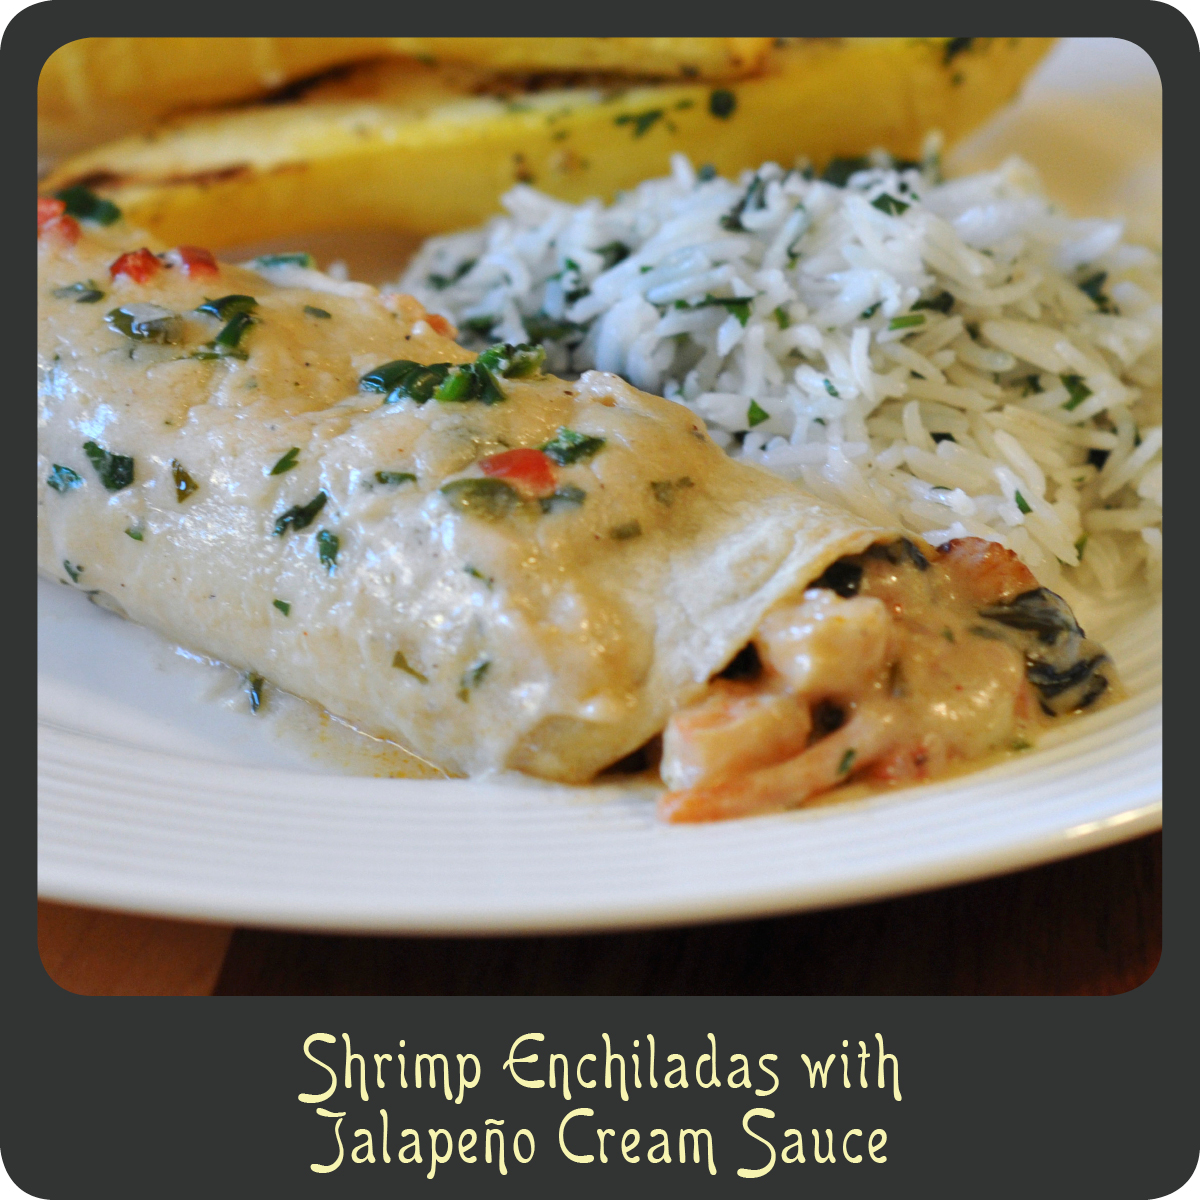
Recipe—Shrimp Enchiladas with Jalapeño Cream Sauce

Today is day 2 of my hot & spicy week! My jalapeño plant has been giving me more peppers than I know what to do with so this week I will be featuring five different jalapeño based recipes. I hope you enjoy each and every one!

Looking to add some spice to your life? These shrimp enchiladas will do the trick! While the enchilada filling has a good kick to it, the jalapeño cream sauce balances out the heat nicely giving the enchilada a cooling creamy exterior. I love that these are packed with some serious veggies. The sweetness from the corn goes great with the roasted shrimp. It is probably one of my favorite flavor combinations. While these are a little more time consuming to make they are well worth it! Enjoy!

Note: I would like to advise that these do pack a bit of heat so beware. You can leave out the chipotle peppers and add a teaspoon of chili powder to tone it down if spicy isn’t for you.

ENCHILADA FILLING INGREDIENTS
2 lbs medium shrimp, cleaned and peeled
4 tbsp olive oil (divided)
salt and pepper
2 tbsp garlic, minced
1 white onion, diced
2 tbsp chipotle pepper in adobo sauce, finely chopped
1/2 tsp oregano
1 1/2 c shredded carrots
8 oz canned corn, drained
5 c baby spinach
8–10 tortillas
2 c jack cheese, shredded

JALAPENO CREAM SAUCE INGREDIENTS
2 tbsp butter
2 tbsp flour
1 1/2 c chicken broth
3/4 c sour cream
2 jalapeños, seeded and minced (I used 1 red and 1 green)
1/2 tsp garlic powder
1/4 c fresh cilantro, chopped

STEPS

  • Preheat oven to 400º.
  • Place cleaned shrimp on a baking sheet and drizzle with 2 tablespoons of olive oil. Season with salt and pepper.
  • Toss to coat.
  • Place sheet in oven and bake for 8 minutes or until cooked through.
  • Remove from oven and allow to cool.
  • Reduce oven temperature to 350º.
  • Heat the remaining 2 tablespoons of olive oil in a large skillet or wok.
  • Add the garlic and onion and cook over medium high heat until onions are translucent.
  • Toss the peppers, oregano, carrots, corn, and spinach into the skillet and cook until the spinach just begins to wilt and reduce heat to low.
  • While the filling mixture is cooking cut the shrimp into bite size pieces.
  • Add the shrimp to the skillet and toss to combine.
  • Remove skillet from heat.
  • In a large saucepan melt the butter and whisk in the flour until light gold in color.
  • Slowly whisk in the chicken stock and cook until simmering.
  • Stir in the sour cream, jalapeños, and garlic powder and simmer until nice and thick.
  • Remove from heat and stir in the cilantro.
  • Warm the tortillas a couple at a time and place on a large flat surface.
  • Place a scoop of the shrimp filling on each tortilla and top with cheese.
  • Roll up each enchilada and place seam side down in a greased baking dish. Repeat this step until the shrimp filling is gone.
  • Pour the jalapeño cream sauce evenly over the top of the enchiladas.
  • Put finished enchiladas in the oven and bake until tortillas are golden on the edges, about 20 minutes.

Appetizers

Recipe—Queso Fundido

Today is day 1 of my hot & spicy week! My jalapeño plant has been giving me more peppers than I know what to do with so this week I will be featuring five different jalapeño based recipes. I hope you enjoy each and every one!

Planning a fiesta anytime soon? If so, this is a perfect appetizer sure to start the party off right. It is quick and easy. I have made this for two social gatherings in the last couple of weeks since jalapeños are in abundance at our house and both times the dish was practically licked clean. It is one of those appetizers that you just can’t get enough of. Just serve it up with your favorite tortilla chips and watch it disappear.

Note: If you have a small appetizer sized crock-pot you can put the finished queso fundido in it on low heat to stay warm.

INGREDIENTS
2 tbsp olive oil
1 tomato, diced
1/2 yellow onion, diced
2 jalapenos, deseeded, deveined, and finely chopped
3 tbsp tequila
2 c jack cheese, shredded
1/4 c milk
1/4 fresh cilantro, chopped

STEPS

  • In a medium saucepan heat oil over medium high heat and add tomatoes, onions, and jalapeños.
  • Cook until onions are translucent and soft, about 4–5 minutes.
  • Carefully add in tequila and simmer for 2–3 minutes.
  • Mix in cheese and milk and stir until melted and smooth.
  • Remove from heat and stir in cilantro.
  • You can serve as it is OR you can put the cheese mixture in an oven safe dish and finish off under the broiler for 3–4 minutes or until just starting to turn a golden brown on top.

Sweet Treats

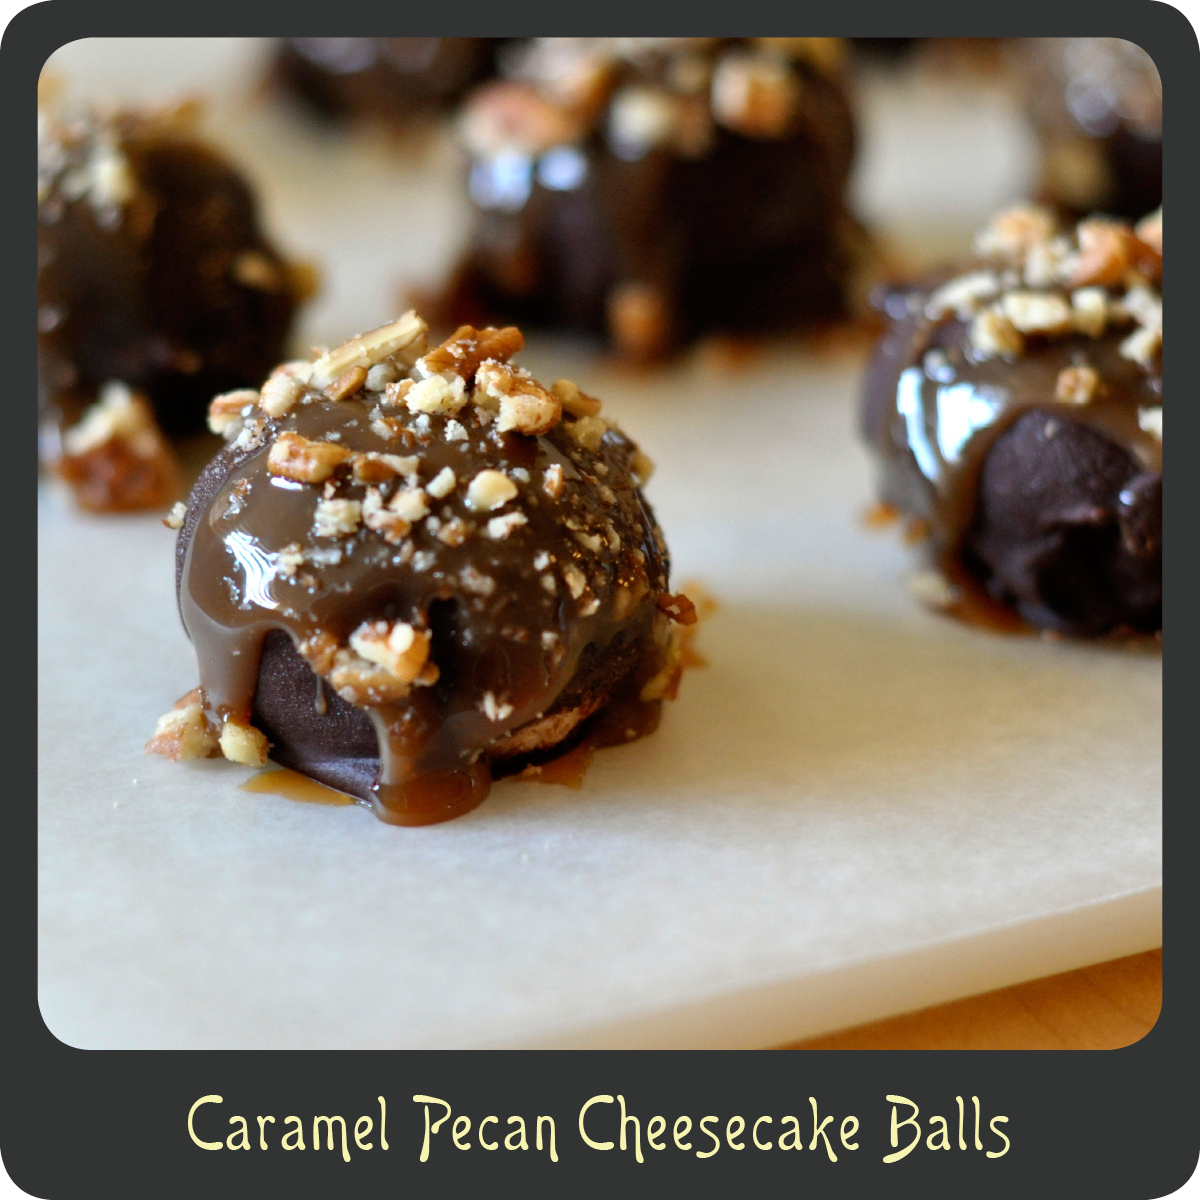
Recipe—Caramel Pecan Cheesecake Balls

These no-bake caramel pecan cheesecake balls are the type of dessert that make your teeth hurt just looking at them. And I mean that in the best way possible. There is a reason these are bite size servings. They are so rich that you really will only want to eat one, but will probably devour a couple. You just wont be able to resist. They are dangerous like that so beware! I made these for a recent birthday party and had at least half the people ask for the recipe. I’m pretty sure that’s a good thing. These are the perfect party dessert if you are looking for something that is absolutely delicious and bite size.

Note: I ate these frozen as well as refrigerated and they were delicious both ways.

INGREDIENTS
8 oz cream cheese, softened
1 1/2 c graham cracker crumbs
1 c powder sugar
1 bag semi sweet chocolate chips
2 tbsp butter
1/2 c pecans, chopped
1/4 cup caramel sauce

STEPS

  • In a medium mixing bowl combine the cream cheese, graham cracker crumbs, and powdered sugar. Beat using a mixer until well combined and smooth.
  • Add in more powdered sugar and graham cracker crumbs as needed to make the consistency of a cookie dough so that it is easy to work with.
  • Place bowl in the fridge for a half hour to allow “dough” to set.
  • Using a tablespoon or melon baller scoop up balls and roll in your hand until round in shape.
  • Place each ball on a wax paper lined baking sheet.
  • Place the baking sheet in the freezer for an hour so that the cheesecake balls harden and don’t melt when you are dipping them in the hot chocolate.Melt the chocolate and butter in a double boiler whisking with a fork until smooth. (The step can also be done in the microwave just be sure to check on it and stir every 30 seconds. The chocolate can burn easily.)
  • Dip each ball into the melted chocolate and turn until evenly coated. (I find using a fork works great to remove the balls from the chocolate so that the excess can drip off between the prongs.)
  • Place the chocolate-coated cheesecake balls back on the wax paper covered baking sheet.
  • When you are done dipping each ball drizzle with the caramel sauce. (I find using a zip loc bag with the corner cut off works great. And it is a breeze to clean up, just throw the bag away!)
  • Sprinkle the cheesecake balls with crushed nuts and place in the fridge for at least one hour before consuming.
Appetizers

Recipe—Cheesy Stuffed Mushrooms Wrapped in Bacon

The other night I wanted to surprise my husband with a nice steak dinner because, well… that’s what good wives should do for their hardworking men. I wanted to come up with a “manly” appetizer that would complement a nice steak. I love my steaks with mushrooms as well as blue cheese so this is what I came up with. A steakhouse worthy appetizer of baby portobellos filled with rich blue cheese and a dash of tangy steak sauce and finished off with salty bacon. They were delish! The cream cheese really helps to cut the overpowering blue cheese flavor giving these just the right balance. These could easily be prepared ahead of time and stored in the fridge until you are ready to bake them making them perfect for dinner parties. They are absolutely delectable and worth the effort.

Note: For an easy and mess free way to fill your mushroom caps, put the cheese filling in a Ziploc bag and cut off the corner to create a disposable pastry bag.

INGREDIENTS
12 slices of bacon
12 baby portobello mushrooms
1/2 c cream cheese, softened
1/4 c blue cheese crumbles
1 tsp steak sauce (I like A1)
salt and pepper
2 tbsp chopped green onions

STEPS

  • Preheat oven to 400º.
  • Arrange bacon slices in a large Pyrex baking dish and cook for 8 minutes.
  • Flip bacon over and cook for an additional 8 minutes. You want it to only be partially cooked and pliable so that it is easy to work with.
  • While the bacon is cooking clean the mushrooms and remove the stems.
  • Remove bacon from oven and place slices on a paper towel lined plate.
  • Reduce oven temp to 350º.
  • In a small bowl combine the cream cheese, blue cheese, steak sauce, salt and pepper and stir thoroughly breaking up the large chunks of blue cheese.
  • Once your cheese mixture is well combined stir in the green onions.
  • Fill your mushroom caps with the cheese mixture. (See above note)
  • Wrap each mushroom in a piece of the bacon and secure using a toothpick.
  • Place the finished mushroom caps on a foil lined baking sheet and cook for 15–18 minutes or until mushrooms are soft and the filling has melted.
Sweet Treats

Recipe—Piña Colada Pie with Drunken Rum Sauce

Looking for that perfect summer dessert that takes you away to a tropical island? Then look no further! My piña colada pie is a little slice of paradise. This crust less pie could not be easier to make. You literally combine all the ingredients and put it in the oven to bake. It is a creamy custard based pie which is great all on it’s own but add in the drunken rum sauce and ooo-weeee! That’s good stuff, like a party in your mouth! I like to top mine with some homemade whip cream and crushed macadamia nuts to dress it up a bit. I made this for some friends the other night and they said it was like nothing they had ever had before (I am pretty sure it was a compliment). It is a one of a kind dessert that will make your mouth happy.

PIE INGREDIENTS
1 1/2 c heavy whipping cream
1/2 c sugar
6 eggs
1 tbsp vanilla
1/2 c flour
2 c shredded coconut
8 oz can crushed pineapple, drained

DRUNKEN RUM SAUCE INGREDIENTS
1 c butter
1 c Myers dark rum
1 c brown sugar

GARNISHES
whipped cream
crushed macadamia nuts

STEPS

  • Preheat oven to 350º.
  • In a large mixing bowl combine cream, sugar, eggs, vanilla, and flour.
  • Mix using a hand mixer for about 2 minutes on medium speed.
  • Fold in coconut and pineapple until completely combined.
  • Pour your pie mixture into a greased pie dish.
  • Bake for 40–45 minutes.
  • Remove pie from oven and allow to cool.
  • While pie is cooling start the rum sauce by melting the butter in a small saucepan.
  • Stir in brown sugar and whisk until sugar is dissolved.
  • Add in rum and bring to a gentle boil.
  • Turn heat to low and simmer for 2–3 minutes.
  • Pour sauce over a warm slice of pie and top with whipped cream and some macadamia nuts.