Dinners, Sandwiches

Recipe—Jalapeño Cheddar Chicken Burger with Guacamole

This chicken burger is the love child of Mexican and American cuisine. It is delicious. Or should I say was delicious, because my husband and I each devoured ours. The entire thing. This had to be the most flavor packed chicken burger I have ever had. Usually when I think of turkey or chicken burgers I think of dry flavorless patties. Not the case with these bad boys! These jalapeño cheddar chicken burgers were incredibly moist and definitely not short on flavor. If you are looking for a way to spruce up the average burger, or even to cut some calories give these burgers a try. They are definitely unique and unlike any chicken burger you have probably ever had before, the perfect burger to enjoy with a refreshing Corona on a warm summer day. Ahhhhhh yeaaahhhhh. That’s what I’m talking about.

Note: These can definitely be cooked on the barbeque. I used my skillet because ground chicken tends to stick easily due to the low fat content.

INGREDIENTS
1 lb ground chicken
1/2 c yellow onion, finely chopped
1/4 c fresh cilantro, finely chopped
2 tsp garlic, minced
2 tsp jalapeño, chopped
1 tsp ground cumin
1 tsp paprika
1/2 c shredded cheddar
kosher salt and pepper
2 tbsp olive oil
2–4 buns

FABULOUS TOPPINGS
guacamole
slices of cheddar cheese
lettuce
sliced tomatoes
sliced red onion

STEPS

  • Preheat oven to 350º.
  • Combine ground chicken, onion, cilantro, garlic, jalapeño, cumin, paprika, cheddar, salt, and pepper in a bowl.
  • Using your hands mix everything together.
  • Form the mixture into 2–4 patties depending on the size you want.
  • In a large skillet, heat the olive oil over medium-high heat.
  • Add the patties and cook for 5–7 minutes per side or until cooked through.
  • While the patties are cooking toast the buns in the oven or 4–5 minutes.
  • Place each patty on a bun and garnish with whatever your heart desires. (I would use all the garnishes I recommended if I were you.)
Salads

Recipe—Creamy Cucumber Dill Salad

Cucumbers are one of my all time favorite summer veggies. I just slice them up and eat them plain. There are also lots of other wonderful healthy ways to enjoy the fresh veggie. This is one of my new favorite ways to prepare cucumbers. The dressing makes your taste buds come to life. It is tangy and very refreshing. Perfect for a warm afternoon! This recipe pairs great with pretty much any protein and is a fabulous addition to your summer cookouts. You can whip this salad up super quick and it is incredibly healthy all around. Low cal, low carb, and delicious! What more could you want in a recipe?

INGREDIENTS
2 cucumbers, thinly sliced (peeled is optional)
1 red onion, thinly sliced
2 tbsp lemon juice
1 c plain Greek yogurt
1 tsp fresh dill, chopped
1/2 tsp sugar
salt and pepper to taste

STEPS

  • In a medium bowl combine the cucumbers and onions.
  • In a small bowl mix together the lemon juice, Greek yogurt, dill, sugar, salt, and pepper.
  • Pour the dressing over the cucumbers and toss to coat.
  • For a nice presentation sprinkle with a little extra chopped dill.
  • Place in the fridge and chill until ready to serve.
Brunch

Recipe—Almond Poppy Seed Bread

There are several occasions throughout the year when I am scrambling to put together a brunch menu, Easter, Christmas, etc. One staple item I always have is some sort of breakfast loaf. I love making breakfast loaves because I can have them done the day before, giving me one less thing to worry about the morning I am entertaining. This glazed almond poppy seed loaf is a classic recipe. It is super simple (you literally throw all the ingredients in a bowl and mix) and goes with everything from a simple cup of joe, to a full brunch spread.

Note: This batter works great for almond poppy seed muffins too. Just follow the directions as written but use greased muffin pans instead of bread pans and bake for 18–23 minutes.

BREAD INGREDIENTS
3 c flour
1/2 tsp salt
1 1/2 tsp baking powder
3 eggs
1 1/4 c cooking oil
2 1/4 c sugar
1 1/2 c milk
2 tbsp poppy seeds
1 1/2 tsp almond extract
1 1/2 tsp vanilla

GLAZE INGREDIENTS
1/4 c butter, melted
1/2 tsp almond extract
1/2 tsp vanilla
1 tbsp water
1 1/2–2 c powdered sugar
1/2 c sliced almonds (optional)

STEPS

  • Preheat oven to 350º.
  • Mix all of the bread ingredients together.
  • Pour the batter into greased 2 loaf pans.
  • Bake for 50–60 minutes or until a toothpick when inserted comes out almost clean. (I like my bread moist so I pull it out when the toothpick still has a little bit of crumbly residue on it. A totally clean toothpick will mean a dryer loaf.)
  • After removing the loaves from the oven, place the sliced almonds on a baking sheet and roast them for 3 minutes or until they just start to turn a golden color.
  • Allow loaves to sit for 15 minutes after removing from the oven.
  • Gently remove loaves from pans and place on a cutting board or cooling rack to cool.
  • Once the bread has completely cooled, combine the melted butter, almond extract, vanilla, water, and powdered sugar in a bowl and whisk until smooth. (Start with 1 1/2 cups of powdered sugar and add more as needed to get desired consistency. I like mine slightly runny so it drips down the sides when drizzling over the bread.)
  • Drizzle the frosting over the bread and then immediately sprinkle with the roasted sliced almonds.
Uncategorized

Happy National Grilled Cheese Day!

There is something truly wonderful about a perfectly toasted grilled cheese sandwich. Eating a grilled cheese takes me back to my childhood days. I have always been a lover of the ooey gooey cheesy sandwich. There is something absolutely perfect about the simplicity of cheese toasted between a couple of slices of buttered bread.

Today is a day to celebrate the all American sandwich enjoyed by people of all ages. Toasted bread with cheese has been around for ages. The classic version we know in the U.S. originated in the 1920s when sliced bread and American cheese was cheap and easily available. It was one of the more popular meals during the Great Depression for this very reason. Until the 1960s it was served as an open faced sandwich, a single slice of bread with cheese melted on top.

Grilled cheese sandwiches have come a long way with gourmet versions growing in popularity over the last several years. You can use a variety of meats, cheeses, and vegetables to make the ordinary grilled cheese, extraordinary.

Here are a couple of grownup versions of the American classic for you to try:

Jalapeno Popper Grilled Cheese

Fancy Man Grilled Cheese

Whether you prefer a classic or a modern day version, today is still a day about grilled cheese. Wonderful, fabulous, grilled cheese.

Dinners

Recipe—Crock-Pot Ranch Pork Chops

I don’t care if you are retired, a stay at home mom, a working individual, or even unemployed; everyone needs a quick, cheap, and easy dinner from time to time. When I find myself in this situation I go to my favorite kitchen appliance, my crock-pot. My crock-pot is freaking amazing. I toss in a couple simple ingredients before I go to work, I come home, and dinner is done. You rock my socks crock-pot! These pork chops come out super tender (practically falling apart) and the sauce is creamy and flavorful. If you are wondering what to serve them with I recommend some mashed potatoes or even white rice. Unfortunately the crock-pot isn’t much a multitasker so with this recipe you are on your own when it comes to side dishes.

Note: I make the sauce the night before and just keep it in the fridge. Then I have one less thing to do when I’m rushing around in the morning.

INGREDIENTS
4 thick cut boneless pork chops
fresh ground pepper
10.75 oz can cream of chicken soup
1 oz envelope dry ranch dressing mix
2 tsp garlic, minced
1/2 c water or chicken broth

STEPS

  • Season the pork chops with fresh ground pepper.
  • Place the pork chops in the bottom of a greased crock-pot.
  • In a medium mixing bowl whisk together the soup, ranch mix, garlic, and water.
  • Pour the sauce mixture over the top of the pork chops.
  • Cook on high for 4–5 hours or low for 6–7.
  • Transfer the pork chops to a serving dish or plate and using a whisk, stir the sauce in the crock-pot.
  • Ladle a small amount of the sauce over each pork chop.
Side Dishes

Recipe—Baked Sweet Potatoes

I know many people think that sweet potatoes are a fall dish but why should we limit ourselves to only eating the sweet root vegetable during the cooler months? I am still getting sweet potatoes almost every other week in my produce box and have had fun getting creative with them. The other day at the grocery store I saw some turkey breast tenderloins on sale and I decided to cook a mock Thanksgiving dinner. A Thanksgiving feast once a year is not nearly enough! These potatoes are sweet, tangy, and even had a little hint of spice. They will really get your taste buds going. I’m so glad I made these because they were the perfect side dish for our citrus grilled turkey tenderloins.

Note: I used Hannah sweet potatoes but this recipe works with any type of sweet potato. That is why these are lighter in color than the typical orange sweet potato you may be used to seeing.

INGREDIENTS
4 large sweet potatoes, sliced into 3/4” medallions
1/2 c fresh squeezed orange juice
1/2 tsp orange zest
1/3 c maple syrup
1 tsp cinnamon
3/4 tsp ground ginger
1/2 tsp nutmeg
pinch of cayenne
1/4 tsp salt
1/2 c dried cranberries
3 tbsp butter
2 tbsp brown sugar

STEPS

  • Preheat oven to 400º.
  • Place the sweet potatoes in a large bowl and add the orange juice, zest, syrup, cinnamon, ground ginger, nutmeg, cayenne, salt, and cranberries. Toss to coat evenly.
  • Transfer the sweet potatoes along with all the juices to a baking dish.
  • Slice the butter and place the pats over the top of the sweet potatoes.
  • Sprinkle with the brown sugar.
  • Cover with foil and bake for 20 minutes.
  • After 20 minutes lift the foil and using a baster or a large spoon, pour some of the liquid from the baking dish over the top of the potatoes.
  • Bake for an additional 30 minutes or until the potatoes are tender.
  • Remove the foil and turn on the broiler for 3 minutes to caramelize the top.
Kitchen Tips

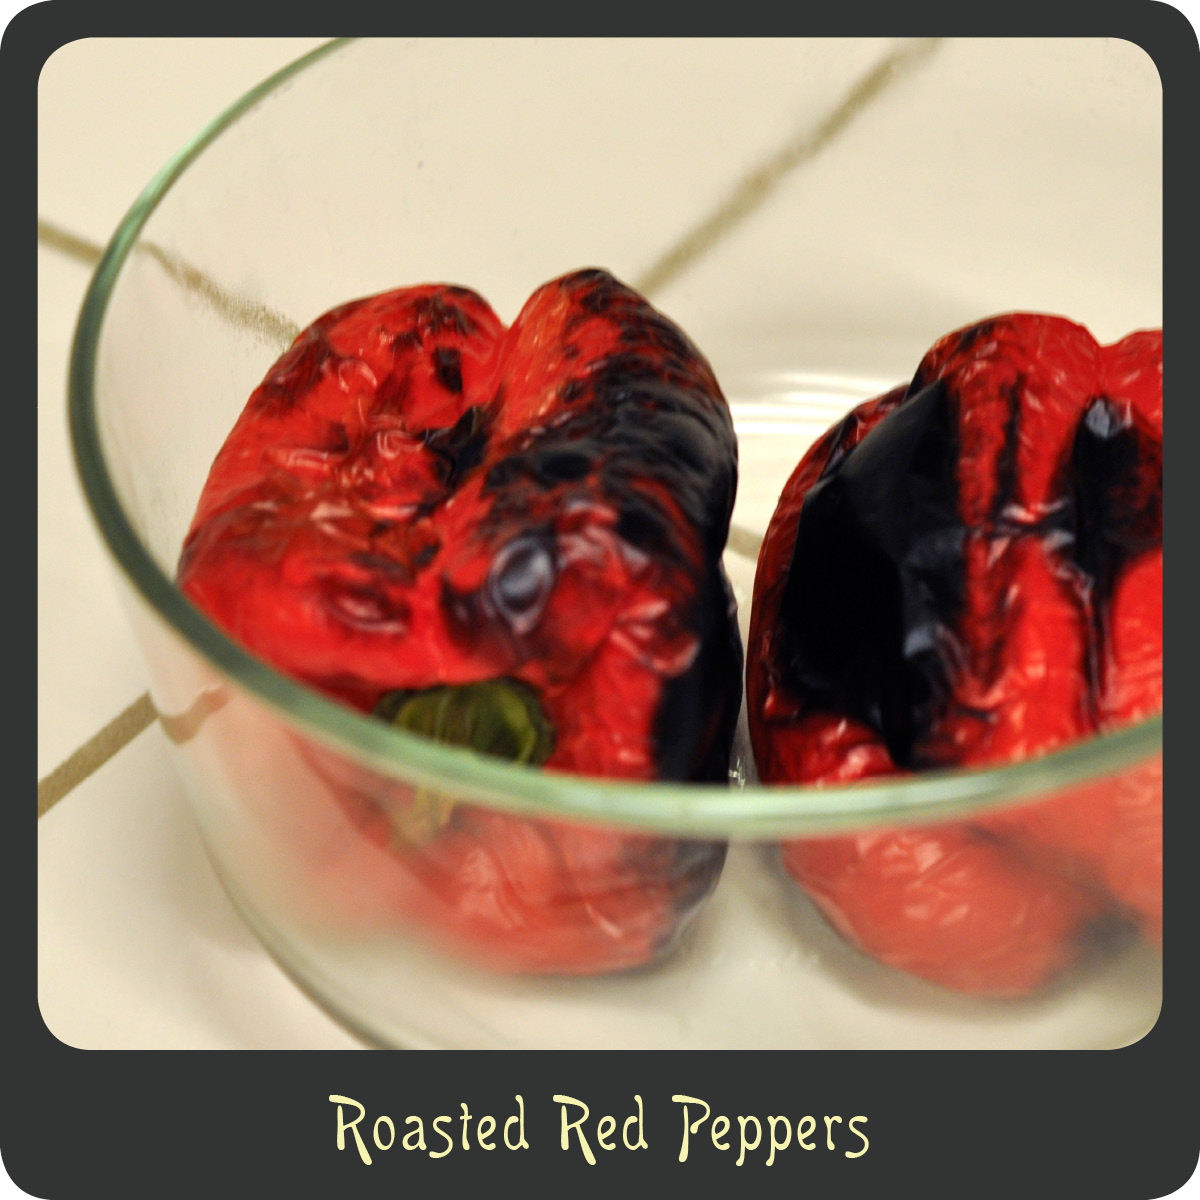
Kitchen Tip—How to Roast Peppers

Roasting peppers at home is surprisingly easy. They are great in sandwiches, Mexican dishes, and even pasta. I use roasted bell peppers and jalapeños pretty frequently in cooking. They seem to hold up best since they have a nice thick flesh. If you have an abundance of peppers and you are unable to use them all before they spoil, roasting and freezing them is a great way to preserve them. This is what I did with my crop of jalapeños at the end of the summer. They will last in the freezer for 3–6 months depending on how you store them. I love always having them on hand ready for whatever flavorful dish I’m cooking up next!

INGREDIENTS
any type of pepper, washed and dried

STEPS FOR ROASTING PEPPERS

  • Put your oven’s rack on the highest rung possible and turn on the oven broiler.
  • If roasting small peppers, such as jalapeños, place them on a skewer for easy handling.
  • Place the peppers on a foil lined baking sheet.
  • Broil the peppers for 10–12 minutes or until the skin is blackened.
  • Flip the peppers over and broil for another 10 minutes.
  • Remove the peppers from the oven and skewer and place them in a paper lunch sack. If you do not have a paper lunch sack place them in a small bowl and cover tightly with saran wrap.
  • Allow the peppers to steam in the bag or bowl for 15 minutes. This helps to loosen up the skin for easy removal.
  • Pull the stems out of the peppers and carefully peel off the charred skin.
  • Slice the peppers down one side filleting them open
  • Spread the pepper open and use the backside of the knife to scrape the seeds out.

STEPS FOR FREEZING ROASTED PEPPERS

  • Place your roasted peppers on a wax paper lined baking sheet making sure they don’t touch.
  • Place the baking sheet in the freezer and leave there over night.
  • Once the peppers are completely frozen place them in an airtight baggie or container. By freezing them on a sheet first it keeps them from sticking to each other once in a single container or bag.
Salads, Sandwiches

Recipe—Low-Carb Egg Salad Wraps

I am constantly on the hunt for tasty low carb recipes. This wonderful blog I follow, Low Carb Jabberwockey, is always giving me inspiration for new ways to try classic recipes, but without the carbs. The other day she posted a recipe for an egg salad wrap, basically egg salad on a leaf of romaine with tomatoes and avocados. Genius, I thought! Well it just so happens I had an abundance of hard-boiled eggs after Easter. Imagine that! I decided to take the Jabberwockey’s idea and make it my own. These turned out phenomenal! I think this is a great recipe regardless of if you are watching your carbs. Who needs boring ol’ sliced bread anyways? Not this gal!

INGREDIENTS
6 hard-boiled eggs, chopped
1 celery stalk, diced
1 tbsp green onions or chives, chopped
1/4 tsp salt
1/8 tsp pepper
1/4–1/2 c mayo
2 tsp yellow mustard
4 leaves of romaine lettuce
8 slices of bacon, cooked
1/2 avocado, sliced

STEPS

  • In a medium bowl mix together eggs, celery, green onions, salt, pepper, mayo, and mustard.
  • On each piece of lettuce place 2 strips of bacon.
  • Top the bacon with a spoonful of the egg salad and a couple of the avocado slices.
  • Grab a napkin and enjoy!
Dinners

Recipe—Bacon Cheddar Chicken (Copycat Version of Outback’s Alice Springs Chicken)

I am a bacon and cheese fanatic, which is why I am in LOVE with Outback Steakhouse’s Alice Springs Chicken. If you have never had this dish I speak of, let me tell you all about it. It is a juicy chicken breast cooked in a sweet and tangy honey mustard sauce, then topped with the most delicious things you can think of, sautéed mushrooms, bacon, and cheese, LOTS of cheese! Yummy-messy-goodness that’s what this is! I will admit though, I think mine is slightly better than Outback’s. Shhhhhh… don’t tell. While this dish does require a bit of prep I personally think it is well worth it.

Note: For best results be sure to allow adequate time for marinating the chicken breasts.

INGREDIENTS
1 c Dijon mustard
1 c honey
1/2 c mayonnaise
1 tsp lemon juice
4 boneless, skinless, chicken breasts
1 tbsp olive oil
2 tbsp butter
2 c white mushrooms, sliced
salt and pepper
paprika
8 slices bacon, cooked
1 c Monterey jack, shredded
1 c cheddar, shredded
2 tsp fresh parsley, chopped

STEPS

  • In a medium sized bowl mix together the mustard, honey, mayonnaise, and lemon juice until well combined.
  • Spoon out half of the marinade and place in a small bowl, cover, and chill until later.
  • Add the chicken breast to the large bowl with the marinade and toss to coat.
  • Cover the bowl and place in the fridge for 2–12 hours to marinade.
  • Preheat oven to 375º.
  • Heat the olive oil in a large skillet over medium heat.
  • Add the chicken to the skillet and discard the marinade that the chicken was soaking in.
  • Cook the chicken for 5–7 minutes per side or until golden brown.
  • While the chicken is cooking melt the butter in a small skillet over medium-high heat and sauté the mushrooms.
  • Transfer the cooked chicken breasts to a large baking dish and drizzle with some of the reserved honey mustard marinade. (Save the leftover marinade to serve alongside the finished dish.)
  • Season the chicken with salt, pepper, and paprika.
  • Place two pieces of bacon on each chicken breast and top with the sautéed mushrooms.
  • Sprinkle the Monterey jack on each breast and then the cheddar.
  • Bake the dish for 10–12 minutes or until the cheese is thoroughly melted and the chicken cooked through.
  • Remove the dish from the oven and sprinkle the chopped parsley over the melted cheese.
  • Serve each chicken breast with a small side of the honey mustard.

Recipe adapted from Favorite Family Recipes.

Side Dishes

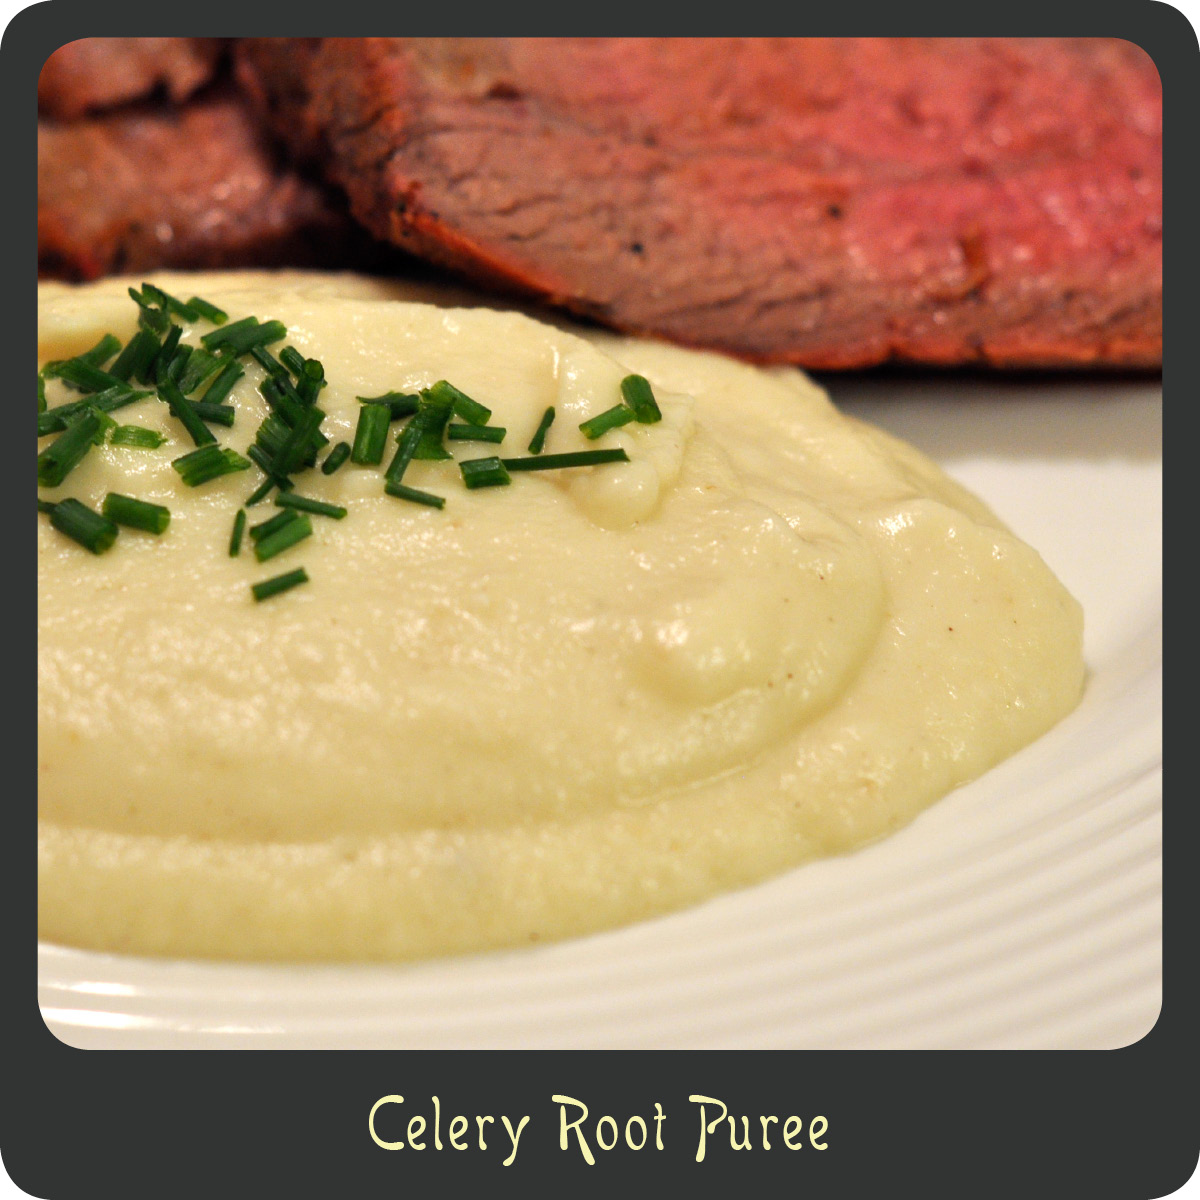
Recipe—Celery Root Puree

First time I ever had celery root puree was over at a friend’s house for an incredible dinner. Ever since then I have been in love with the creamy rich side dish. Celery root puree is a worthy competitor of mashed potatoes and takes a dinner from average to over the top. Don’t be intimidated by celery root, it is just as easy to prepare as mashed potatoes. While it may be gnarly and unattractive out the outside it has a very delicate and light flavor unlike anything else. By boiling the celery root in milk it gives it a silky texture that is just heavenly. This side dish goes a long way since it’s really rich. It goes magnificent with almost any kind of meat but I am especially fond of it with a nice cut of steak. Come on, be adventurous and give celery root a shot!

Note: This celery root puree can be made in advance and then reheated over the stove or in the microwave right before serving.

INGREDIENTS
1 1/2 c milk
1 1/2 c water
2 tsp salt
1 large celery root, peeled and cut into 1” cubes
1 medium russet potato, peeled and cut into 1” cubes
1/2 of a small yellow onion, quartered
3 tbsp butter, cut into 3 pieces
salt
1/4 tsp ground white pepper
1 tbsp fresh chives, chopped

STEPS

  • In a large saucepan bring the milk, water, and salt to a rapid boil over medium-high heat.
  • Add the chopped celery root, potato, and onion to the pot.
  • Reduce heat to medium and simmer until the vegetables are fork tender, about 25 minutes.
  • Drain off all of the liquid.
  • Place the cooked vegetables and the butter in a food processor or blender and puree until smooth. (Add a splash of cream or milk if needed.)
  • Season the puree with salt and white pepper.
  • Transfer the celery root puree to a serving bowl or plates and garnish with chopped chives.