Sweet Treats

Recipe—Homemade Marshmallows

divadicucina_marshmallows

I was trying to come up with a cute idea for a Christmas gift for my son’s teachers and came up with the idea of making hot cocoa gift baskets. You know, a mug, some hot cocoa, some homemade cookies, and marshmallows. Well I am never the person to take the easy way out by just buying an actual bag of jet puffed marshmallows at the store, I wanted these gift baskets to be special, made from the heart. So I decided to attempt to make my very own marshmallows. Gourmet marshmallows seem to be all the rage this season but unfortunately they can cost a fortune. With this recipe you can make your own at home. They are a little bit of work, and one might by intimidated, but they are actually easy. I think the hardest part was waiting for them to set! These homemade marshmallows put store bought marshmallows to shame and are so totally worth making on your own. If making your own marshmallows isn’t on your bucket list it should be. Give these a shot. They will take your hot cocoa on a cold winter night over the top!

divadicucina_hotcocoa

Note: The original recipe I followed called for using a stand up mixer but I used a hand mixer. You can use either. The marshmallows can be very sticky and difficult to handle so the trick to cutting them is to constantly coat them in powdered sugar after every slice of the knife.

INGREDIENTS
3 c sugar
1 1/4 c light corn syrup
water
4 envelopes Knox unflavored gelatin
1/2 tsp salt
1 tbsp vanilla extract
1 c powdered sugar

STEPS

  • Combine sugar, corn syrup, and 3/4 cup water in a large saucepan and bring to a boil over medium-high heat.
  • While sugar water is heating up add 3/4 cup water to a large mixing bowl and sprinkle the 4 packs of gelatin over the top. Set aside.
  • Bring the sugar water mixture to a rolling boil and boil for 5 minutes or until a candy thermometer reads 235º.
  • Carefully pour the hot sugar water into your mixing bowl with the water and gelatin and mix on low.
  • Add the salt and increase mixer speed to high.
  • Beat the sugar mixture on high for 5 minutes and than add vanilla.
  • Continue beating the mixture for another 5 minutes.
  • When you are done, pour the marshmallow cream into a greased 9” x 13” pan.
  • Smooth the top and gently tap to release air.
  • Leave the dish on the counter for at least 10 hours.
  • After the waiting is up sprinkle the entire top of your marshmallows with powdered sugar making sure it’s coated and place a cutting board over the top of your dish.
  • While holding the cutting board and dish together carefully flip the dish and cutting board upside down simultaneously releasing the marshmallows onto the cutting board. (Your set marshmallows will now be upside down on the cutting board.)
  • Lift the baking dish and sprinkle all of the exposed marshmallow with powdered sugar making sure there are no exposed areas.
  • Using a large sharp knife cut into 1” strips and coat each exposed side with powdered sugar.
  • Cut those strips into 1” cubes making sure you coat each cut side with powdered sugar.
  • Once done, sprinkle all of the marshmallows with the remaining powdered sugar making sure there are no exposed sticky areas.
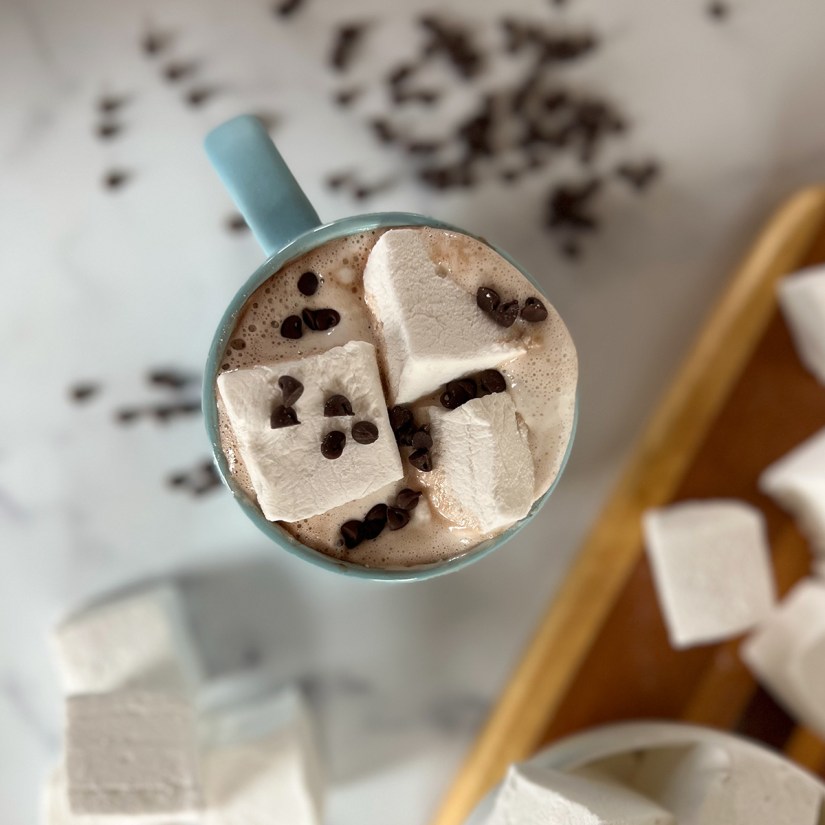
  • Enjoy in a big mug of hot cocoa!
Beverages

Recipe—Homemade Spiked Eggnog

What’s Christmas without a glass or three of spiked eggnog? It is a must have item in our family. I am not a huge eggnog fan but I will drink the occasional glass here and there. However, my sister really loves the stuff so I wanted to be sure and have some on hand for her while we celebrated the holidays early this year. Unfortunately, this eggnog comes with a sad story.

This year I thought I would be adventurous and make my own eggnog. It turned out incredible and was actually really easy to make! This was by far the best eggnog I have ever had. I was so excited to share this fabulous concoction with my sister because I knew she would feel the same way. After slaving over the oven all day (okay I’m exaggerating, more like 20 minutes, this recipe is actually really quick to make) I had the eggnog done and poured it into my brand new glass pitcher. It was a gorgeous site! My mom, sister, husband, son, and I went and walked through a Christmas light display at our local zoo. The perfect end to the evening would be a homemade glass of eggnog. I poured the first glass and then went to pour the second when crack! The handle on my new pitcher literally fell off and the entire batch of eggnog shattered on my counter and went everywhere! I was on the verge of tears. However, the one lonely glass you see above survived. Thank goodness! So we all shared this one lonely glass of eggnog and it was the best glass of eggnog ever!

If you have never had homemade eggnog I highly recommend you give it a try. One thing that I absolutely love about this recipe is that the eggs are par cooked in the hot milk rather than raw, giving this a less eggy flavor. It is the perfect holiday beverage and takes on a superior quality being homemade.

Note: If you want virgin eggnog just omit the rum for a family friendly version. 

INGREDIENTS
3 1/2 c milk
1 1/2 tsp vanilla
1 tsp ground cinnamon
1 cinnamon stick
pinch of ground cloves
6 egg yolks
3/4 c granulated sugar
1 c rum
1 c heavy cream
1/4 tsp nutmeg

STEPS

  • In a large saucepan heat the milk, vanilla, cinnamon, cinnamon stick, and cloves over medium heat.
  • Bring to a gentle boil and remove from heat.
  • Allow the milk to set for about 2 minutes while the cinnamon stick seeps.
  • While the milk is cooling, beat the egg yolks and sugar in a large mixing bowl until it’s pale yellow and fluffy.
  • Remove the cinnamon stick from your milk and slowly pour into the egg mixture.
  • Beat on low until well incorporated.
  • Pour the mixture back into the saucepan and heat on medium/medium-low heat for 5 minutes until thick and creamy. DO NOT LET IT BOIL OR THE EGGS WILL CURDLE!
  • Remove the saucepan from heat and stir in the rum, heavy cream, and nutmeg.
  • Allow the eggnog to cool on the counter for at least an hour.
  • Transfer the eggnog to a pitcher or serving dish and refrigerate for 8–10 hours.
Dinners

Recipe—Sweet and Sour Meatballs

I have always been a lover of Chinese food. I mean come on, who isn’t? I remember as a kid that whenever we went out to eat Chinese food or ordered it to go that we got sweet and sour pork. I just love the tangy sweet sauce and the pineapple. Oh, that sweet yummy caramelized pineapple! When I saw this recipe on one of my favorite blogs, Recipes Happen, I knew I had to give it a try.  I LOVE Chinese food and I LOVE meatballs! This recipe turned out awesome and was enjoyed by the whole family. My husband even went back for thirds! (I don’t know where that guy stores all the food he can consume.) I highly recommend serving this over white rice. It really soaks up the flavors of the sauce. We will certainly be making this again and again because it was super easy and absolutely delicious! Thanks Bonnie for posting this wonderful recipe, my family and I loved it!

Note: Bonnie’s recipe calls for breadcrumbs but I adapted it slightly and used panko since I had it on hand and I thought it went well with the Asian inspired dish. I bet this would also be great made with ground turkey or chicken to help cut a few calories. 

INGREDIENTS
1 egg
1 tbsp dried onion flakes
1 tbsp milk
1/4 tsp ginger
1/2 tsp salt
1/2 c panko
ground pepper
1 lb ground beef
20 oz can pineapple chunks
1/4 c apple cider vinegar
1/4 c brown sugar
2 tbsp soy sauce
1 c sliced carrots
1 green bell pepper, chopped
4 tsp cornstarch
2 tbsp water

STEPS

  • Preheat oven to 350º.
  • In a large mixing bowl combine the egg, dried onion, milk, ginger, salt, panko, pepper, and ground beef. (I recommend using your hands to thoroughly combine everything.)
  • Shape the beef mixture into 1” balls and place in a large baking dish making sure there is space between them.
  • Bake the meatballs for 30 minutes or until cooked through.
  • While the meatballs are cooking drain the pineapple juice into a measuring cup and set the pineapple aside.
  • If needed, add water to the juice so you have 1-cup worth of liquid.
  • Pour the juice mixture into a large skillet or wok and add in the vinegar, brown sugar, and soy sauce.
  • Over medium-high heat bring the liquid to a simmer and add in the carrots.
  • Simmer until the carrots are just barely fork tender and then add in the bell peppers and pineapple chunks.
  • Cook for approximately 4–5 minutes.
  • In a small bowl mix together the cornstarch and water until smooth.
  • Pour the cornstarch mixture into your skillet and stir constantly until incorporated.
  • Remove the meatballs from the oven and transfer them to the skillet making sure to leave the meat drippings in the baking dish.
  • Toss the meatballs to coat and simmer in the sauce for 2 minutes.
  • Serve over cooked rice and enjoy!

Recipe adapted from Recipes Happen.

Brunch, Salads, Side Dishes

Recipe—Creamy Persimmon Pomegranate Salad

During the fall and winter months it can be difficult to find quality ripe fruit for a fruit salad. And when you do find some, you pay an arm and a leg. This is a fabulously simple salad you can whip up in minutes using some seasonal fall fruits. This sweet and creamy salad is great for breakfast or even as an addition to your Thanksgiving meal. I think the walnuts and pomegranate seeds give it a nice little crunch and best of all, it is really healthy!

Note: You may or may not find seeds in your persimmons. I have found them both ways. When you chop them be sure to keep a watch for them and discard any you find.

INGREDIENTS
6 fuyu or amagaki persimmons, chopped
3/4 c pomegranate seeds
1/2 c candied walnuts, chopped
1 c plain Greek yogurt
2 tbsp honey

STEPS

  • Combine the persimmons, pomegranate seeds, and walnuts in a medium bowl.
  • In a small bowl, stir together the honey and yogurt.
  • Pour the yogurt over the fruit and gently stir to combine.
Dinners, Side Dishes

Recipe—Baked Acorn Squash

I have a confession to make, I know this will make me sound like a total blonde but I want to be sure you all know I’m human and that I don’t know everything about cooking. I am still learning every day. So here I go… until I got my first acorn squash in my organic produce box a few weeks back I thought they were a decorative item. Seriously. Okay, go ahead and laugh now.  I remember seeing them in the grocery stores with all the gourds and pumpkins every fall but I was oblivious to the fact that people actually ate them. I am so glad I discovered that these were in fact edible because they are delicious and I now love cooking with them. I am sharing a recipe for a classic oven baked acorn squash. This is a really sweet treat and a fun way to enjoy the veggie. These squash remind me of my favorite Thanksgiving side dish, sweet potatoes with brown sugar and pecans. Yum! Depending on how many people I have over for turkey day this year I may just even make these instead. Why not mix it up and break out of tradition?

INGREDIENTS
1 acorn squash
1 tbsp butter, softened
salt
2 tbsp brown sugar
2 tsp maple syrup

STEPS

  • Preheat oven to 400º.
  • Carefully cut acorn squash in half and using a spoon clean out the seeds and stringy pulp.
  • Coat the inside of each squash half with the softened butter and sprinkle with salt.
  • Add 1 tablespoon of the brown sugar to the cavity of each half.
  • Drizzle a teaspoon of maple sugar over each half.
  • Put a 1/4” of water in a baking dish (This keeps the squash from drying out.)
  • Place the prepared acorn squash in the water cut side up.
  • Bake squash for 1 hour or until they are soft and easily pierced with a fork.
  • Allow to cool for 5 minutes before serving.
Appetizers, Sauces

Recipe—Mango Salsa

I have traveled to the Hawaiian Islands several times and I can’t even begin to describe how incredible the regional cuisine is. Hawaii is known for it’s tropical fruits grown in rich volcanic soil and some of the best quality fish in the world. Every time I make this vibrant colored salsa it takes me back to the islands. It goes great served with just tortilla chips, but pairs incredibly well with grilled fish, shrimp tacos, and crab cakes. Another favorite way to dish it up is over warmed Brie served with Triscuits. It may seem like more of a summer recipe, but I enjoy making it year round. Mix yourself up a refreshing Mai Tai and pretend like you are on an island getaway while you are enjoying this tropical treat.

INGREDIENTS
2 mangos, diced
1 jalapeño, diced (deseed the pepper if you don’t want it to be too hot)
1/4 red bell pepper, diced
1 green onion, chopped
2 tbsp cilantro, chopped
2 tbsp lemon juice
4 tbsp rice vinegar
2 tsp sugar
pinch of salt

STEPS

  • Mix together mangos, jalapeño, red bell pepper, green onion, and cilantro.
  • In a separate small bowl mix together lemon juice, rice vinegar, sugar, and salt until sugar and salt are dissolved.
  • Pour liquid mixture over salsa and mix well.
  • Cover and allow to chill for at least 30 minutes before serving.

See my crab cake recipe here for a great pairing for this mango salsa (skip the spicy remoulade if serving with the mango salsa):
https://divadicucina.wordpress.com/2011/12/06/recipe-crab-cakes-with-spicy-remoulade/