

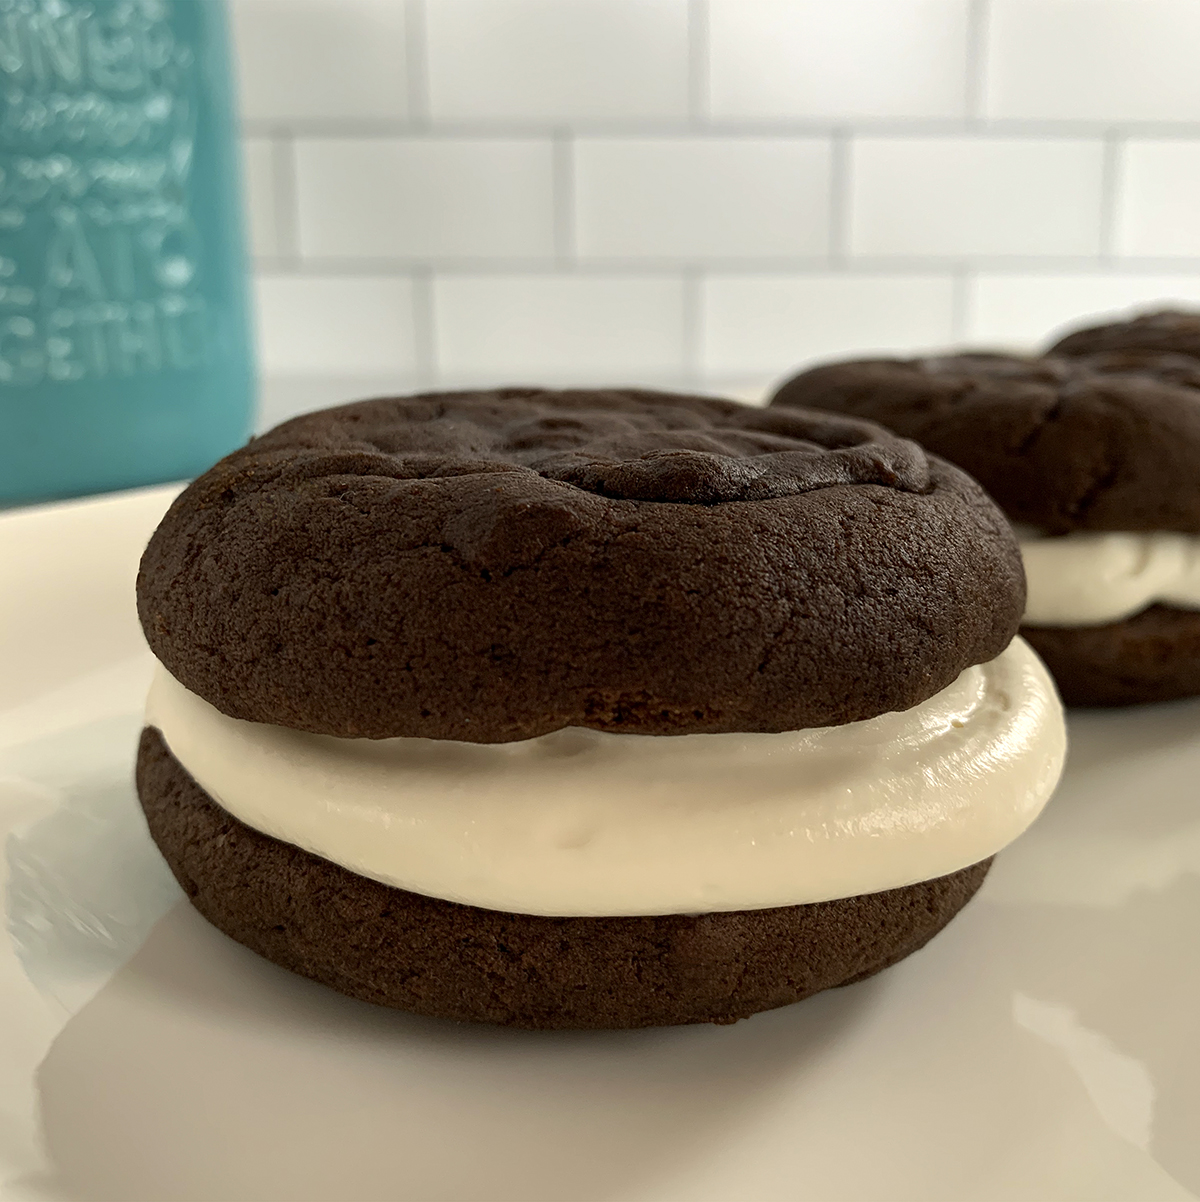
There is something so fun about whoopie pies. That creamy marshmallow filling sandwiched between two fluffy chocolate cakes. Yes, please!
The other day I saw an article about the history of whoopie pies and it is too cute not to share. According to legend, Amish wives would take leftover cake batter and make the tiny cakes. Husbands and kids would then find the little “pies” in their lunch boxes the next day and would exclaim “Whoopee!” Cute right? That would probably be my reaction if I found one of these in my lunch too.
They may seem complicated but actually are super easy to make. You basically make cookies out of cake batter and just bake them for a few minutes, let them cool, and then fill them with gooey goodness. Oh, and then add a glass of milk or a good stout.

Notes:
- This recipe makes about 10–12 assembled pies.
- You can put the marshmallow filling between the cakes just by scooping it on, or I like to use a piping bag with a large tip to get really smooth edges. You can have fun using decorative piping tips too.
- Store uneaten whoopie pies in an airtight container in the fridge for best results. Then allow them to come to room temperature for about 10–15 minutes. This will allow the cake to soften back up. My husband and son actually like to keep them in the freezer and they eat them frozen so they are like a super indulgent ice cream sandwich.
CAKE INGREDIENTS
1/2 c unsweetened cocoa
2 c flour
1 1/2 tsp baking soda
1/2 tsp baking powder
1/2 tsp salt
1/2 c vegetable oil
1 c sugar
1 egg
1 c whole milk
2 tsp vanilla
MARSHMALLOW FILLING INGREDIENTS
1 c powdered sugar
1/2 c unsalted butter, softened
1 tsp vanilla extract
1 1/2 c marshmallow creme/fluff
STEPS
- Preheat the oven to 400º.
- Line a couple of baking sheets with parchment paper or a silicone mat.
- Stir together the cocoa, flour, baking soda, baking powder, and salt in a medium bowl and set aside.
- In a separate mixing bowl, beat together the vegetable oil, sugar, egg, milk, and vanilla extract until well integrated.
- Slowly add the dry ingredients to the mixing bowl and beat until just combined.
- Scoop large equal sized spoonfuls of batter onto the lined baking sheet keeping them a couple of inches apart.
- Bake the “cakes” for about 6–7 minutes. Make sure they are puffed up and looked cook through but don’t overcook them.
- Using a spatula, immediately transfer the cakes to a cooling rack and allow them to cool completely.
- Prepare the marshmallow filling by beating together all the powdered sugar, butter, and vanilla until nice and smooth. Gradually add the marshmallow creme until it is mixed in. (If the frosting doesn’t seem thick enough, add in a bit more powdered sugar a little at a time. You want it to be about the consistency of frosting.)
- Take one of the cakes, turn it upside down, and put a nice sized dollop of the marshmallow filling in the center of the underside of the cake. (If your filling is squishing out from the weight of the cake on top, you can place the filling in the fridge for about 30 minutes. The butter chilling will help to thicken it up.)
- Place a matching cake flat side down on top of the filling and push it down to spread the filling evenly from edge to edge. I like my filling to be about 1/2” thick.
- Repeat until all the pies are complete!
If you like this recipe, check out my recipe for Carrot Cake Whoopie Pies which are made with a cream cheese marshmallow filling.

Reminds me of my childhood!
Me too! I love when recipes can take us back like that. 😀